




















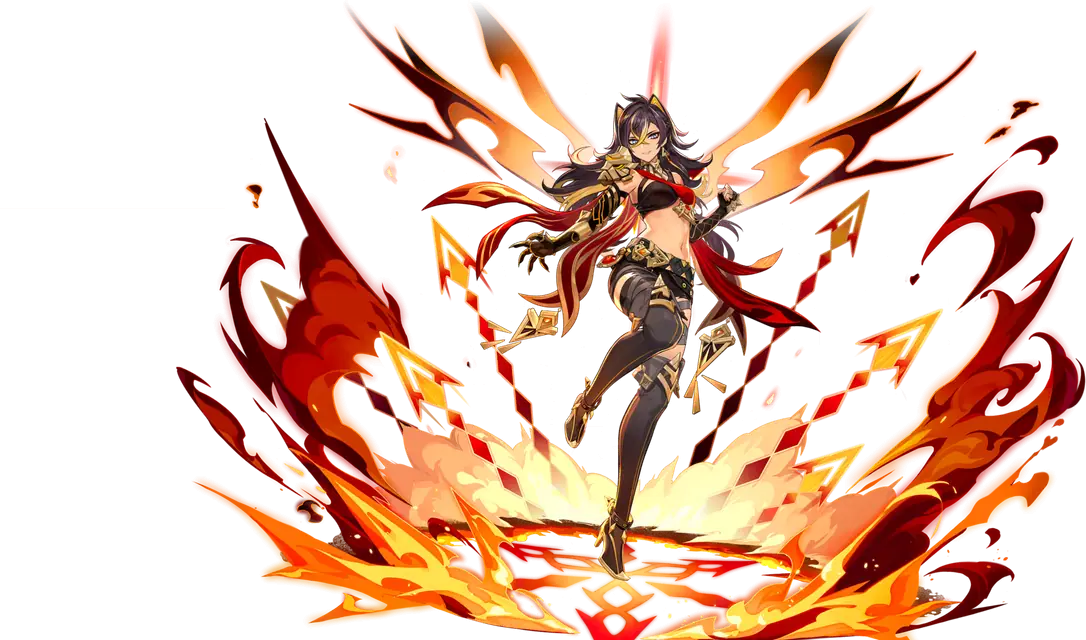
Genshin Impact character

Dehya (Genshin Impact)

Guide, build and skills

  • 5-star
  • Element Pyro
  • Weapon Claymore
  • Game data 7.2.0

Pyro field and protection

Molten Inferno (E) and Leonine Bite (Q) scale with ATK and Max HP; Energy Recharge raises Burst damage with Emblem of Severed Fate.

Dehya from Genshin Impact with a Kaption Polish subtitle
How Kaption shows Dehya in Polish: "Przyprowadźcie do mnie Kusaylę! Nie ma sensu go już ukrywać!"

At a glance

Dehya is a Pyro Claymore character who can protect the active character while dealing damage from a Fiery Sanctum field. The field increases resistance to interruption and redirects part of the damage the active character takes to Dehya. It is mitigation rather than a shield, so the team can still lose HP.

She can also stay on the field for her Elemental Burst, which sends out automatic Pyro punches. Her Skill and Burst damage both use ATK and Max HP, so those stats help whether you build her for damage or use her field to support a teammate.

Video guide

COMPLETE DEHYA GUIDE! Best Dehya Builds - Artifacts, Weapons, Teams & Showcase | Genshin Impact

Video by Zy0x on YouTube · 27 min · 618.5K views · March 2023

The YouTube player loads only after you click.

Build

Suggested build The game doesn't recommend a build for this character.

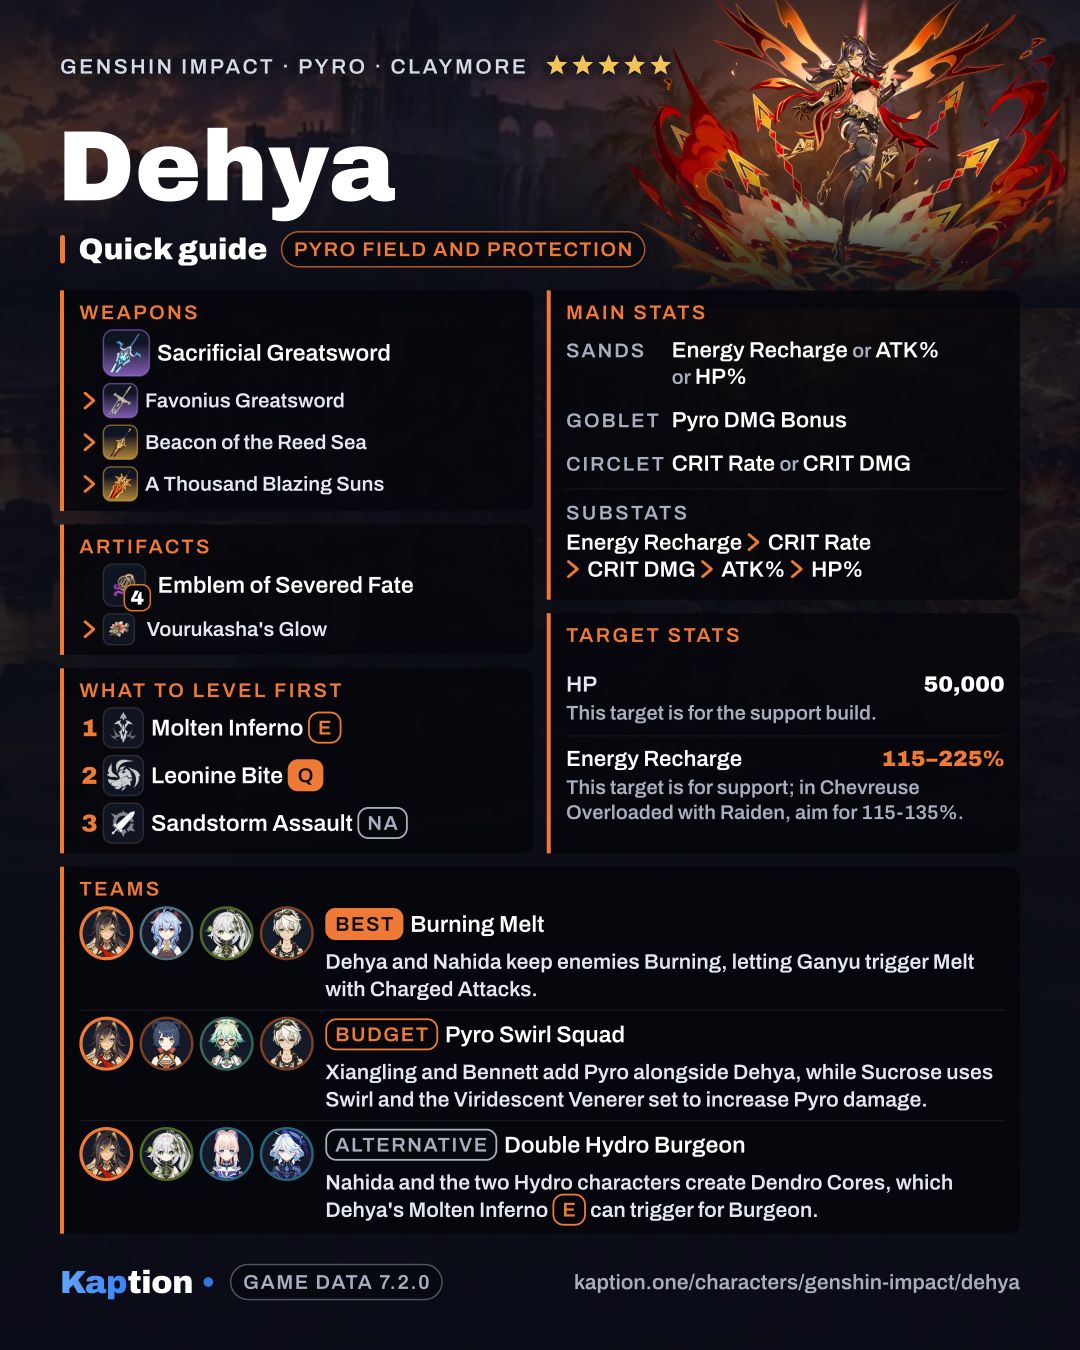
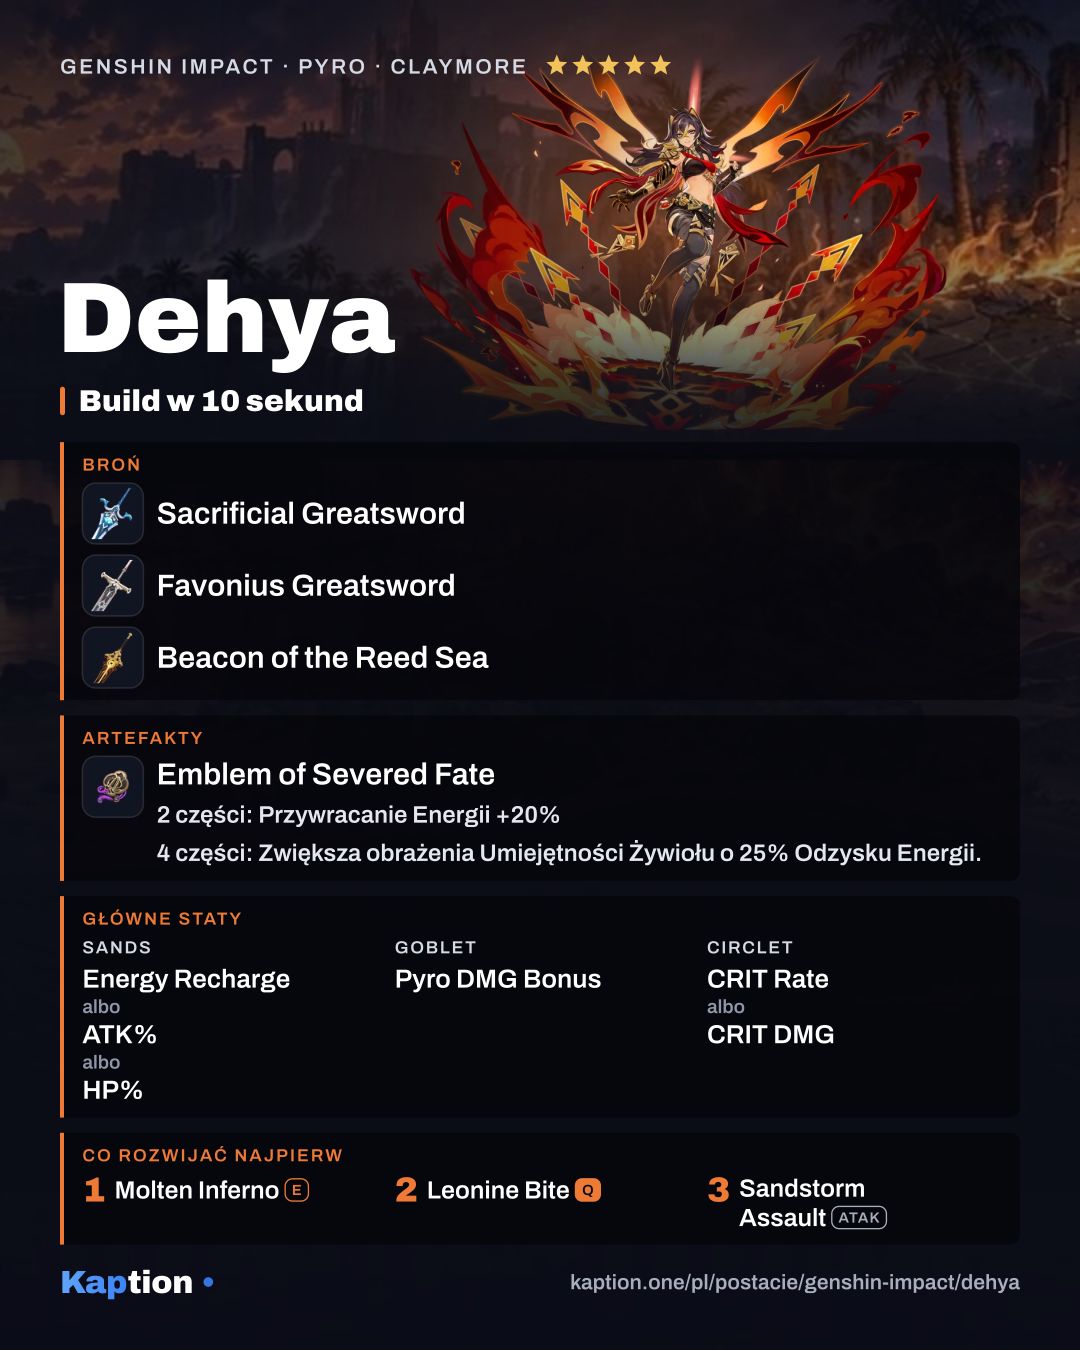
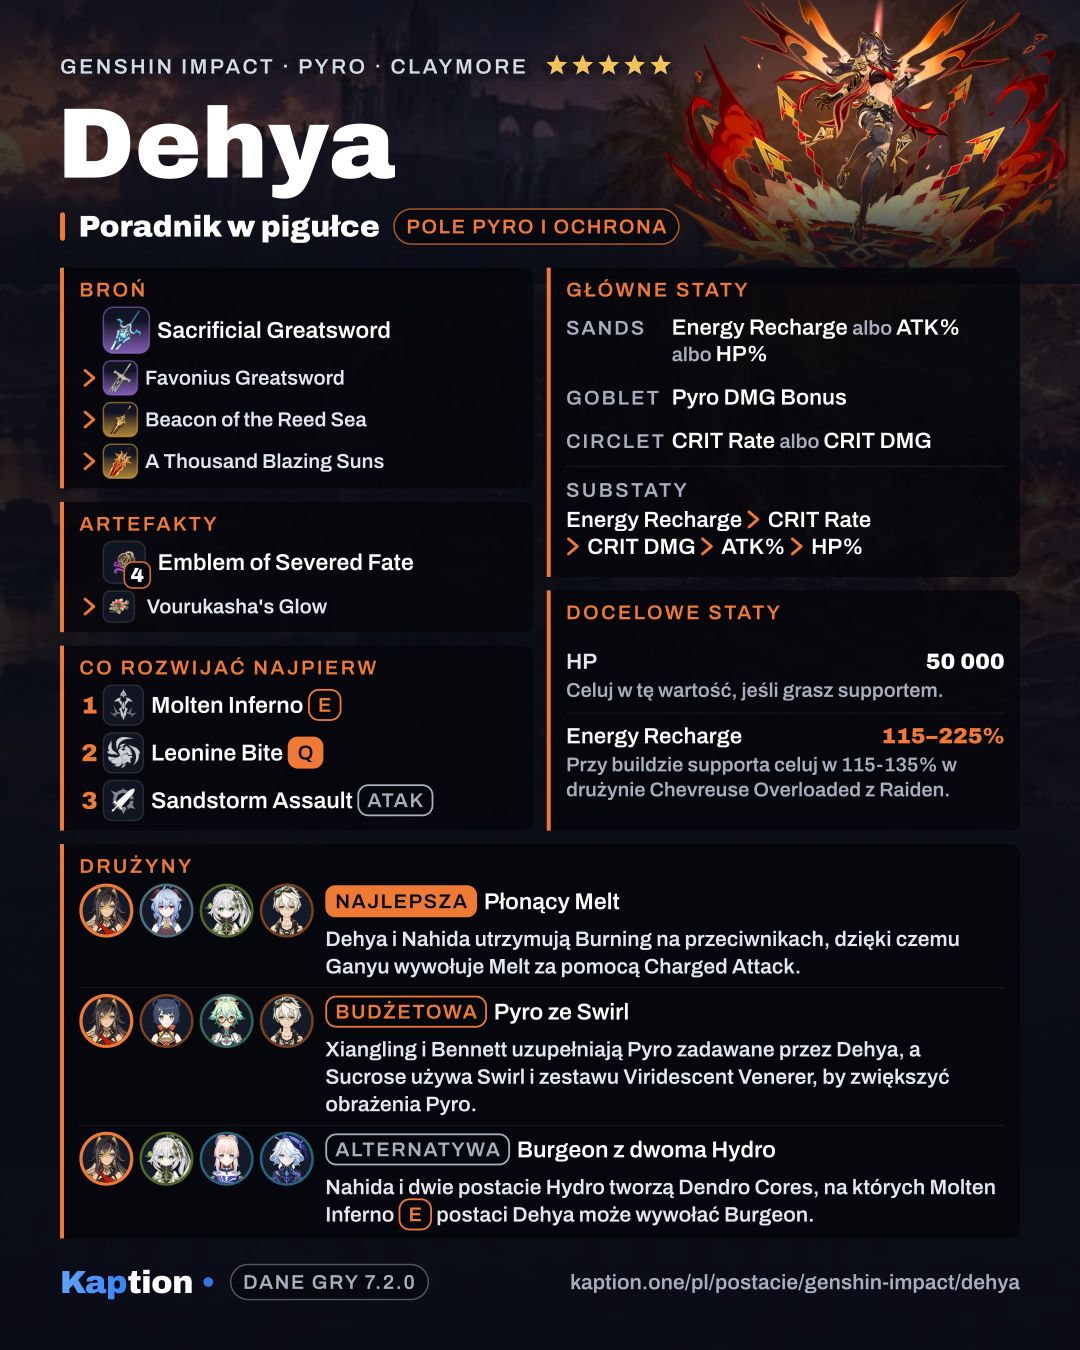
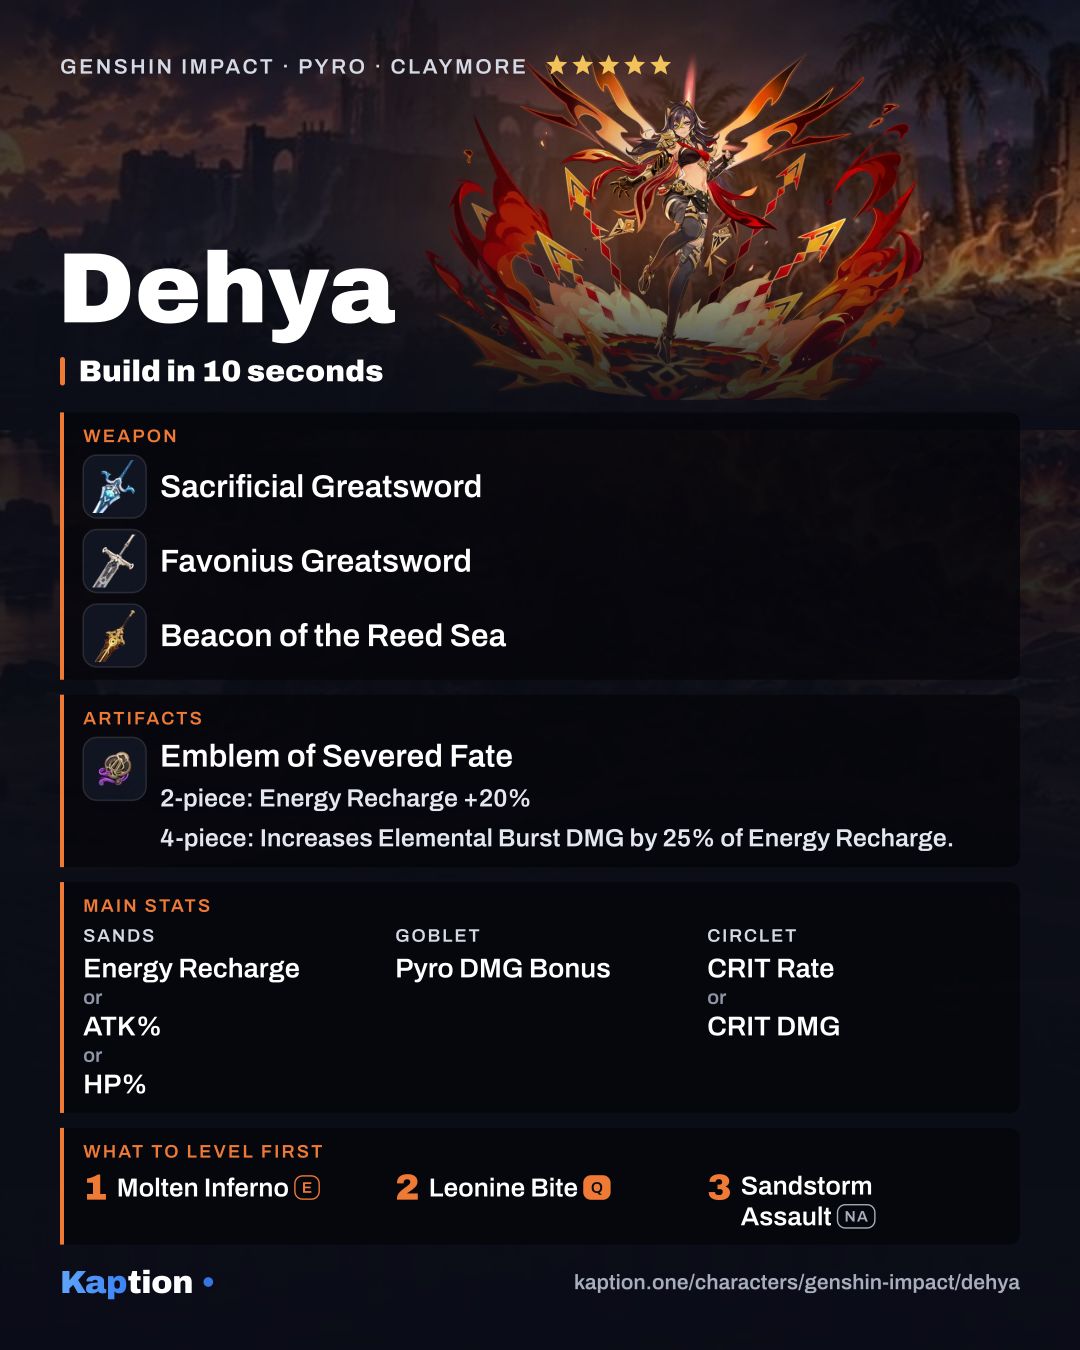
4× Emblem of Severed Fate · Sands Energy Recharge or ATK% or HP% · Goblet Pyro DMG Bonus · Circlet CRIT Rate or CRIT DMG · substats Energy Recharge > CRIT Rate > CRIT DMG > ATK% > HP%

Molten Inferno and Leonine Bite scale with ATK and Max HP; Energy Recharge raises Burst damage with Emblem of Severed Fate.

Artifacts

Artifact set

Pick one. The first is the top pick.

  1. Tenacity of the Millelith
    Tenacity of the Millelith
    • 2-piece bonus: HP +20%
    Show effect
    • 4-piece bonus: When an Elemental Skill hits an opponent, the ATK of all nearby party members is increased by 20% and their Shield Strength is increased by 30% for 3s. This effect can be triggered once every 0.5s. This effect can still be triggered even when the character who is using this artifact set is not on the field.
  2. Scroll of the Hero of Cinder City
    Scroll of the Hero of Cinder City
    • 2-piece bonus: When a nearby party member triggers a Nightsoul Burst, the equipping character regenerates 6 Elemental Energy.
    Show effect
    • 4-piece bonus: After the equipping character triggers a reaction related to their Elemental Type, all nearby party members gain a 12% Elemental DMG Bonus for the Elemental Types involved in the elemental reaction for 15s. If the equipping character is in the Nightsoul's Blessing state when triggering this effect, all nearby party members gain an additional 28% Elemental DMG Bonus for the Elemental Types involved in the elemental reaction for 20s. The equipping character can trigger this effect while off-field, and the DMG bonus from Artifact Sets with the same name do not stack.

4 pieces · Artifact set

  1. Emblem of Severed Fate
    Emblem of Severed Fate
    • 2-piece bonus: Energy Recharge +20%
    Show effect
    • 4-piece bonus: Increases Elemental Burst DMG by 25% of Energy Recharge. A maximum of 75% bonus DMG can be obtained in this way.

4 pieces · Artifact set

  1. Vourukasha's Glow
    Vourukasha's Glow
    • 2-piece bonus: HP +20%
    Show effect
    • 4-piece bonus: Elemental Skill and Elemental Burst DMG will be increased by 10%. After the equipping character takes DMG, the aforementioned DMG Bonus is increased by 80% for 5s. This effect increase can have 5 stacks. The duration of each stack is counted independently. These effects can be triggered even when the equipping character is not on the field.

2 + 2 pieces · Artifact set

Wear both sets, 2 pieces each.

  1. Crimson Witch of Flames
    Crimson Witch of Flames
    • 2-piece bonus: Pyro DMG Bonus +15%
  2. Noblesse Oblige
    Noblesse Oblige
    • 2-piece bonus: Elemental Burst DMG +20%

Main stats

Sands
Energy Recharge or ATK% or HP%
Goblet
Pyro DMG Bonus
Circlet
CRIT Rate or CRIT DMG

Substats

  1. Energy Recharge
  2. CRIT Rate
  3. CRIT DMG
  4. ATK%
  5. HP%

Target stats

Totals to aim for on the character's stat screen.

StatTarget
HP 50,000 This target is for the support build.
Energy Recharge 115–225% This target is for support; in Chevreuse Overloaded with Raiden, aim for 115-135%.

Recommended weapons

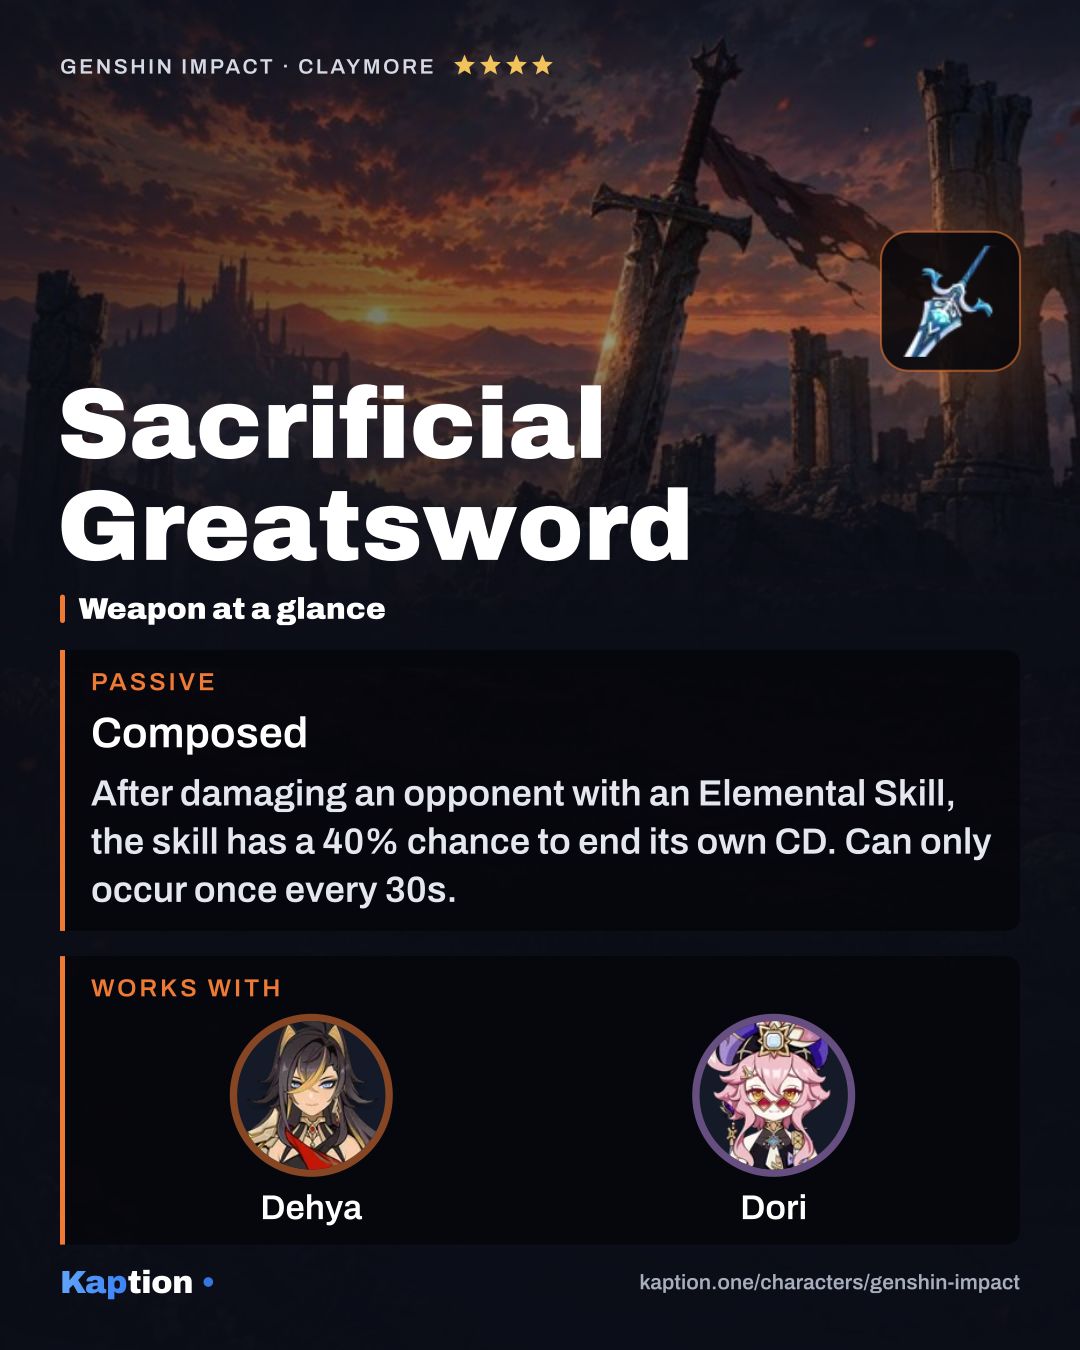
  1. Sacrificial Greatsword
    Sacrificial Greatsword 4-star
    Composed Show effect

    After damaging an opponent with an Elemental Skill, the skill has a 40% chance to end its own CD. Can only occur once every 30s.

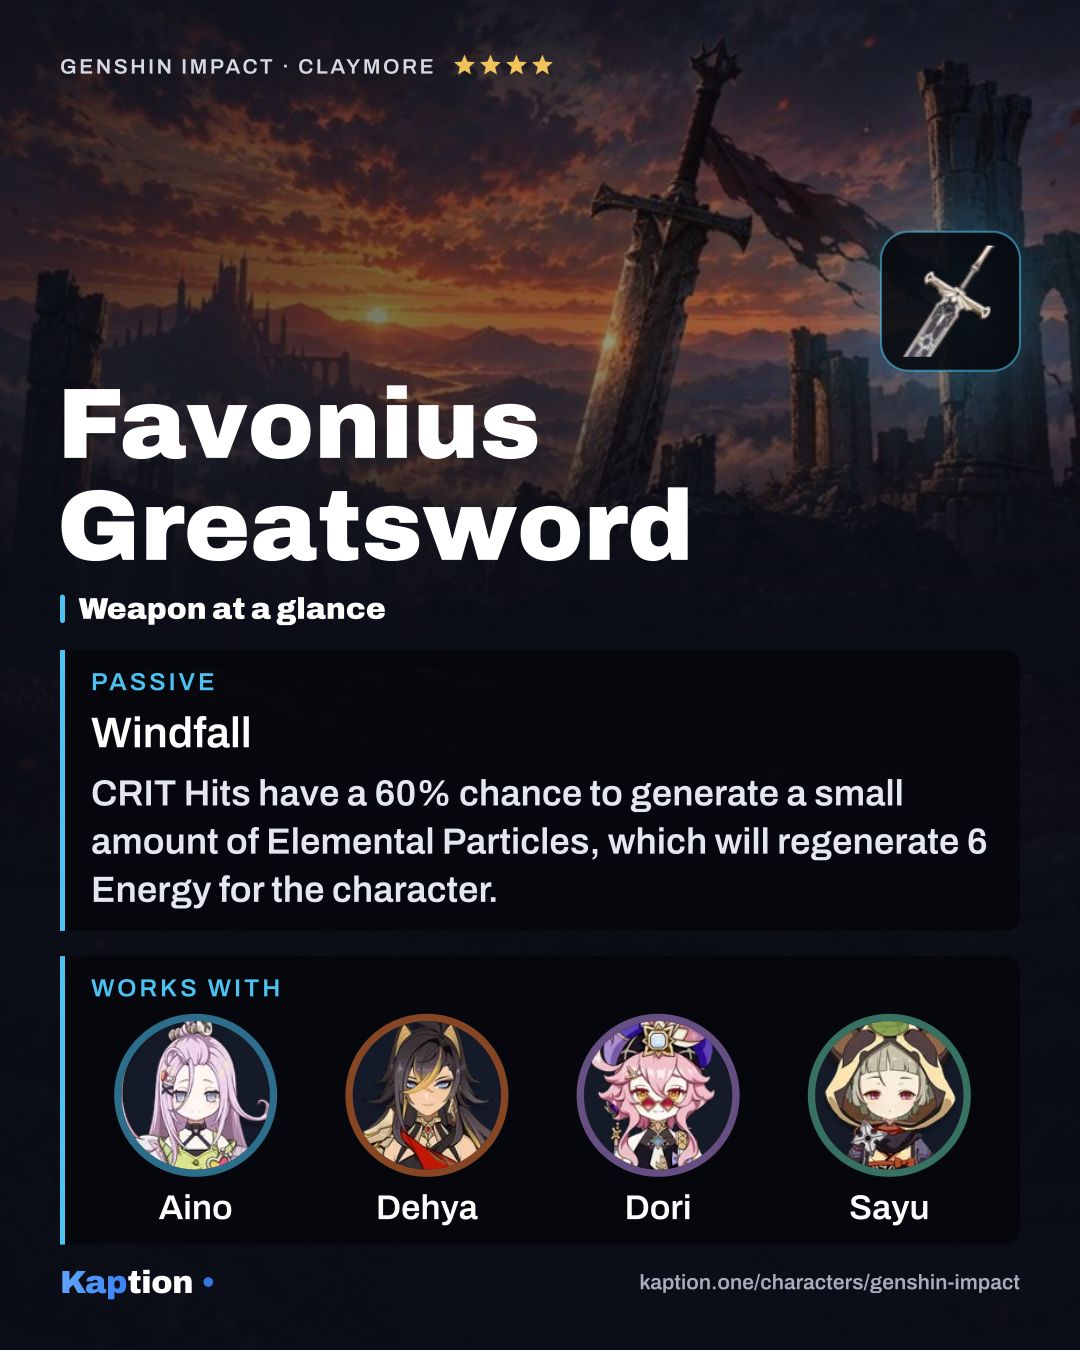
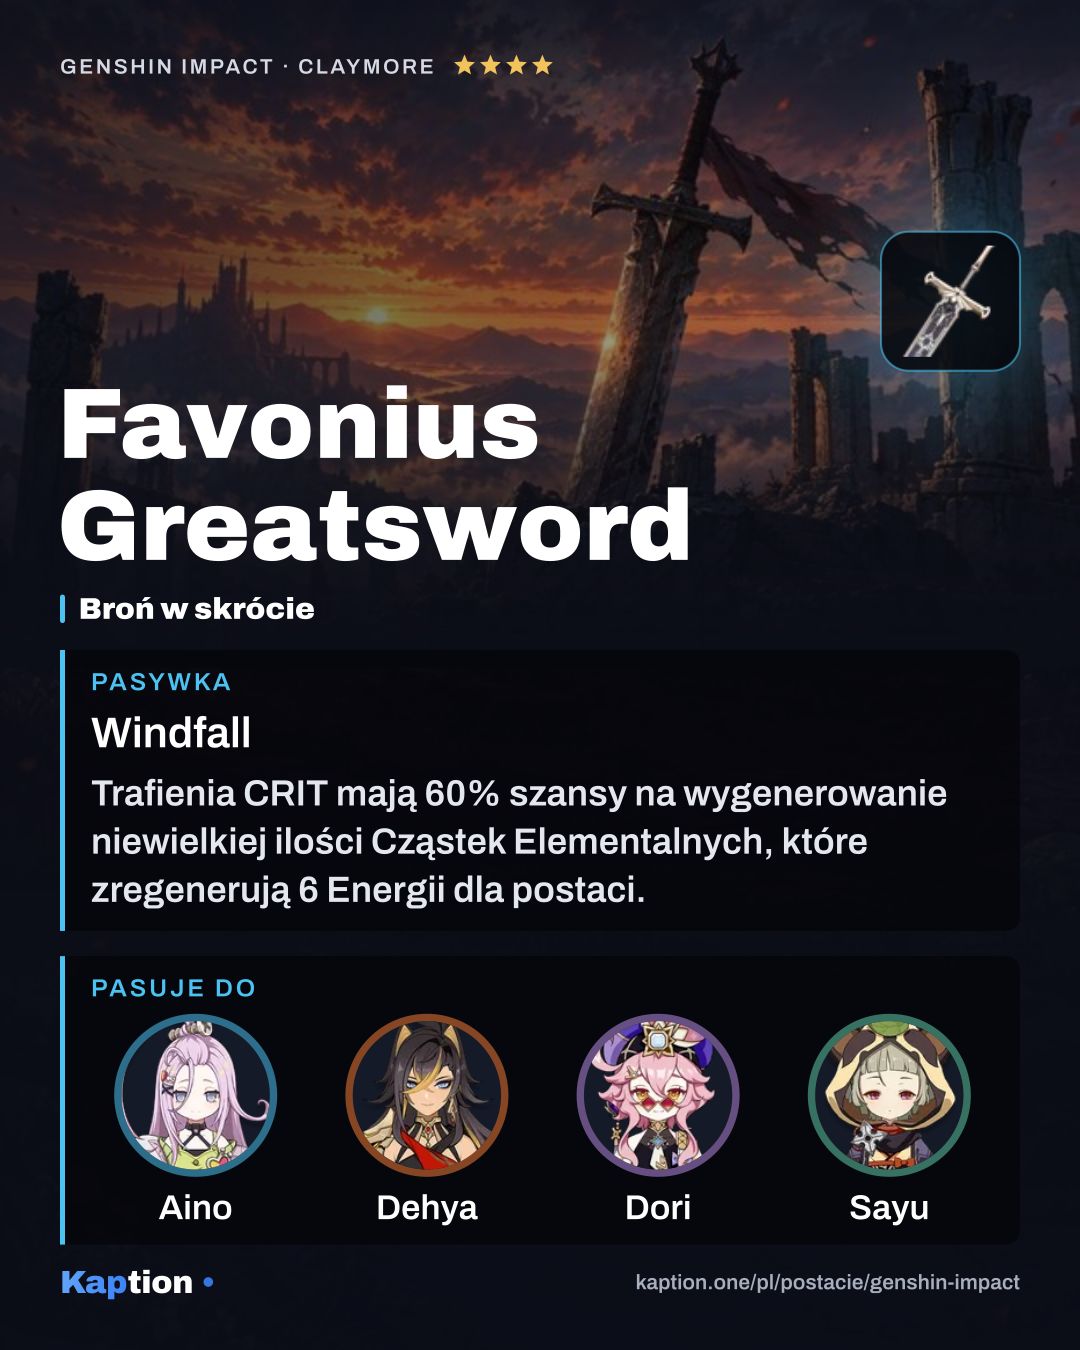
  2. Favonius Greatsword
    Favonius Greatsword 4-star
    Windfall Show effect

    CRIT Hits have a 60% chance to generate a small amount of Elemental Particles, which will regenerate 6 Energy for the character. Can only occur once every 12s.

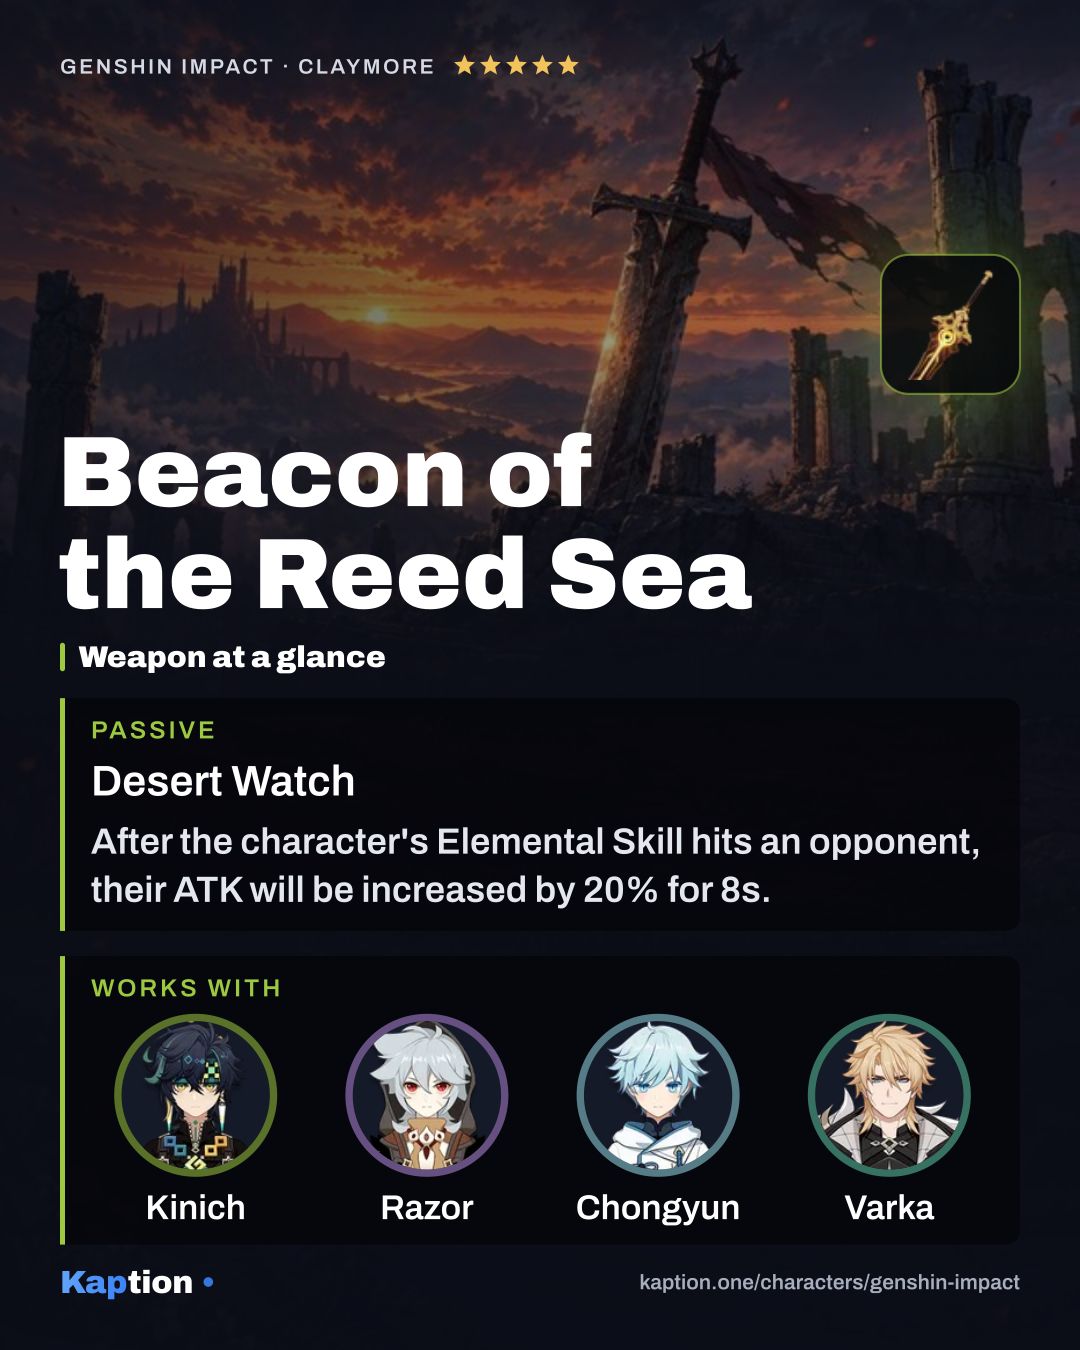
  3. Beacon of the Reed Sea
    Beacon of the Reed Sea 5-star
    Desert Watch Show effect

    After the character's Elemental Skill hits an opponent, their ATK will be increased by 20% for 8s. After the character takes DMG, their ATK will be increased by 20% for 8s. The 2 aforementioned effects can be triggered even when the character is not on the field. Additionally, when not protected by a shield, the character's Max HP will be increased by 32%.

  4. A Thousand Blazing Suns
    A Thousand Blazing Suns 5-star
    Sunset Reignites the Dawn Show effect

    Gain the "Scorching Brilliance" effect when using an Elemental Skill or Burst: CRIT DMG increased by 20% and ATK increased by 28% for 6s. This effect can trigger once every 10s. While a "Scorching Brilliance" instance is active, its duration is increased by 2s after Normal or Charged attacks deal Elemental DMG. This effect can trigger once every second, and the max duration increase is 6s. Additionally, when the equipping character is in the Nightsoul's Blessing state, "Scorching Brilliance" effects are increased by 75%, and its duration will not count down when the equipping character is off-field.

  5. Fang of the Mountain King
    Fang of the Mountain King 5-star
    Turquoise Hunt Show effect

    Gain 1 stack of Canopy's Favor after hitting an opponent with an Elemental Skill. This can be triggered once every 0.5s. After a nearby party member triggers a Burning or Burgeon reaction, the equipping character will gain 3 stacks. This effect can be triggered once every 2s and can be triggered even when the triggering party member is off-field. Canopy's Favor: Elemental Skill and Burst DMG is increased by 10% for 6s. Max 6 stacks. Each stack is counted independently.

  6. Akuoumaru
    Akuoumaru 4-star
    Watatsumi Wavewalker Show effect

    For every point of the entire party's combined maximum Energy capacity, the Elemental Burst DMG of the character equipping this weapon is increased by 0.12%. A maximum of 40% increased Elemental Burst DMG can be achieved this way.

  7. Wolf's Gravestone
    Wolf's Gravestone 5-star
    Wolfish Tracker Show effect

    Increases ATK by 20%. On hit, attacks against opponents with less than 30% HP increase all party members' ATK by 40% for 12s. Can only occur once every 30s.

Have this character? Make a card of your own build from your UID Stats, artifacts, weapon and talents from your in-game showcase, as a PNG in a dozen layouts.

Teams

Show more teams (4)Show less

Also plays in

Other characters' teams with a place for Dehya.

Skills

Names in English, as in the game · underlined ones open their card · Priority = level-up order

  1. Basic attack

    Sandstorm AssaultAttack

    Level priority 3 of 3

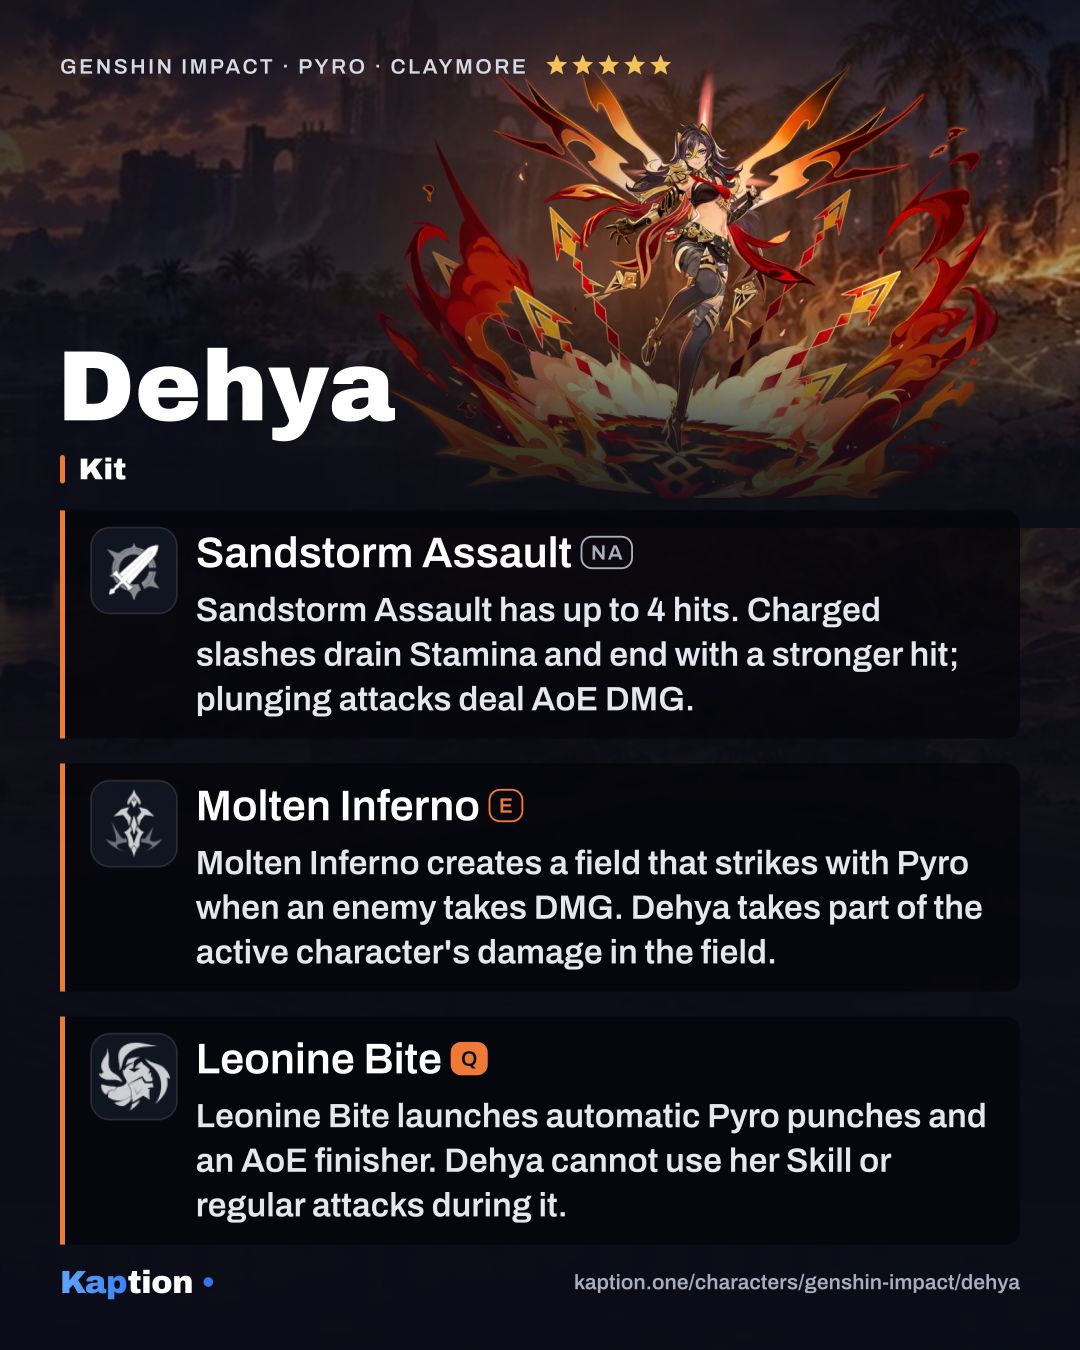
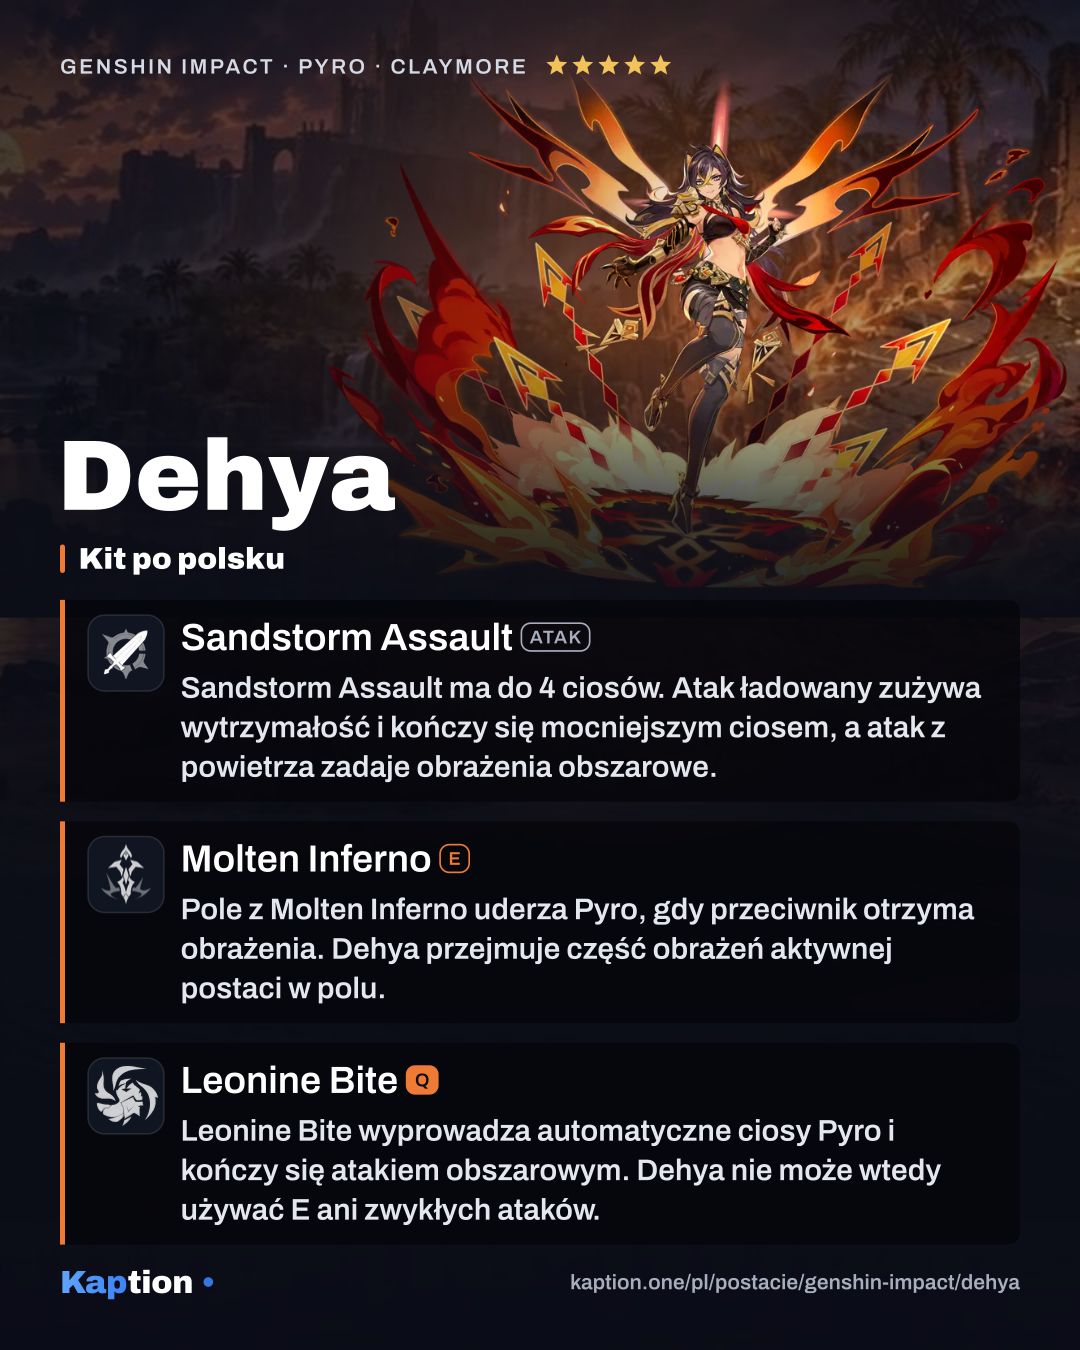
    Sandstorm Assault (NA) has up to 4 hits. Charged slashes drain Stamina and end with a stronger hit; plunging attacks deal AoE DMG.

    Normal Attack Performs up to 4 consecutive strikes using her Claymore and her martial arts. Charged Attack Drains Stamina over time to perform continuous slashes. At the end of the sequence, performs a more powerful slash. Plunging Attack Plunges from mid-air to strike the ground, damaging opponents along the path and dealing AoE DMG upon impact.

  2. Skill

    Molten InfernoE

    Level priority 1 of 3

    Molten Inferno (E) creates a field that strikes with Pyro when an enemy takes DMG. Dehya takes part of the active character's damage in the field.

    This art of Dehya's own invention changes its method of use depending on the combat situation. Indomitable Flame This skill will be unleashed should there be no Fiery Sanctum field created by Dehya herself present at the time. Deals AoE Pyro DMG, and creates a field known as Fiery Sanctum. Ranging Flame This skill will be unleashed should a Fiery Sanctum field created by Dehya herself already exist. Dehya will perform a leaping attack, dealing AoE Pyro DMG before recreating a Fiery Sanctum field at her new position. A Fiery Sanctum field created this way will inherit the remaining duration of the previous field. Ranging Flame can be used only once throughout a single Fiery Sanctum field's duration. Fiery Sanctum When an opponent within a Fiery Sanctum field takes DMG, the field will unleash a coordinated attack, dealing AoE Pyro DMG to them based on Dehya's ATK and Max HP. This effect can be triggered once every 2.5s. Active characters within this field have their resistance to interruption increased, and when such characters take DMG, a portion of that damage will be mitigated and flow into Redmane's Blood. Dehya will then take this DMG over 10s. When the mitigated DMG stored by Redmane's Blood reaches or goes over a certain percentage of Dehya's Max HP, she will stop mitigating DMG in this way. Only 1 Fiery Sanctum created by Dehya herself can exist at the same time. Walk this fiery ordeal with me and purge all impurity, just as a beast of flames that must descend from the blaze.

  3. Ultimate

    Leonine BiteQ

    Level priority 2 of 3

    Leonine Bite (Q) launches automatic Pyro punches and an AoE finisher. Dehya cannot use her Skill or regular attacks during it.

    Unleashing her burning anger and casting her inconvenient blade aside, Dehya enters the Blazing Lioness state and increases her resistance to interruption. In this state, Dehya will automatically and continuously unleash the Flame-Mane's Fists, dealing Pyro DMG based on her ATK and Max HP, and when its duration ends, she will unleash an Incineration Drive, dealing AoE Pyro DMG based on her ATK and Max HP. If a Fiery Sanctum field created by Dehya's own Elemental Skill "Molten Inferno" exists when this ability is unleashed, Dehya will retrieve it, and then create another field once Blazing Lioness's duration expires. This field will take on the retrieved field's duration at the moment of its retrieval. In this state, Dehya will be unable to cast her Elemental Skill, or perform Normal, Charged, and Plunging Attacks. "Normal Attack: Sandstorm Assault" and Elemental Skill "Molten Inferno" will be replaced by "Roaring Barrage." Roaring Barrage Unleashing Roaring Barrage within 0.4s after each Flame-Mane's Fist strike will increase the speed at which the next Flame-Mane's Fist strike will be triggered. Even the flowing flames must obey her rage and at her command become her fangs and claws.

Passives

  1. Passive

    Unstinting SuccorPassive

    After retrieving the field, Dehya takes 60% less Redmane's Blood DMG for 6s. Casting E without a field boosts interruption resistance in it for 9s.

    Within 6 seconds after Dehya retrieves the Fiery Sanctum field through Molten Inferno: Ranging Flame or Leonine Bite, she will take 60% less DMG when receiving DMG from Redmane's Blood. This effect can be triggered once every 2s. Additionally, within 9s after Dehya unleashes Molten Inferno: Indomitable Flame, she will grant all party members the Gold-Forged Form state. This state will further increase a character's resistance to interruption when they are within the Fiery Sanctum field. Gold-Forged Form can be activated once every 18s.

  2. Passive

    Stalwart and TruePassive

    Below 40% HP, Dehya heals 20% of Max HP, then 6% every 2s for 10s. This can trigger once every 20s.

    When her HP is less than 40%, Dehya will recover 20% of her Max HP and will restore 6% of her Max HP every 2s for the next 10s. This effect can be triggered once every 20s.

  3. Passive

    The Sunlit WayPassive

    From 06:00 to 18:00, party movement speed increases by 10%. It does not work in Domains, Trounce Domains or Spiral Abyss.

    During the day (06:00 – 18:00), your party members gain the Swift Stride effect: Movement SPD increased by 10%. Does not take effect in Domains, Trounce Domains, or Spiral Abyss. Swift Stride does not stack.

Constellations

  1. C1

    The Flame Incandescent

    Worth it

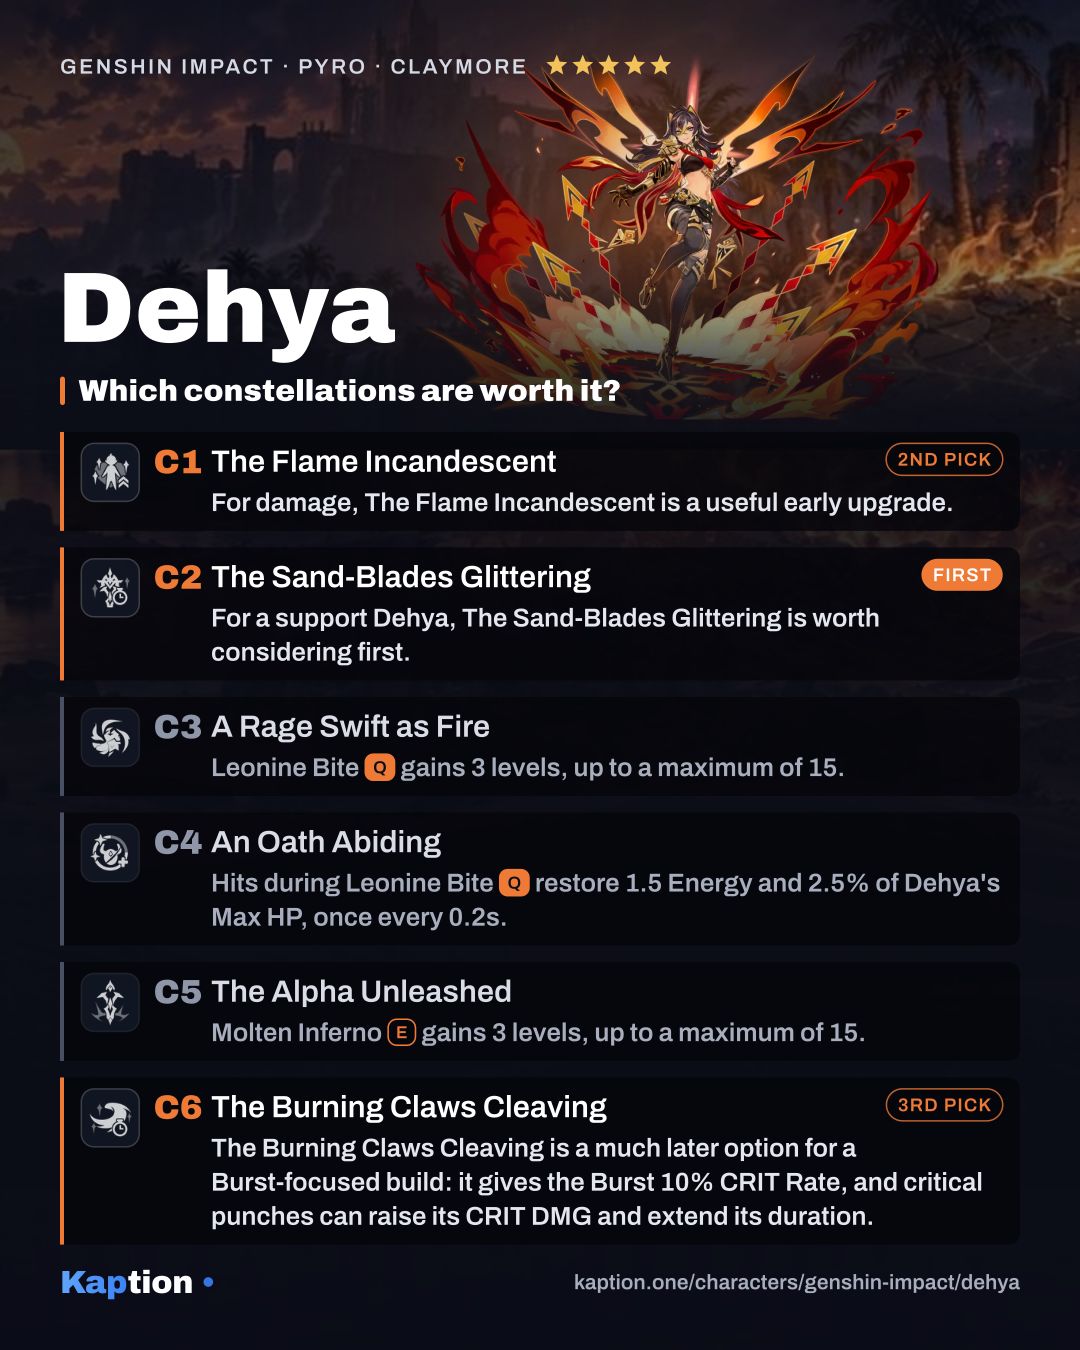
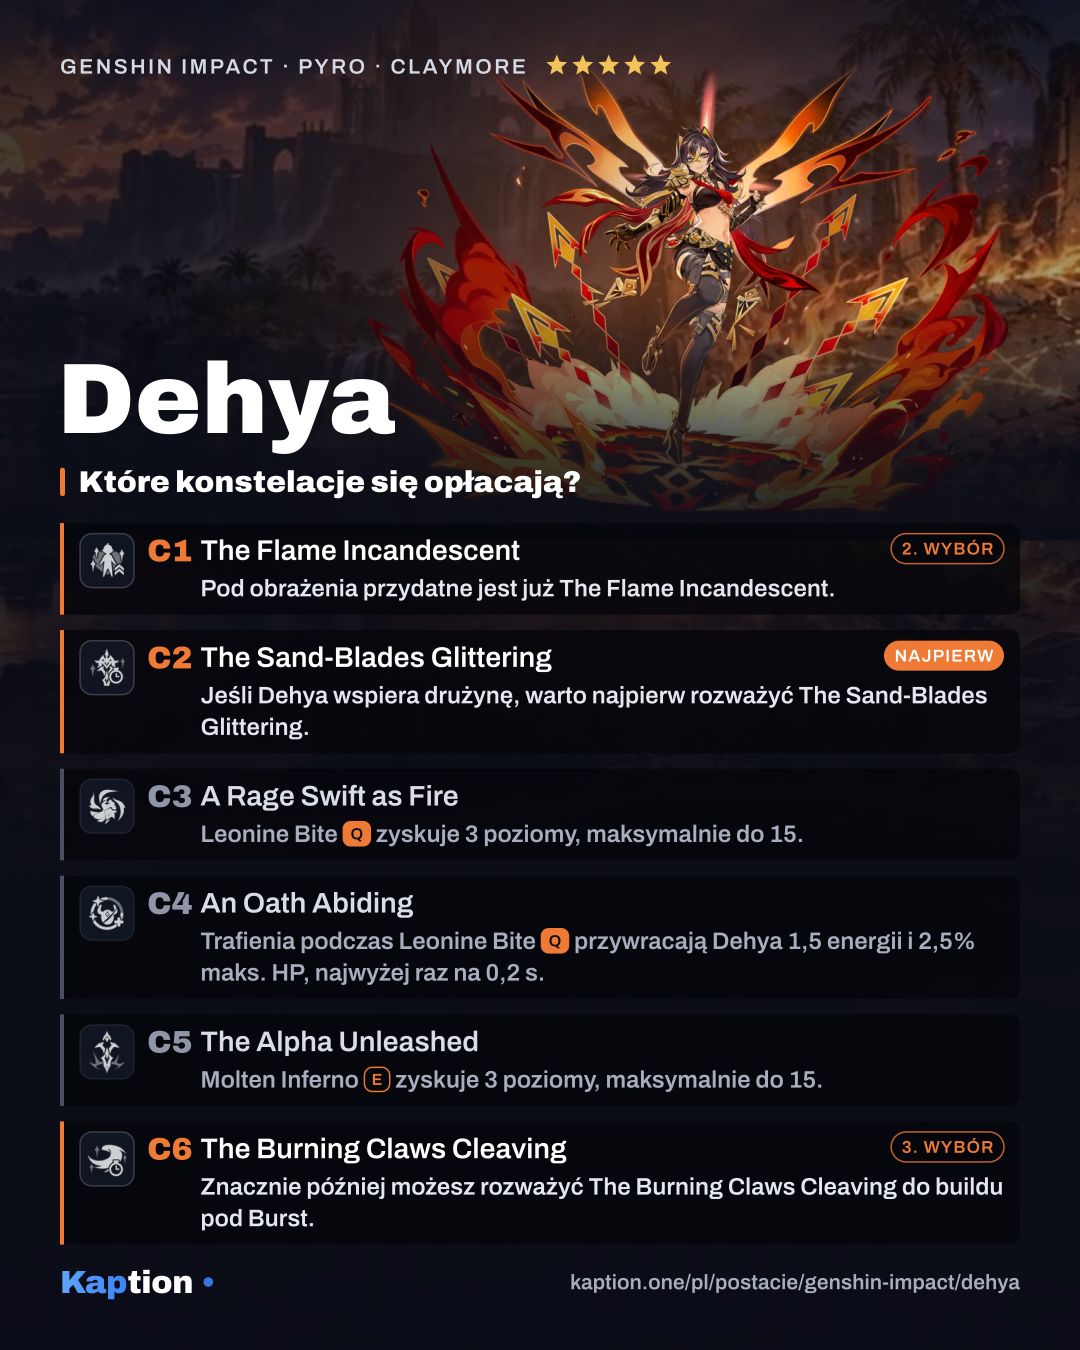
    For damage, The Flame Incandescent (C1) is a useful early upgrade.

    Dehya's Max HP is increased by 20%, and she deals bonus DMG based on her Max HP when using the following attacks: ·Molten Inferno's DMG will be increased by 3.6% of her Max HP. ·Leonine Bite's DMG will be increased by 6% of her Max HP.

  2. C2

    The Sand-Blades Glittering

    Worth it

    For a support Dehya, The Sand-Blades Glittering (C2) is worth considering first.

    When Dehya uses Molten Inferno: Ranging Flame, the duration of the recreated Fiery Sanctum field will be increased by 6s. Additionally, when a Fiery Sanctum exists on the field, DMG dealt by its next coordinated attack will be increased by 50% when active character(s) within the Fiery Sanctum field are attacked.

  3. C3

    A Rage Swift as Fire

    Increases the Level of Leonine Bite by 3. Maximum upgrade level is 15.

  4. C4

    An Oath Abiding

    When Flame-Mane's Fist and Incineration Drive attacks unleashed during Leonine Bite hit opponents, they will restore 1.5 Energy for Dehya and 2.5% of her Max HP. This effect can be triggered once every 0.2s.

  5. C5

    The Alpha Unleashed

    Increases the Level of Molten Inferno by 3. Maximum upgrade level is 15.

  6. C6

    The Burning Claws Cleaving

    Worth it

    The Burning Claws Cleaving (C6) is a much later option for a Burst-focused build: it gives the Burst 10% CRIT Rate, and critical punches can raise its CRIT DMG and extend its duration.

    The CRIT Rate of Leonine Bite is increased by 10%. Additionally, after a Flame-Mane's Fist attack hits an opponent and deals CRIT Hits during a single Blazing Lioness state, it will cause the CRIT DMG of Leonine Bite to increase by 15% for the rest of Blazing Lioness's duration and extend that duration by 0.5s. This effect can be triggered every 0.2s. The duration can be extended for a maximum of 2s and CRIT DMG can be increased by a maximum of 60% this way.

Materials

Ascension, to max level

  • Mora Mora × 420,000
  • Sand Grease Pupa Sand Grease Pupa × 168
  • Agnidus Agate Sliver Agnidus Agate Sliver × 1
  • Agnidus Agate Fragment Agnidus Agate Fragment × 9
  • Agnidus Agate Chunk Agnidus Agate Chunk × 9
  • Agnidus Agate Gemstone Agnidus Agate Gemstone × 6
  • Faded Red Satin Faded Red Satin × 18
  • Trimmed Red Silk Trimmed Red Silk × 30
  • Rich Red Brocade Rich Red Brocade × 36
  • Light Guiding Tetrahedron Light Guiding Tetrahedron × 46

All skills to max

  • Mora Mora × 4,957,500
  • Crown of Insight Crown of Insight × 3
  • Teachings of Praxis Teachings of Praxis × 9
  • Guide to Praxis Guide to Praxis × 63
  • Philosophies of Praxis Philosophies of Praxis × 114
  • Faded Red Satin Faded Red Satin × 18
  • Trimmed Red Silk Trimmed Red Silk × 66
  • Rich Red Brocade Rich Red Brocade × 93
  • Puppet Strings Puppet Strings × 18

Guide

How the kit works

Start with Molten Inferno. If Dehya has no Fiery Sanctum active, she deals AoE Pyro damage and creates one. When an enemy inside takes damage, the field follows up with a coordinated AoE Pyro attack, at most once every 2.5 seconds. You can then switch to the teammate you want to protect.

Use the Skill again to move the field with Ranging Flame. The new field keeps the old field's remaining duration rather than starting a fresh one, and you can reposition it only once during that field's duration. Only one of Dehya's fields can exist at a time.

Cast Leonine Bite when you want Dehya to attack on field. It retrieves her existing field and restores one with the saved remaining duration after the Burst ends. During the Burst, press Roaring Barrage within 0.4 seconds of each punch to speed up the next one. Normal, Charged and Plunging Attacks and the Skill are unavailable in this state.

The initial field also grants an extra interruption-resistance effect for 9 seconds, with an 18-second interval between activations. After retrieving the field, Dehya takes 60% less redirected damage for 6 seconds. If her HP falls below 40%, she heals herself; that recovery can trigger once every 20 seconds.

Build and why

For a field-support build, try four pieces of Tenacity of the Millelith. Skill hits give nearby teammates 20% ATK and 30% Shield Strength for 3 seconds, including when Dehya is off field. Four pieces of Scroll of the Hero of Cinder City are another option: after Dehya triggers a Pyro-related reaction, teammates gain a 12% Elemental DMG Bonus for the elements involved for 15 seconds.

For Burst damage, consider four pieces of Emblem of Severed Fate. Its Energy Recharge helps with the Burst, and its four-piece effect converts 25% of that stat into Burst DMG Bonus, up to 75%. Vourukasha's Glow is another damage option: it raises HP and boosts Skill and Burst damage, with its bonus increasing when Dehya takes damage, even off field.

On a damage build, use Energy Recharge, ATK Percentage or HP Percentage on the sands, Pyro DMG Bonus on the goblet, and CRIT Rate or CRIT DMG on the circlet. For substats, look for Energy Recharge first, followed by CRIT Rate, CRIT DMG, ATK Percentage and HP Percentage.

For field support, Sacrificial Greatsword has a 40% chance to reset the Skill's cooldown after it deals damage, once every 30 seconds. Favonius Greatsword is another option: CRIT Hits have a 60% chance to generate particles, once every 12 seconds, so give Dehya some CRIT Rate. For damage, Beacon of the Reed Sea gives ATK after Skill hits and after taking damage, plus Max HP when she has no shield.

Leveling priority

For a field-support build, level Molten Inferno first: its coordinated attacks are the part of the kit your team uses while Dehya is off field. Level Leonine Bite next if you use her Burst. For a build centered on Burst damage, it is reasonable to reverse those two priorities.

Leave Sandstorm Assault (NA) until last. The Burst uses its own automatic attacks instead of normal attacks, so raising the normal attack talent does not improve those punches.

For ascension, you need Mora, Sand Grease Pupa, Light Guiding Tetrahedron and the Agnidus Agate materials: Sliver, Fragment, Chunk and Gemstone. You also need Faded Red Satin, Trimmed Red Silk and Rich Red Brocade.

The talent upgrades use Mora, Teachings of Praxis, Guide to Praxis, Philosophies of Praxis, the same three red materials, Puppet Strings and Crown of Insight. Raising all three talents to their maximum uses three Crowns of Insight.

Constellations worth it

For a support Dehya, The Sand-Blades Glittering is worth considering first. Ranging Flame adds 6 seconds to the recreated field's duration. While the field exists, an attack on the active character inside it also raises the damage of its next coordinated attack by 50%.

For damage, The Flame Incandescent is a useful early upgrade. It adds 20% Max HP and gives both Molten Inferno and Leonine Bite extra damage based on that HP. The Burning Claws Cleaving is a much later option for a Burst-focused build: it gives the Burst 10% CRIT Rate, and critical punches can raise its CRIT DMG and extend its duration.

You can stop before those later upgrades if the base kit does what you need. A Rage Swift as Fire and The Alpha Unleashed add talent levels, while An Oath Abiding restores Dehya's Energy and HP when Burst attacks hit. Consider them mainly if you want those specific improvements.

Teams

Pair Dehya with an on-field teammate who benefits from resistance to interruption and can fight inside Fiery Sanctum. Her field also supplies Pyro attacks while that teammate is active. Remember that its damage redirection has a limit based on Dehya's Max HP, and her own recovery does not heal the rest of the party.

Common mistakes

Do not expect the second use of Molten Inferno to refresh the field's full duration. Use it to move the field where the active character can stay inside it, and watch the remaining time. Even if Sacrificial Greatsword resets the cooldown, the recreated field still inherits the previous field's remaining duration.

Do not treat the field as complete protection. Damage still reaches the active character, and Dehya takes the redirected portion over 10 seconds. Bring healing when the team needs it, and do not rely on Dehya's self-heal to restore anyone else's HP.

During Leonine Bite, do not wait to use Roaring Barrage until the punches are over. Press it shortly after each punch to speed up the next. Also avoid building only for Normal Attack damage if the Burst is your focus: its punches are separate from Sandstorm Assault (NA).

Finally, match the artifact set to the job. Tenacity of the Millelith supports teammates through Skill hits, while Emblem of Severed Fate is aimed at Dehya's Burst damage. A damage build also needs enough Energy Recharge to make use of that Burst.
Dehya in Polish

Story lines the way Kaption shows them in Polish, with the English original underneath.

  • Dehya · Annals of the Scarlet Sands Przyprowadźcie do mnie Kusaylę! Nie ma sensu go już ukrywać! Just bring Kusayla to me! There's no use hiding him anymore!
  • Dehya · Shade Upon Red Silk Hej, nieroby. Możecie przynajmniej powiedzieć mi resztę informacji, zanim wrócicie do kłótni? Hey, knuckleheads. Can you at least tell me the rest of the intel before you go back to your bickering?
  • Dehya · Annals of the Scarlet Sands Nie martw się o to teraz. Wiesz, jaką karę cię spotka, gdy zgłosimy to Korpusowi, prawda? Don't worry about that for now. You know what kind of punishment you'll face once we report you to the Corps, I assume?
  • Dehya · Shade Upon Red Silk Próbował odgryźć własny język! Szybko, przeszukaj okolicę w poszukiwaniu środków pierwszej pomocy! He tried to bite off his own tongue! Quick, search the area for any first aid supplies!
  • Dehya · Shade Upon Red Silk To znaczy, jeśli choć trochę był przyzwoity, to dlaczego miałbym opuszczać brygadę i zrywać z nim wszelkie więzi? I mean, if he was even remotely decent, then why would I have to leave the brigade and cut all ties with him?
  • Dehya · Annals of the Scarlet Sands W takim razie... proszę pani, czy mogłaby pani poprosić mistrza, żeby wyszedł i porozmawiał z nami? In which case... my lady, could you ask the master to come out and have a chat with us?
  • Dehya · Sincerity's Facade To nawet kilka razy przeszło mi przez myśl. To jakby powiedzieć: „co w tym złego, by przystosować się do nowego życia?” That thought has even crossed my mind a few times. It's like saying, "what's wrong with adapting to a new life?"
  • Dehya · Annals of the Scarlet Sands Czyli... mistrz raczej nie był niewinną ofiarą w całej tej sprawie? So... the master was not likely an innocent victim in all of this?

Frequently asked questions

What's the best build for Dehya?

Artifacts: Tenacity of the Millelith, Emblem of Severed Fate ×4 or Vourukasha's Glow ×4. Main stats: Sands: Energy Recharge, ATK% or HP%, Goblet: Pyro DMG Bonus, Circlet: CRIT Rate or CRIT DMG. Recommended weapons: Sacrificial Greatsword, Favonius Greatsword or Beacon of the Reed Sea.

What should I level first on Dehya?

Molten InfernoE first, then Leonine BiteQ and Sandstorm AssaultAttack.

Which constellations are worth getting for Dehya?

The biggest upgrades: C2 The Sand-Blades Glittering, C1 The Flame Incandescent and C6 The Burning Claws Cleaving.

Who should Dehya team up with?

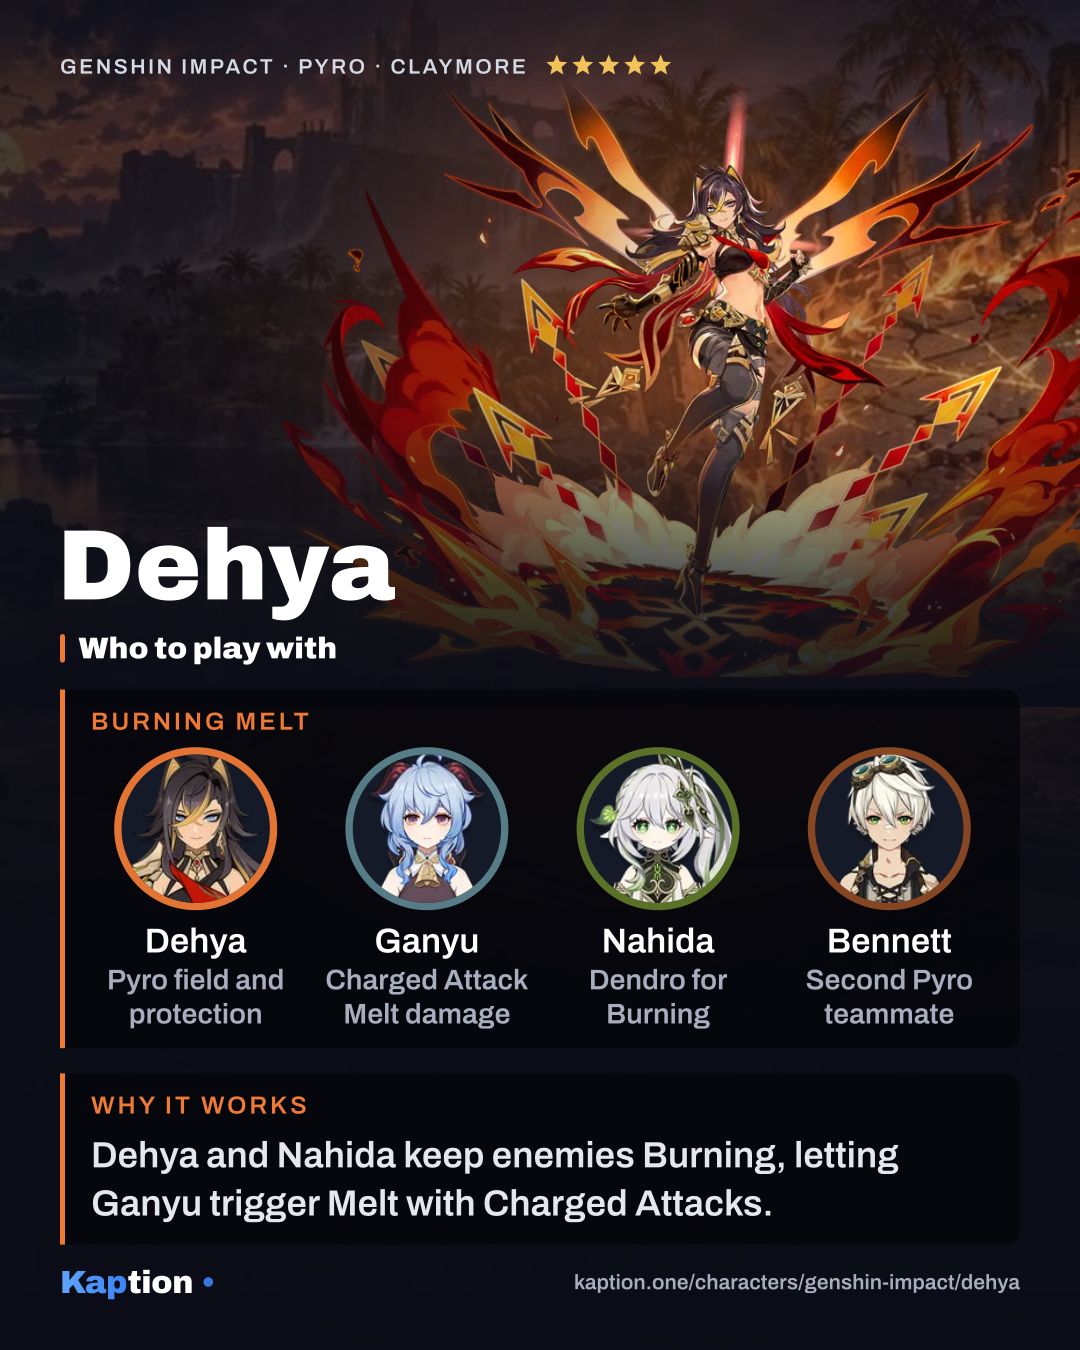
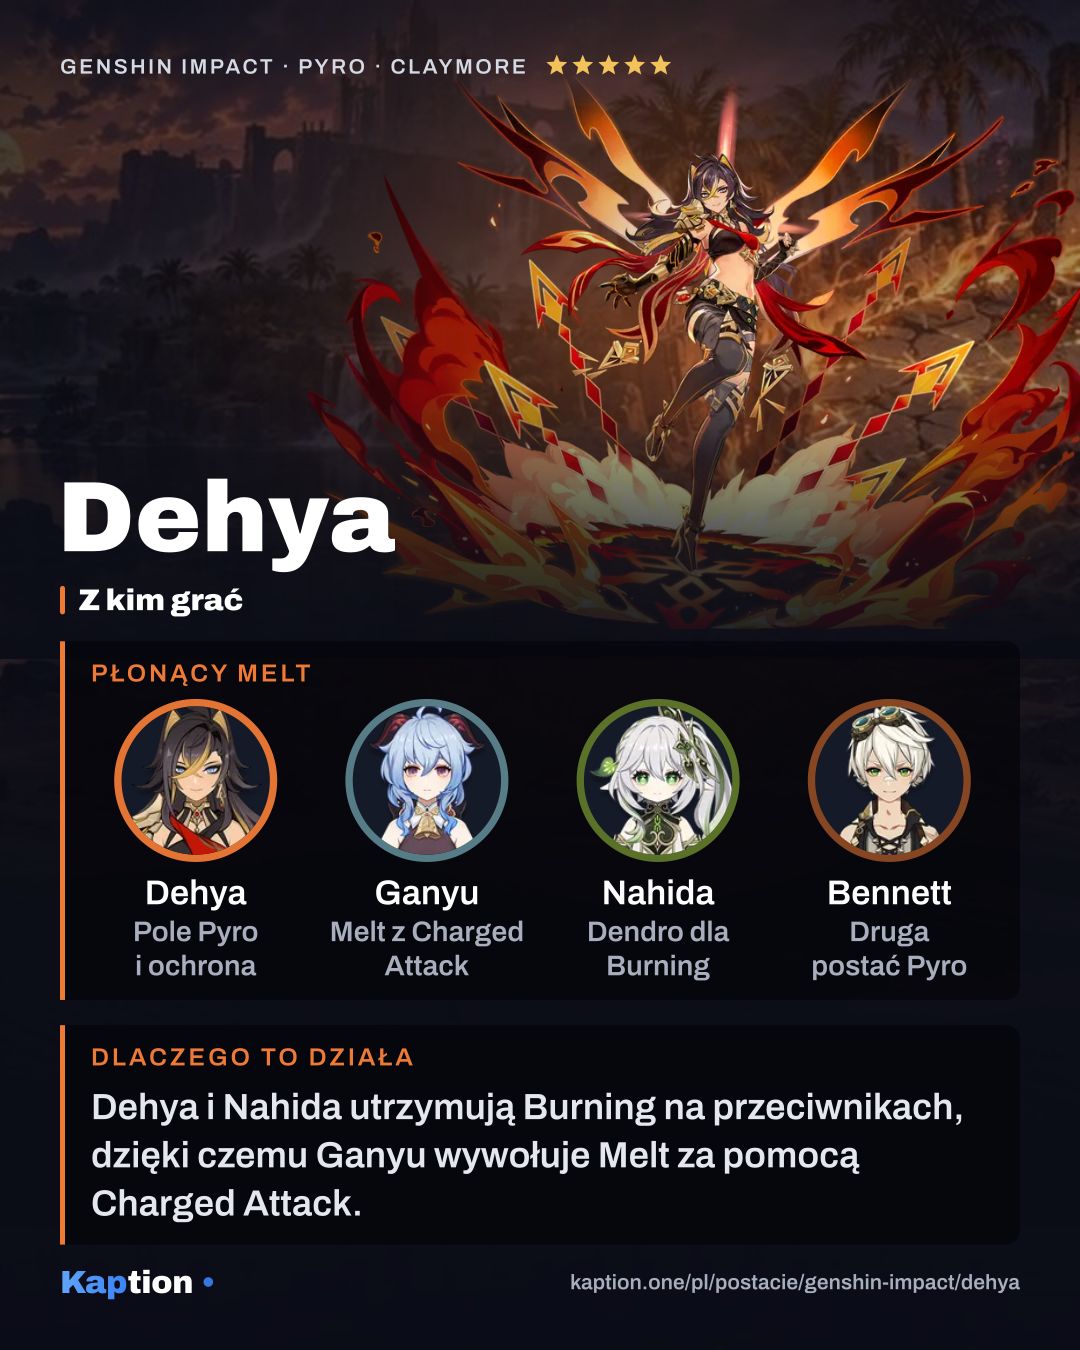
Good teammates: Ganyu, Nahida and Bennett.

Is Dehya in Polish in Genshin Impact?

The game has no Polish language option. Kaption shows Polish subtitles for the dialogue right on the game screen, so Dehya's lines read in Polish. Skill and item names stay in English, as in the game.

Share

Ready-made cards for Instagram, TikTok, X or Discord, in English or Polish.

4:5 for Instagram and Facebook · 9:16 for Stories, TikTok and Shorts · 16:9 for X and Discord

The build cards and quick guides of every Genshin Impact character (131) in one ZIP: 4:5 (45 MB) 9:16 (60 MB) 16:9 (31 MB)

On Discord, paste the copied link or drag the downloaded file into the chat.

Game data version 7.2.0.

← All Genshin Impact characters