














Genshin Impact character

Dori (Genshin Impact)

Guide, build and skills

  • 4-star
  • Element Electro
  • Weapon Claymore
  • Game data 7.2.0

Electro trigger and healer

Energy Recharge helps Dori recover Energy from E hits, while HP Percentage boosts Jinni's healing.

Dori from Genshin Impact with a Kaption Polish subtitle
How Kaption shows Dori in Polish: "Nie martw się, maluchu. Cyno prowadzi to śledztwo, prawda? To on zapłaci wszystkie rachunki."

At a glance

Dori is a 4-star Electro character who uses a Claymore. She supports a teammate with healing and Energy while dealing Electro DMG from her Skill and Burst.

Her Jinni connects to a nearby character, so positioning matters. Dori also gains Energy from Skill hits based on her Energy Recharge, making that stat useful alongside HP Percentage, which improves the Jinni's healing.

Video guide

Dori 101 - The Art of the Scam

Video by Meese on YouTube · 35 min · 25.7K views · October 2025

The YouTube player loads only after you click.

Build

Suggested build The game doesn't recommend a build for this character.

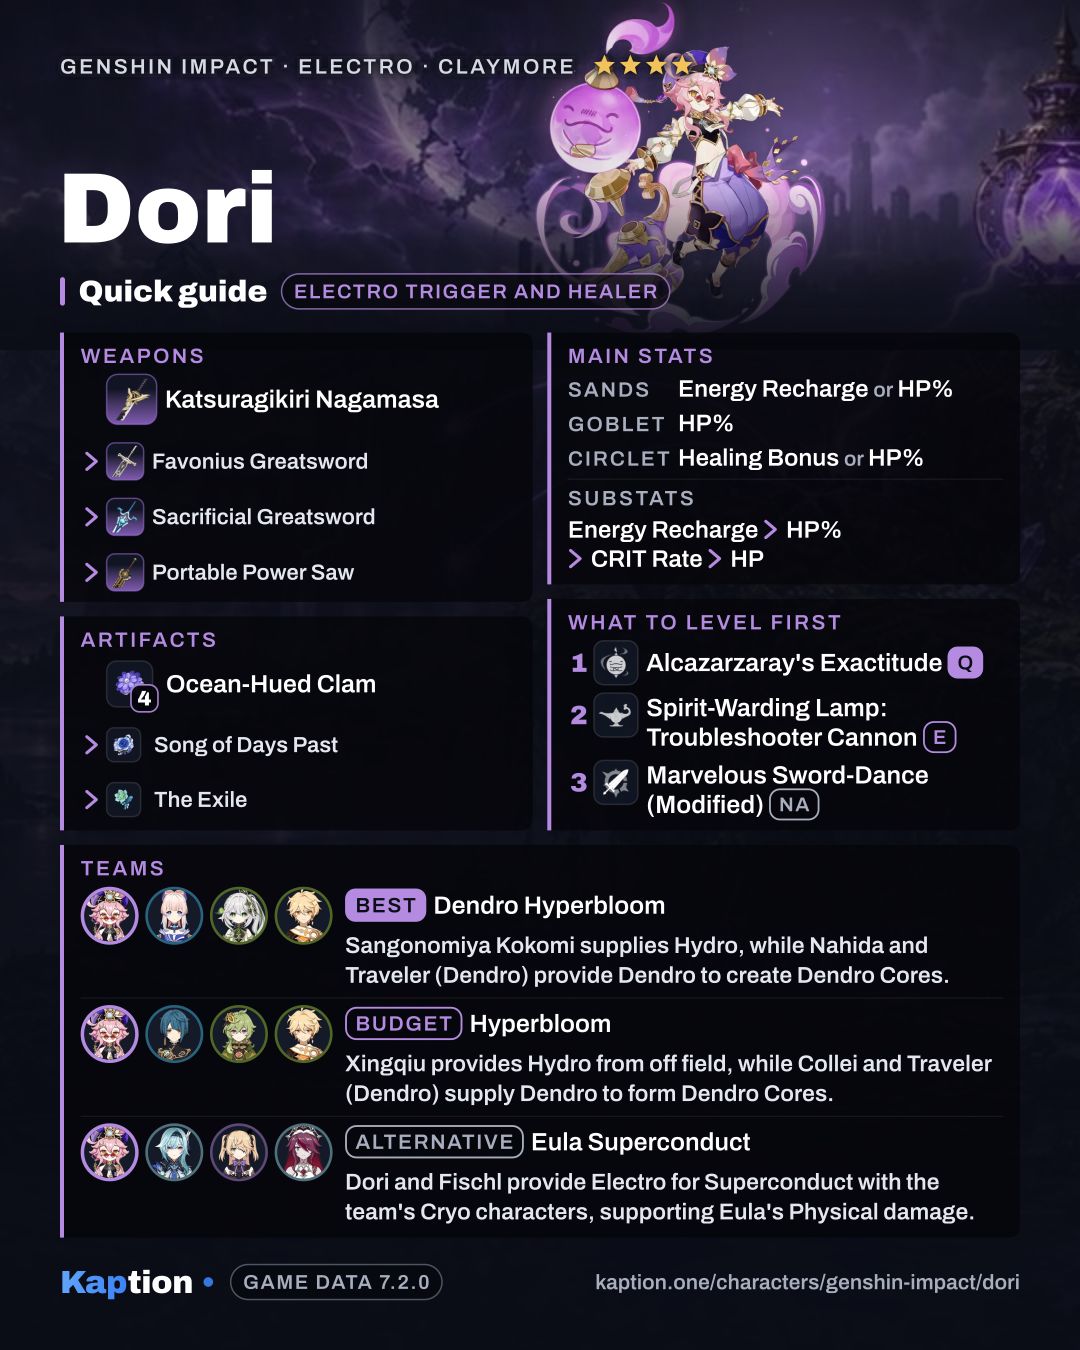
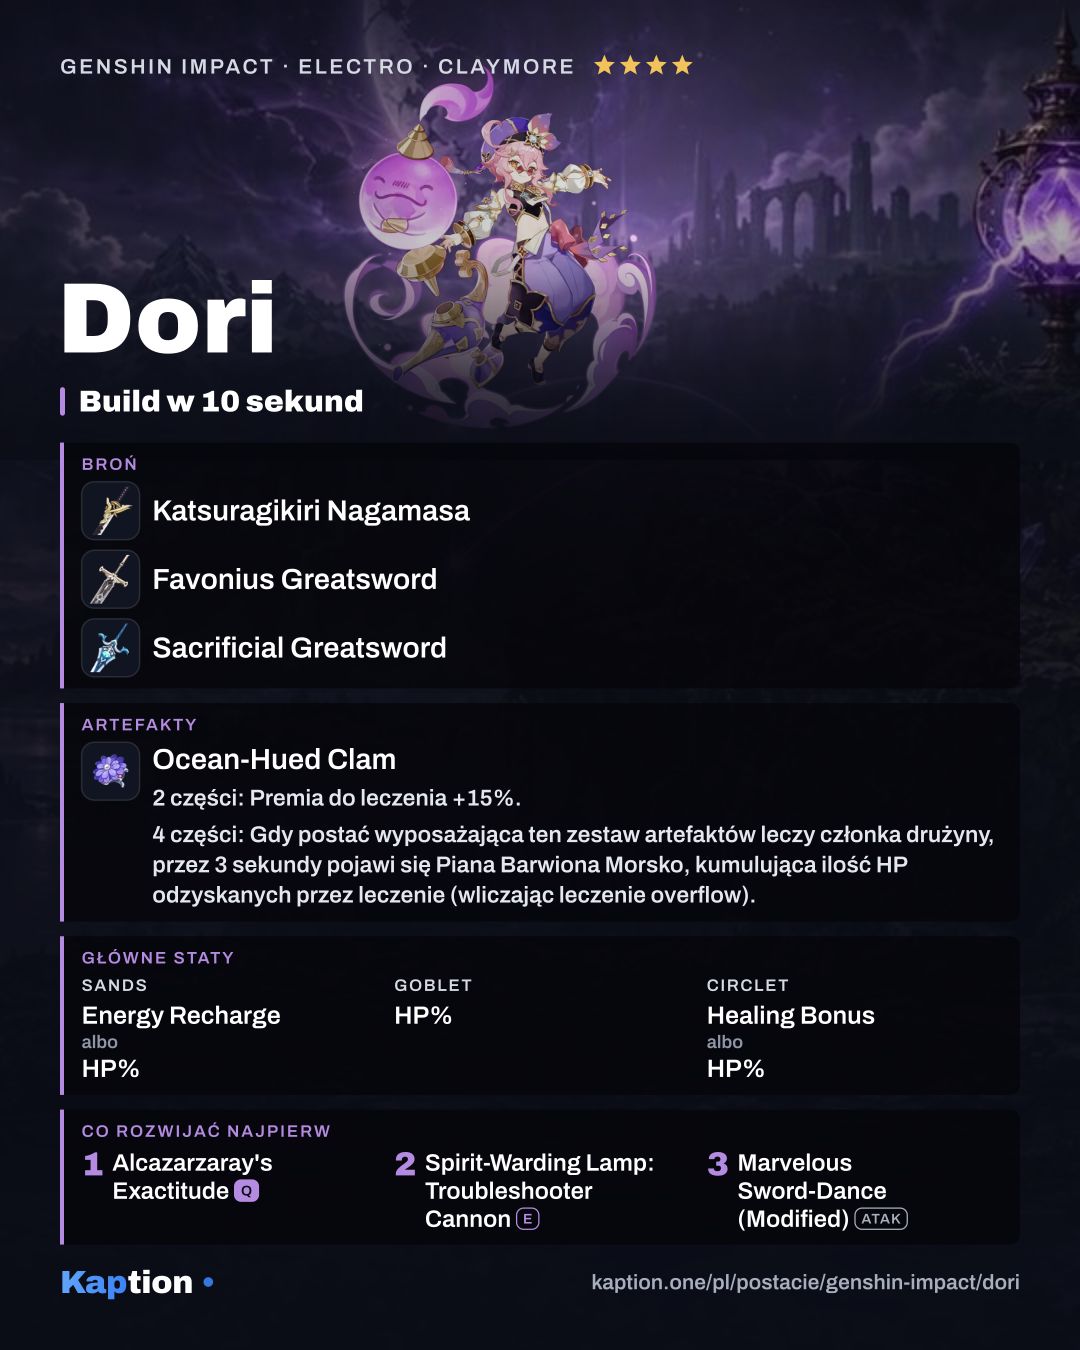
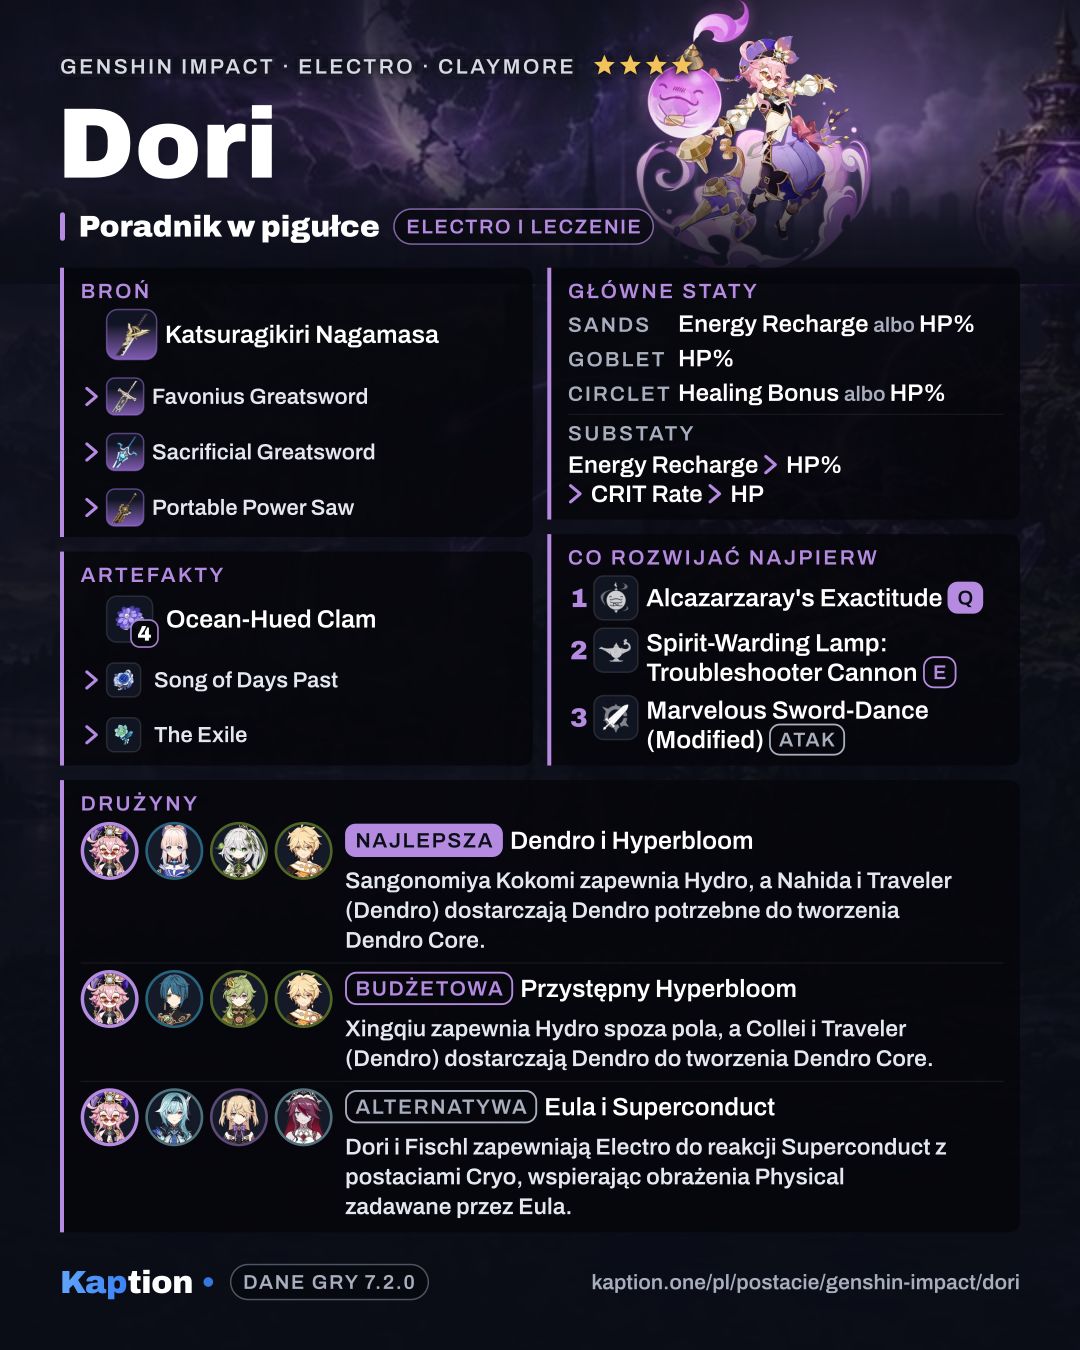
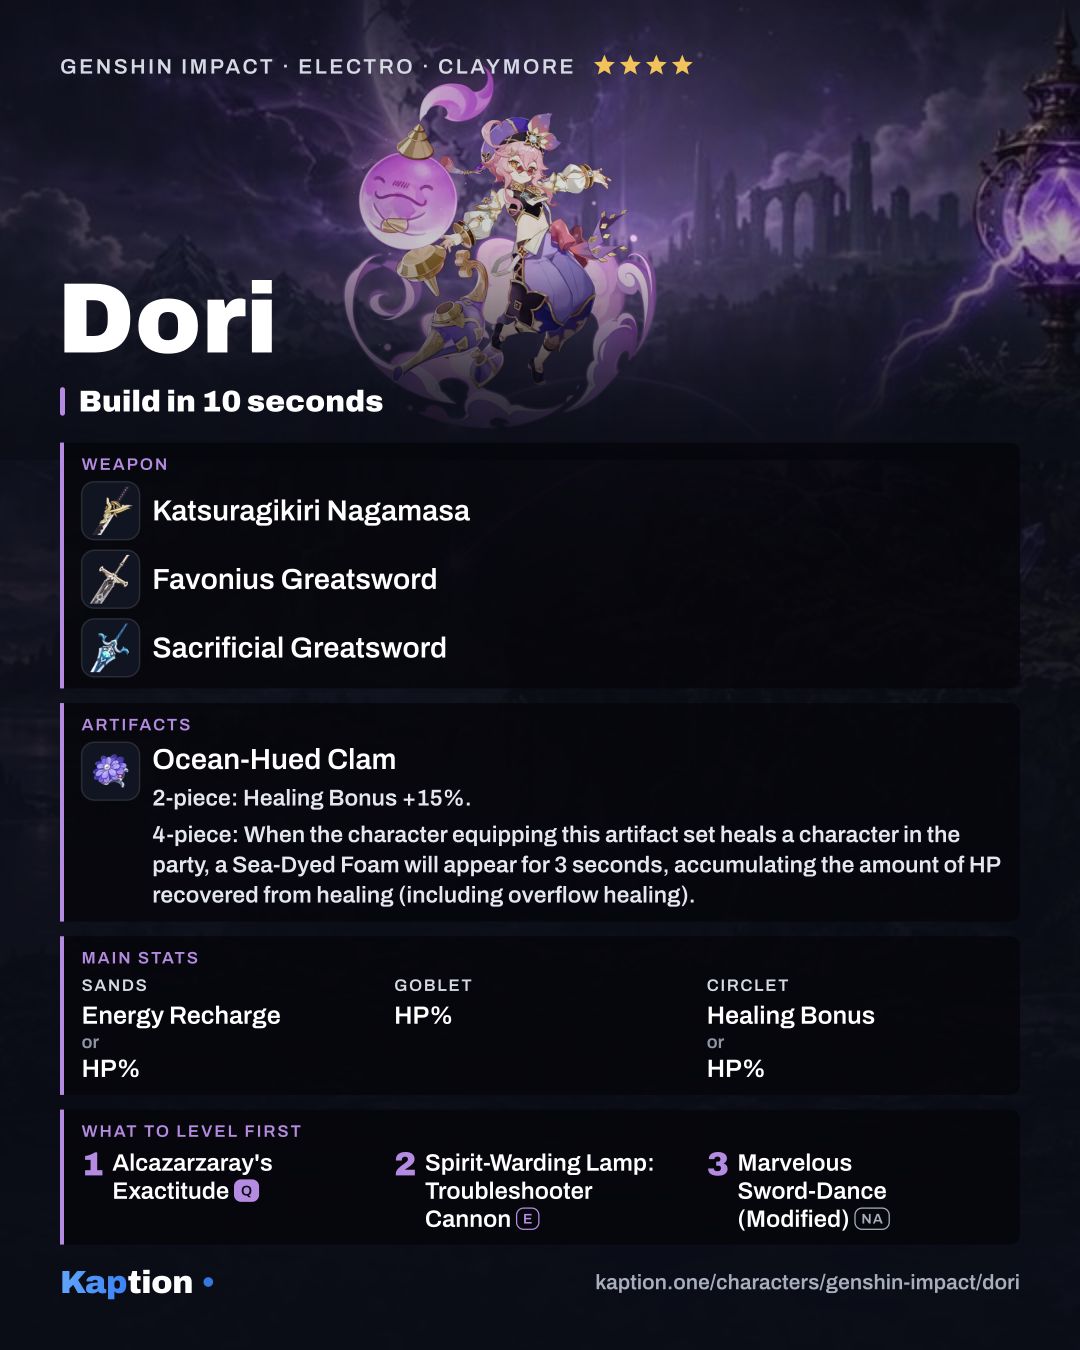
4× Ocean-Hued Clam · Sands Energy Recharge or HP% · Goblet HP% · Circlet Healing Bonus or HP% · substats Energy Recharge > HP% > CRIT Rate > HP

Energy Recharge helps Dori recover Energy from E hits, while HP Percentage boosts Jinni's healing.

Artifacts

Artifact set

Pick one. The first is the top pick.

  1. Noblesse Oblige
    Noblesse Oblige
    • 2-piece bonus: Elemental Burst DMG +20%
    Show effect
    • 4-piece bonus: Using an Elemental Burst increases all party members' ATK by 20% for 12s. This effect cannot stack.
  2. Gilded Dreams
    Gilded Dreams
    • 2-piece bonus: Increases Elemental Mastery by 80.
    Show effect
    • 4-piece bonus: Within 8s of triggering an Elemental Reaction, the character equipping this will obtain buffs based on the Elemental Type of the other party members. ATK is increased by 14% for each party member whose Elemental Type is the same as the equipping character, and Elemental Mastery is increased by 50 for every party member with a different Elemental Type. Each of the aforementioned buffs will count up to 3 characters. This effect can be triggered once every 8s. The character who equips this can still trigger its effects when not on the field.
  3. Deepwood Memories
    Deepwood Memories
    • 2-piece bonus: Dendro DMG Bonus +15%.
    Show effect
    • 4-piece bonus: After Elemental Skills or Bursts hit opponents, the targets' Dendro RES will be decreased by 30% for 8s. This effect can be triggered even if the equipping character is not on the field.

4 pieces · Artifact set

Pick one. The first is the top pick.

  1. Ocean-Hued Clam
    Ocean-Hued Clam
    • 2-piece bonus: Healing Bonus +15%.
    Show effect
    • 4-piece bonus: When the character equipping this artifact set heals a character in the party, a Sea-Dyed Foam will appear for 3 seconds, accumulating the amount of HP recovered from healing (including overflow healing). At the end of the duration, the Sea-Dyed Foam will explode, dealing DMG to nearby opponents based on 90% of the accumulated healing. (This DMG is calculated similarly to Reactions such as Electro-Charged, and Superconduct, but is not affected by Elemental Mastery, Character Levels, or Reaction DMG Bonuses). Only one Sea-Dyed Foam can be produced every 3.5 seconds. Each Sea-Dyed Foam can accumulate up to 30,000 HP (including overflow healing). There can be no more than one Sea-Dyed Foam active at any given time. This effect can still be triggered even when the character who is using this artifact set is not on the field.
  2. Song of Days Past
    Song of Days Past
    • 2-piece bonus: Healing Bonus +15%.
    Show effect
    • 4-piece bonus: When the equipping character heals a party member, the Yearning effect will be created for 6s, which records the total amount of healing provided (including overflow healing). When the duration expires, the Yearning effect will be transformed into the "Waves of Days Past" effect: When your active party member hits an opponent with a Normal Attack, Charged Attack, Plunging Attack, Elemental Skill, or Elemental Burst, the DMG dealt will be increased by 8% of the total healing amount recorded by the Yearning effect. The "Waves of Days Past" effect is removed after it has taken effect 5 times or after 10s. A single instance of the Yearning effect can record up to 15,000 healing, and only a single instance can exist at once, but it can record the healing from multiple equipping characters. Equipping characters on standby can still trigger this effect.

4 pieces · Artifact set

  1. The Exile
    The Exile
    • 2-piece bonus: Energy Recharge +20%
    Show effect
    • 4-piece bonus: Using an Elemental Burst regenerates 2 Energy for all party members (excluding the wearer) every 2s for 6s. This effect cannot stack.

2 + 2 pieces · Artifact set

Wear both sets, 2 pieces each.

  1. Tenacity of the Millelith
    Tenacity of the Millelith
    • 2-piece bonus: HP +20%
  2. Emblem of Severed Fate
    Emblem of Severed Fate
    • 2-piece bonus: Energy Recharge +20%

Main stats

Sands
Energy Recharge or HP%
Goblet
HP%
Circlet
Healing Bonus or HP%

Substats

  1. Energy Recharge
  2. HP%
  3. CRIT Rate
  4. HP

Recommended weapons

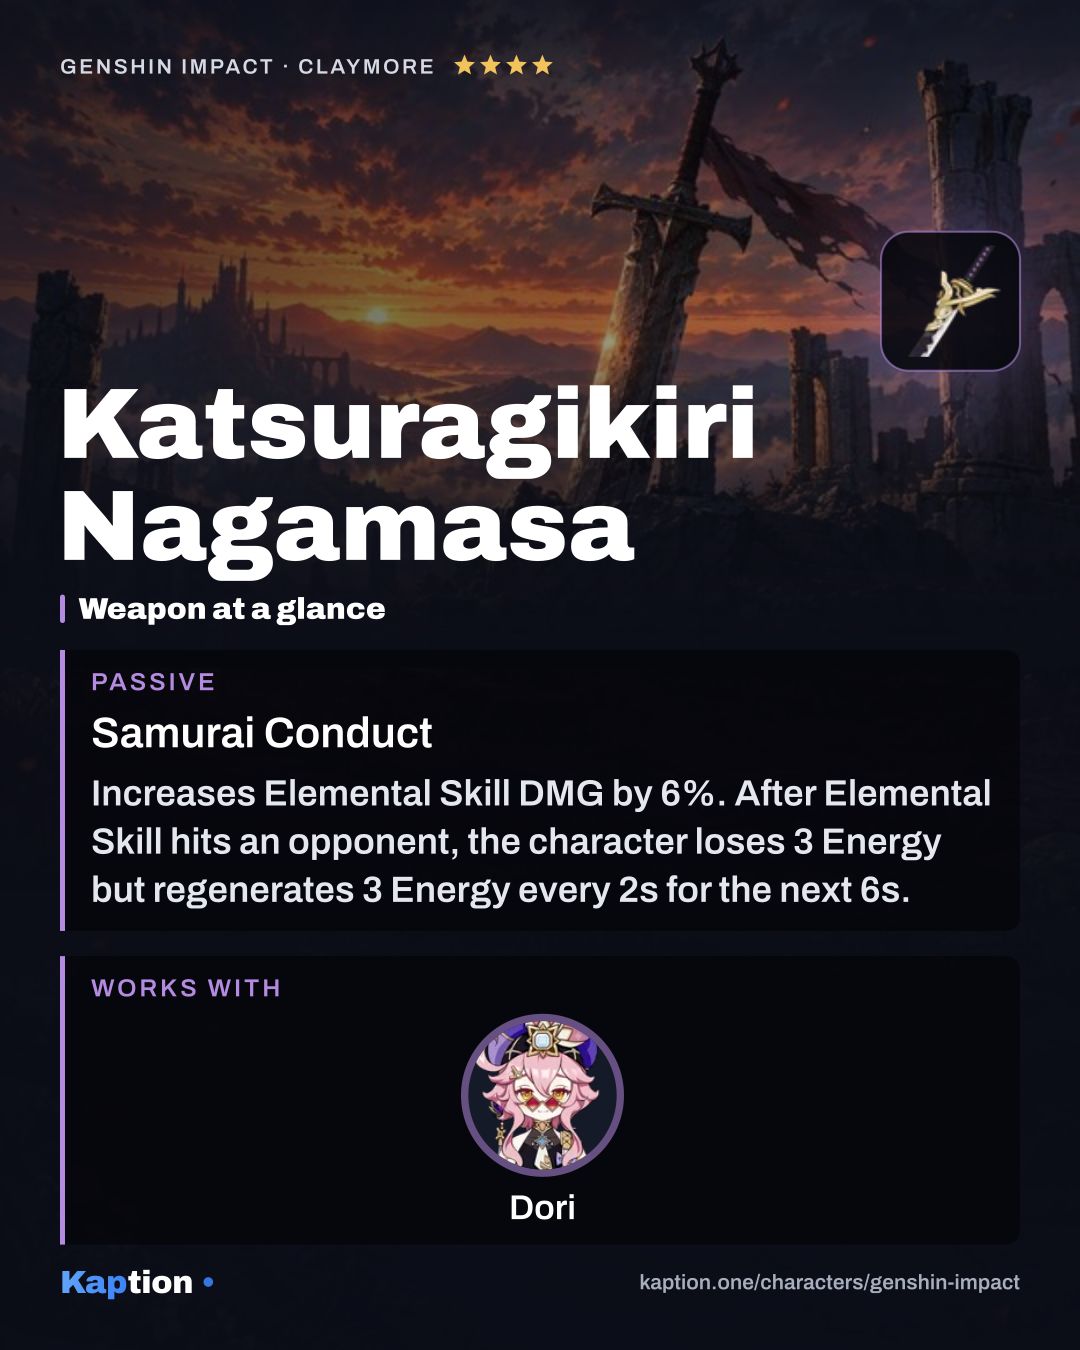
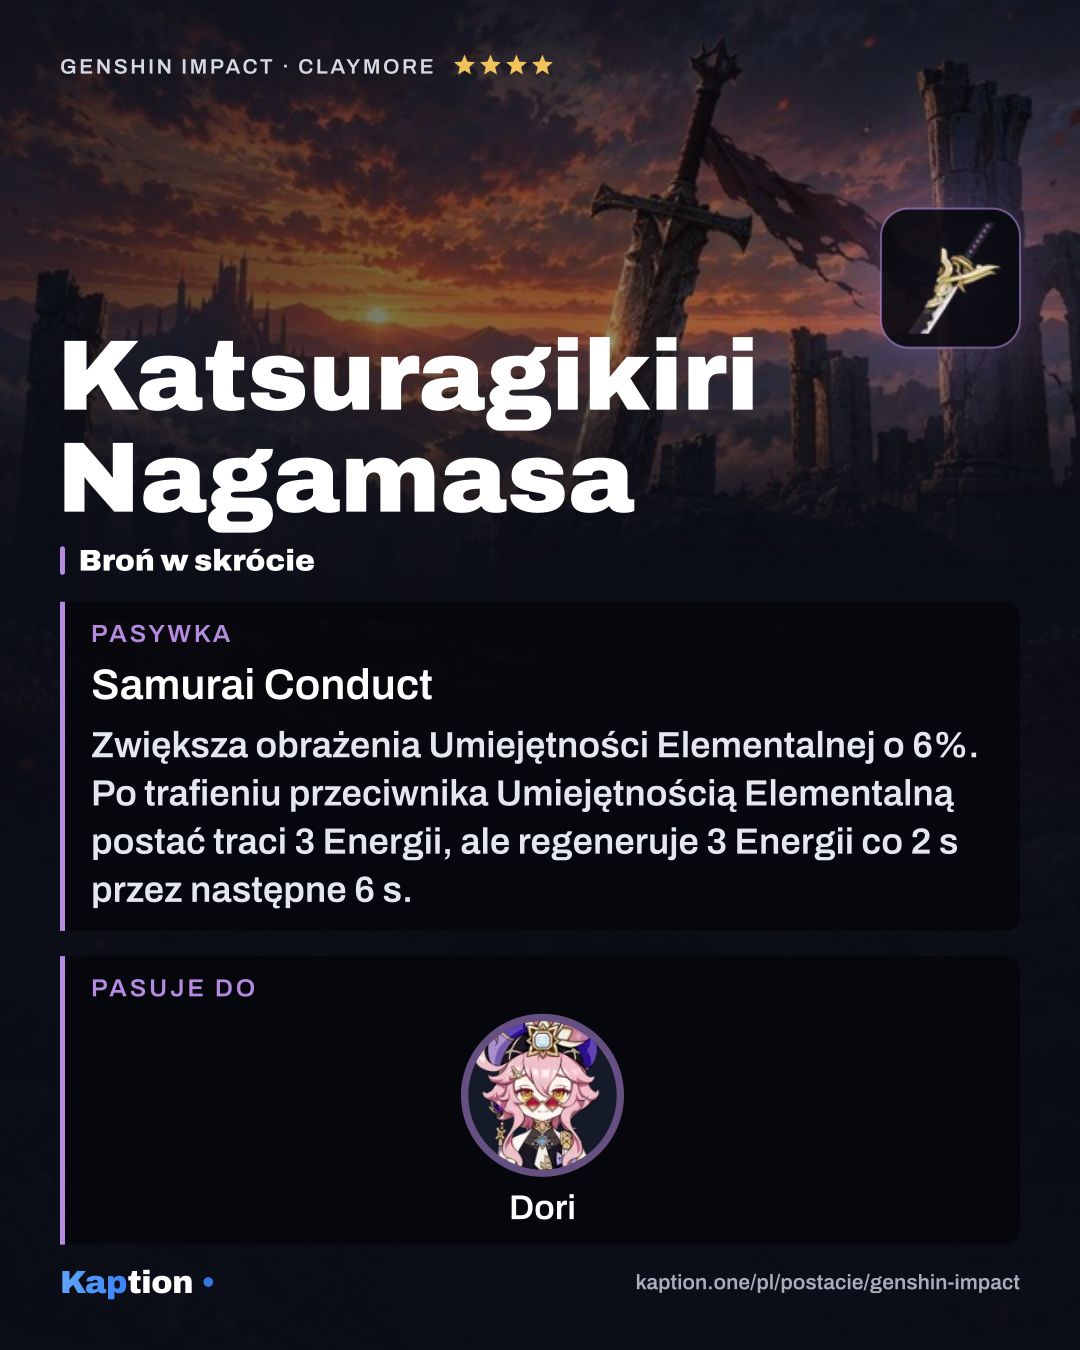
  1. Katsuragikiri Nagamasa
    Katsuragikiri Nagamasa 4-star
    Samurai Conduct Show effect

    Increases Elemental Skill DMG by 6%. After Elemental Skill hits an opponent, the character loses 3 Energy but regenerates 3 Energy every 2s for the next 6s. This effect can occur once every 10s. Can be triggered even when the character is not on the field.

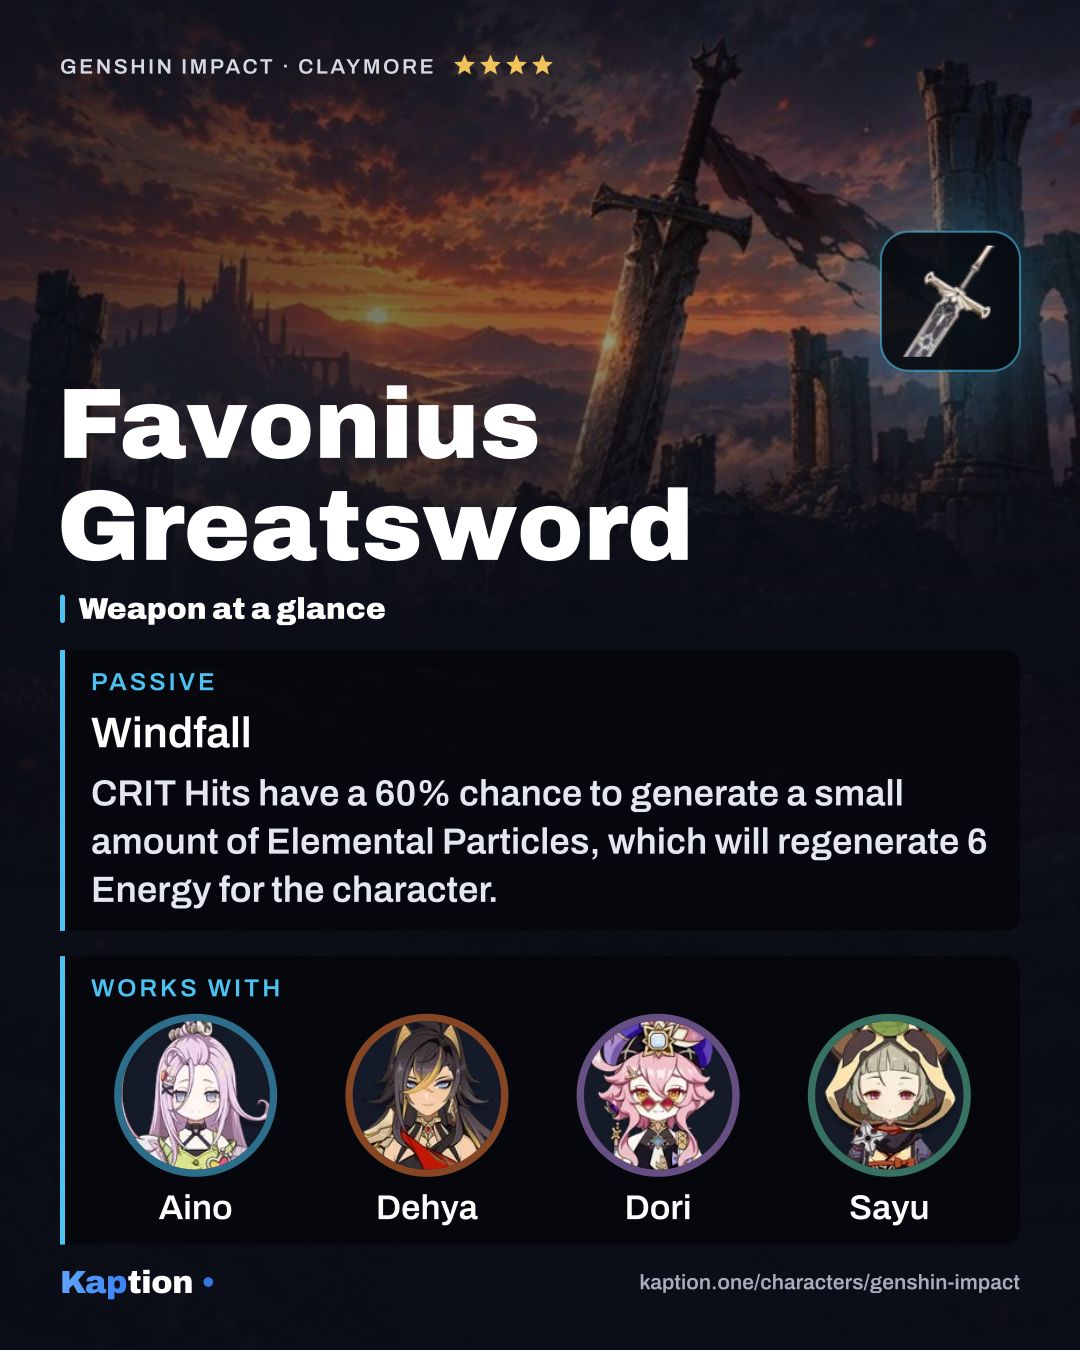
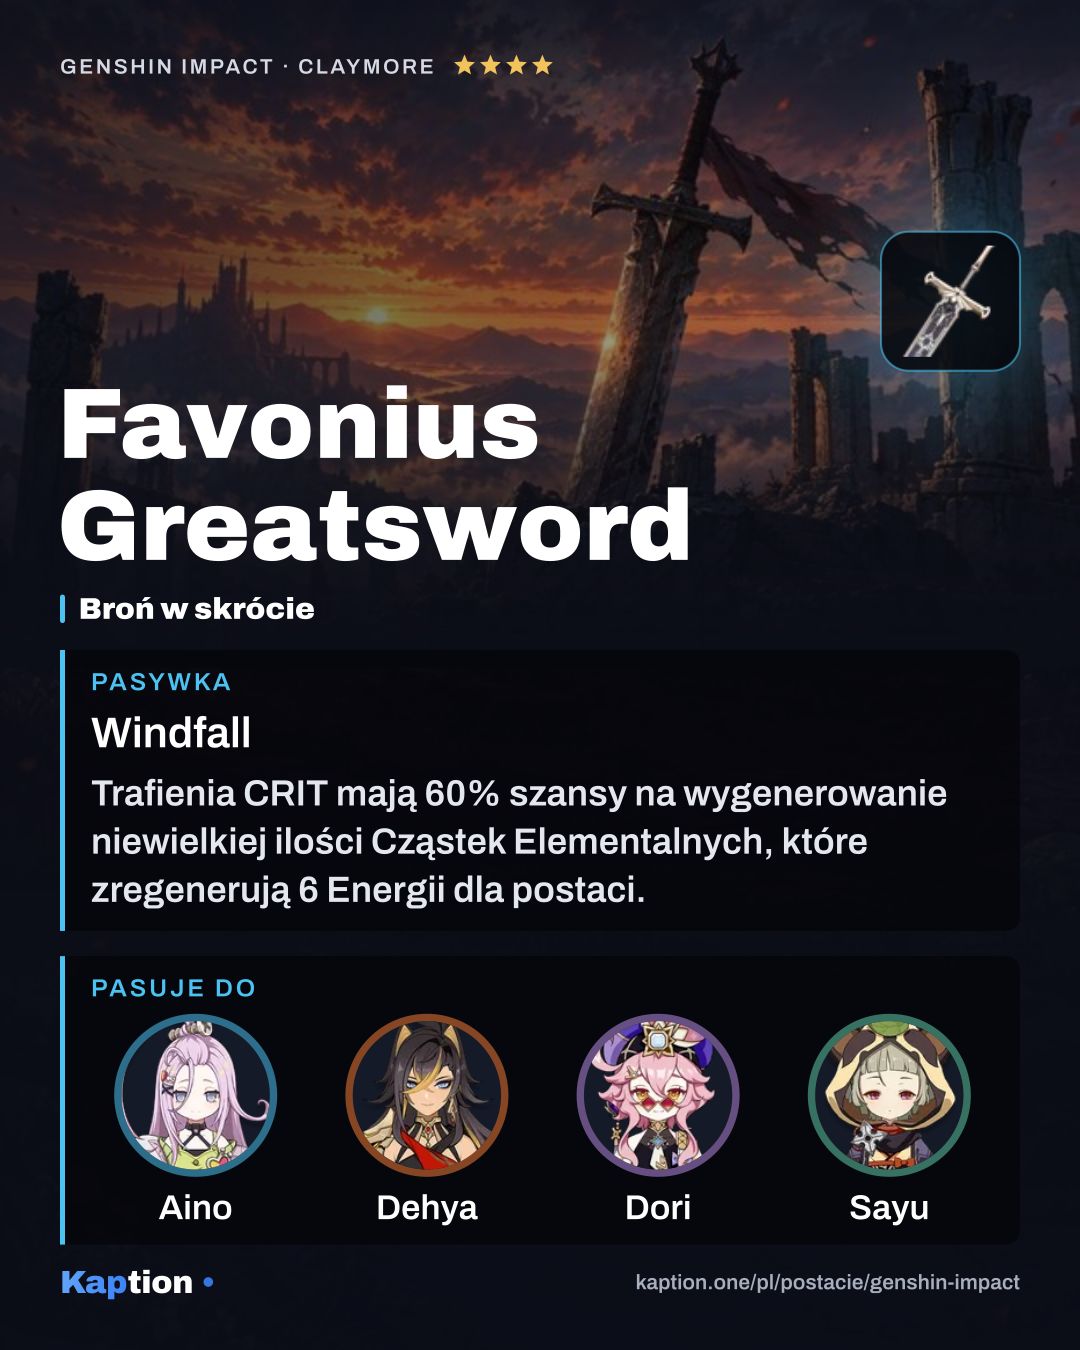
  2. Favonius Greatsword
    Favonius Greatsword 4-star
    Windfall Show effect

    CRIT Hits have a 60% chance to generate a small amount of Elemental Particles, which will regenerate 6 Energy for the character. Can only occur once every 12s.

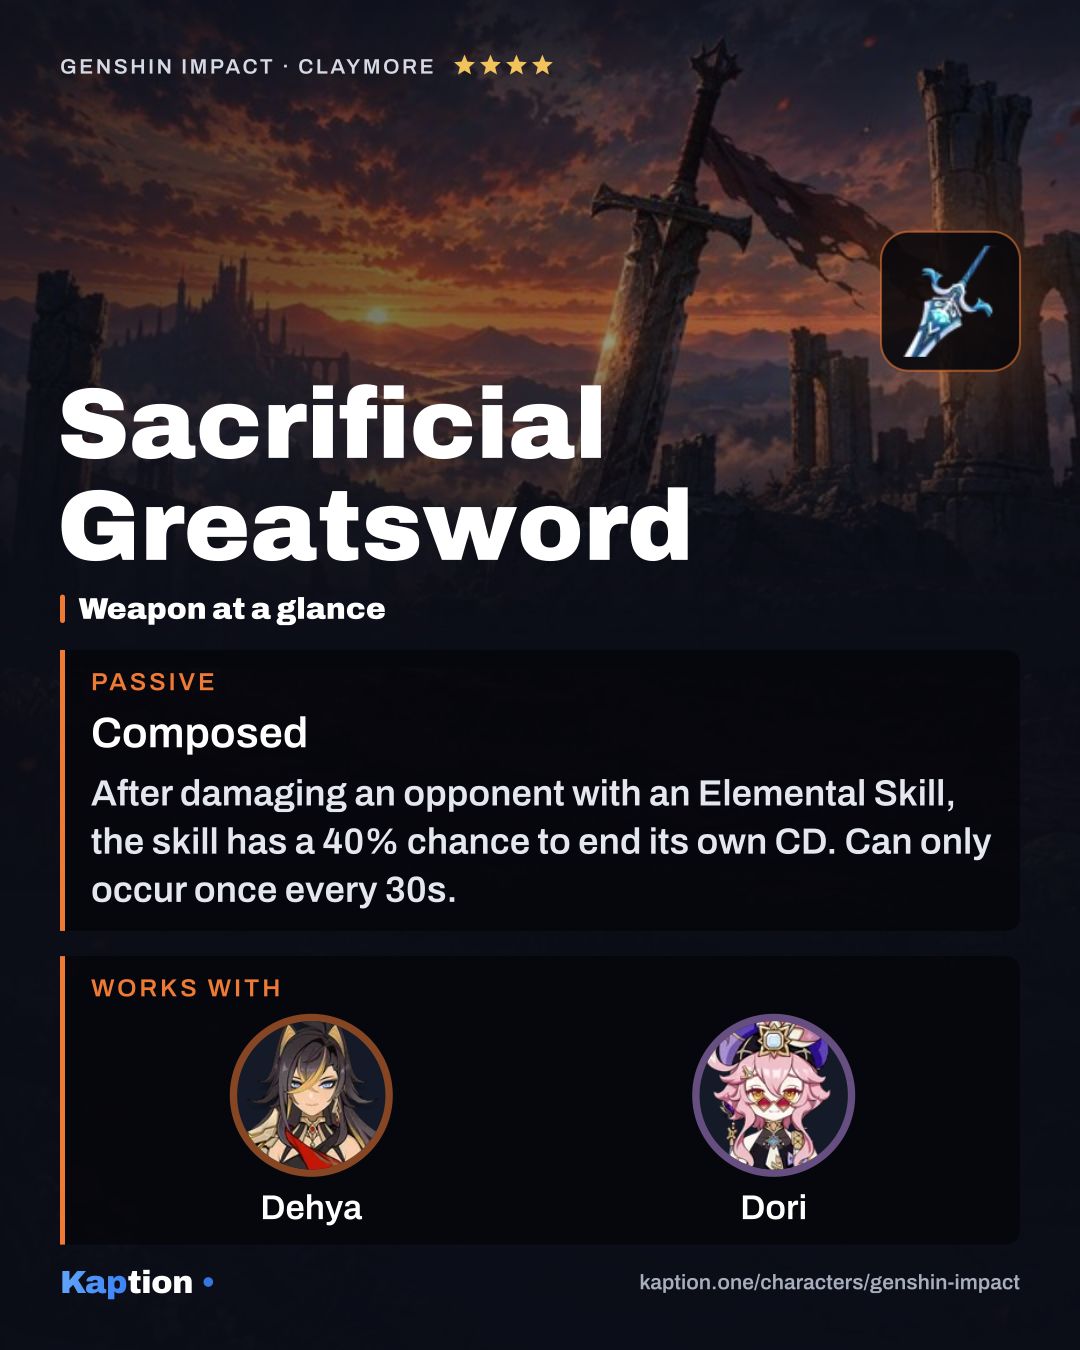
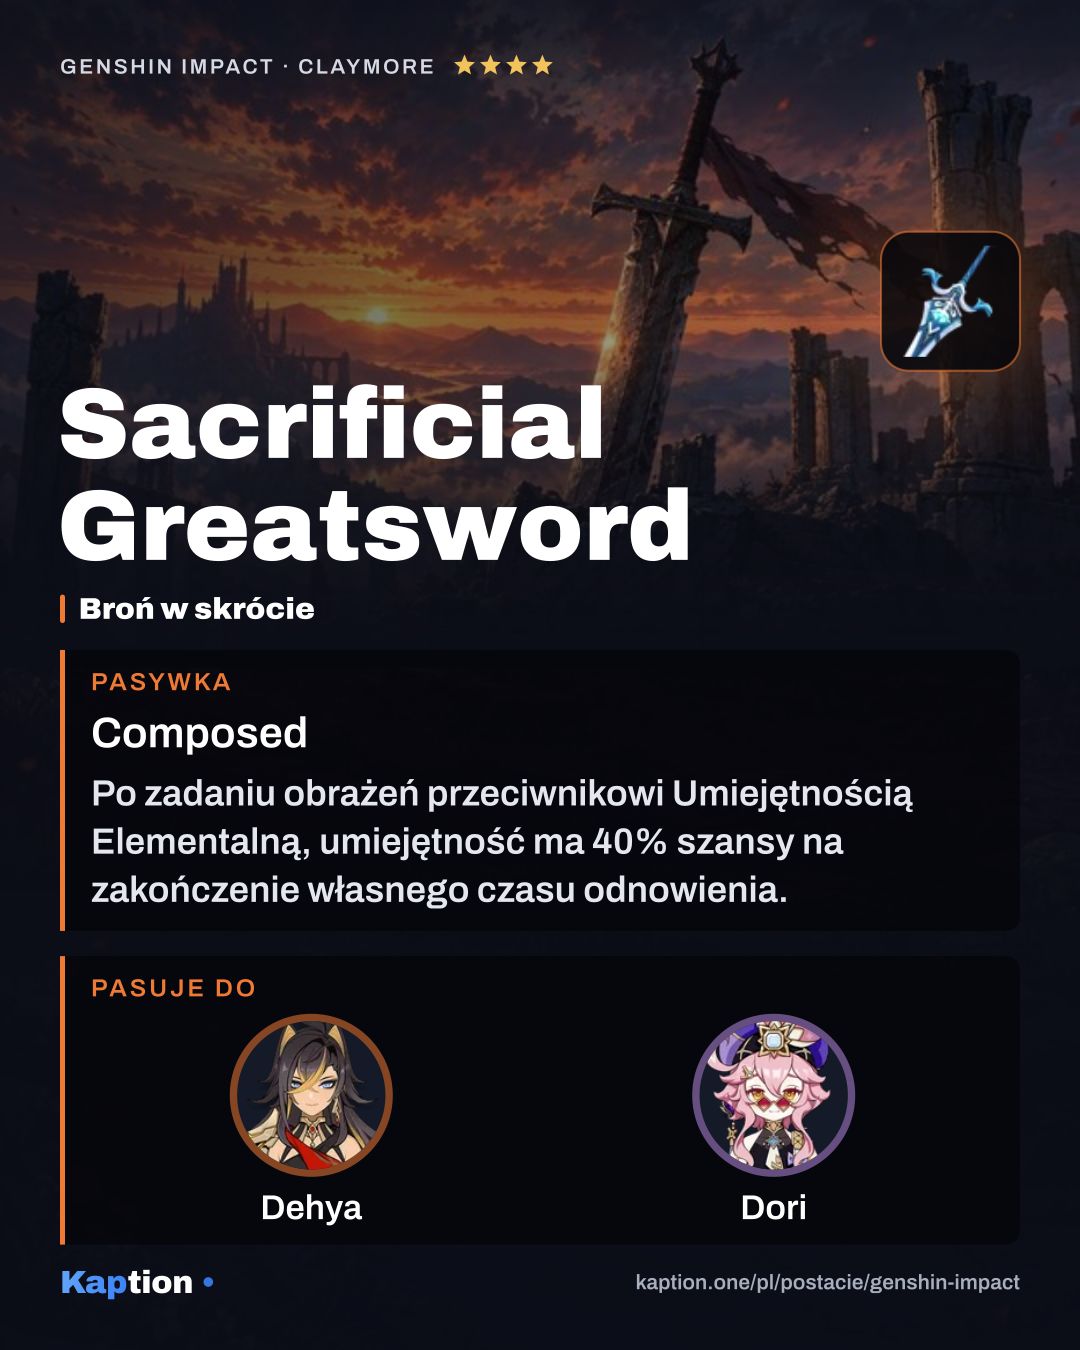
  3. Sacrificial Greatsword
    Sacrificial Greatsword 4-star
    Composed Show effect

    After damaging an opponent with an Elemental Skill, the skill has a 40% chance to end its own CD. Can only occur once every 30s.

  4. Portable Power Saw
    Portable Power Saw 4-star
    Sea Shanty Show effect

    When the wielder is healed or heals others, they will gain a Stoic's Symbol that lasts 30s, up to a maximum of 3 Symbols. When using their Elemental Skill or Burst, all Symbols will be consumed and the Roused effect will be granted for 10s. For each Symbol consumed, gain 40 Elemental Mastery, and 2s after the effect occurs, 2 Energy per Symbol consumed will be restored for said character. The Roused effect can be triggered once every 15s, and Symbols can be gained even when the character is not on the field.

  5. Flame-Forged Insight
    Flame-Forged Insight 4-star
    Mind in Bloom Show effect

    When Electro-Charged, Lunar-Charged, Bloom, Lunar-Bloom, Crystallize or Lunar-Crystallize is triggered, restore 12 Elemental Energy and increase Elemental Mastery by 60 for 15 seconds. This effect can be triggered at most once every 15s and can be triggered even when the equipping character is off-field.

  6. Beacon of the Reed Sea
    Beacon of the Reed Sea 5-star
    Desert Watch Show effect

    After the character's Elemental Skill hits an opponent, their ATK will be increased by 20% for 8s. After the character takes DMG, their ATK will be increased by 20% for 8s. The 2 aforementioned effects can be triggered even when the character is not on the field. Additionally, when not protected by a shield, the character's Max HP will be increased by 32%.

Have this character? Make a card of your own build from your UID Stats, artifacts, weapon and talents from your in-game showcase, as a PNG in a dozen layouts.

Teams

Show more teams (3)Show less

Skills

Names in English, as in the game · underlined ones open their card · Priority = level-up order

  1. Basic attack

    Marvelous Sword-Dance (Modified)Attack

    Level priority 3 of 3

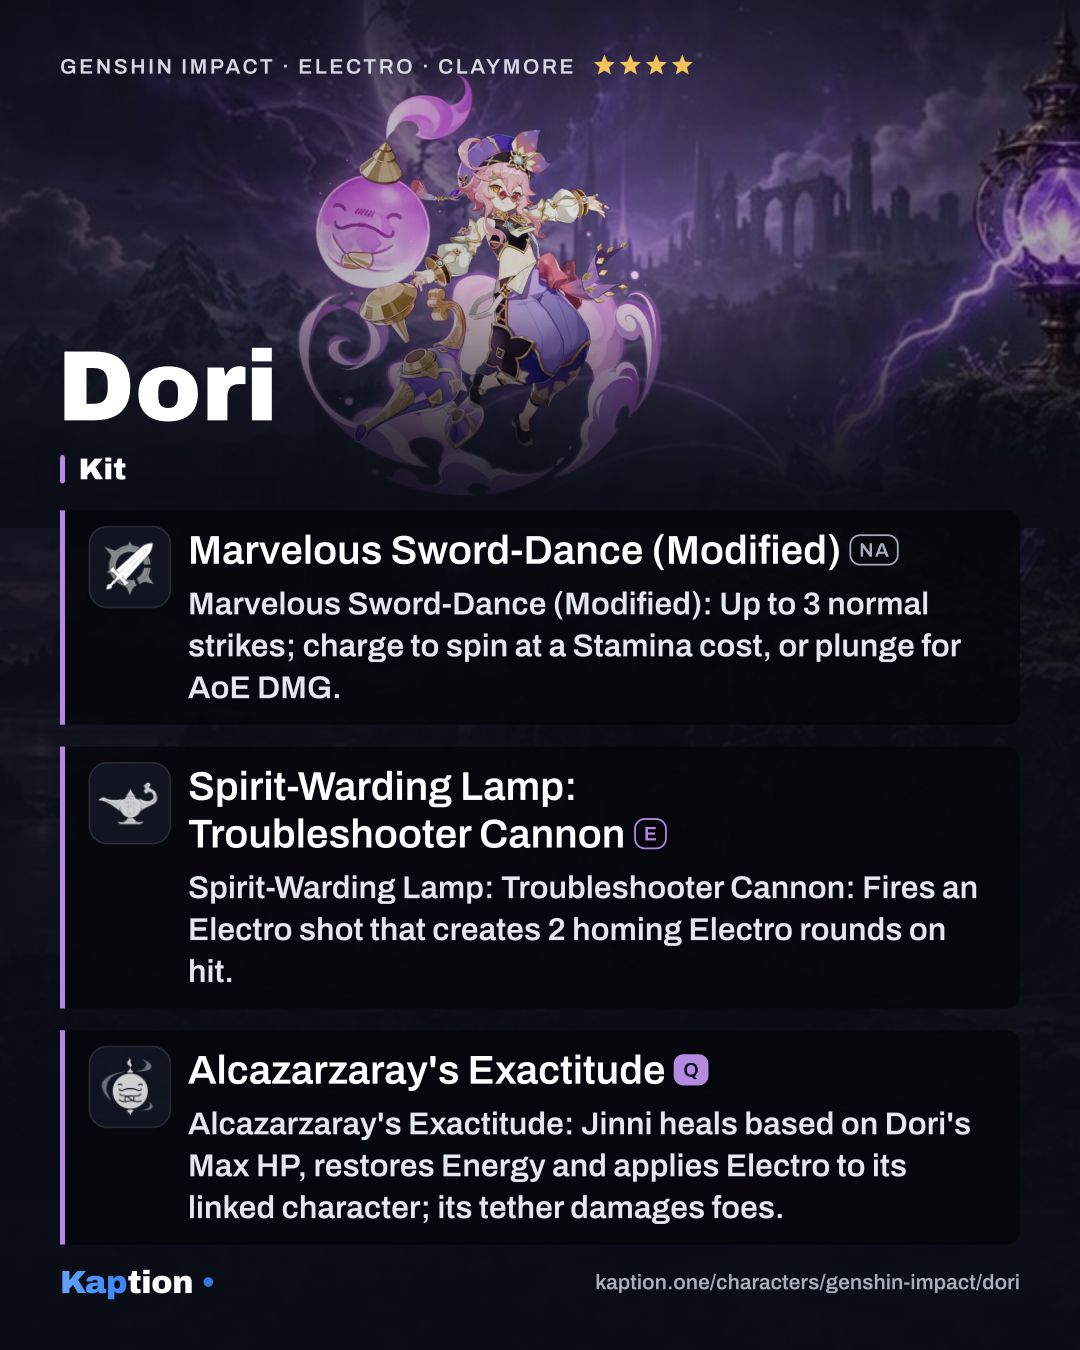
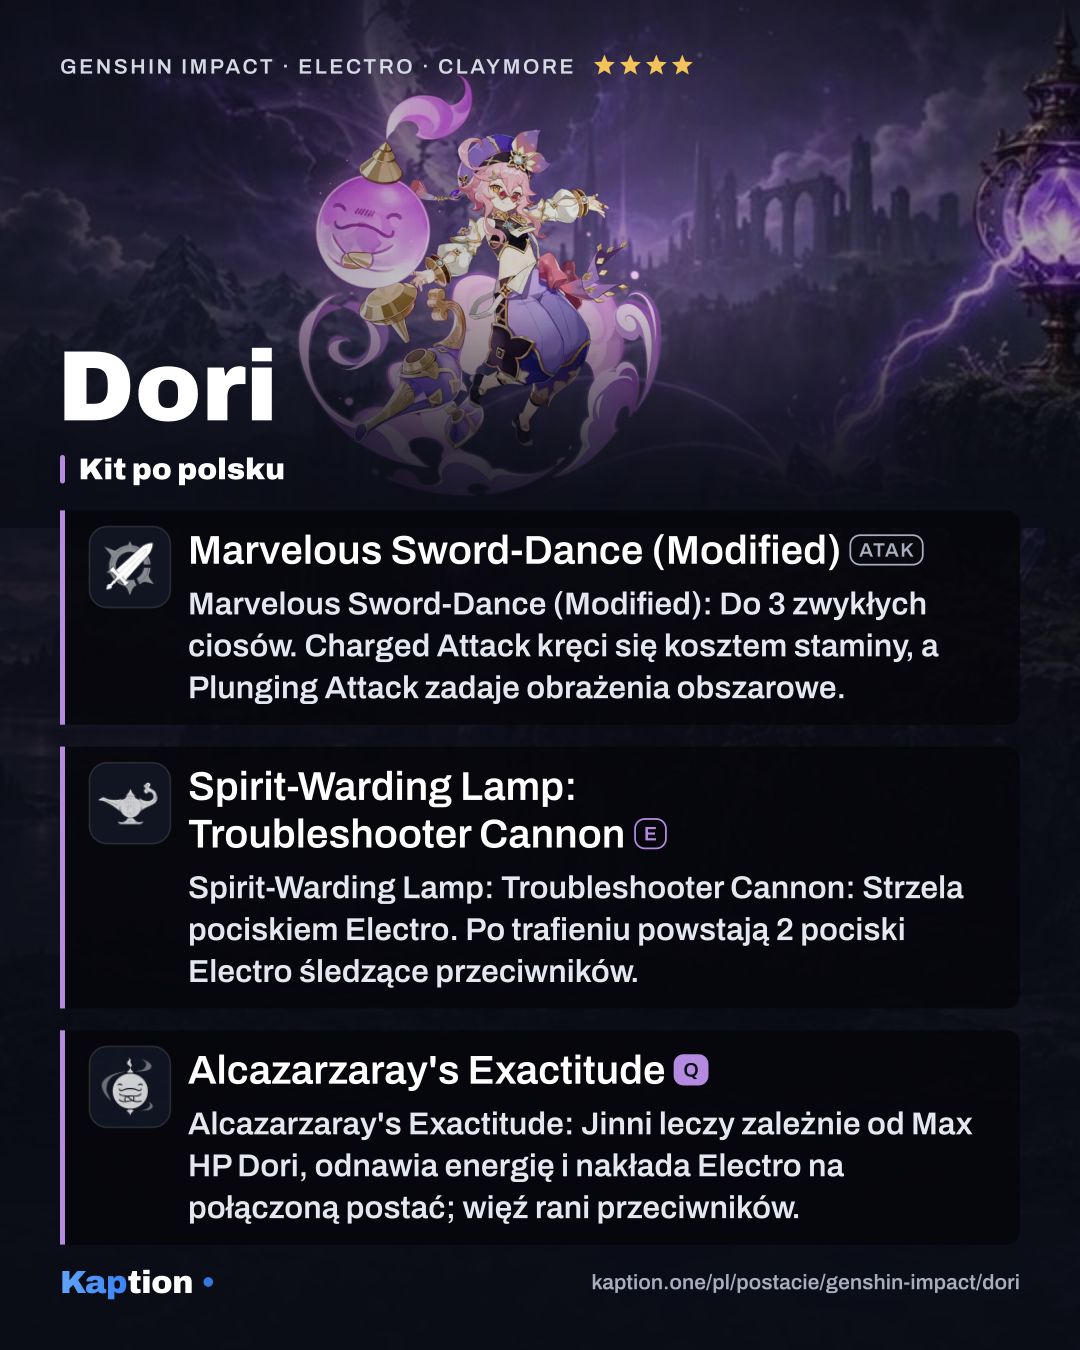
    Marvelous Sword-Dance (Modified) (NA): Up to 3 normal strikes; charge to spin at a Stamina cost, or plunge for AoE DMG.

    Normal Attack Performs up to 3 consecutive strikes. Charged Attack Drains Stamina over time to perform continuous spinning attacks against all nearby opponents. At the end of the sequence, performs a more powerful slash. Plunging Attack Plunges from mid-air to strike the ground below, damaging opponents along the path and dealing AoE DMG upon impact.

  2. Skill

    Spirit-Warding Lamp: Troubleshooter CannonE

    Level priority 2 of 3

    Spirit-Warding Lamp: Troubleshooter Cannon (E): Fires an Electro shot that creates 2 homing Electro rounds on hit.

    Directs a Spirit-Warding Lamp to fire off a Troubleshooter Shot at opponents, dealing Electro DMG. After the Troubleshooter Shot hits, it will create 2 After-Sales Service Rounds that will automatically track nearby opponents and deal Electro DMG. It is said that Dori can fix any problem for you... for the right price.

  3. Ultimate

    Alcazarzaray's ExactitudeQ

    Level priority 1 of 3

    Alcazarzaray's Exactitude (Q): Jinni heals based on Dori's Max HP, restores Energy and applies Electro to its linked character; its tether damages foes.

    Summons forth the Jinni within the lamp to give the client various kinds of aid. Jinni Connects to a nearby character. The connected character will: · Continuously restore HP based on Dori's Max HP. · Continuously regenerate Energy. · Be affected by Electro. When the connector between the Jinni and the character touches opponents, it will deal one instance of Electro DMG to them every 0.4s. Only one Jinni can exist at one time. "Hmm? You'll pick this lamp, will you? Oh my, you've got good taste! Unfortunately, there's no price on this treasure — comparable, I'd say, to how you will not sell that mascot by your side for any price in the world."

Passives

  1. Passive

    An Eye for GoldPassive

    Certain Electro reactions triggered by the linked character reduce E's cooldown by 1s, once every 3s.

    After a character connected to the Jinni triggers an Electro-Charged, Lunar-Charged, Superconduct, Stellar-Conduct, Overloaded, Quicken, Aggravate, Hyperbloom, Electro Swirl, or Electro Crystallize reaction, the CD of Spirit-Warding Lamp: Troubleshooter Cannon is decreased by 1s. This effect can be triggered once every 3s.

  2. Passive

    Compound InterestPassive

    E hits restore 5 Energy per 100% Energy Recharge, up to 15 Energy once per use.

    When the Troubleshooter Shots or After-Sales Service Rounds from Spirit-Warding Lamp: Troubleshooter Cannon hit opponents, Dori will restore 5 Elemental Energy for every 100% Energy Recharge possessed. Per Spirit-Warding Lamp: Troubleshooter Cannon, only one instance of Energy restoration can be triggered and a maximum of 15 Energy can be restored this way.

  3. Passive

    Unexpected OrderPassive

    Crafting Character or Weapon Materials has a 25% chance to recover some of the materials used.

    Has a 25% chance to recover some of the materials used when crafting Character and Weapon Materials.

Constellations

  1. C1

    Additional Investment

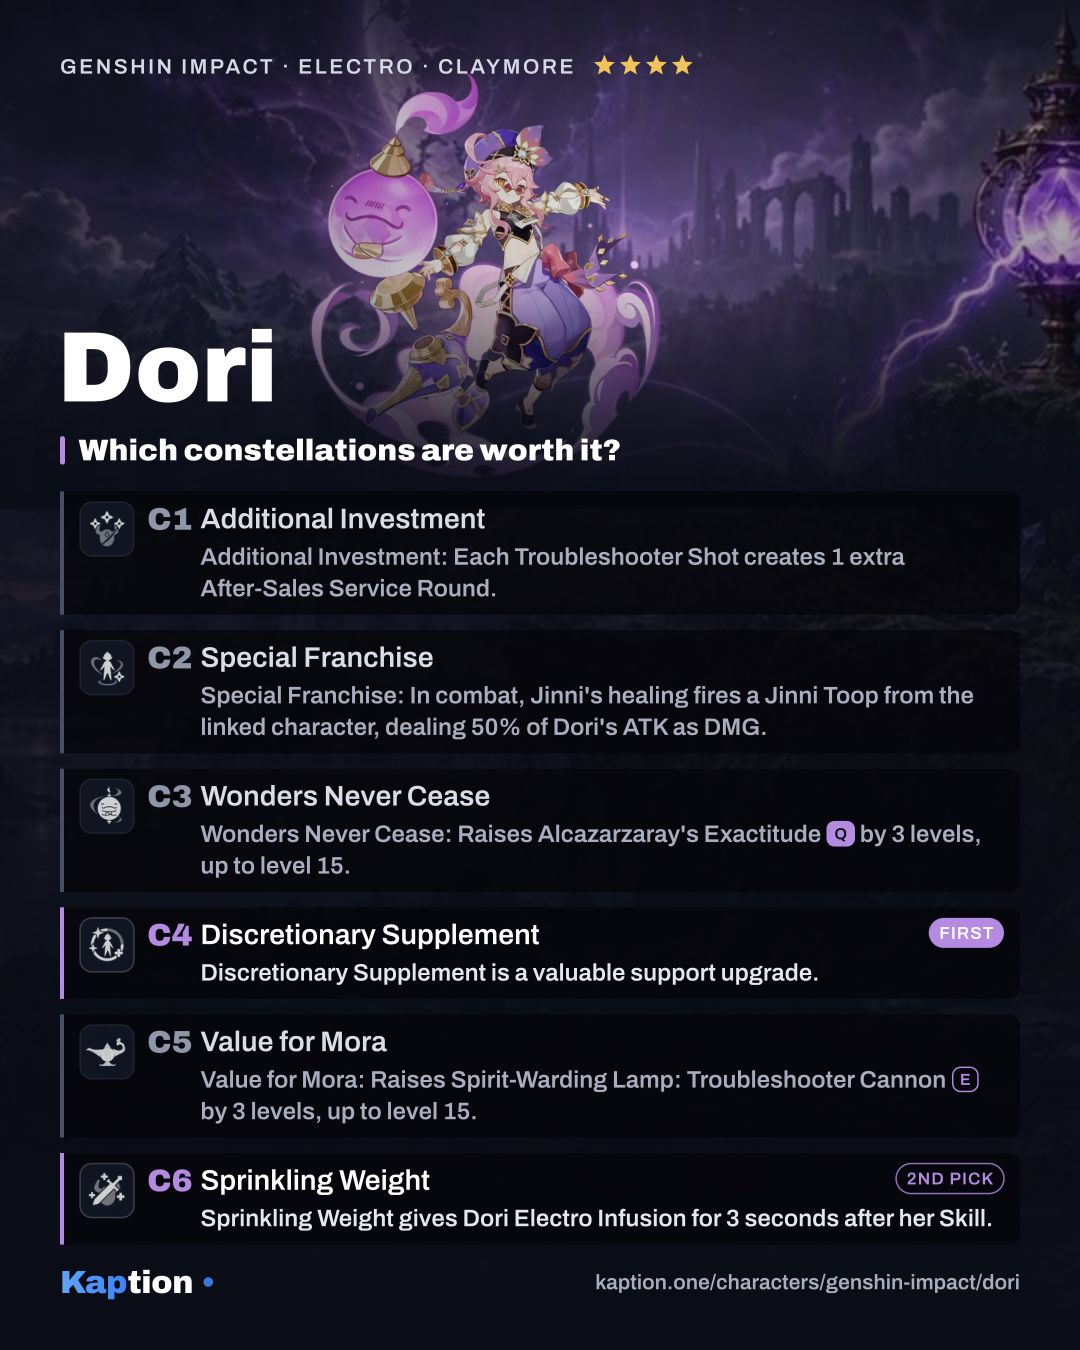
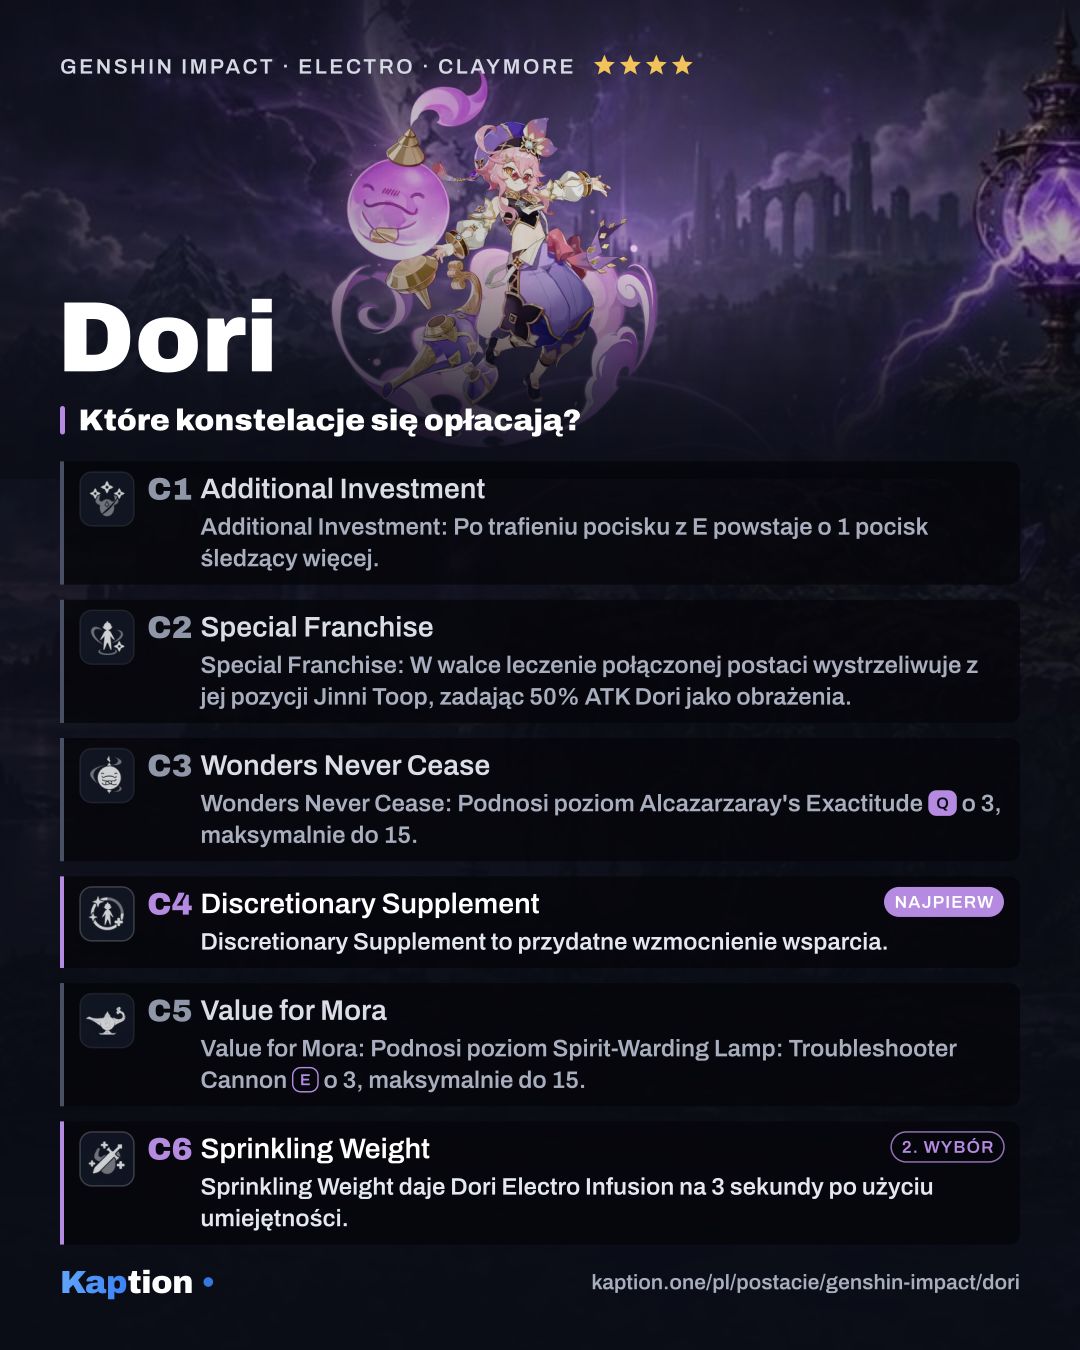
    The number of After-Sales Service Rounds created by Troubleshooter Shots is increased by 1.

  2. C2

    Special Franchise

    When you are in combat and the Jinni heals the character it is connected to, it will fire a Jinni Toop from that character's position that deals 50% of Dori's ATK DMG.

  3. C3

    Wonders Never Cease

    Increases the Level of Alcazarzaray's Exactitude by 3. Maximum upgrade level is 15.

  4. C4

    Discretionary Supplement

    Worth it

    Discretionary Supplement (C4) is a valuable support upgrade.

    The character connected to the Jinni will obtain the following buffs based on their current HP and Energy: ·When their HP is lower than 50%, they gain 50% Incoming Healing Bonus. ·When their Energy is less than 50%, they gain 30% Energy Recharge.

  5. C5

    Value for Mora

    Increases the Level of Spirit-Warding Lamp: Troubleshooter Cannon by 3. Maximum upgrade level is 15.

  6. C6

    Sprinkling Weight

    Worth it

    Sprinkling Weight (C6) gives Dori Electro Infusion for 3 seconds after her Skill.

    Dori gains the following effects for 3s after using Spirit-Warding Lamp: Troubleshooter Cannon: ·Electro Infusion. ·When Normal Attacks hit opponents, all nearby party members will heal HP equivalent to 4% of Dori's Max HP. This type of healing can occur once every 0.1s.

Materials

Ascension, to max level

  • Mora Mora × 420,000
  • Kalpalata Lotus Kalpalata Lotus × 168
  • Vajrada Amethyst Sliver Vajrada Amethyst Sliver × 1
  • Vajrada Amethyst Fragment Vajrada Amethyst Fragment × 9
  • Vajrada Amethyst Chunk Vajrada Amethyst Chunk × 9
  • Vajrada Amethyst Gemstone Vajrada Amethyst Gemstone × 6
  • Faded Red Satin Faded Red Satin × 18
  • Trimmed Red Silk Trimmed Red Silk × 30
  • Rich Red Brocade Rich Red Brocade × 36
  • Thunderclap Fruitcore Thunderclap Fruitcore × 46

All skills to max

  • Mora Mora × 4,957,500
  • Crown of Insight Crown of Insight × 3
  • Teachings of Ingenuity Teachings of Ingenuity × 9
  • Guide to Ingenuity Guide to Ingenuity × 63
  • Philosophies of Ingenuity Philosophies of Ingenuity × 114
  • Faded Red Satin Faded Red Satin × 18
  • Trimmed Red Silk Trimmed Red Silk × 66
  • Rich Red Brocade Rich Red Brocade × 93
  • Bloodjade Branch Bloodjade Branch × 18

Guide

How the kit works

Start with Spirit-Warding Lamp: Troubleshooter Cannon. Its shot deals Electro DMG and, on hitting an opponent, creates two After-Sales Service Rounds that track nearby enemies. Compound Interest restores 5 Energy to Dori per 100% Energy Recharge when the shot or rounds hit. It triggers once per Skill use and restores at most 15 Energy.

Use Alcazarzaray's Exactitude to summon the Jinni near the teammate you want to support. The connected character continuously recovers HP based on Dori's Max HP and regenerates Energy, but is also affected by Electro. Move so the connector touches opponents to deal Electro DMG, once every 0.4 seconds. Only one Jinni can exist at a time.

An Eye for Gold reduces the Skill's cooldown by 1 second when the connected character triggers one of its listed reactions, including Hyperbloom, Electro-Charged or Superconduct. This can happen once every 3 seconds. Marvelous Sword-Dance (Modified) (NA) has up to three normal strikes; its charged attack spins at a continuing Stamina cost. Unexpected Order has a 25% chance to recover some materials when crafting Character and Weapon Materials.

Build and why

For a support build, start with four pieces of Noblesse Oblige. Using the Burst gives all party members 20% ATK for 12 seconds; the effect cannot stack. Gilded Dreams is a good reaction-focused option: its four-piece effect grants ATK for teammates of the same element and Elemental Mastery for teammates of different elements after Dori triggers a reaction. In a Dendro team, Deepwood Memories is worth considering because Skill or Burst hits reduce the target's Dendro RES by 30% for 8 seconds.

Ocean-Hued Clam is another option if you want healing to produce damage: its four-piece effect records healing, including overflow, then deals damage based on 90% of it. The Exile trades that damage for Energy for the other party members after Dori uses her Burst. You can also combine two pieces of Tenacity of the Millelith for HP with two pieces of Emblem of Severed Fate for Energy Recharge.

Use Energy Recharge or HP Percentage on the sands, HP Percentage on the goblet, and Healing Bonus or HP Percentage on the circlet. Look for Energy Recharge first in substats, then HP Percentage, CRIT Rate and HP. HP improves Jinni healing; Energy Recharge helps Compound Interest restore Dori's Energy.

Favonius Greatsword is the first weapon choice. Its CRIT Hits can generate particles, so give Dori some CRIT Rate. Sacrificial Greatsword can reset the Skill's cooldown after it deals damage. Katsuragikiri Nagamasa is another option: after a Skill hit it first costs Energy, then regenerates Energy over 6 seconds.

Leveling priority

A sensible order is Alcazarzaray's Exactitude first for the healing used by this build, then Spirit-Warding Lamp: Troubleshooter Cannon for its damage. Leave Marvelous Sword-Dance (Modified) (NA) until last if Dori mostly supports from the sidelines.

For ascension, collect Mora, Kalpalata Lotus, Vajrada Amethyst Sliver, Vajrada Amethyst Fragment, Vajrada Amethyst Chunk, Vajrada Amethyst Gemstone and Thunderclap Fruitcore. You also need Faded Red Satin, Trimmed Red Silk and Rich Red Brocade.

Talent upgrades use Mora, Teachings of Ingenuity, Guide to Ingenuity, Philosophies of Ingenuity, the three red cloth materials, Bloodjade Branch and Crown of Insight.

Constellations worth it

Discretionary Supplement is a valuable support upgrade. A character connected to the Jinni gains 50% Incoming Healing Bonus below 50% HP and 30% Energy Recharge below 50% Energy. Each bonus depends on the connected character's current resources.

Sprinkling Weight gives Dori Electro Infusion for 3 seconds after her Skill. During that time, her Normal Attack hits heal all nearby party members for 4% of her Max HP, at most once every 0.1 seconds. It gives her a reason to stay on the field briefly when the team needs healing.

Wonders Never Cease is worth considering for three extra Burst levels. Additional Investment adds one tracking round, while Special Franchise fires a Jinni Toop when the Jinni heals in combat. Value for Mora adds three Skill levels. You can leave these out when prioritizing support gains.

Teams

Pair Dori with a character who benefits from healing and Energy, then choose elements for the reactions you want. Eula and Rosaria are Cryo options for a team using Superconduct; Fischl can fill another Electro slot. Dori brings the Jinni's healing and Energy to the connected character.

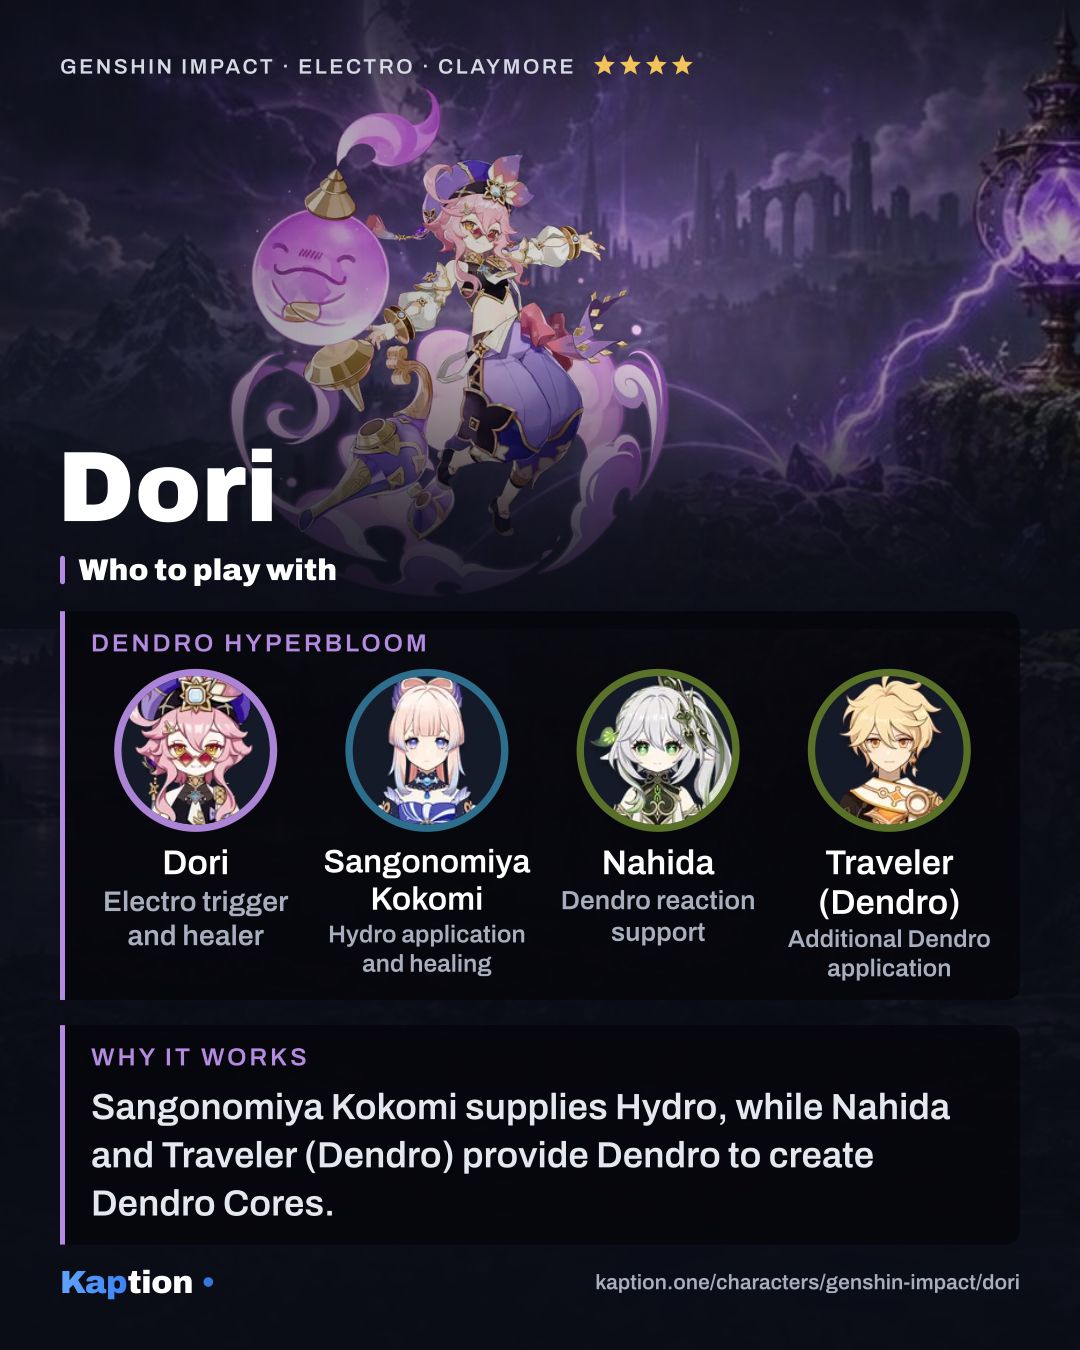
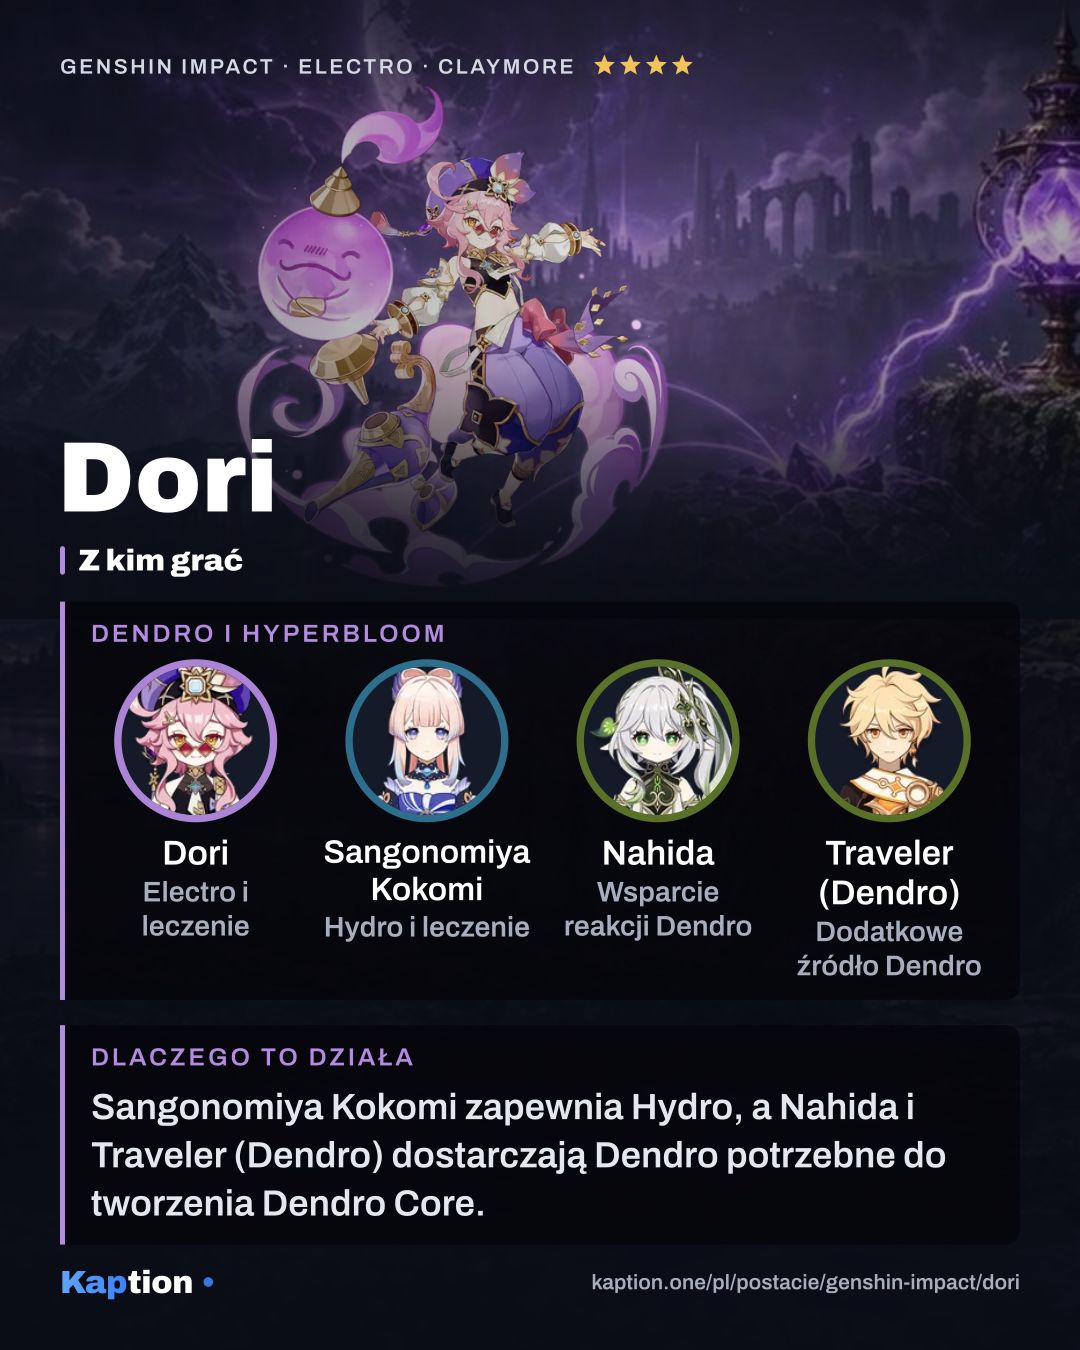
For a Dendro and Hydro team, consider Nahida or Collei alongside Xingqiu or Yelan. Dori's Electro can contribute to reactions such as Hyperbloom. Give the Jinni connection to the character you want to support, and remember that An Eye for Gold requires that connected character to trigger the listed reaction.

Zhongli is an option if you want a shield. Kaedehara Kazuha is an Anemo option for a Swirl team; choose the remaining slots around the element and reactions you want to use.

Common mistakes

Do not build only HP and ignore Energy Recharge. The Jinni is the center of this support build, and Compound Interest scales its Energy restoration with Energy Recharge. On the other hand, do not forget HP Percentage if the healing feels too low.

Do not assume the Jinni heals the whole team at once without C6. Pay attention to who is connected and place the connector through opponents when you want its damage. The connected character is affected by Electro, so keep that in mind when choosing where to fight.

With Favonius Greatsword, neglecting CRIT Rate makes its particle effect harder to trigger. Also remember that its effect has a chance to activate on a CRIT Hit, not a guarantee.

Dori in Polish

Story lines the way Kaption shows them in Polish, with the English original underneath.

  • Dori · Suspicious Smuggling Case Nie martw się, maluchu. Cyno prowadzi to śledztwo, prawda? To on zapłaci wszystkie rachunki. No need to worry, little one. Cyno's the one heading this investigation, isn't he? I'll be sure to bill all the expenses to him.
  • Dori · Suspicious Smuggling Case Jeśli chodzi o aukcję, prawdopodobnie próbują przyciągnąć i zwerbować każdego, kto ma zainteresowanie lub wiedzę w tej dziedzinie. As for the auction, chances are they're trying to attract and scout out anyone with interest or expertise on the subject.
  • Dori · Suspicious Smuggling Case Ahem, wracając do sedna, będą konsekwencje, jeśli handel Puszonymi Wiedzą przez tych przemytników zostanie niekontrolowany. Ahem, anyway back to the point, there'll be consequences if the sale of Canned Knowledge by those smugglers is left unchecked.
  • Dori · Suspicious Smuggling Case Oczywiście, oszczędne użycie nie stanowi problemu, dlatego właśnie kiedyś to sprzedawałem. Of course, using it sparingly is not an issue, which is exactly why I used to sell it.
  • Dori · Suspicious Smuggling Case Poza tym, przy tak zaostrzonych przepisach, pomyślałam, że mogę odłożyć to na bok. Plus, with regulations getting as tight as they are now, I figured I might as well just hang it up.
  • Dori · An Odd Textual Mystery Urk! Cyno, c—czy twoja pamięć jest naprawdę taka dobra? Nie kupuję tego! Urk! Cyno, i—is your memory really that good? I'm not buying it!
  • Dori · Echoes of Fate Ale wścibski! Ech, moja wina, że w ogóle wysłałem mu pozwolenie na badania! So nosy! Ugh, my fault for sending him the research permit to begin with!
  • Dori · Boom Boom Boooom! A Grand Battle! Gdybym tylko mógł... Ale musi zostać dla mnie miejsce na prowizję, prawda? If only I could... But there has to be room for me to take a cut, now, doesn't there?

Frequently asked questions

What's the best build for Dori?

Artifacts: Noblesse Oblige, Ocean-Hued Clam ×4 or The Exile ×4. Main stats: Sands: Energy Recharge or HP%, Goblet: HP%, Circlet: Healing Bonus or HP%. Recommended weapons: Katsuragikiri Nagamasa, Favonius Greatsword or Sacrificial Greatsword.

What should I level first on Dori?

Alcazarzaray's ExactitudeQ first, then Spirit-Warding Lamp: Troubleshooter CannonE and Marvelous Sword-Dance (Modified)Attack.

Which constellations are worth getting for Dori?

The biggest upgrades: C4 Discretionary Supplement and C6 Sprinkling Weight.

Who should Dori team up with?

Good teammates: Sangonomiya Kokomi, Nahida and Traveler (Dendro).

Is Dori in Polish in Genshin Impact?

The game has no Polish language option. Kaption shows Polish subtitles for the dialogue right on the game screen, so Dori's lines read in Polish. Skill and item names stay in English, as in the game.

Share

Ready-made cards for Instagram, TikTok, X or Discord, in English or Polish.

4:5 for Instagram and Facebook · 9:16 for Stories, TikTok and Shorts · 16:9 for X and Discord

The build cards and quick guides of every Genshin Impact character (131) in one ZIP: 4:5 (45 MB) 9:16 (60 MB) 16:9 (31 MB)

On Discord, paste the copied link or drag the downloaded file into the chat.

Game data version 7.2.0.

← All Genshin Impact characters