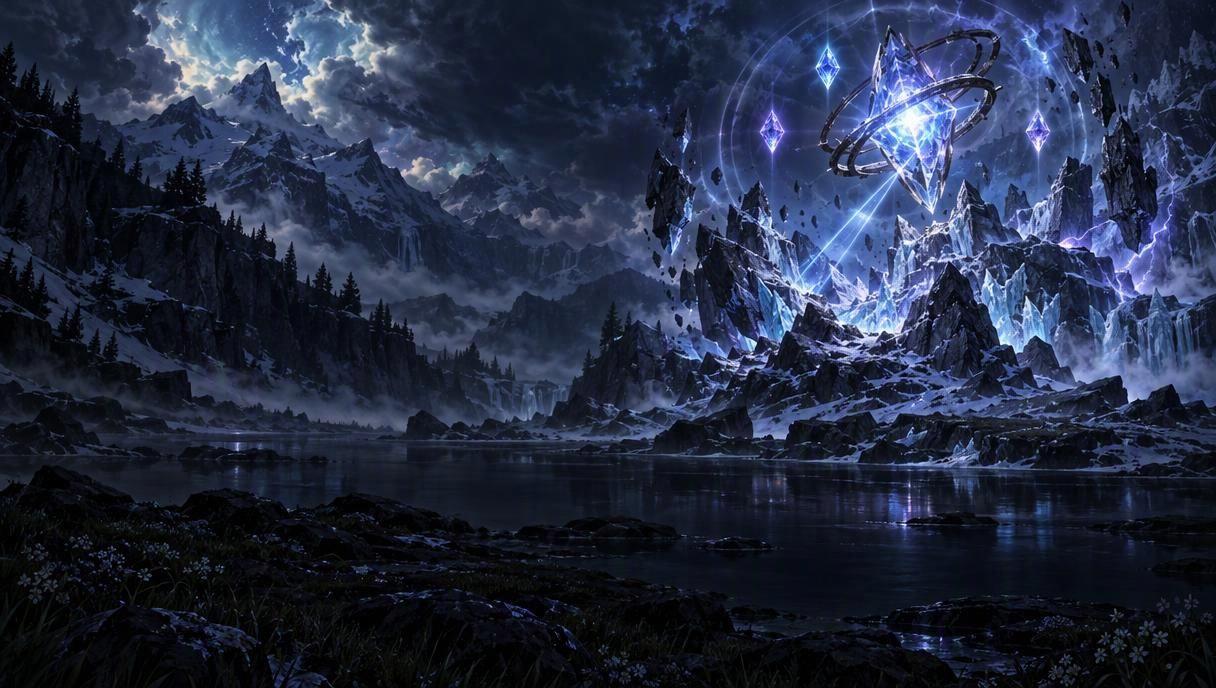

















Genshin Impact character

Mitya (Genshin Impact)

Guide, build and skills

  • 5-star
  • Element Electro
  • Weapon Catalyst
  • Game data 7.2.0

Stellar-Conduct damage dealer

Mitya from Genshin Impact with a Kaption Polish subtitle
Polish subtitles for Genshin Impact dialogue work today.

At a glance

Mitya is an Electro Catalyst character who turns the party’s Superconduct reactions into Stellar-Conduct. His kit creates Gradient Beacons, strengthens Stellar-Conduct through Elemental Mastery and lets him spend those Beacons on a special Charged Attack.

He can support the team with Elemental Mastery in his Detection Core’s Steady State, or use its Overloaded state to generate more Beacons after Stellar-Conduct reactions. Bring Cryo alongside him to make use of that reaction, and give him field time when you want to spend the Beacons.

Build

From the game data

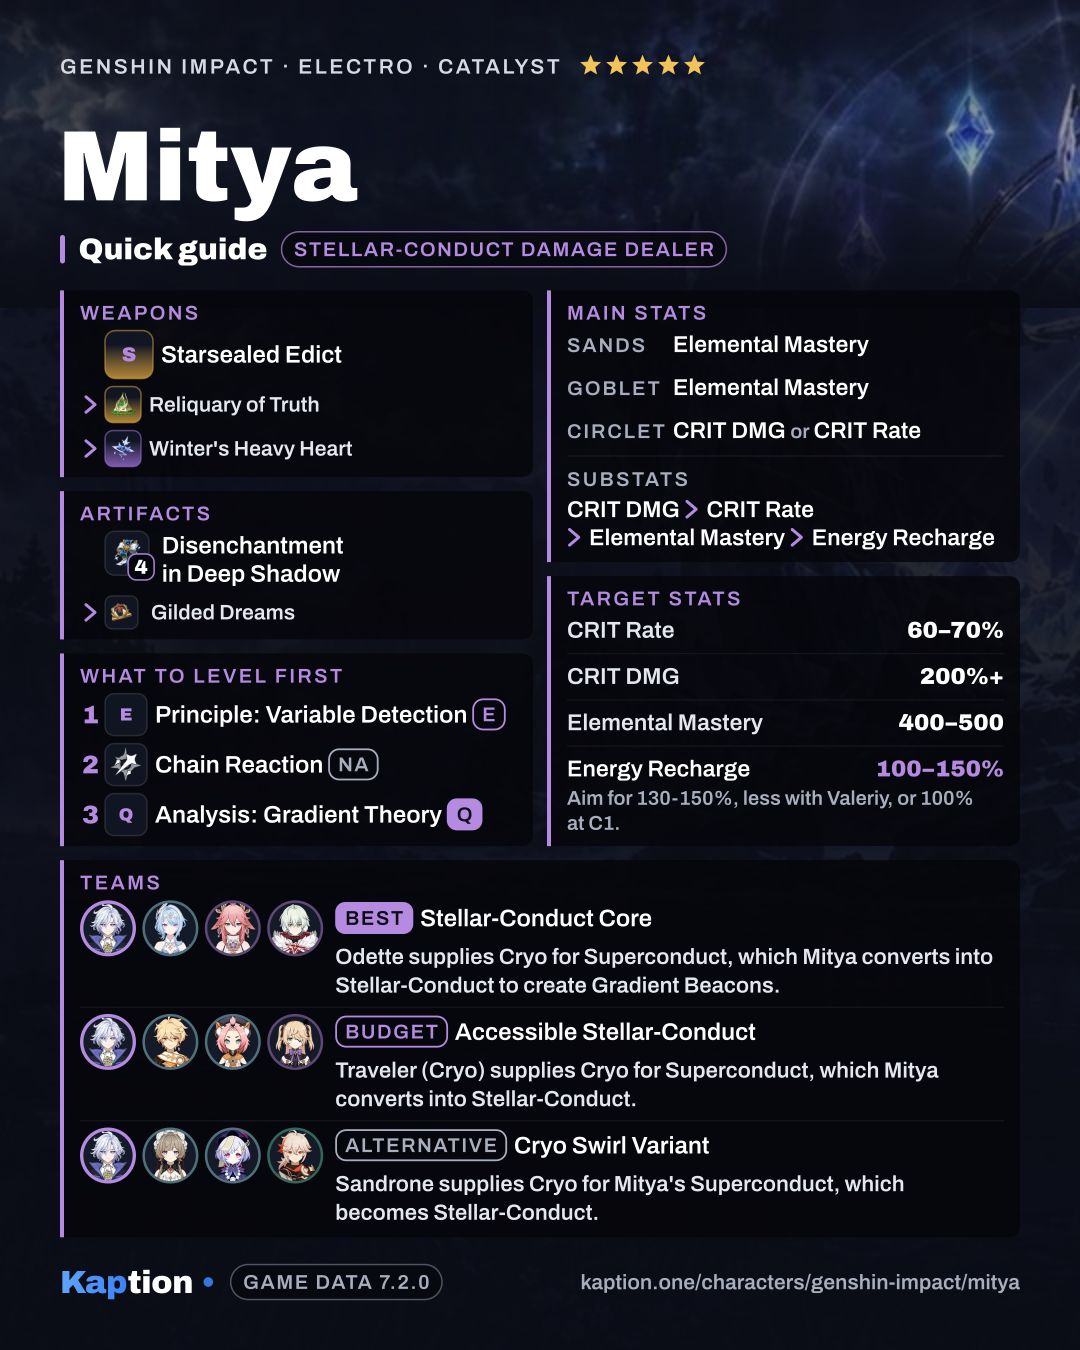
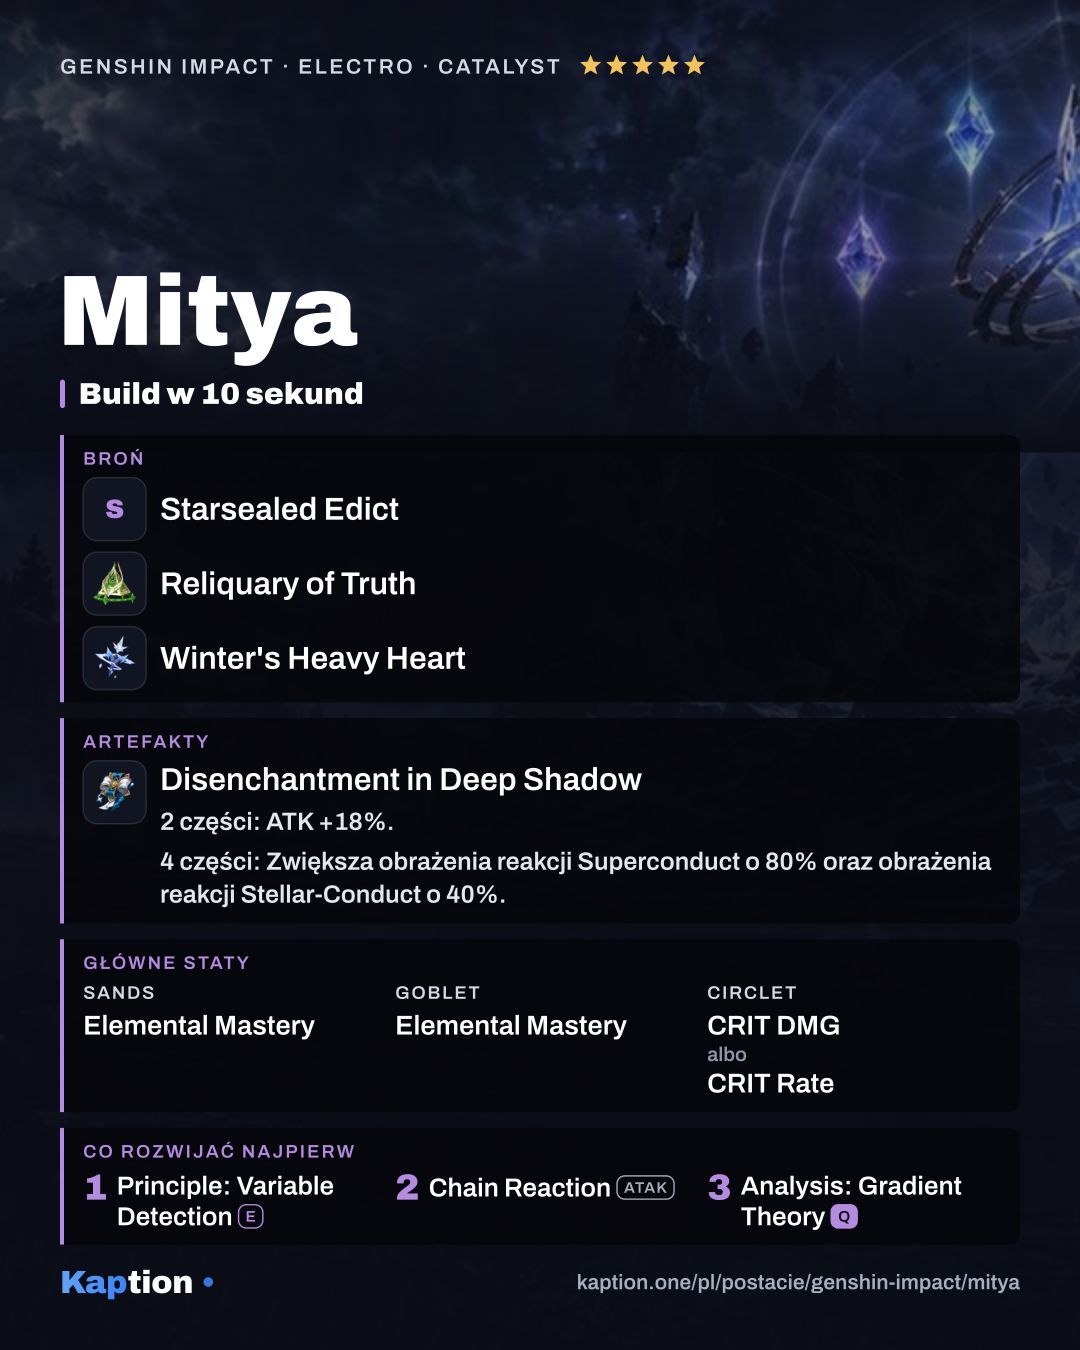
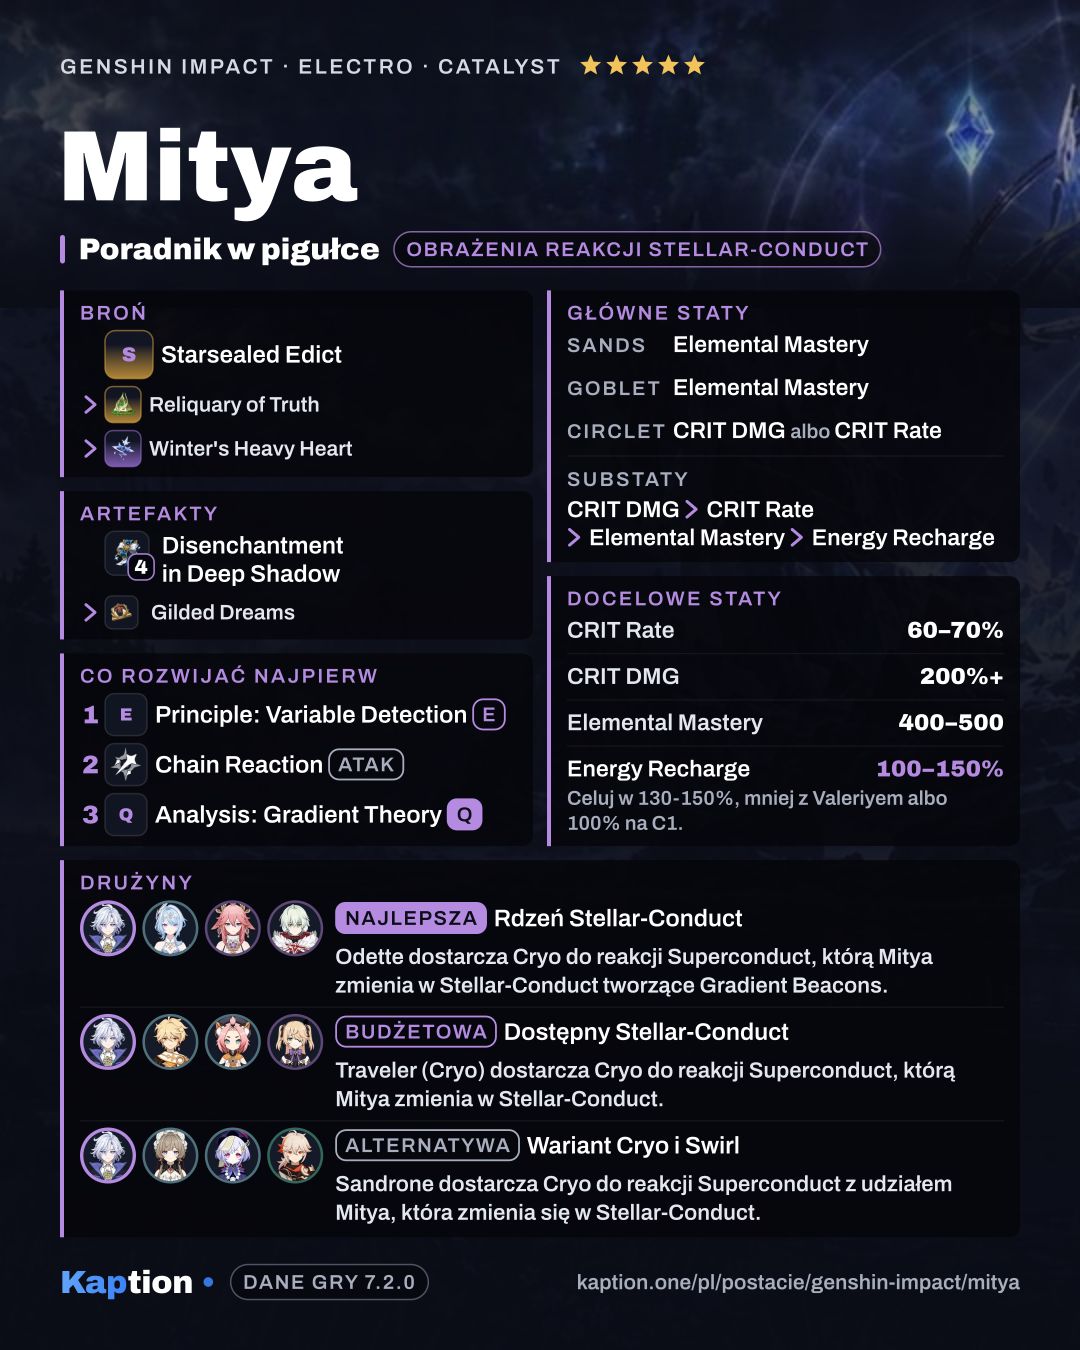
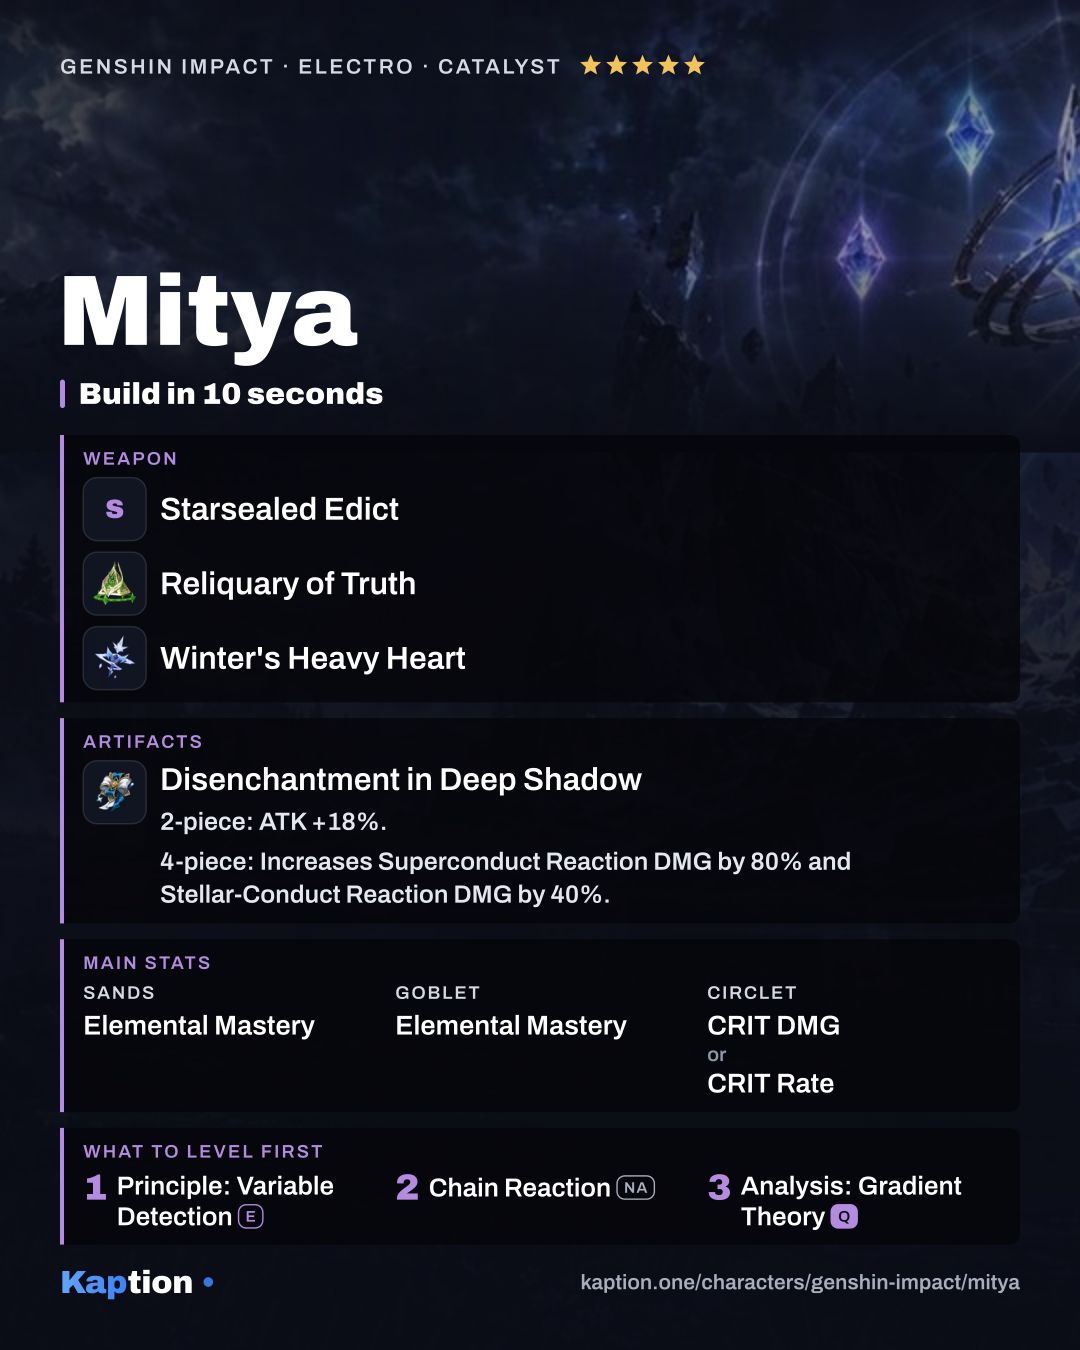
4× Disenchantment in Deep Shadow · Sands Elemental Mastery · Goblet Elemental Mastery · Circlet CRIT DMG or CRIT Rate · substats CRIT DMG > CRIT Rate > Elemental Mastery > Energy Recharge

Artifacts

4 pieces · Artifact set

Pick one. The game lists them in this order.

  1. Disenchantment in Deep Shadow
    Disenchantment in Deep Shadow
    • 2-piece bonus: ATK +18%.
    Show effect
    • 4-piece bonus: Increases Superconduct Reaction DMG by 80% and Stellar-Conduct Reaction DMG by 40%. When the wielder attacks opponents affected by Superconduct or Stellar-Conduct, this attack's CRIT Rate is increased by 16%.
  2. Gilded Dreams
    Gilded Dreams
    • 2-piece bonus: Increases Elemental Mastery by 80.
    Show effect
    • 4-piece bonus: Within 8s of triggering an Elemental Reaction, the character equipping this will obtain buffs based on the Elemental Type of the other party members. ATK is increased by 14% for each party member whose Elemental Type is the same as the equipping character, and Elemental Mastery is increased by 50 for every party member with a different Elemental Type. Each of the aforementioned buffs will count up to 3 characters. This effect can be triggered once every 8s. The character who equips this can still trigger its effects when not on the field.

Alternatives

When you don't have the set above.

  • Tenacity of the Millelith
    Tenacity of the Millelith Show effect
    • 2-piece bonus: HP +20%
    • 4-piece bonus: When an Elemental Skill hits an opponent, the ATK of all nearby party members is increased by 20% and their Shield Strength is increased by 30% for 3s. This effect can be triggered once every 0.5s. This effect can still be triggered even when the character who is using this artifact set is not on the field.

Main stats

Sands
Elemental Mastery
Goblet
Elemental Mastery
Circlet
CRIT DMG or CRIT Rate

Substats

  1. CRIT DMG
  2. CRIT Rate
  3. Elemental Mastery
  4. Energy Recharge

Target stats

Totals to aim for on the character's stat screen.

StatTarget
CRIT Rate 60–70%
CRIT DMG 200%+
Elemental Mastery 400–500
Energy Recharge 100–150% Aim for 130-150%, less with Valeriy, or 100% at C1.

Recommended weapons

The game doesn't name a weapon for this character.

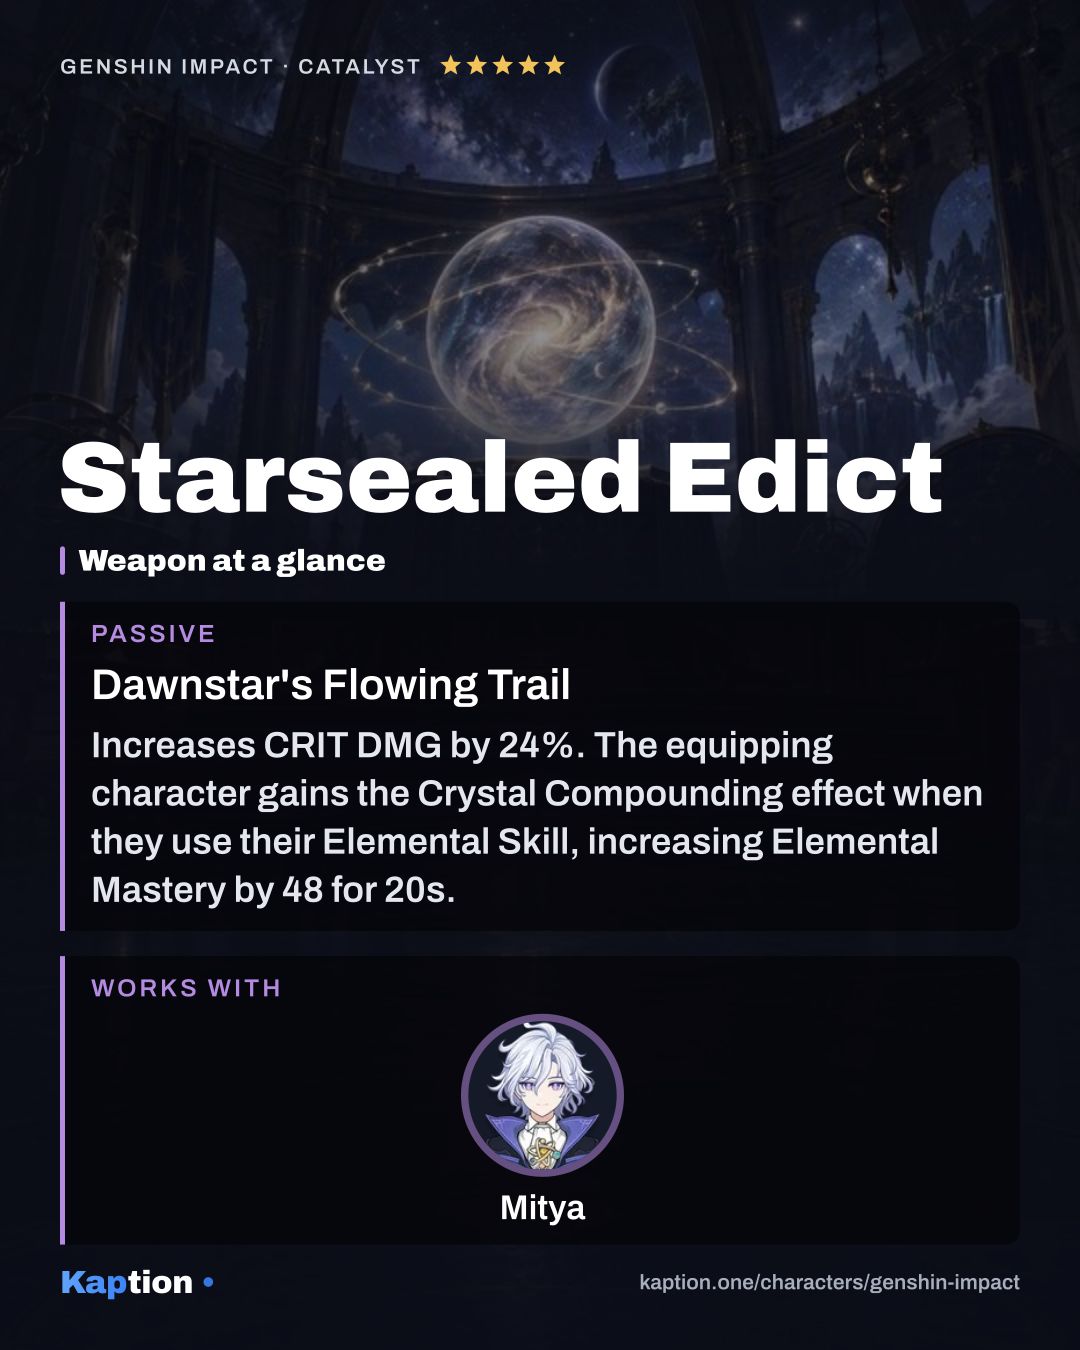
  1. Starsealed Edict 5-star
    Dawnstar's Flowing Trail Show effect

    Increases CRIT DMG by 24%. The equipping character gains the Crystal Compounding effect when they use their Elemental Skill, increasing Elemental Mastery by 48 for 20s. During this time, the equipping character gains a Law of Combustion stack when a nearby party member triggers an Elemental Reaction. Each stack increases Elemental Mastery by an additional 24. Max 3 stacks. These stacks last until Crystal Compounding ends or the equipping character uses their Elemental Skill again. Radiance: Stellar-Conduct: Each Law of Combustion stack also increases the equipping character's Stellar-Conduct CRIT DMG by 12%. These effects can be triggered even when the equipping character is off-field.

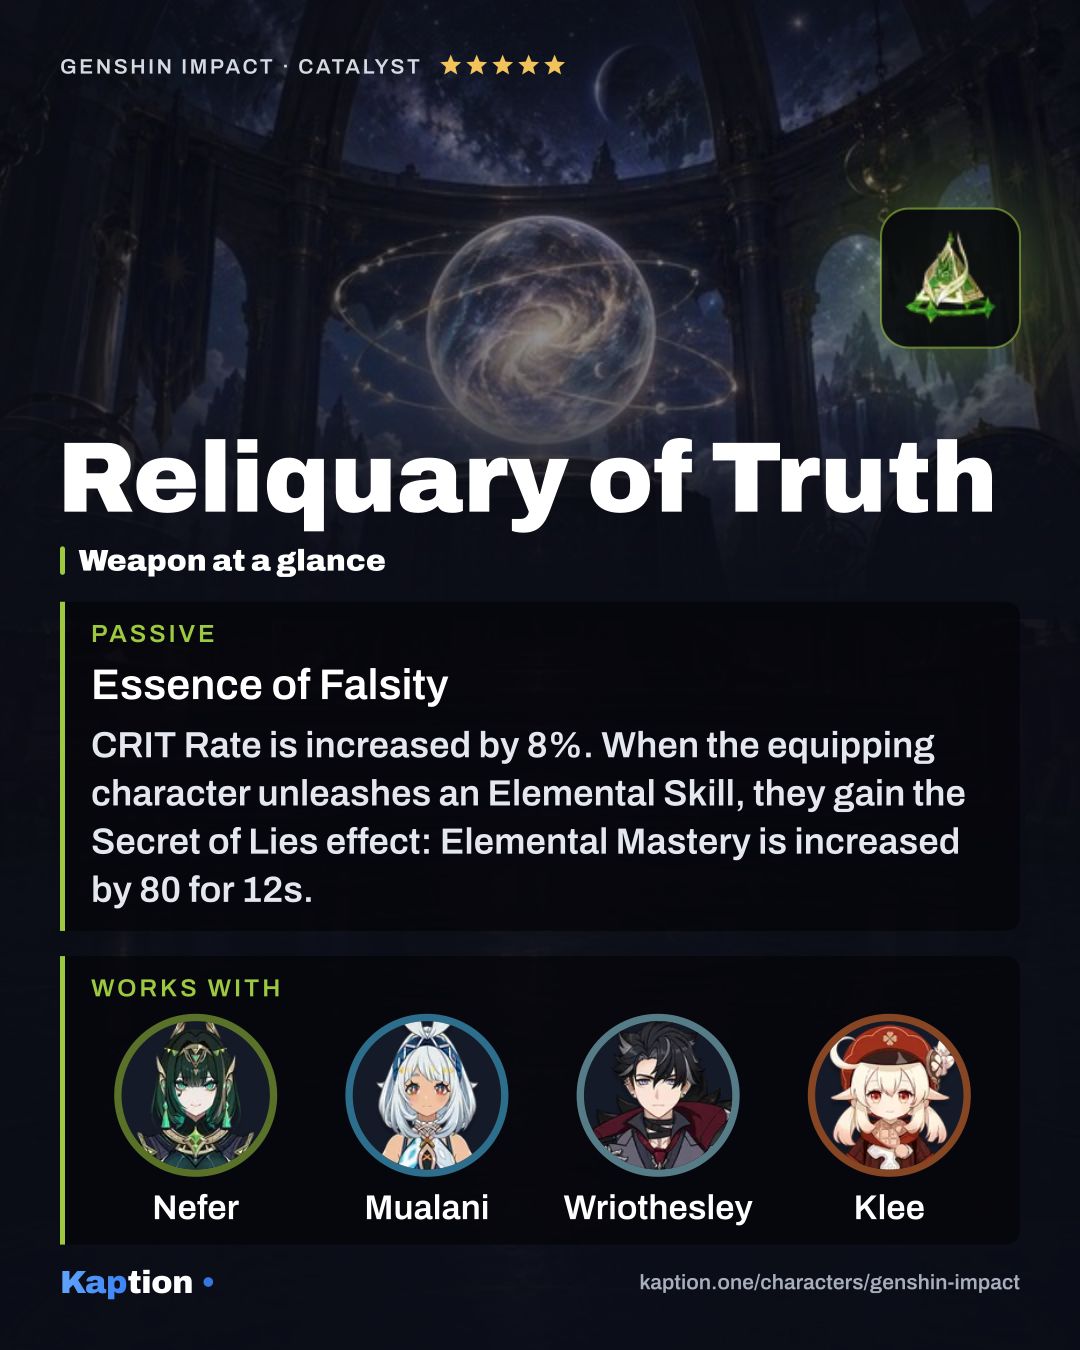
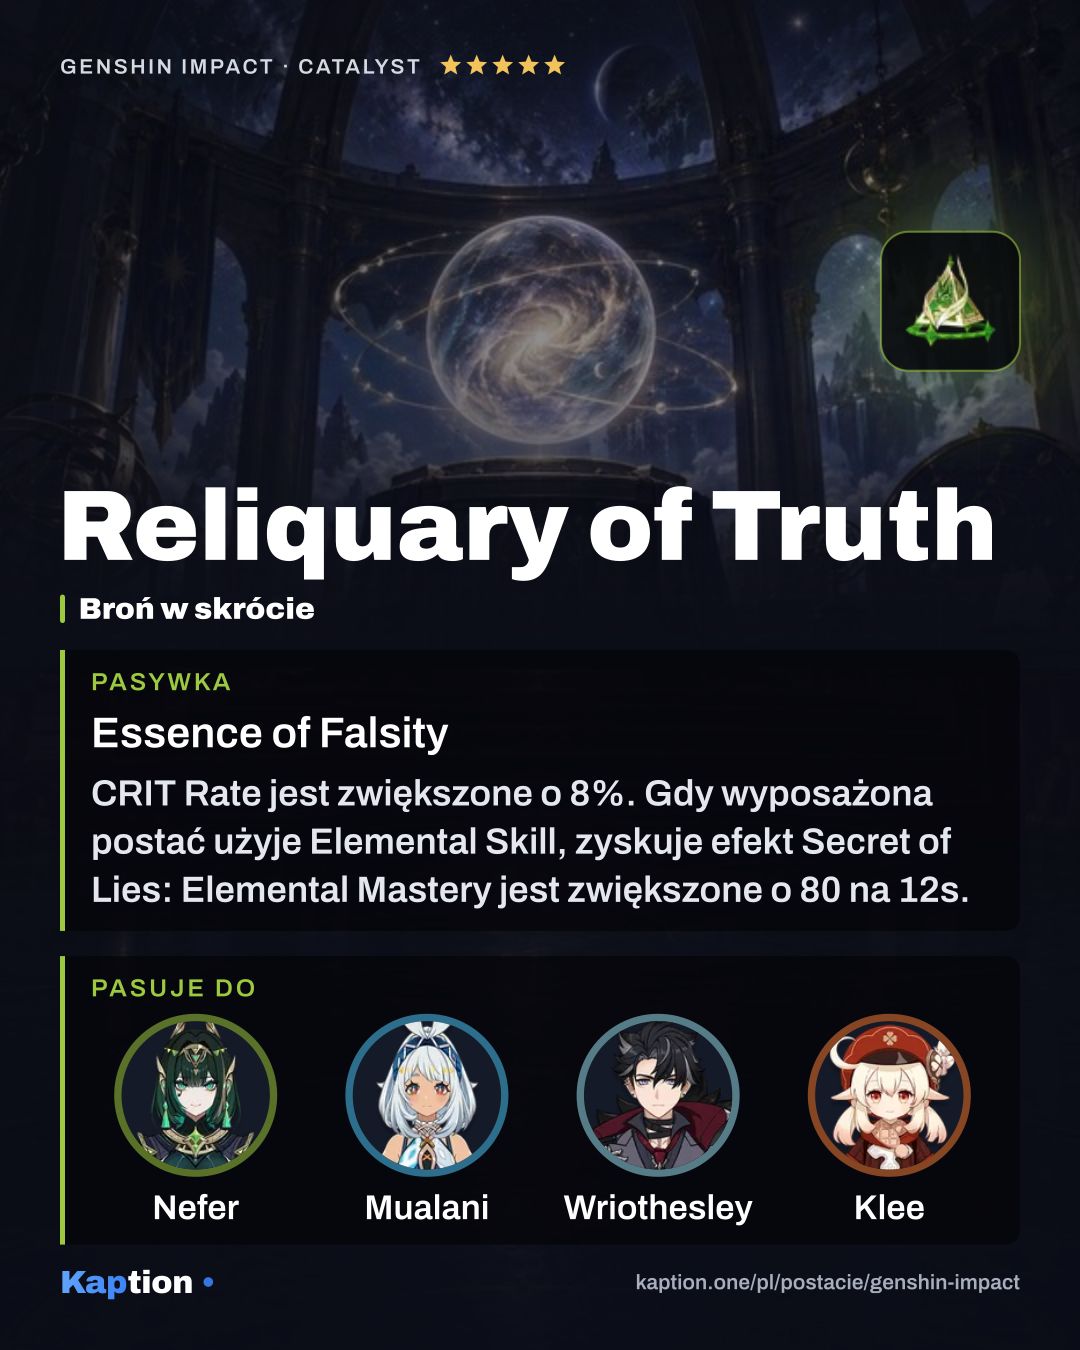
  2. Reliquary of Truth
    Reliquary of Truth 5-star
    Essence of Falsity Show effect

    CRIT Rate is increased by 8%. When the equipping character unleashes an Elemental Skill, they gain the Secret of Lies effect: Elemental Mastery is increased by 80 for 12s. When the equipping character deals Lunar-Bloom DMG to an opponent, they gain the Moon of Truth effect: CRIT DMG is increased by 24% for 4s. When both the Secret of Lies and Moon of Truth effects are active at the same time, the results of both effects will be increased by 50%.

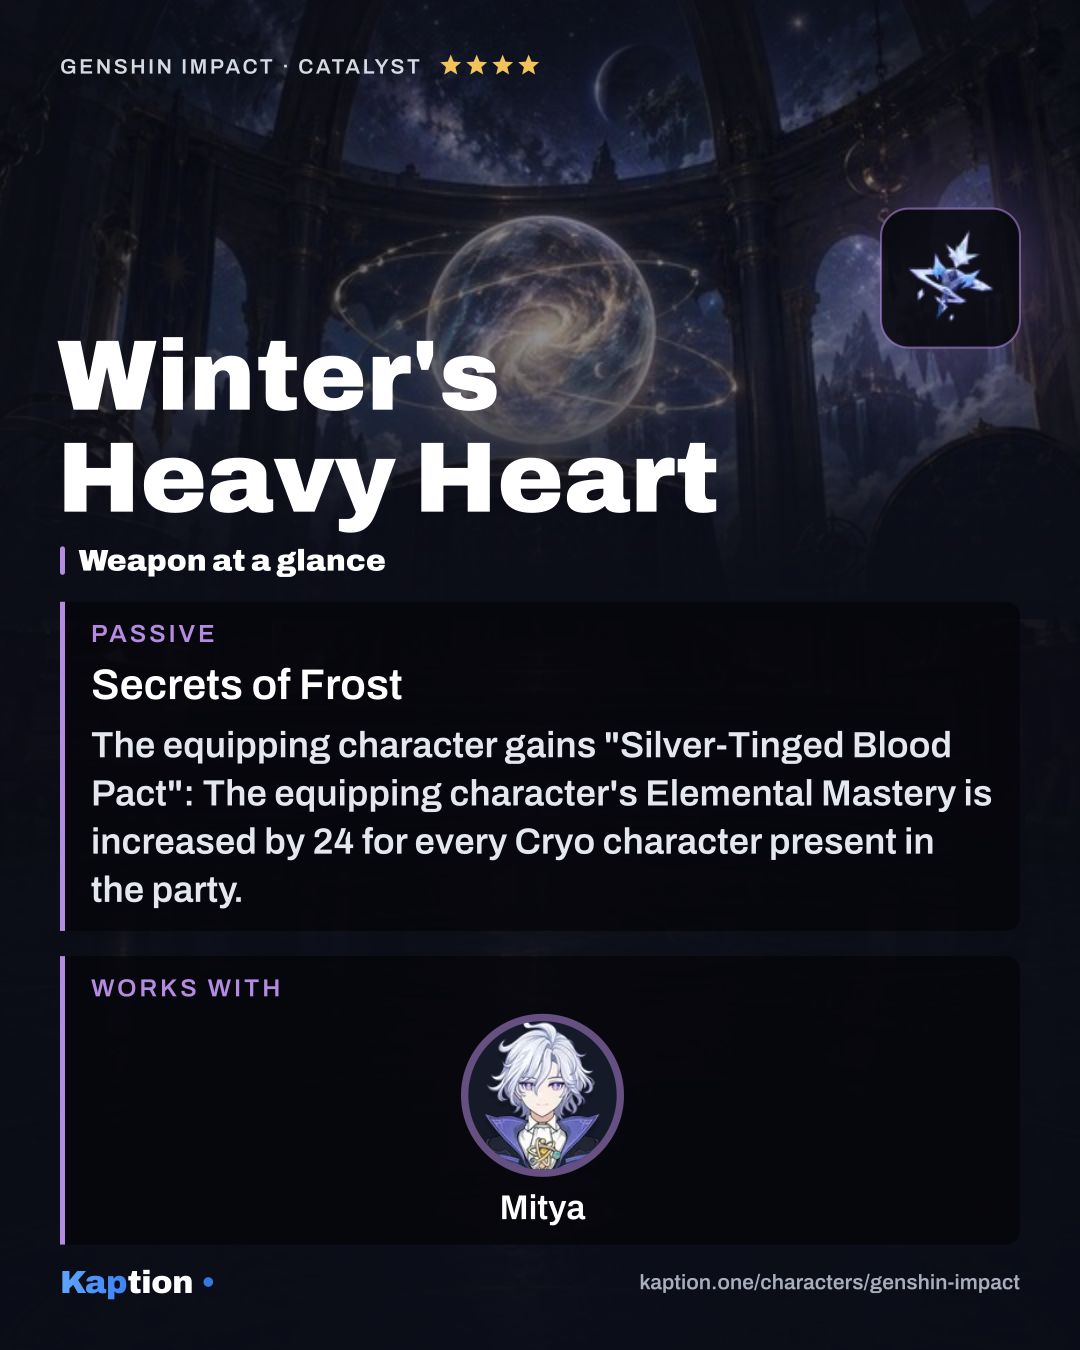
  3. Winter's Heavy Heart
    Winter's Heavy Heart 4-star
    Secrets of Frost Show effect

    The equipping character gains "Silver-Tinged Blood Pact": The equipping character's Elemental Mastery is increased by 24 for every Cryo character present in the party. For every Electro character present in the party, the equipping character's ATK is increased by 4.8%. Up to 4 Cryo or Electro characters can provide the above buffs. Radiance: Stellar Glimmer: The effect of Silver-Tinged Blood Pact is changed to: For every Cryo or Electro character present in the party, the equipping character gains a 20-point Elemental Mastery boost and deals 6% increased Stellar Glimmer reaction DMG.

Have this character? Make a card of your own build from your UID Stats, artifacts, weapon and talents from your in-game showcase, as a PNG in a dozen layouts.

Teams

Show more teams (4)Show less

Also plays in

Other characters' teams with a place for Mitya.

  • Superconduct

    Valeriy

    • Valeriy
    • Mitya
    • Odette
    • Sucrose

    On-field Electro damage

  • Overloaded

    Chevreuse

    • Chevreuse
    • Mitya
    • Mavuika
    • Fischl

    Electro and Overloaded damage

  • Overloaded

    Amber

    • Amber
    • Mitya
    • Fischl
    • Chevreuse

    Overloaded Electro damage

Skills

Names in English, as in the game · underlined ones open their card · Priority = level-up order

  1. Basic attack

    Chain ReactionAttack

    Level priority 2 of 3

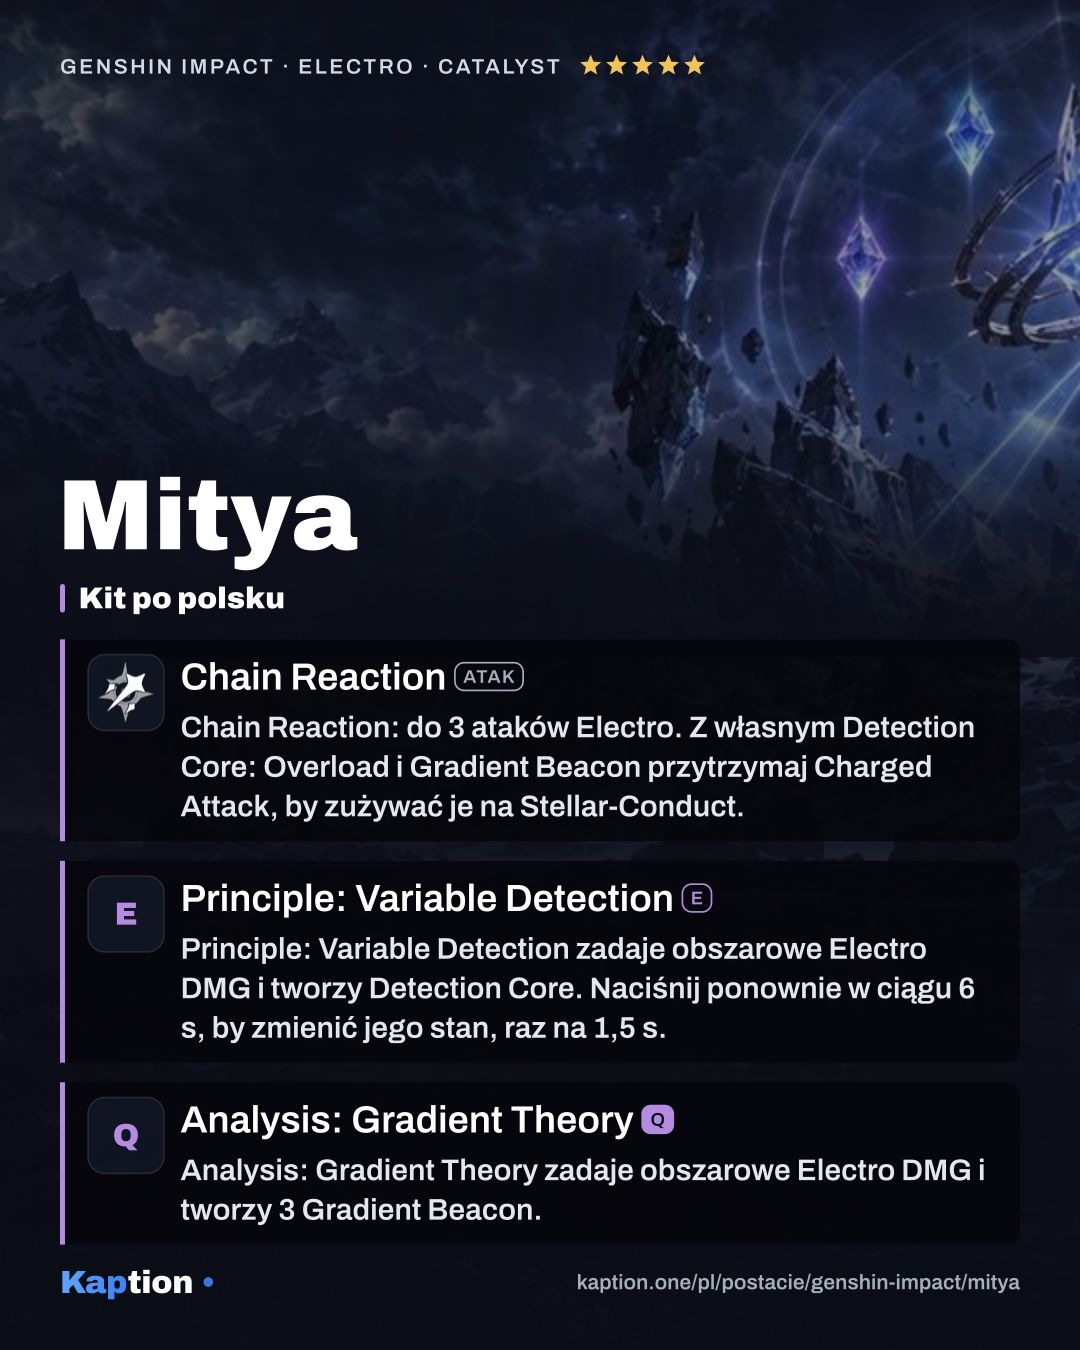
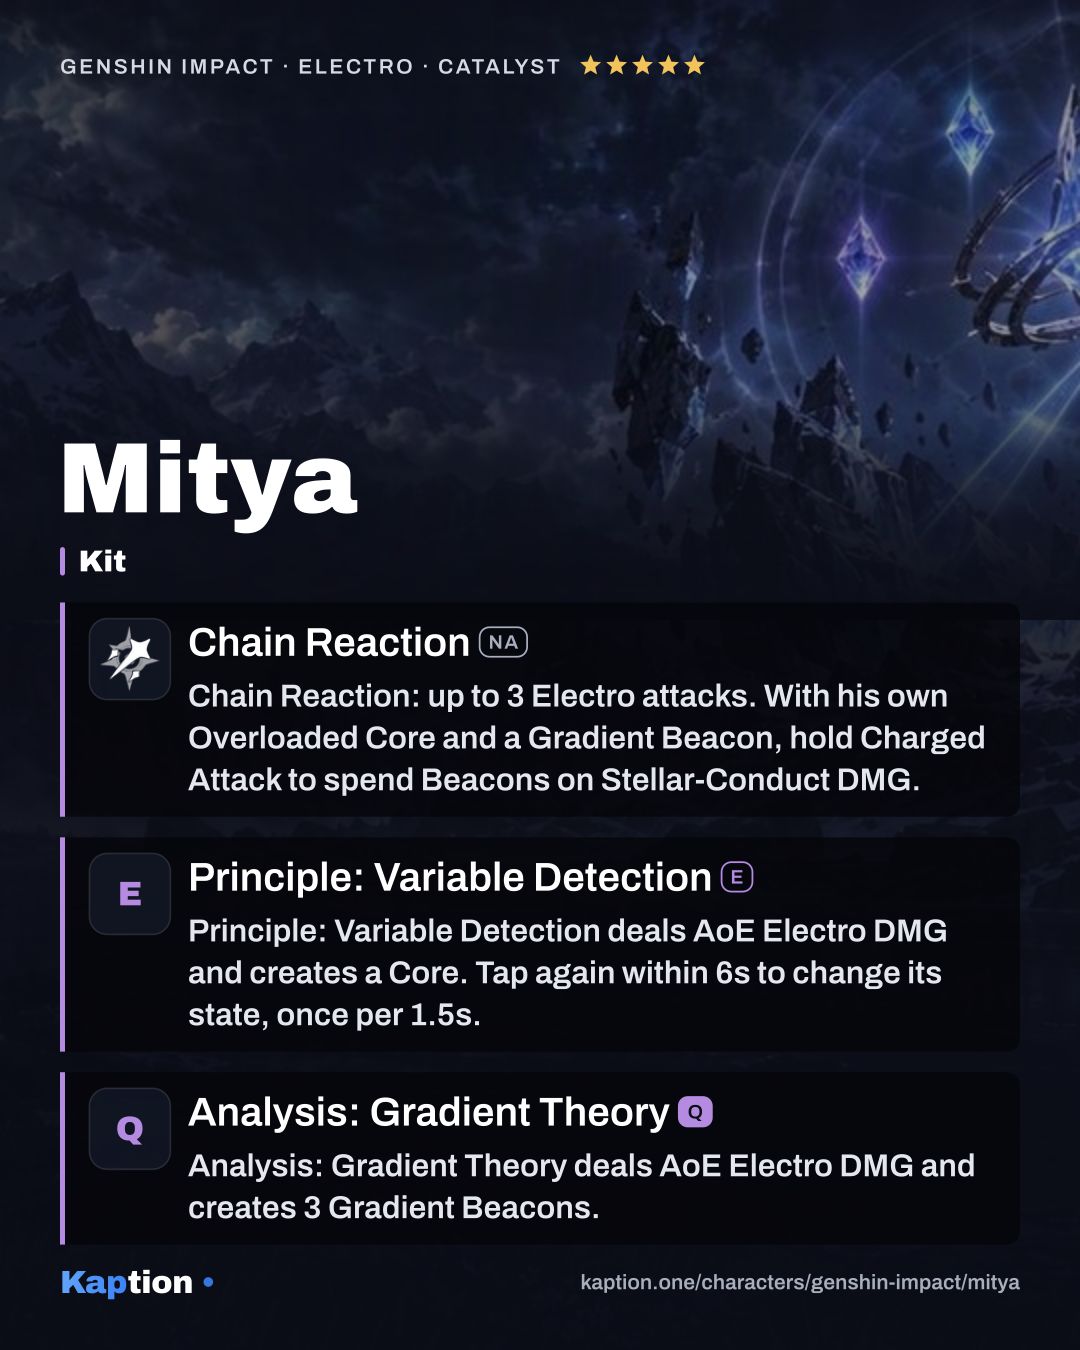
    Chain Reaction (NA): up to 3 Electro attacks. With his own Overloaded Core and a Gradient Beacon, hold Charged Attack to spend Beacons on Stellar-Conduct DMG.

    Normal Attack Performs a maximum of 3 attacks that deal Electro DMG. Charged Attack Consumes a certain amount of Stamina to deal AoE Electro DMG to the area in front after a short casting time. Mitya will instead perform the special Charged Attack Gradient Detonation, which consumes no Stamina, if a Detection Core: Overload created by Mitya himself is currently on the field and he has at least 1 Gradient Beacon: Deals 1 instance of AoE Electro DMG to the area in front and continuously consumes Gradient Beacons while held. Each Gradient Beacon consumed deals 1 instance of AoE Electro DMG to the area in front that is considered Stellar-Conduct reaction DMG. Plunging Attack Plunges from mid-air to strike the ground below, damaging opponents along the path and dealing AoE Electro DMG upon impact.

  2. Skill

    Principle: Variable DetectionE

    Level priority 1 of 3

    Principle: Variable Detection (E) deals AoE Electro DMG and creates a Core. Tap again within 6s to change its state, once per 1.5s.

    Conducts a theoretically relatively safe experiment at a theoretically relatively safe yield, dealing AoE Electro DMG and creating a Detection Core in different ways depending on whether the Skill is tapped or held. Tapping the Elemental Skill Principle: Variable Detection again within 6s after using it changes the Detection Core's state. The Detection Core's state can be changed in this way every 1.5s.

  3. Ultimate

    Analysis: Gradient TheoryQ

    Level priority 3 of 3

    Analysis: Gradient Theory (Q) deals AoE Electro DMG and creates 3 Gradient Beacons.

    Let the elements burst forth like inspiration itself! Deals AoE Electro DMG and creates 3 Gradient Beacons.

Passives

  1. Passive

    Baseline Stress TestPassive

    Steady State: nearby party gains 30 Elemental Mastery per Beacon. Overloaded: after party Stellar-Conduct, get 1 Beacon every 1.5s for 6s.

    The Detection Core created by the Elemental Skill Principle: Variable Detection is enhanced. Depending on the state of the Detection Core created: ·Steady State: All nearby party members gain 30 Elemental Mastery for each Gradient Beacon Mitya has; ·Overloaded: After nearby party members trigger Stellar-Conduct reactions, instead obtain 1 Gradient Beacon every 1.5s for 6s.

  2. Passive

    Explosive Reagent: Safe Limits ExceededPassive

    Gradient Beacons last 10s. Creating one gives Mitya 5% CRIT Rate for 15s, up to 4 stacks.

    The duration of Gradient Beacons is increased to 10s. Additionally, Mitya's CRIT Rate increases by 5% for 15s after creating a Gradient Beacon. This effect can stack up to 4 times.

  3. Passive

    Stellar Jubilee: Top-Secret ProtocolPassive

    Superconduct becomes Stellar-Conduct, creating a Gradient Beacon every 1.5s for 3s. Mitya's Elemental Mastery boosts its base DMG by up to 14%.

    When party members trigger Superconduct, it will be changed to Stellar-Conduct. Stellar-Conduct reactions will no longer create Starlight Prisms, and will instead create 1 Gradient Beacon nearby every 1.5s for 3s. These Beacons can be carried by Mitya and transform the area around them into an even larger Polestar Field. Triggering another Stellar-Conduct reaction will refresh the duration of the aforementioned effects. Additionally, the Base Stellar-Conduct DMG dealt by all nearby party members will be increased based on Mitya's Elemental Mastery: Every point of Elemental Mastery he has increases Base Stellar-Conduct DMG by 0.028%. The maximum Base DMG increase that can be gained this way is 14%. While within a Polestar Field, Mitya will also enter the Radiance: Stellar-Conduct state.

  4. Passive

    Energy CatalysisPassive

    A Steady State Core clears destructible rocks. With Mitya in the party, Prime Ice Construct: Basic Heat Source costs no Kresnik Energy.

    When destructible rocks are nearby, Detection Core: Steady State can quickly clear them. Additionally, when Mitya is in the party, creating Prime Ice Construct: Basic Heat Source does not consume Kresnik Energy.

Constellations

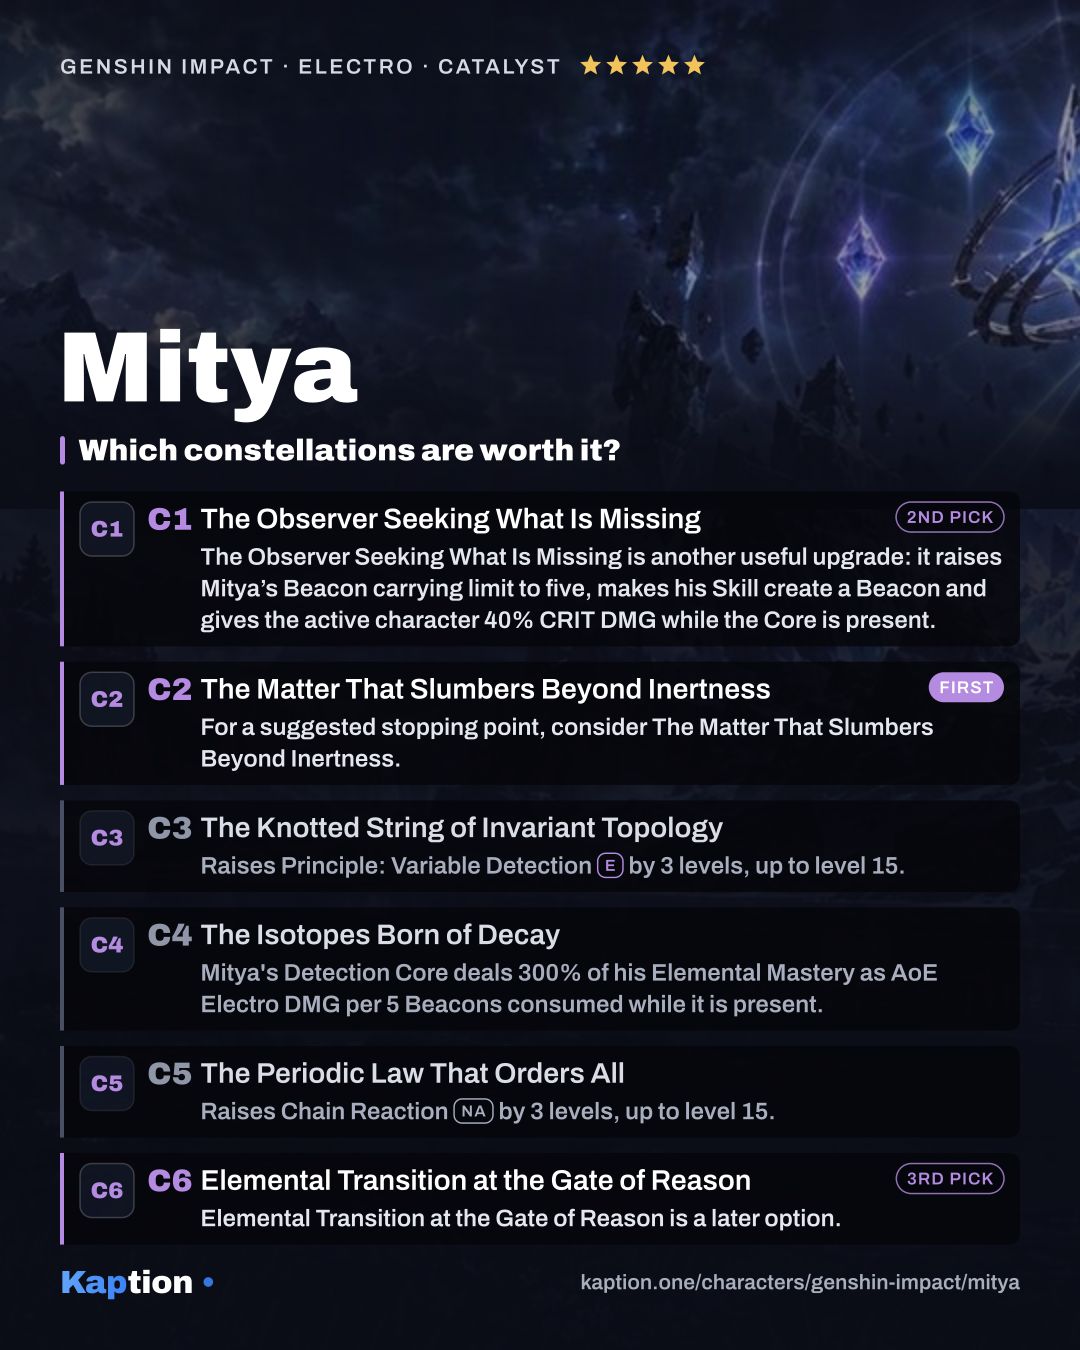
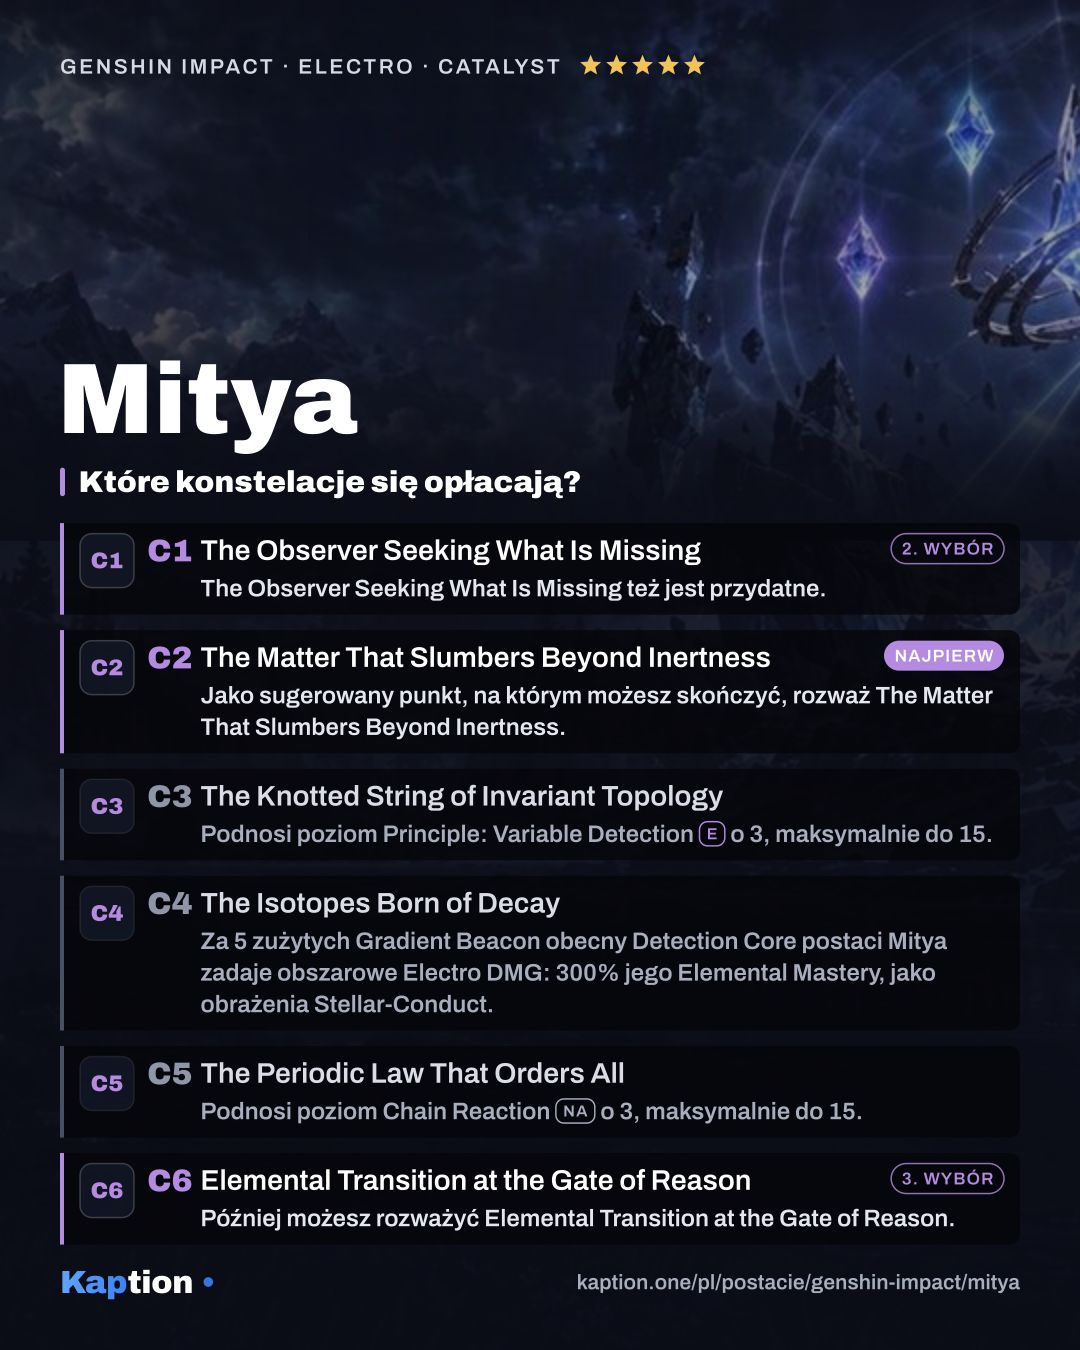
  1. C1

    The Observer Seeking What Is Missing

    Worth it

    The Observer Seeking What Is Missing (C1) is another useful upgrade: it raises Mitya’s Beacon carrying limit to five, makes his Skill create a Beacon and gives the active character 40% CRIT DMG while the Core is present.

    The maximum number of Gradient Beacons Mitya can carry is increased to 5. Using the Elemental Skill Principle: Variable Detection additionally creates 1 Gradient Beacon. While the Detection Core is present, your own active character's CRIT DMG is increased by 40%. Additionally, Mitya regenerates 10 Elemental Energy when a Gradient Beacon is created. This effect can be triggered once every 8s.

  2. C2

    The Matter That Slumbers Beyond Inertness

    Worth it

    For a suggested stopping point, consider The Matter That Slumbers Beyond Inertness (C2).

    While the Detection Core is present, all opponents within the Polestar Field have their Cryo RES and Electro RES decreased by 20%. Additionally, if the Detection Core created is: ·Steady State: All nearby party members gain 123 Elemental Mastery; ·Overloaded: Your own active character gains 234 Elemental Mastery.

  3. C3

    The Knotted String of Invariant Topology

    Increases the Level of the Elemental Skill Principle: Variable Detection by 3. Maximum upgrade level is 15.

  4. C4

    The Isotopes Born of Decay

    Detection Cores created by Mitya himself deals 1 instance of AoE Electro DMG equal to 300% of Mitya's Elemental Mastery to nearby opponents for every 5 Gradient Beacons consumed while it is on the field. This DMG is considered Stellar-Conduct reaction DMG.

  5. C5

    The Periodic Law That Orders All

    Increases the Level of Normal Attack: Chain Reaction by 3. Maximum upgrade level is 15.

  6. C6

    Elemental Transition at the Gate of Reason

    Worth it

    Elemental Transition at the Gate of Reason (C6) is a later option.

    Detection Core is enhanced. If the Detection Core: · Is in the Steady State: Detection Core deals 115% of its original DMG. · Is Overloaded: There is a 34% chance to create 1 new Gradient Beacon whenever Mitya consumes a Gradient Beacon with the Detection Core. Additionally, Stellar-Conduct reaction DMG dealt by all nearby party members is Elevated by 20%.

Materials

Ascension, to max level

  • Mora Mora × 420,000
  • Kristallfold Kristallfold × 168
  • Vajrada Amethyst Sliver Vajrada Amethyst Sliver × 1
  • Vajrada Amethyst Fragment Vajrada Amethyst Fragment × 9
  • Vajrada Amethyst Chunk Vajrada Amethyst Chunk × 9
  • Vajrada Amethyst Gemstone Vajrada Amethyst Gemstone × 6
  • Chimeric Core Chimeric Core × 18
  • Symbiotic Chimeric Nucleus Symbiotic Chimeric Nucleus × 30
  • Prime Chimeric Nexus Prime Chimeric Nexus × 36
  • Shattered Stability Anchor Shattered Stability Anchor × 46

All skills to max

  • Mora Mora × 4,957,500
  • Crown of Insight Crown of Insight × 3
  • Teachings of Charity Teachings of Charity × 9
  • Guide to Charity Guide to Charity × 63
  • Philosophies of Charity Philosophies of Charity × 114
  • Chimeric Core Chimeric Core × 18
  • Symbiotic Chimeric Nucleus Symbiotic Chimeric Nucleus × 66
  • Prime Chimeric Nexus Prime Chimeric Nexus × 93
  • Mask of the Virtuous Doctor Mask of the Virtuous Doctor × 18

Guide

How the kit works

Start with Principle: Variable Detection to deal AoE Electro DMG and create a Detection Core. Tapping or holding the Skill creates it in different ways. You can tap the Skill again within 6 seconds to change the Core’s state, with 1.5 seconds between state changes.

In Steady State, Baseline Stress Test gives nearby party members 30 Elemental Mastery for each Gradient Beacon Mitya has. In Overloaded, nearby party members’ Stellar-Conduct reactions cause him to obtain one Beacon every 1.5 seconds for 6 seconds. Pick the state for the buff or Beacon generation you need.

Stellar Jubilee: Top-Secret Protocol changes the party’s Superconduct into Stellar-Conduct. The reaction creates a Beacon nearby every 1.5 seconds for 3 seconds instead of Starlight Prisms. Mitya can carry these Beacons, which expand the Polestar Field around them; another reaction refreshes the effects. His Elemental Mastery also increases nearby party members’ Base Stellar-Conduct DMG by 0.028% per point, up to 14%.

Use Analysis: Gradient Theory for AoE Electro DMG and three Beacons. With his own Overloaded Core on the field and at least one Beacon, holding the Charged Attack from Chain Reaction (NA) performs Gradient Detonation. It costs no Stamina, deals one AoE Electro hit and keeps consuming Beacons while held, dealing an additional AoE hit considered Stellar-Conduct DMG for each one.

Explosive Reagent: Safe Limits Exceeded sets Beacon duration to 10 seconds. Creating a Beacon also gives Mitya 5% CRIT Rate for 15 seconds, stacking up to four times. Watch those stacks when judging how much CRIT Rate to build.

Build and why

Start with four pieces of Gilded Dreams. Its two-piece bonus gives 80 Elemental Mastery. After an Elemental Reaction, the four-piece bonus gives ATK for teammates of Mitya’s element and Elemental Mastery for teammates of different elements. That Mastery supports his party-wide Stellar-Conduct bonus.

For a team-focused option, consider four pieces of Tenacity of the Millelith: an Elemental Skill hit gives nearby party members 20% ATK and 30% Shield Strength for 3 seconds. The game’s build also offers four pieces of Disenchantment in Deep Shadow. It increases Stellar-Conduct DMG by 40% and gives attacks against opponents affected by that reaction 16% CRIT Rate.

Use Elemental Mastery on the sands and goblet, with CRIT DMG or CRIT Rate on the circlet. The build’s substat order is CRIT DMG, CRIT Rate, Elemental Mastery, then Energy Recharge. Mitya’s passive increases the party’s Base Stellar-Conduct DMG based on his Elemental Mastery, up to a 14% bonus.

Starsealed Edict is the first weapon choice. Its visible effects give 24% CRIT DMG and Elemental Mastery after using the Skill, with more Mastery from nearby party reactions. Reliquary of Truth gives 8% CRIT Rate and 80 Elemental Mastery after a Skill. Winter's Heavy Heart is a four-star option that gives Elemental Mastery for Cryo characters and ATK for Electro characters in the party. Dawning Frost is another option with Mastery after Charged Attack and Skill hits.

Leveling priority

A reasonable talent order is Principle: Variable Detection first, Chain Reaction (NA) second and Analysis: Gradient Theory last. The Core is central to both states of the kit, while the Normal Attack talent includes the Charged Attack. The Burst deals AoE damage and creates three Beacons. The supplied data does not say how talent levels change the reaction damage, so treat this order as a suggestion.

For maximum ascension, gather 420,000 Mora, 168 Kristallfold and 46 Shattered Stability Anchor. You also need one Vajrada Amethyst Sliver, nine Vajrada Amethyst Fragment, nine Vajrada Amethyst Chunk and six Vajrada Amethyst Gemstone, plus 18 Chimeric Core, 30 Symbiotic Chimeric Nucleus and 36 Prime Chimeric Nexus.

For all talents, the total is 4,957,500 Mora and three Crown of Insight. Gather nine Teachings of Charity, 63 Guide to Charity and 114 Philosophies of Charity, along with 18 Chimeric Core, 66 Symbiotic Chimeric Nucleus, 93 Prime Chimeric Nexus and 18 Mask of the Virtuous Doctor.

Constellations worth it

For a suggested stopping point, consider The Matter That Slumbers Beyond Inertness. While the Core is present, opponents in the Polestar Field lose 20% Cryo RES and Electro RES. Steady State gives nearby party members 123 Elemental Mastery, while Overloaded gives the active character 234.

The Observer Seeking What Is Missing is another useful upgrade: it raises Mitya’s Beacon carrying limit to five, makes his Skill create a Beacon and gives the active character 40% CRIT DMG while the Core is present. A Beacon’s creation also restores Mitya 10 Energy, once every 8 seconds.

Elemental Transition at the Gate of Reason is a later option. It improves the Core in either state and Elevates nearby party members’ Stellar-Conduct DMG by 20%. The Knotted String of Invariant Topology and The Periodic Law That Orders All only add talent levels, so you can leave them for later. The Isotopes Born of Decay adds a Core hit for every five Beacons consumed while it is on the field, but is also optional.

Teams

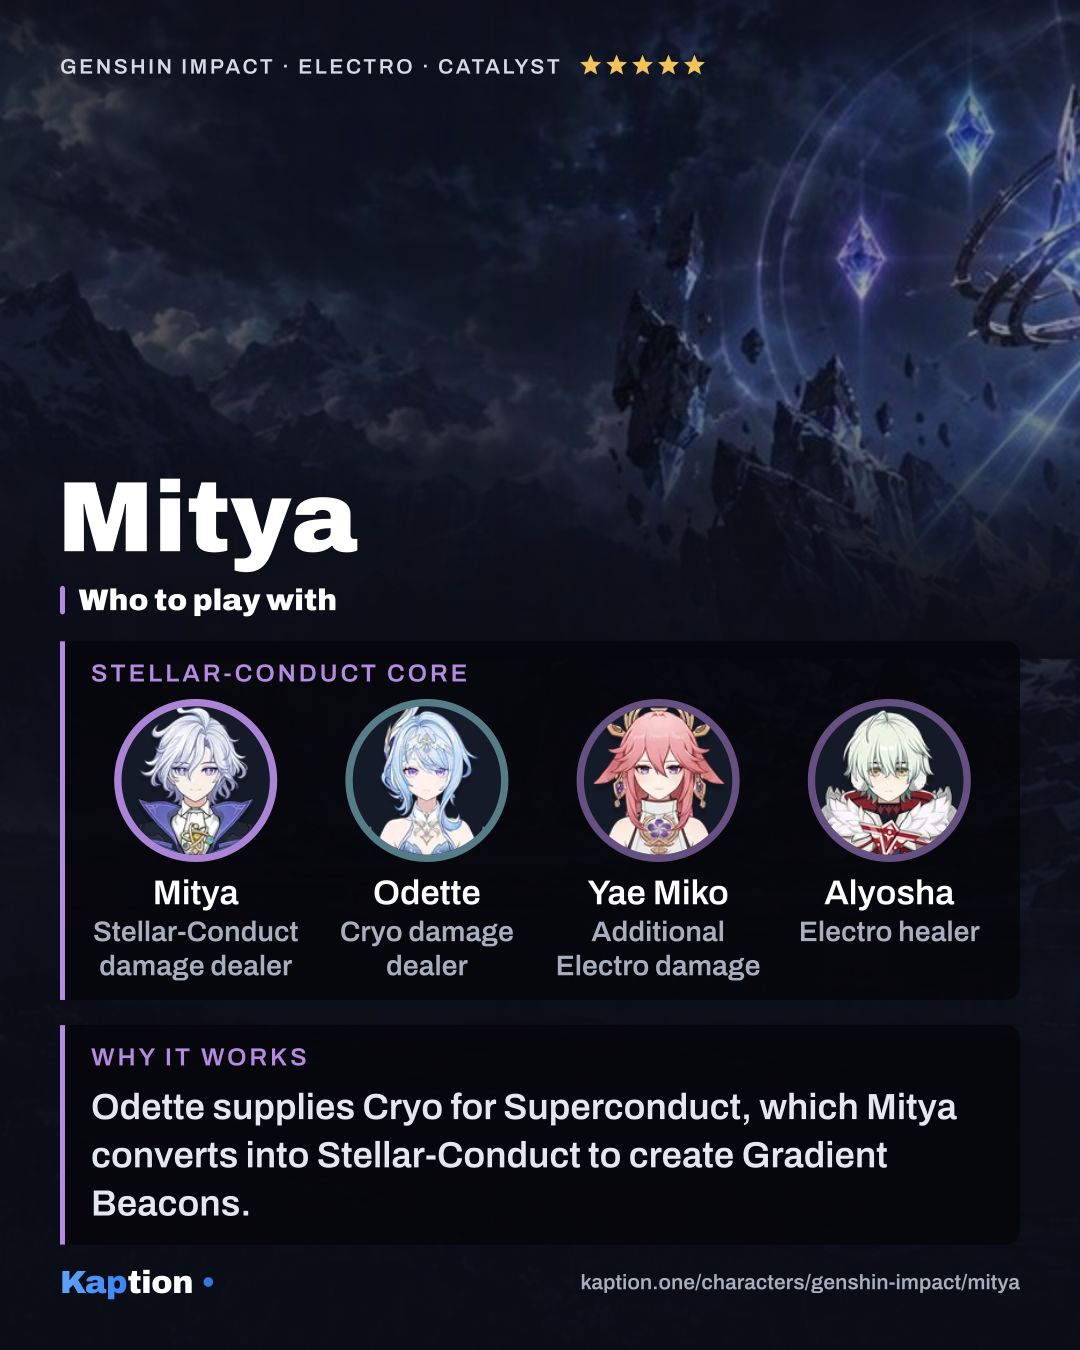
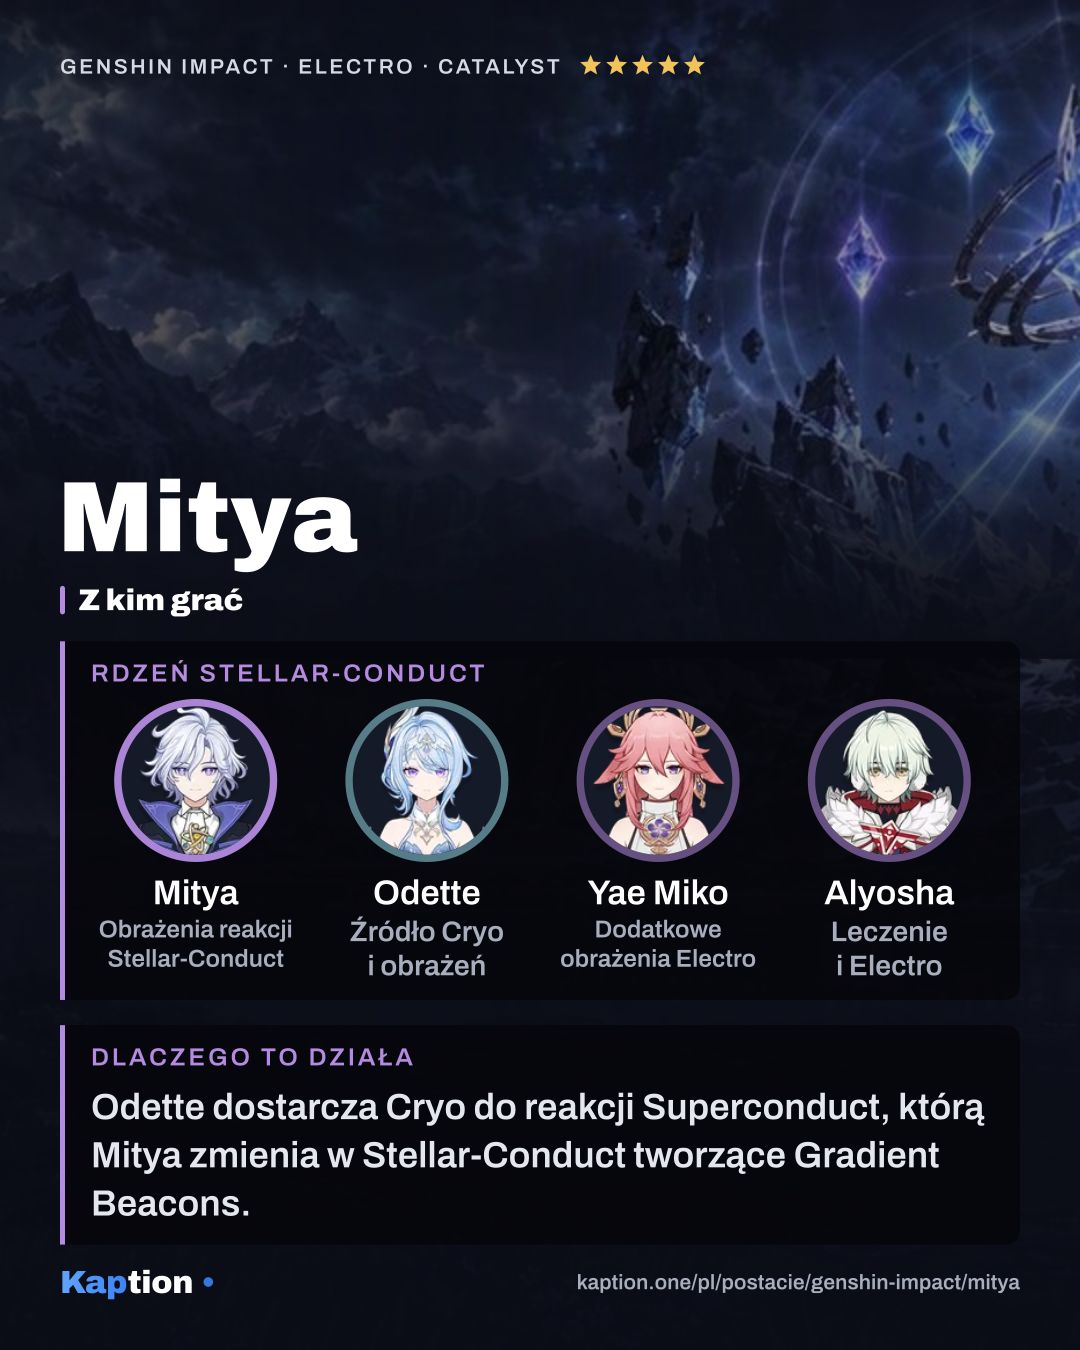
Mitya gives these teams a party-wide increase to Base Stellar-Conduct DMG based on his Elemental Mastery. Steady State adds Elemental Mastery based on his current Beacons; Overloaded instead helps create more Beacons after reactions. Choose the state around whether you want the team buff or his special Charged Attack.

Common mistakes

Do not hold Charged Attack expecting Gradient Detonation without Mitya’s own Overloaded Detection Core and at least one Gradient Beacon. In Steady State, you get the team Mastery buff instead; switch the Core’s state when you want the special attack.

Do not leave Beacons unused for too long. Their duration is 10 seconds with Explosive Reagent: Safe Limits Exceeded, so create them and spend them while the Core is ready. Analysis: Gradient Theory creates three, and Stellar-Conduct reactions help generate more.

Do not judge your CRIT Rate from artifacts alone. Beacon creation can give Mitya up to 20% CRIT Rate, and Disenchantment in Deep Shadow has its own conditional 16% for attacks against affected opponents. Check whether those conditions are active before adding more CRIT Rate.
Frequently asked questions

What's the best build for Mitya?

Artifacts: Tenacity of the Millelith or Disenchantment in Deep Shadow ×4. Main stats: Sands: Elemental Mastery, Goblet: Elemental Mastery, Circlet: CRIT DMG or CRIT Rate. That is what the game suggests. Recommended weapons: Starsealed Edict, Reliquary of Truth or Winter's Heavy Heart.

What should I level first on Mitya?

Principle: Variable DetectionE first, then Chain ReactionAttack and Analysis: Gradient TheoryQ.

Which constellations are worth getting for Mitya?

The biggest upgrades: C2 The Matter That Slumbers Beyond Inertness, C1 The Observer Seeking What Is Missing and C6 Elemental Transition at the Gate of Reason.

Who should Mitya team up with?

Good teammates: Odette, Yae Miko and Alyosha.

Is Mitya in Polish in Genshin Impact?

The game has no Polish language option. Kaption shows Polish subtitles for the dialogue right on the game screen, so Mitya's lines read in Polish. Skill and item names stay in English, as in the game.

Share

Ready-made cards for Instagram, TikTok, X or Discord, in English or Polish.

4:5 for Instagram and Facebook · 9:16 for Stories, TikTok and Shorts · 16:9 for X and Discord

The build cards and quick guides of every Genshin Impact character (131) in one ZIP: 4:5 (45 MB) 9:16 (60 MB) 16:9 (31 MB)

On Discord, paste the copied link or drag the downloaded file into the chat.

Game data version 7.2.0.

← All Genshin Impact characters