



































Guide
How the kit works
Set up the team first. Sandrone enters Radiance: Stellar-Conduct inside a Polestar Field, or Radiance: Stellar Swirl for 8 seconds after a nearby teammate triggers Stellar Swirl. While she is in the party, Superconduct and Cryo Swirl triggered by party members become Stellar-Conduct and Stellar Swirl respectively.
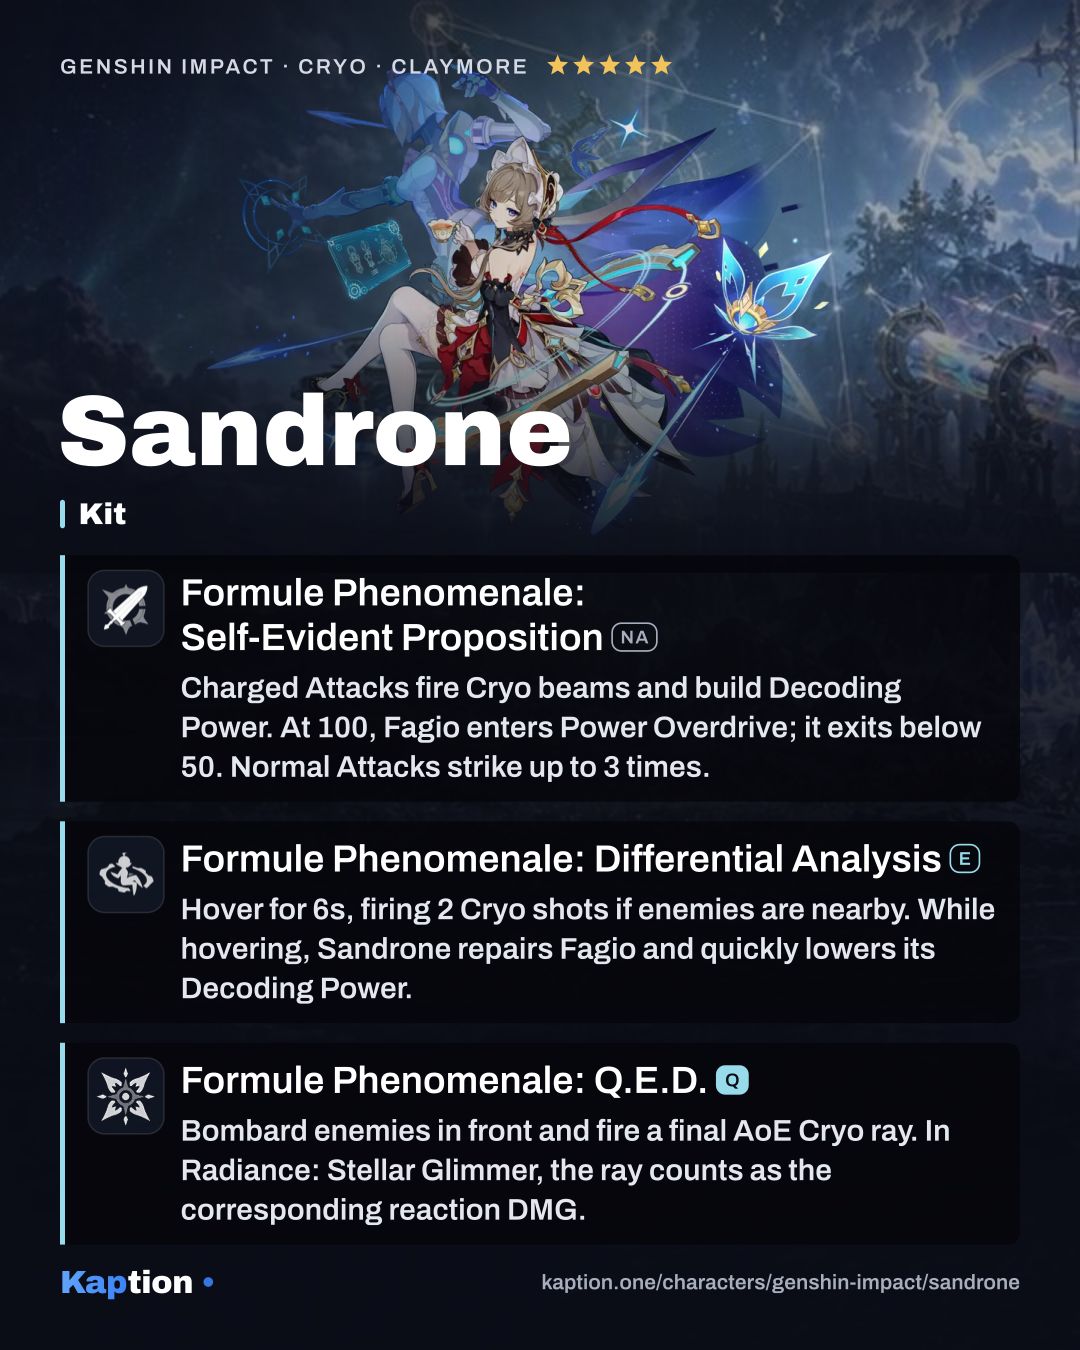
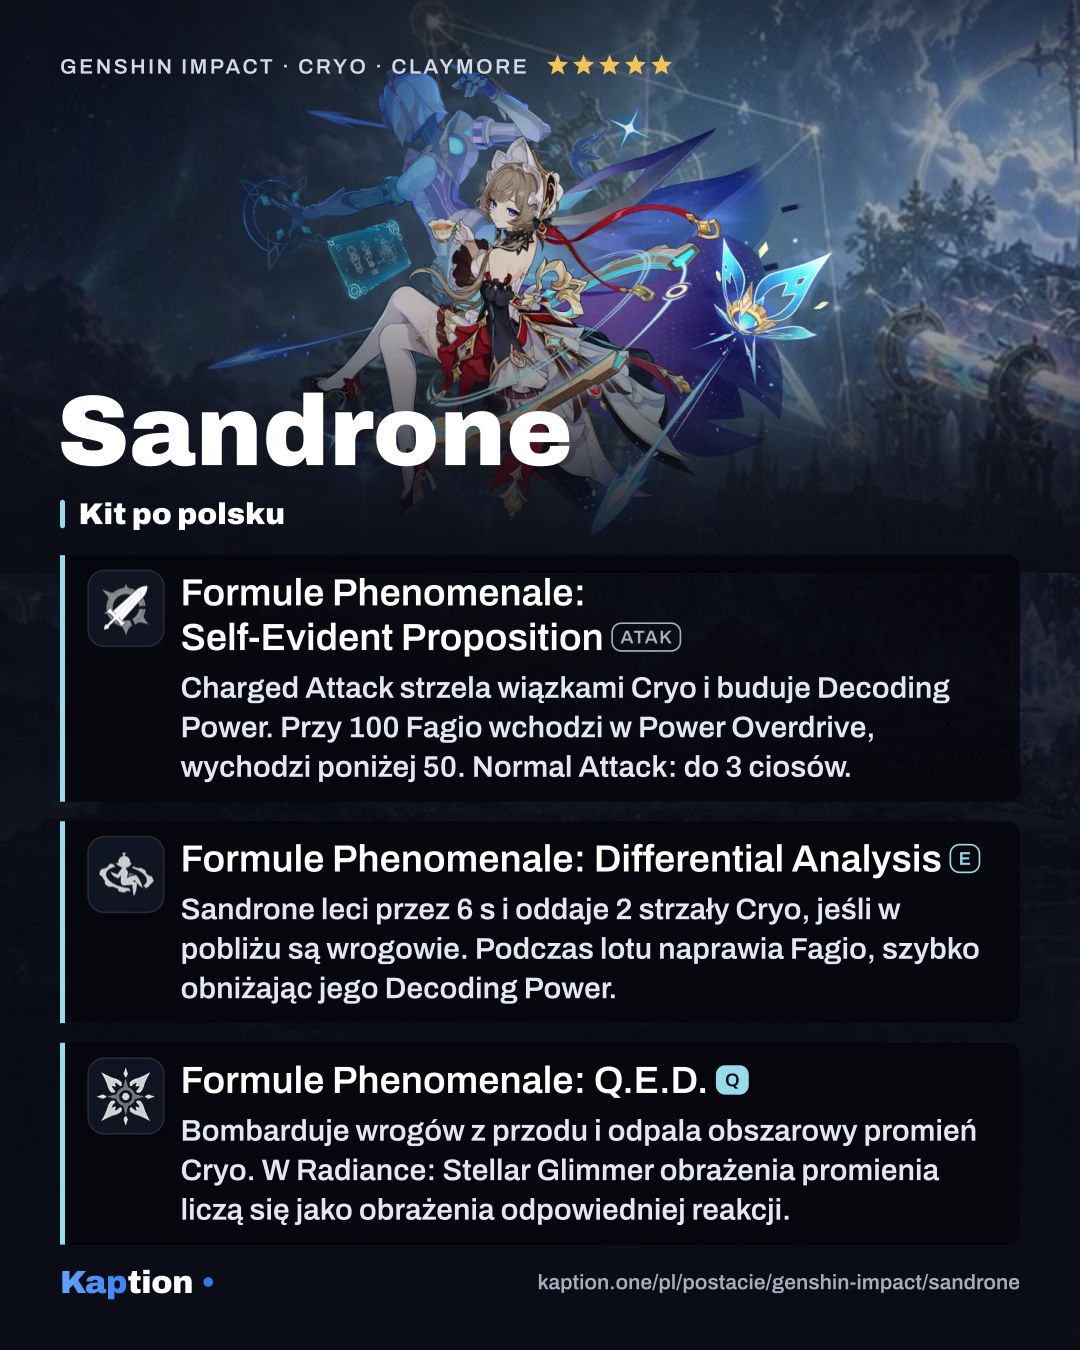
Use Formule Phenomenale: Self-Evident Proposition (NA) as a Charged Attack to summon Fagio in Decoding mode. It sweeps in front of Sandrone and periodically fires condensed beams. Decoding Power rises over time and when beams fire. At 100 power, Fagio enters Power Overdrive, fires Cryo attacks at longer intervals and cannot return to Decoding until its power falls below 50.
Use Formule Phenomenale: Differential Analysis as power builds. Sandrone hovers for 6 seconds and repairs Fagio, making its power fall quickly. With eligible opponents nearby, the skill also fires two Prism Shots. In Radiance: Stellar Glimmer, using the skill above 50 power makes the second shot deal 400% of its original damage.
Build and why
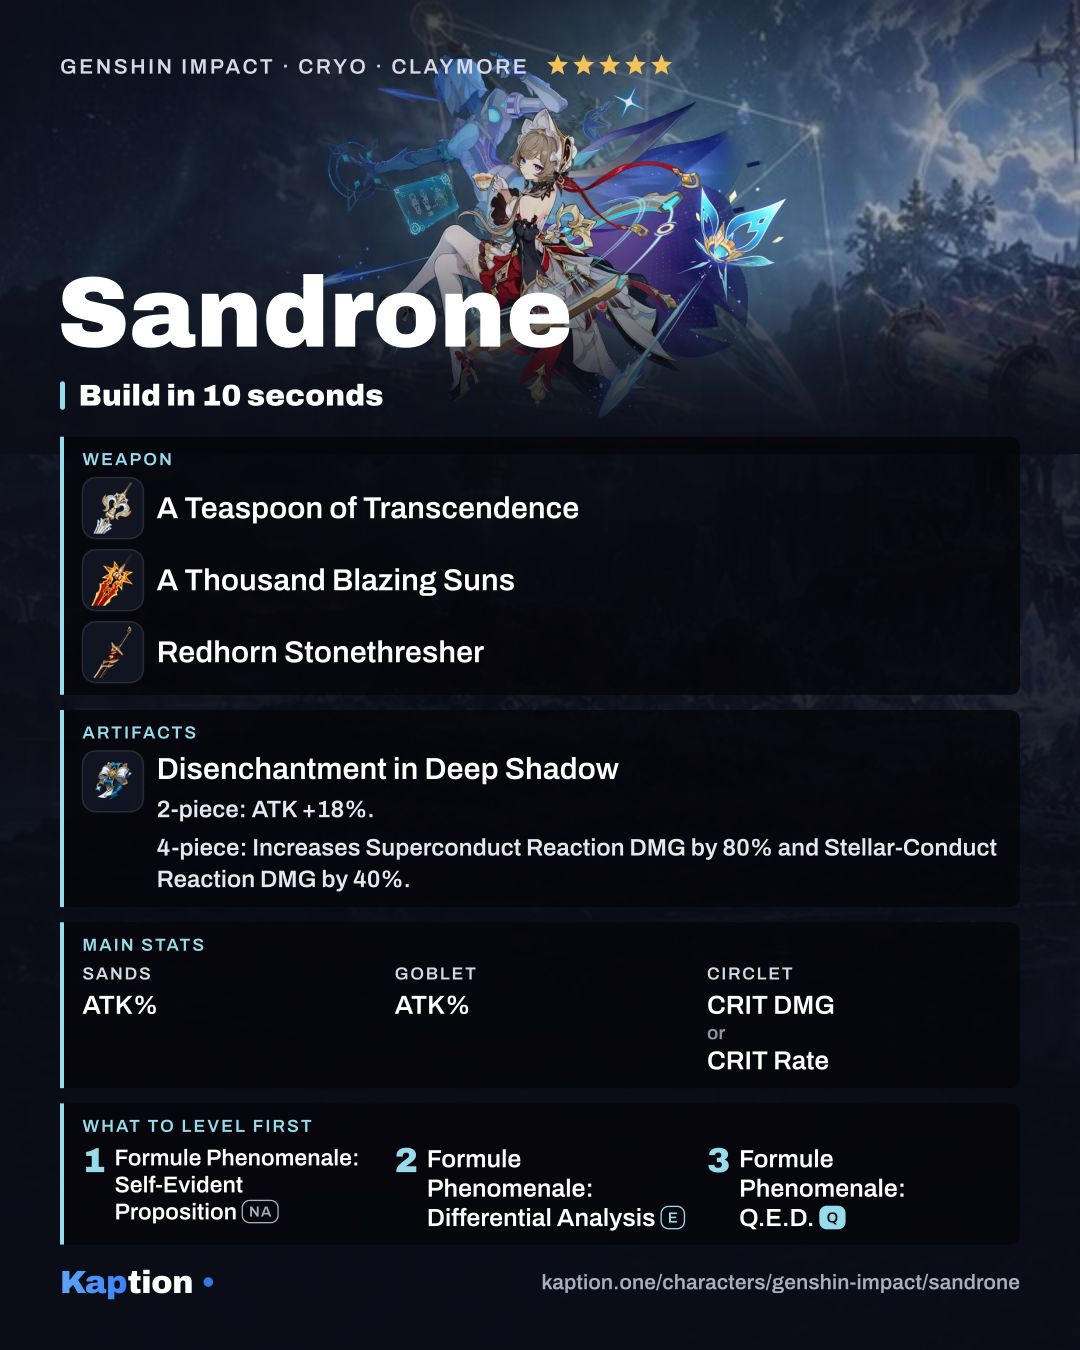
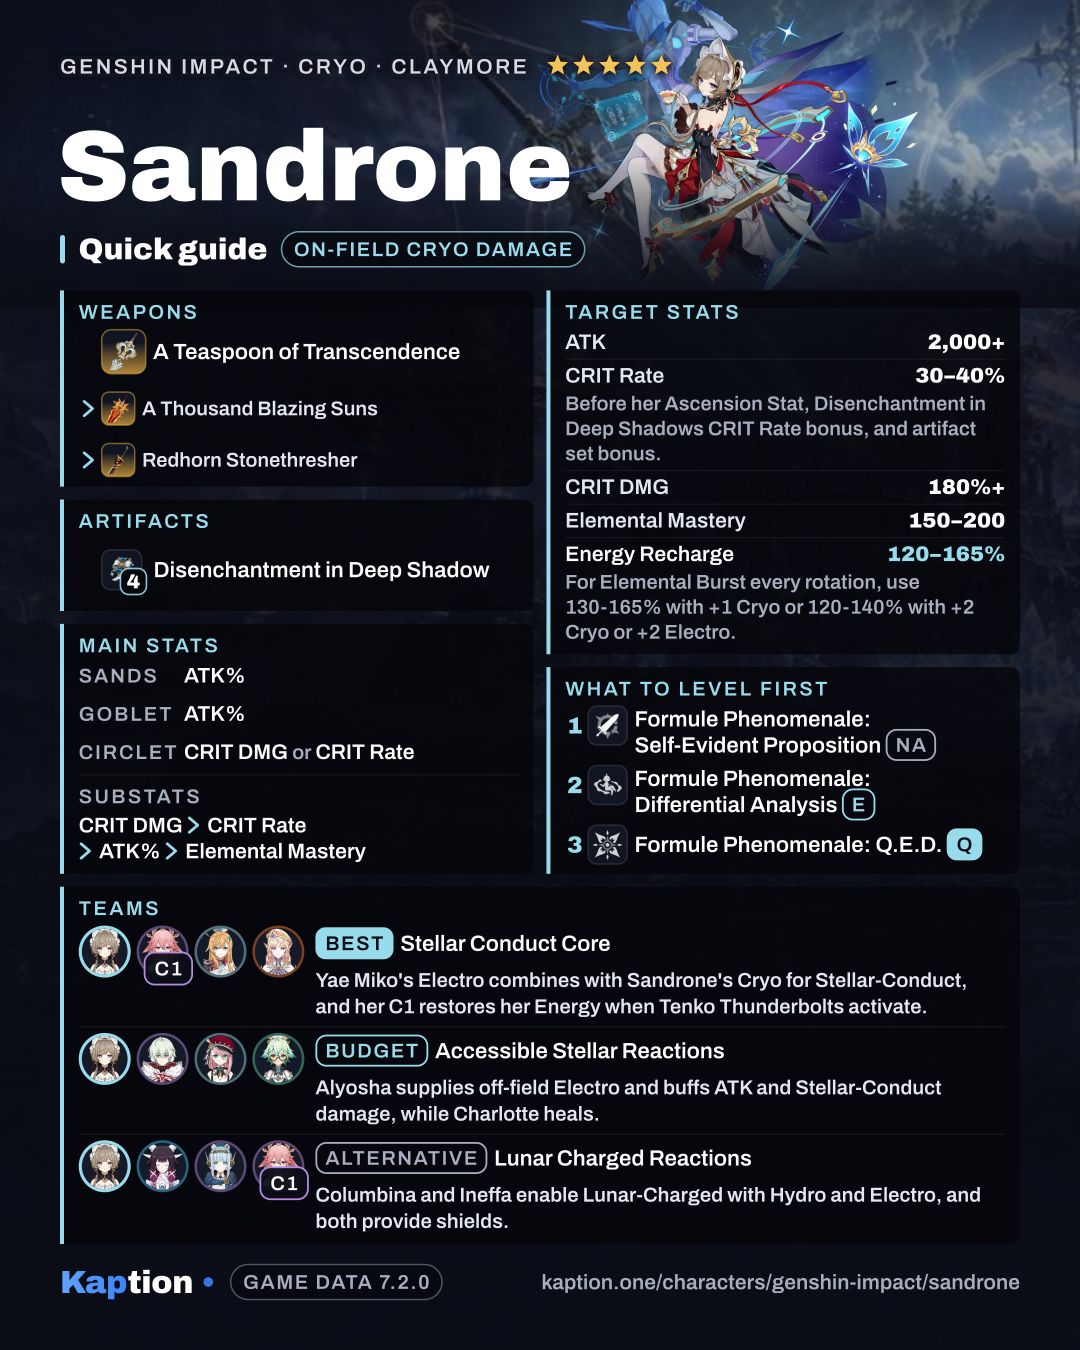
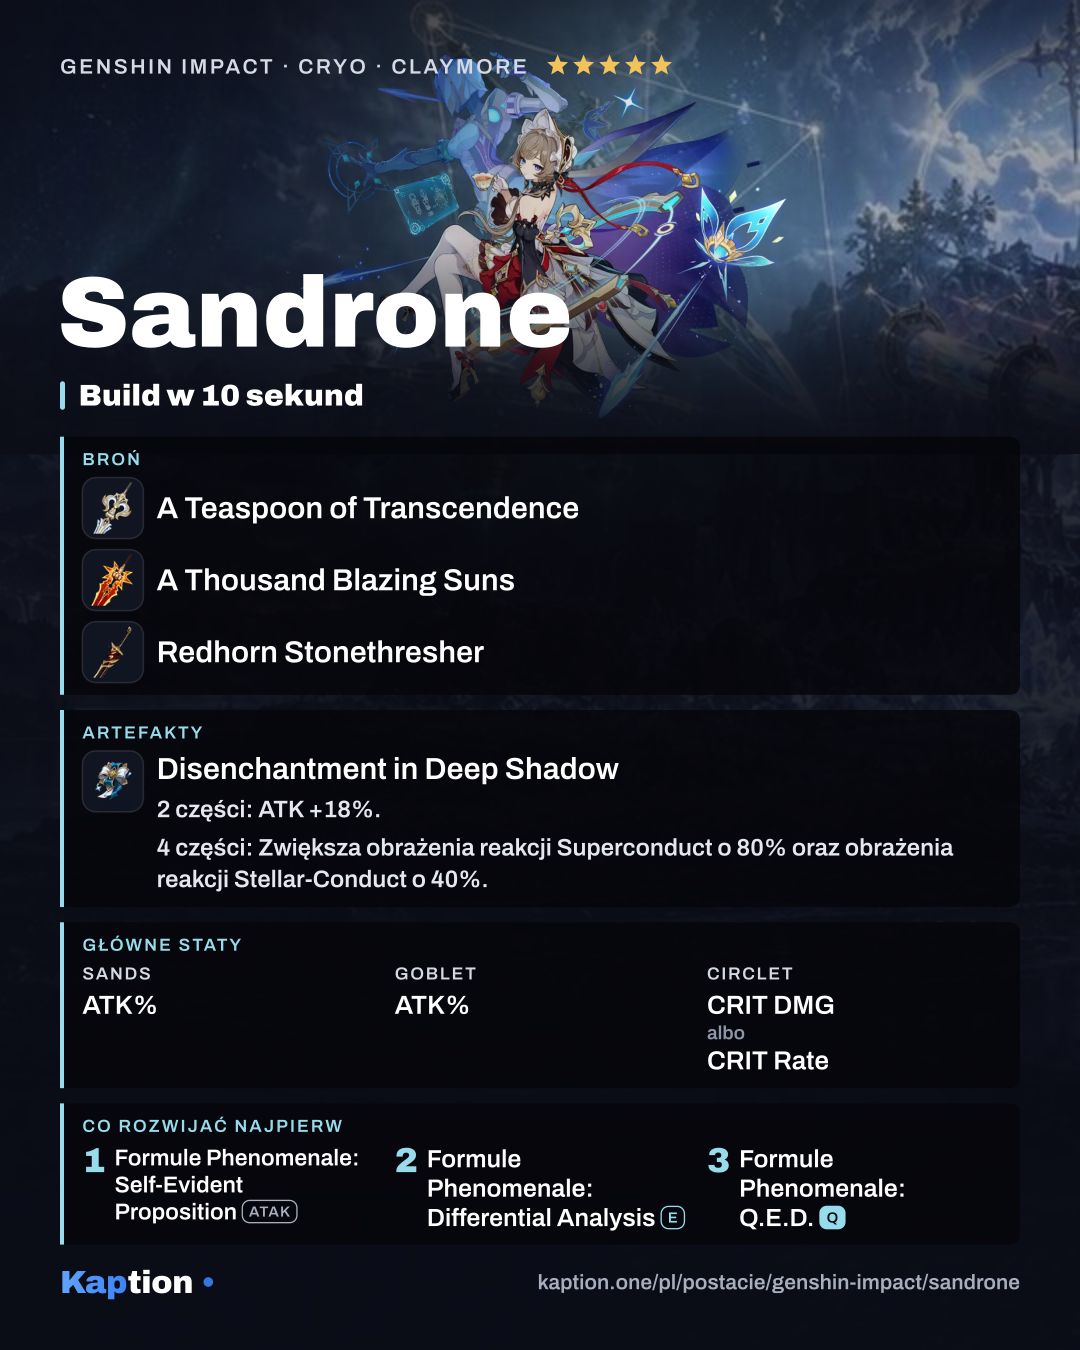
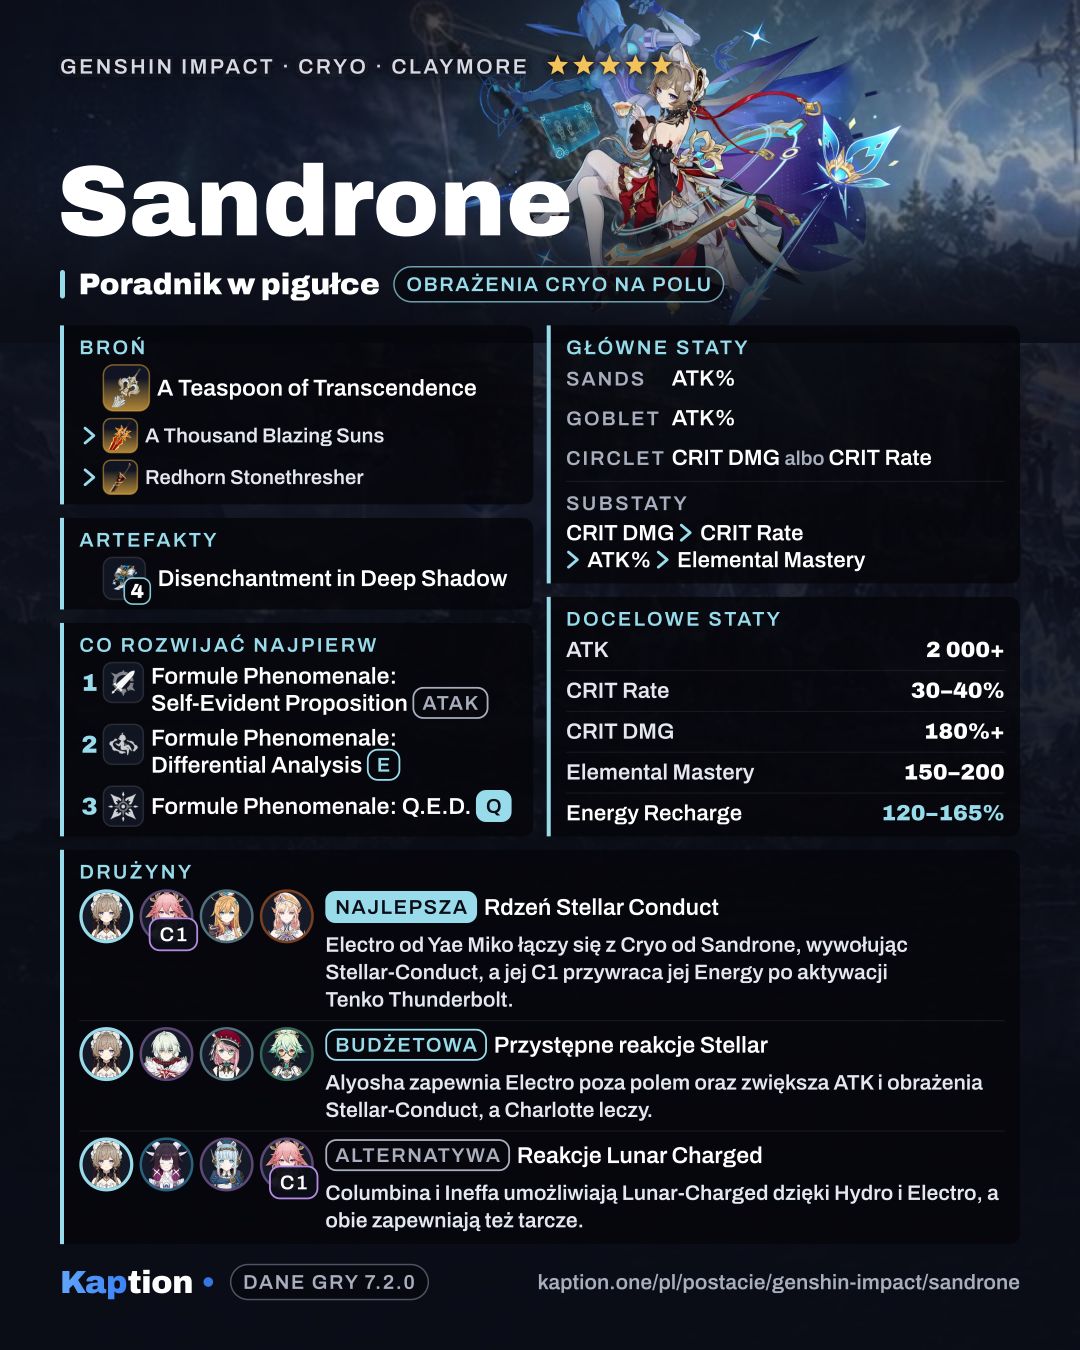
Gilded Dreams is the first set to consider. Its two-piece bonus gives 80 Elemental Mastery. After an Elemental Reaction, the four-piece bonus gives ATK for other Cryo party members and Elemental Mastery for party members of different elements. Both stats fit Sandrone's reaction-focused kit.
Disenchantment in Deep Shadow is a strong option for Stellar-Conduct teams. Four pieces increase Stellar-Conduct reaction damage by 40% and give attacks 16% CRIT Rate against opponents affected by Superconduct or Stellar-Conduct. A Day Carved From Rising Winds is another option: hits grant 25% ATK, with 20% CRIT Rate added if the wearer has completed Witch's Homework.
Use ATK Percentage on the sands and goblet, and CRIT DMG or CRIT Rate on the circlet. For substats, look for CRIT DMG, CRIT Rate, ATK Percentage and Elemental Mastery in that order. Every 100 ATK gives Sandrone 8 Elemental Mastery, up to 160, and raises the relevant reactions' Base DMG by 0.7%, up to 14%.
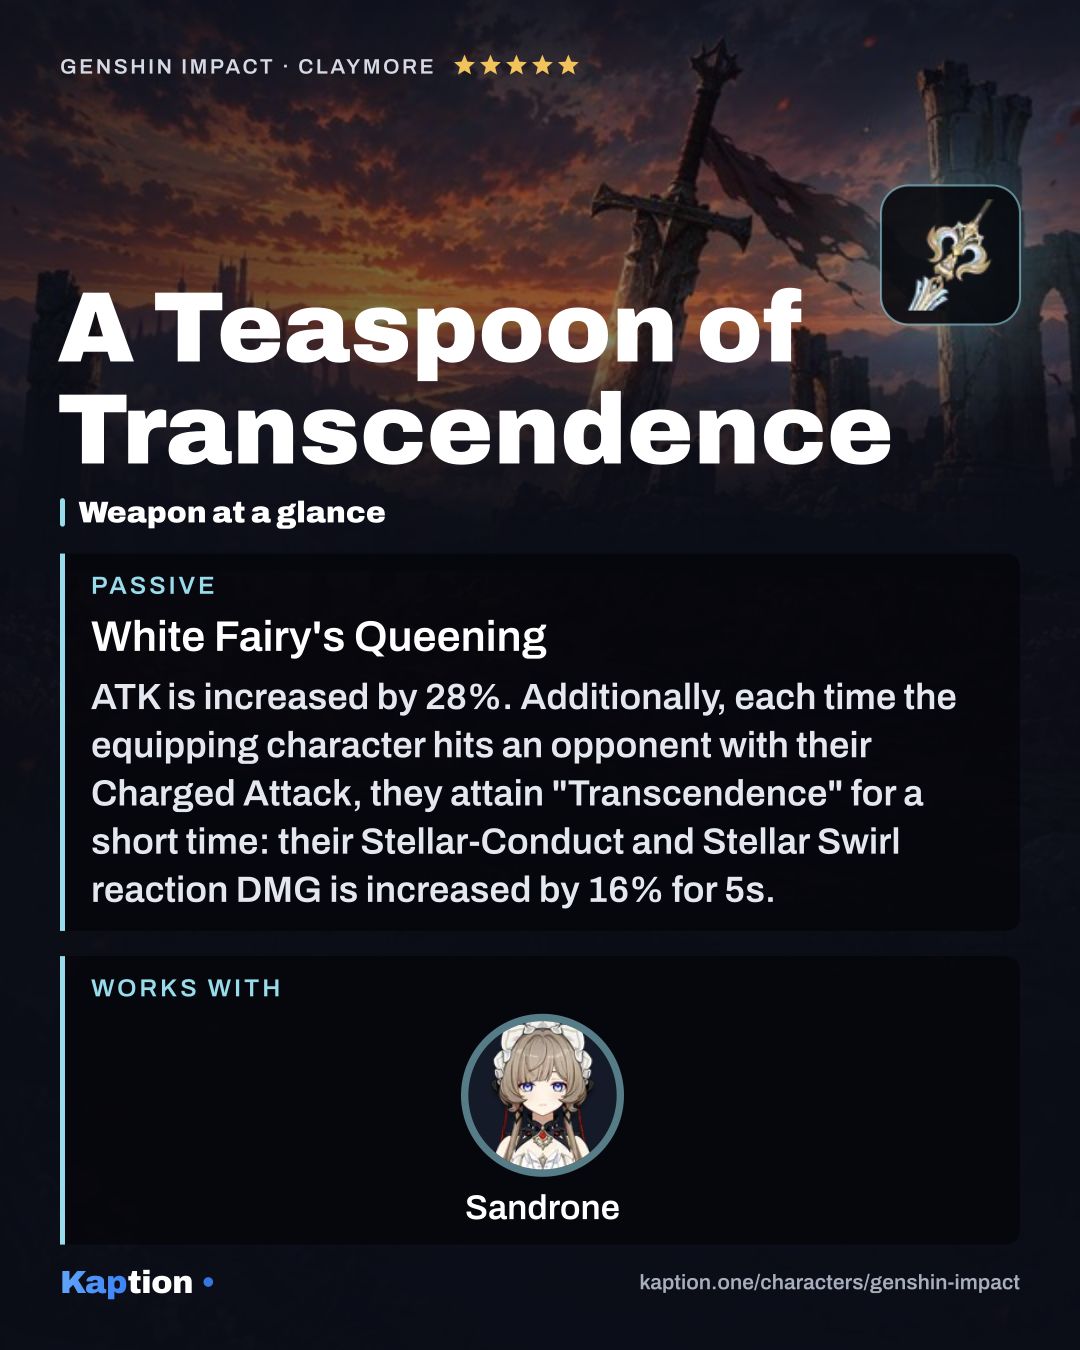
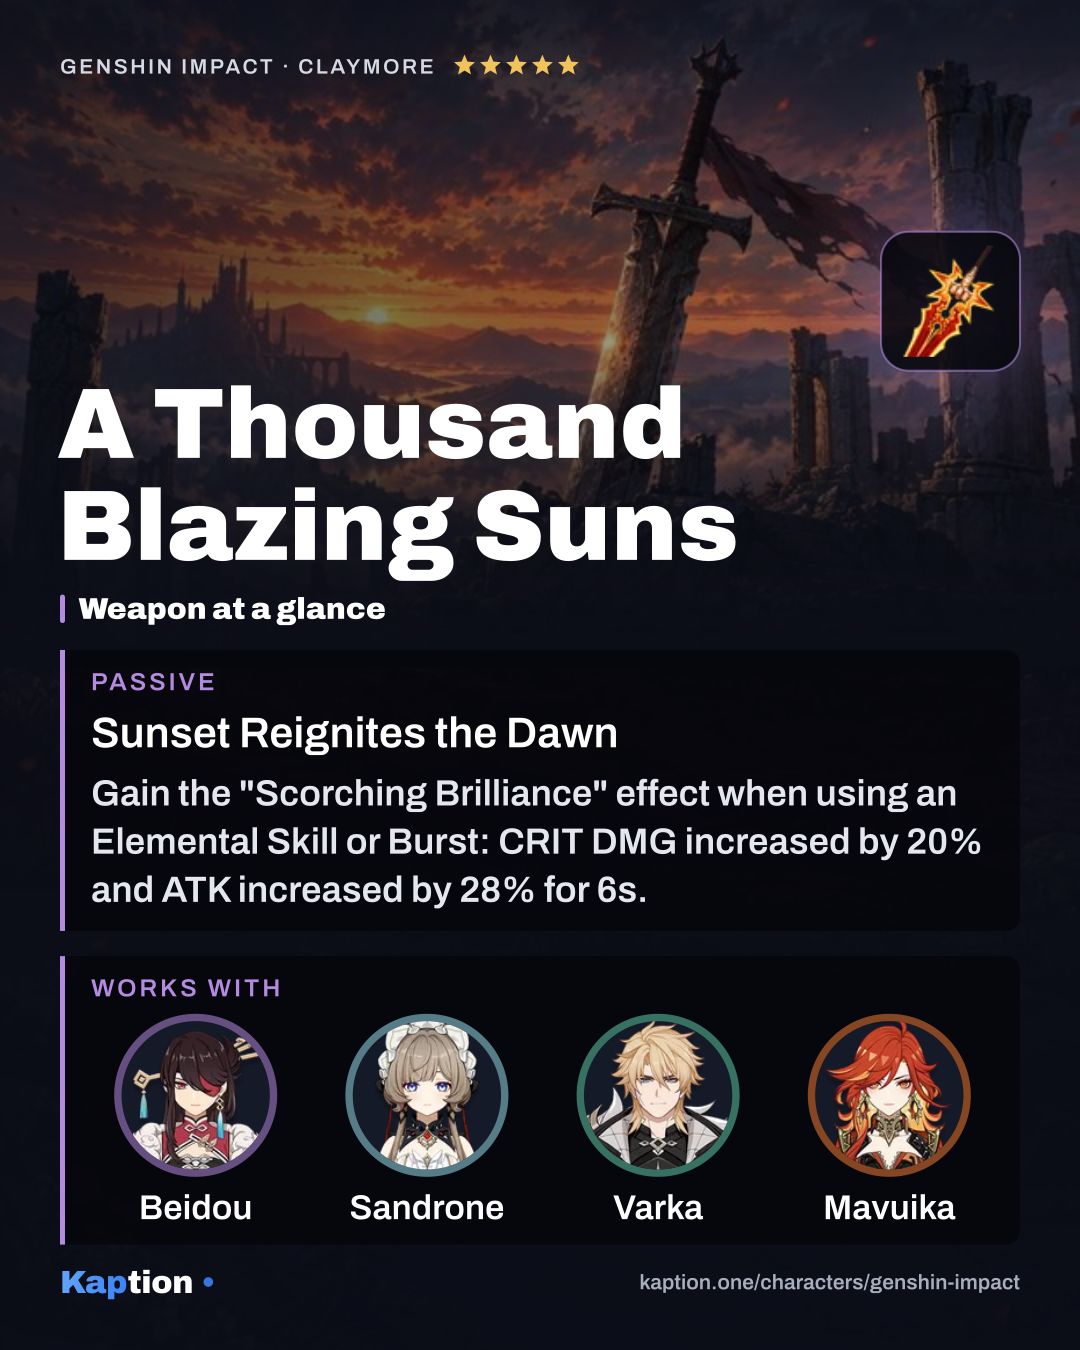
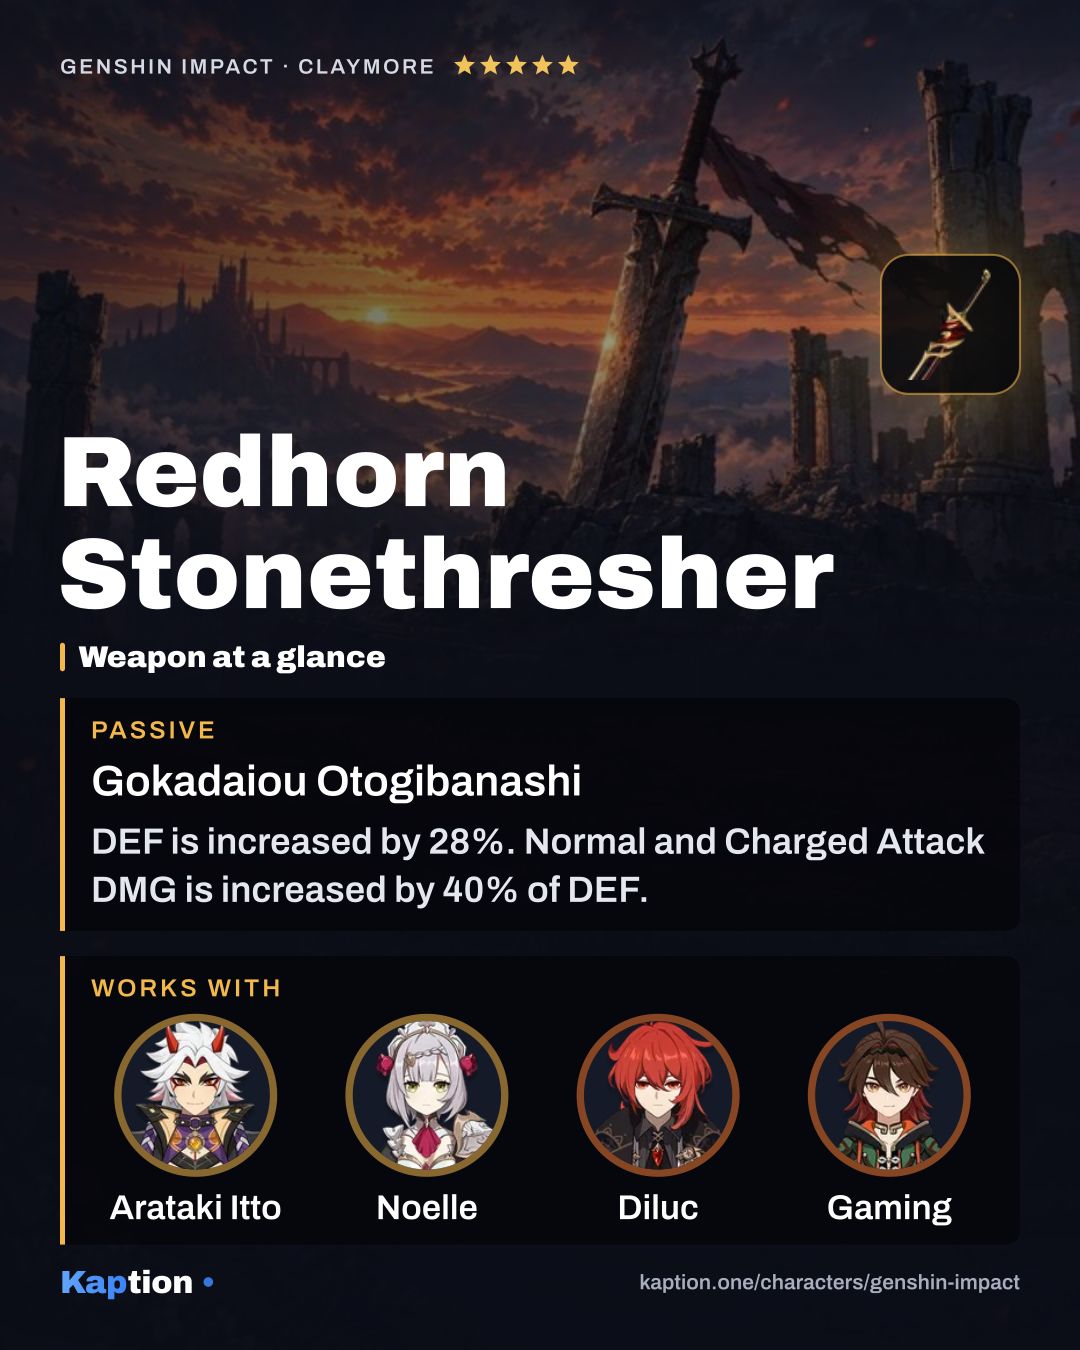
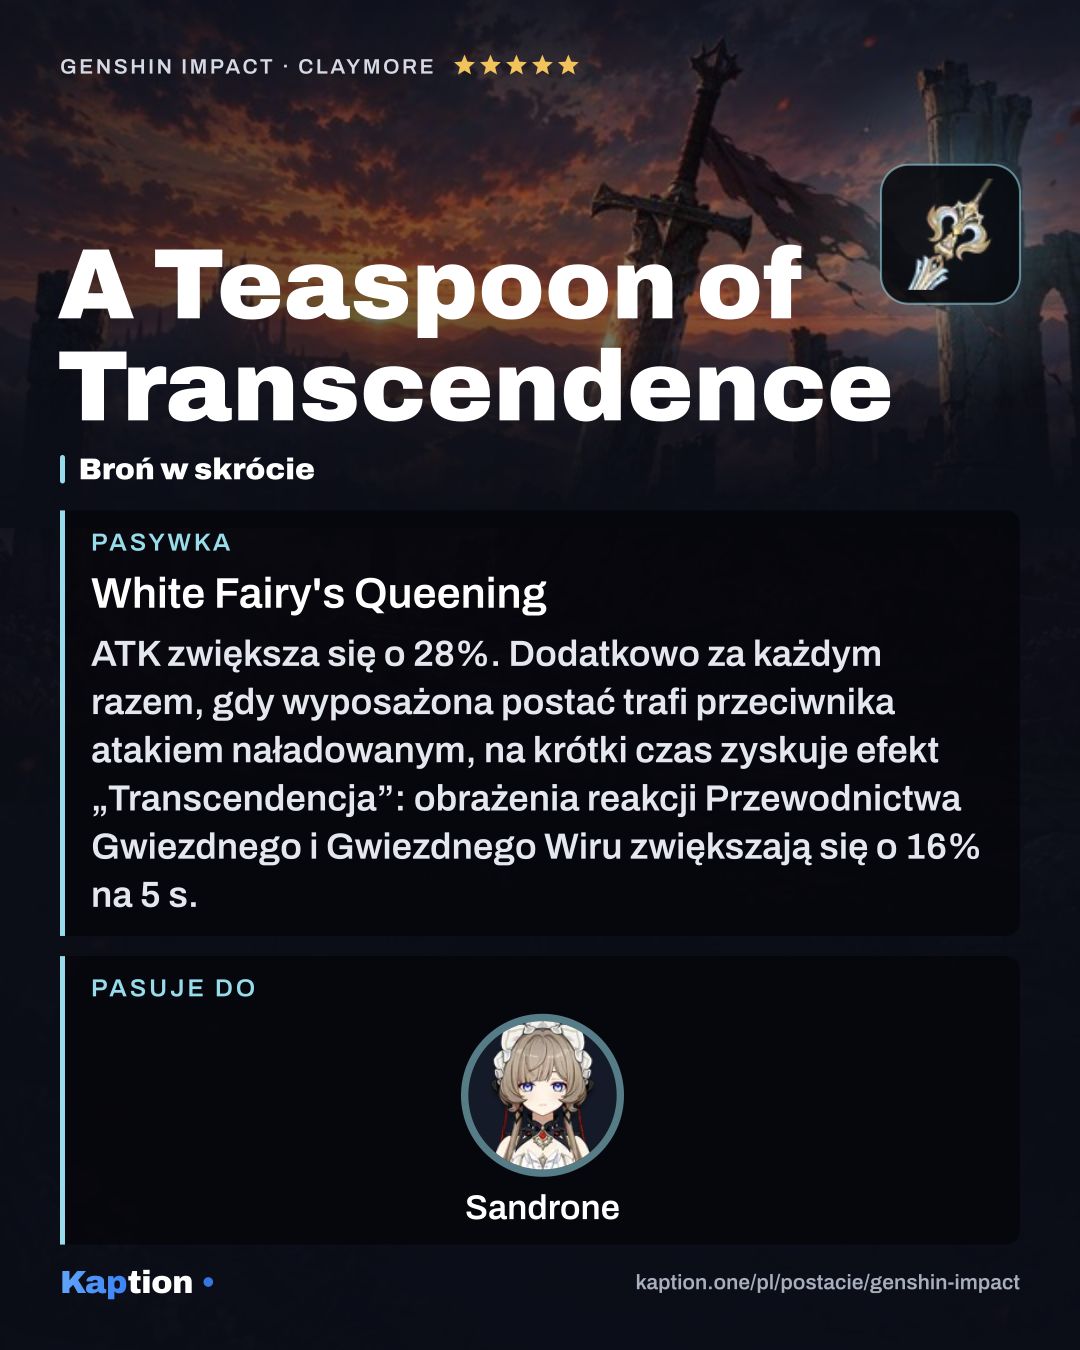
A Teaspoon of Transcendence is the first weapon choice: it gives 28% ATK, and Charged Attack hits grant up to three stacks of 16% Stellar-Conduct and Stellar Swirl damage. A Thousand Blazing Suns gives CRIT DMG and ATK after a Skill or Burst, with its effect extended by qualifying attacks. Redhorn Stonethresher is another option; it increases DEF and adds Charged Attack damage based on DEF.
Leveling priority
A sensible talent order is Formule Phenomenale: Self-Evident Proposition (NA) first, since its Charged Attack is central to Fagio's field time. Follow with Formule Phenomenale: Differential Analysis, then Formule Phenomenale: Q.E.D.. The Skill manages Decoding Power, though that gauge control comes from its mechanics rather than the proposed leveling order.
For maximum character ascension, collect 420,000 Mora, 168 Subdetection Unit, 1 Shivada Jade Sliver, 9 Shivada Jade Fragment, 9 Shivada Jade Chunk, 6 Shivada Jade Gemstone and 46 Plume of the Fallen Watcher. You also need 18 Broken Drive Shaft, 30 Reinforced Drive Shaft and 36 Precision Drive Shaft.
To raise all three talents to the maximum, gather 4,957,500 Mora, 3 Crown of Insight, 9 Teachings of Vagrancy, 63 Guide to Vagrancy, 114 Philosophies of Vagrancy, 18 Broken Drive Shaft, 66 Reinforced Drive Shaft, 93 Precision Drive Shaft and 18 Madman's Restraint. These talent material counts are separate from ascension.
Constellations worth it
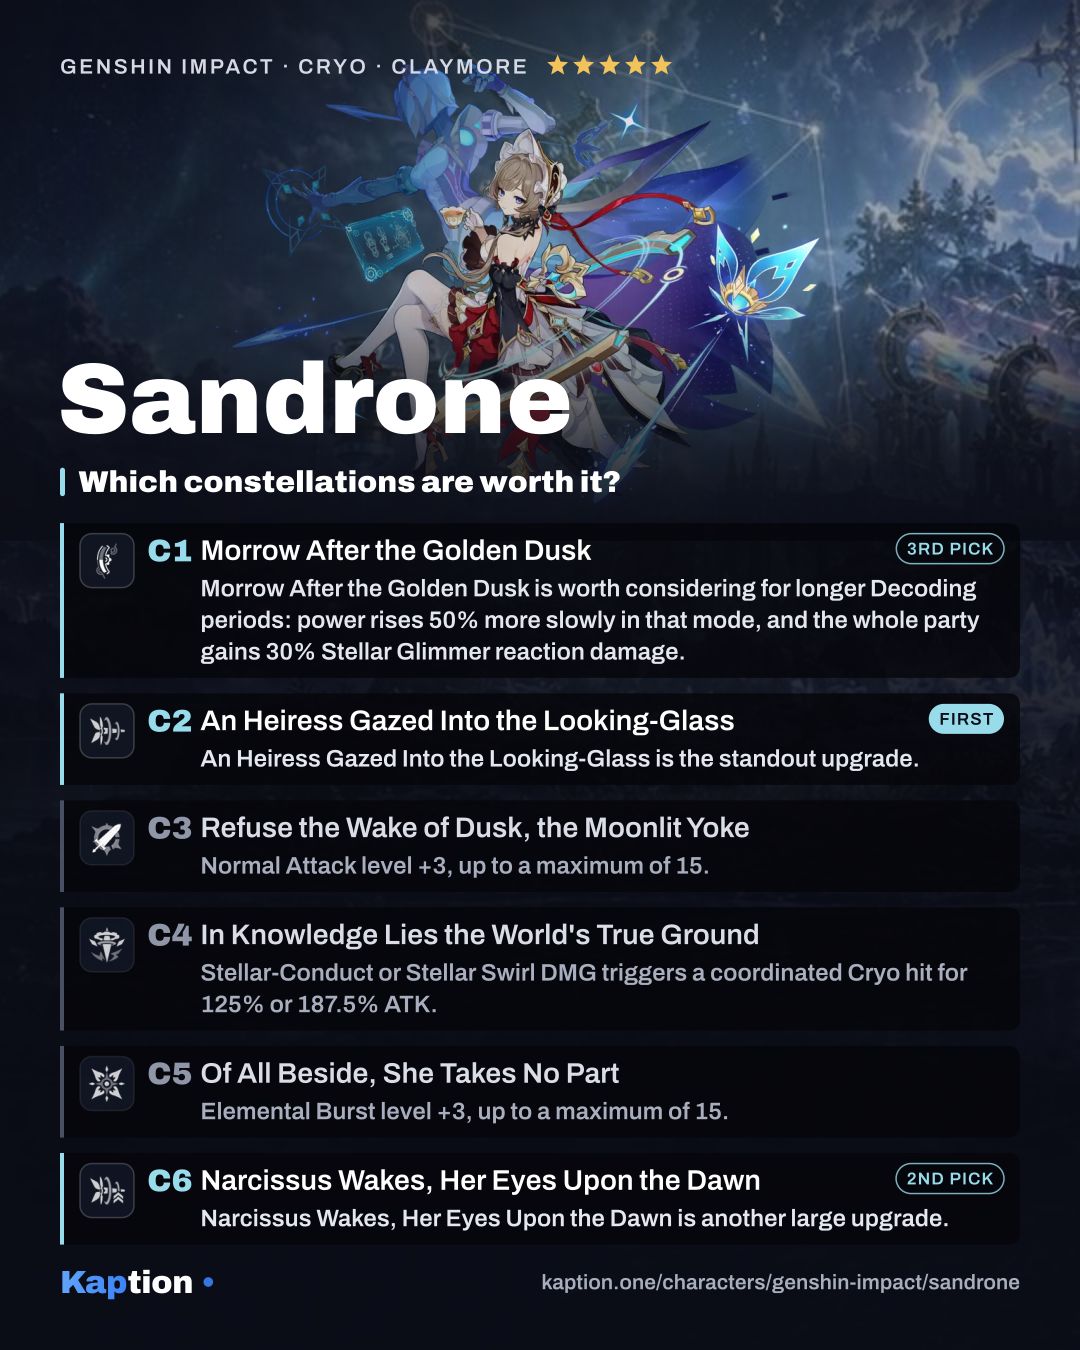
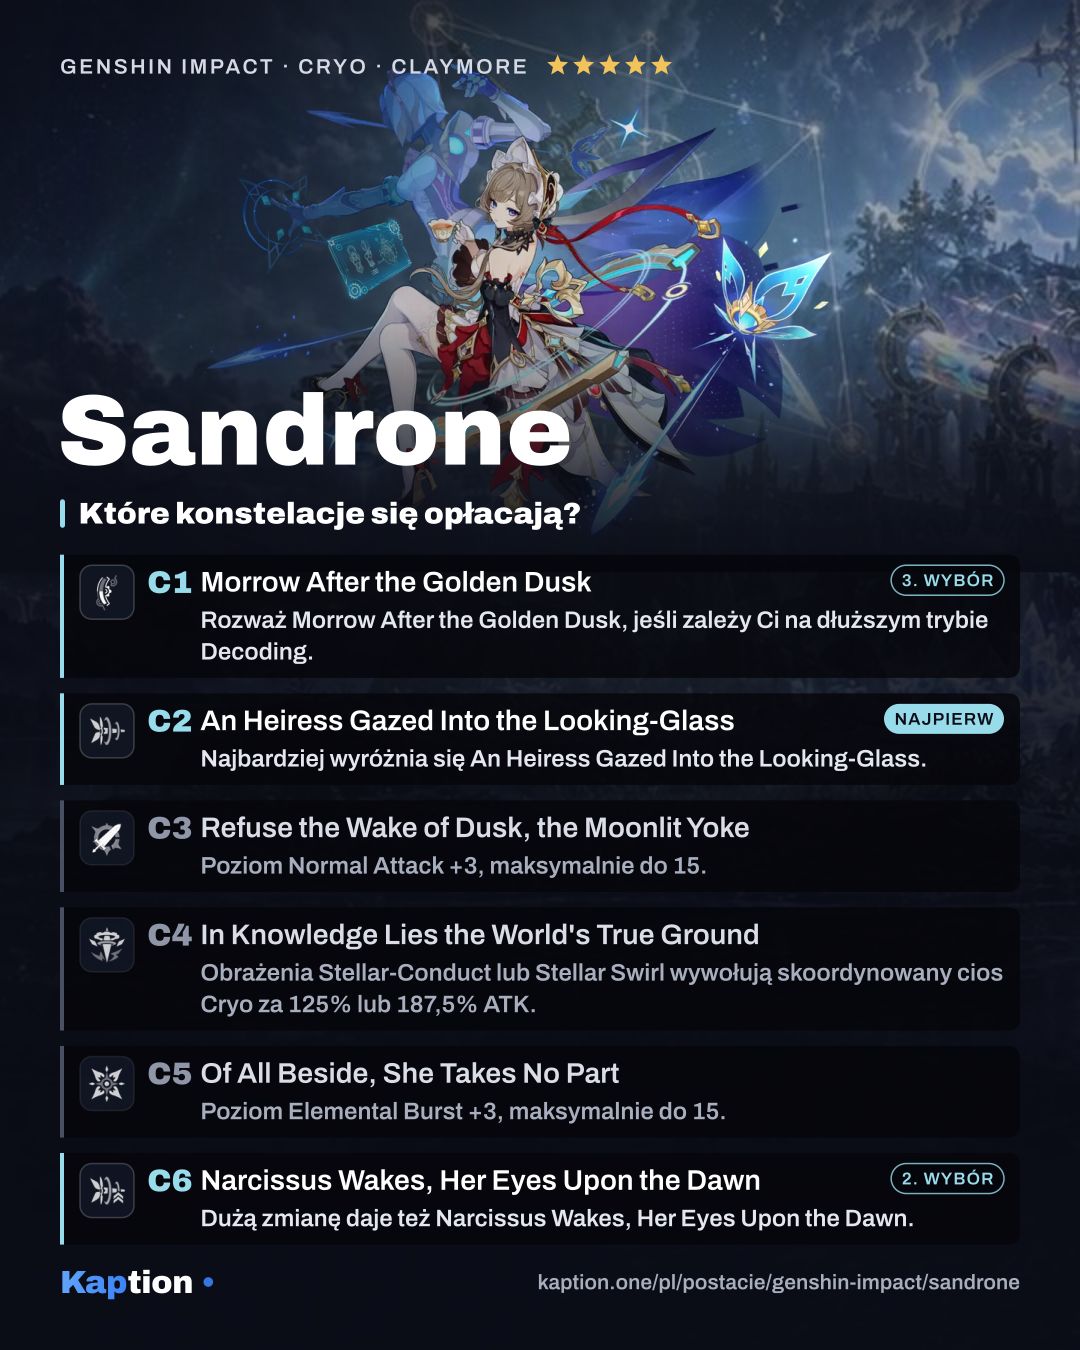
An Heiress Gazed Into the Looking-Glass is the standout upgrade. In Radiance: Stellar Glimmer, it gives condensed beams 40% CRIT DMG, then adds 20% each time a beam fires during the same Decoding period, up to three stacks.
Narcissus Wakes, Her Eyes Upon the Dawn is another large upgrade. The third condensed beam becomes a continuous cluster beam. In Radiance: Stellar Glimmer it adds four Cryo damage instances, each equal to 80% of ATK for Stellar-Conduct or 120% for Stellar Swirl. It also elevates Sandrone's Stellar Glimmer reaction damage by 20%.
Morrow After the Golden Dusk is worth considering for longer Decoding periods: power rises 50% more slowly in that mode, and the whole party gains 30% Stellar Glimmer reaction damage. The C3 and C5 talent-level increases are less distinctive than these effects. You can stop before them if you do not want a later constellation, but you cannot bypass them on the way to C6.
Teams
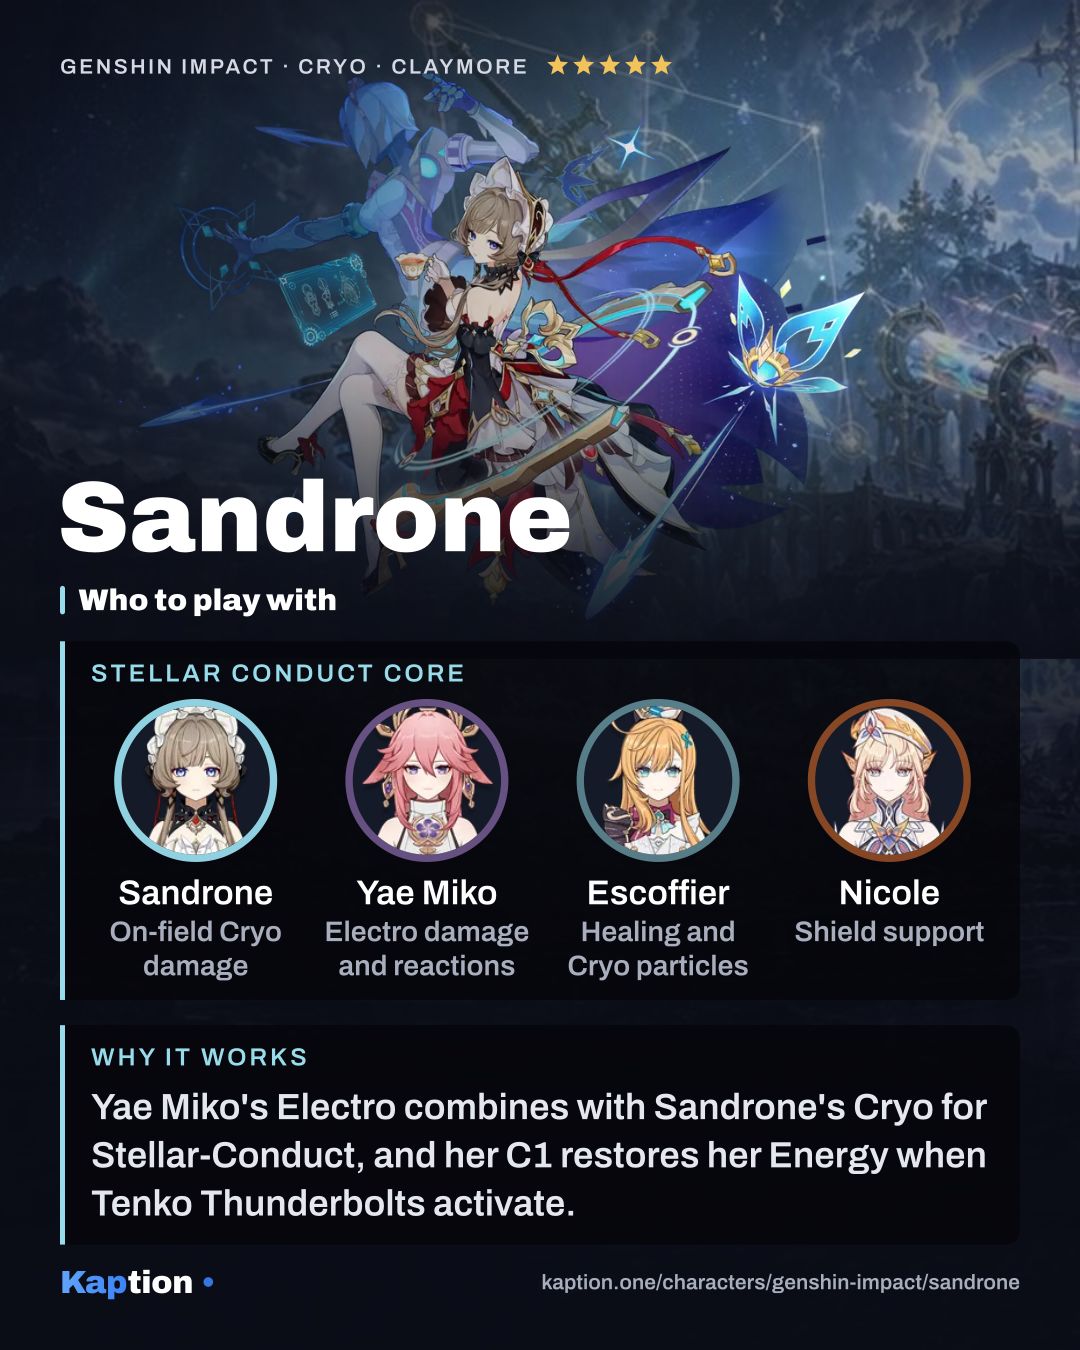
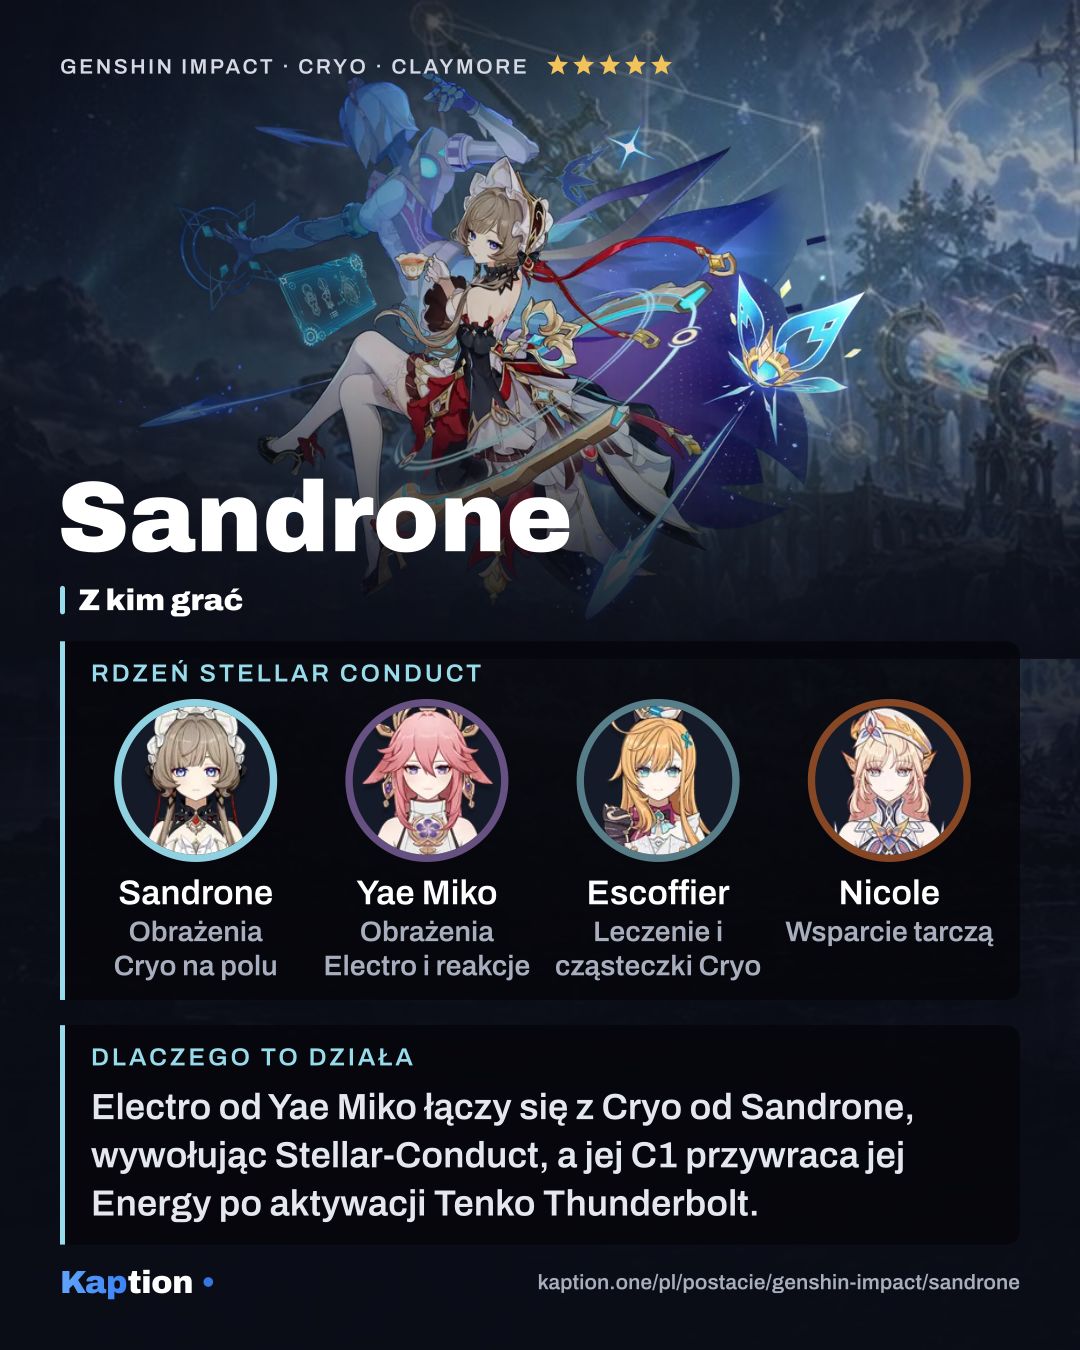
Sandrone gives the team more than her own Cryo damage: while she is present, party members' Superconduct and Cryo Swirl become the corresponding Stellar reactions, whose Base DMG rises with her ATK. Her C1 can increase the party's Stellar Glimmer reaction damage as well.
Common mistakes
Do not wait until Fagio reaches 100 power every time. Power Overdrive fires at longer intervals and prevents a return to Decoding until power drops below 50. Watch the gauge and consider using the Skill above 50 while Radiance is active to strengthen its second Prism Shot.
Do not fire the Burst before building Refined Tactics if you want its ray to benefit from stacks. Likewise, avoid treating Disenchantment in Deep Shadow as an unconditional CRIT Rate bonus: the target must be affected by Superconduct or Stellar-Conduct.
Do not ignore CRIT stats just because ATK also supplies Elemental Mastery. The conversion has a cap, and the recommended build still puts CRIT DMG and CRIT Rate ahead of ATK Percentage in substat priority.