
























Guide
How the kit works
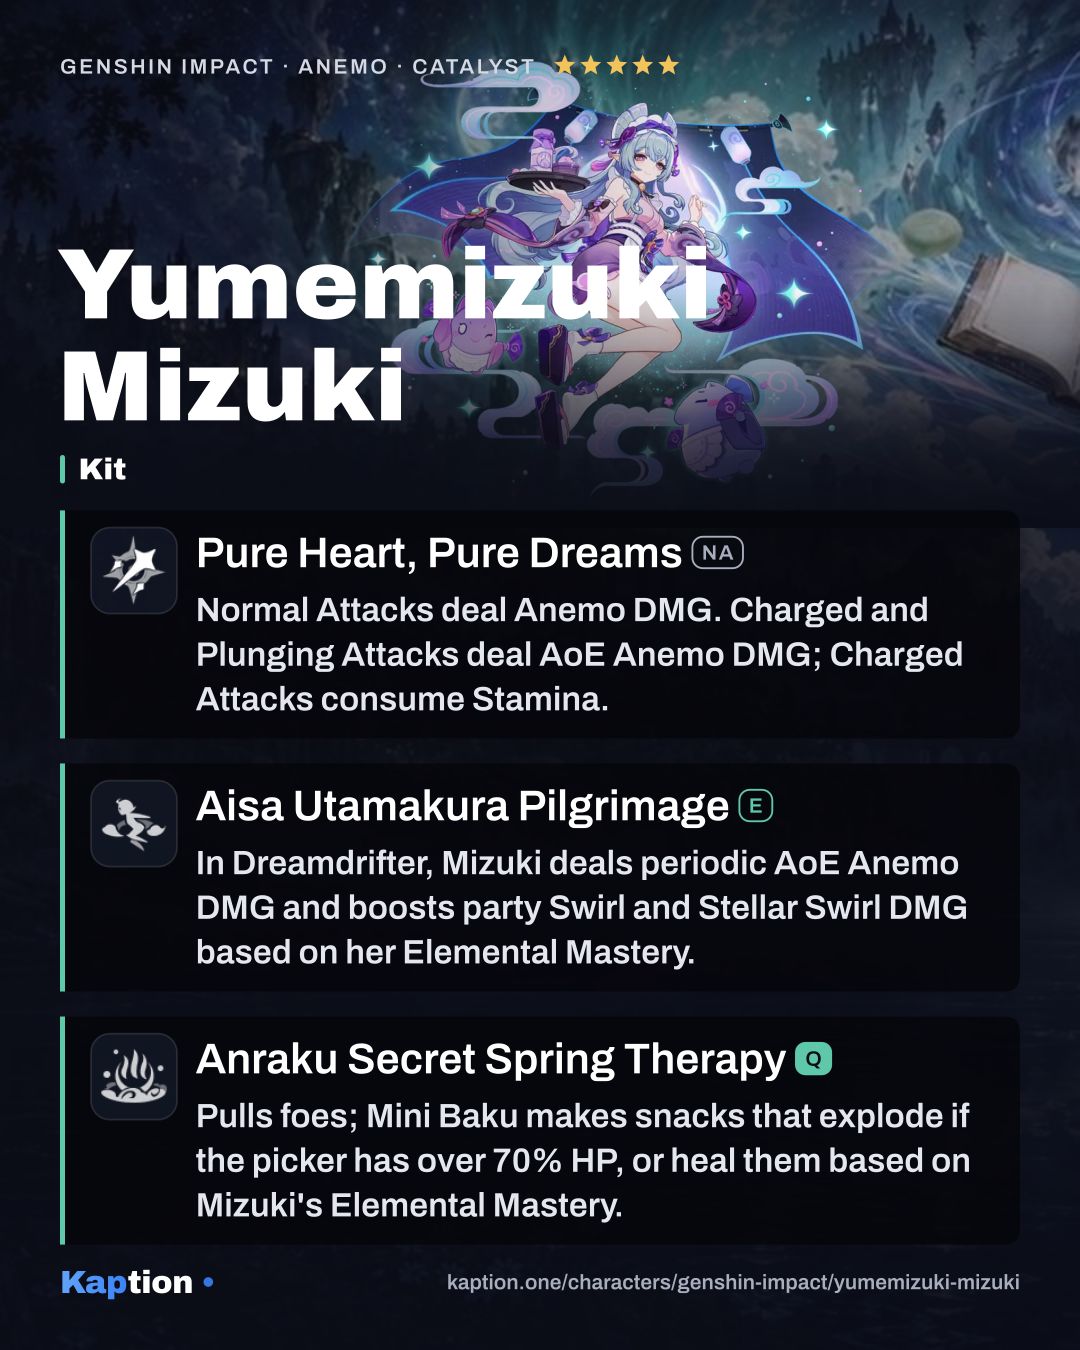
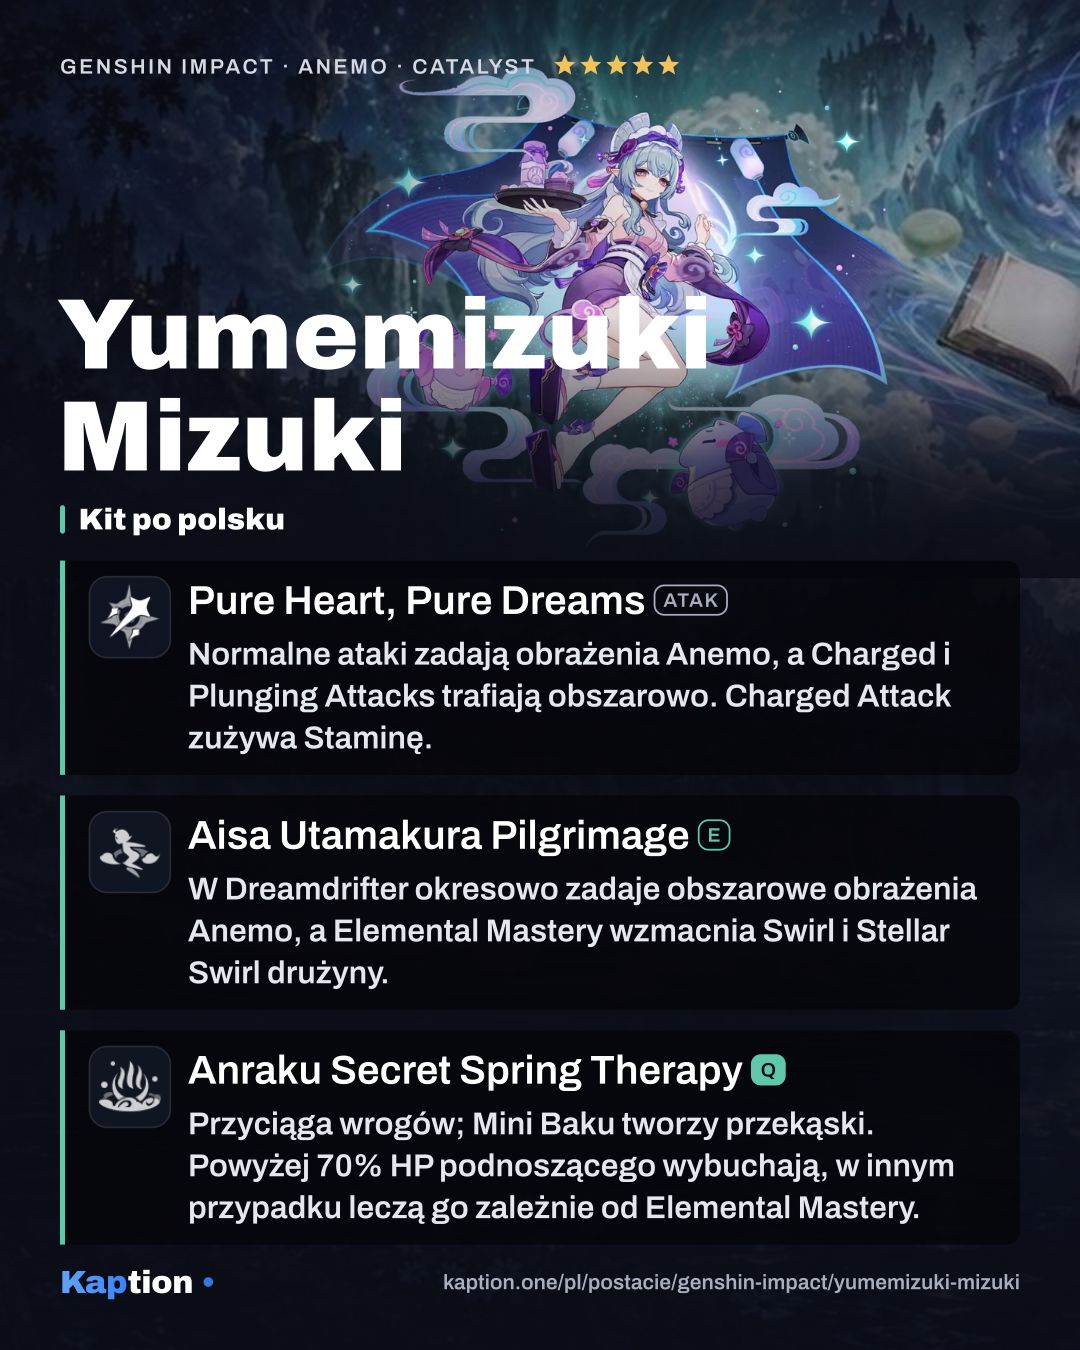
Start by using teammates' abilities to put elements on opponents. When you need the Burst, use Anraku Secret Spring Therapy to pull nearby opponents and objects together, deal AoE Anemo damage and summon Mini Baku. It follows the active character and periodically creates Yumemi Style Special Snacks.
Then use Aisa Utamakura Pilgrimage and steer through the enemies. Mizuki enters Dreamdrifter, drifting forward and dealing periodic AoE Anemo damage. During this state she increases nearby party members' Swirl and Stellar Swirl damage based on her Elemental Mastery. Using the skill again or switching her out ends the state.
Triggering Swirl or Stellar Swirl during Dreamdrifter extends it by 2.5 seconds, up to twice per state. When another nearby party member hits an opponent with Pyro, Hydro, Cryo or Electro, Mizuki gains 100 Elemental Mastery for 4 seconds. Teammates' attacks therefore help her while she is drifting.
At more than 70% HP, a character picking up a snack causes it to deal AoE Anemo damage. At 70% HP or less, it heals that character based on Mizuki's Elemental Mastery. Her own snack healing is increased by 100%. Uncollected snacks eventually explode, and Dreamdrifter increases their pickup distance.
Her passive also strengthens the next periodic Dreamdrifter hit after she triggers Swirl or Stellar Swirl. In Radiance: Stellar Swirl, that hit deals an extra instance of Anemo damage counted as Stellar Swirl damage. While drifting, she also gives nearby party members Elemental Mastery equal to 10% of her own.
Build and why
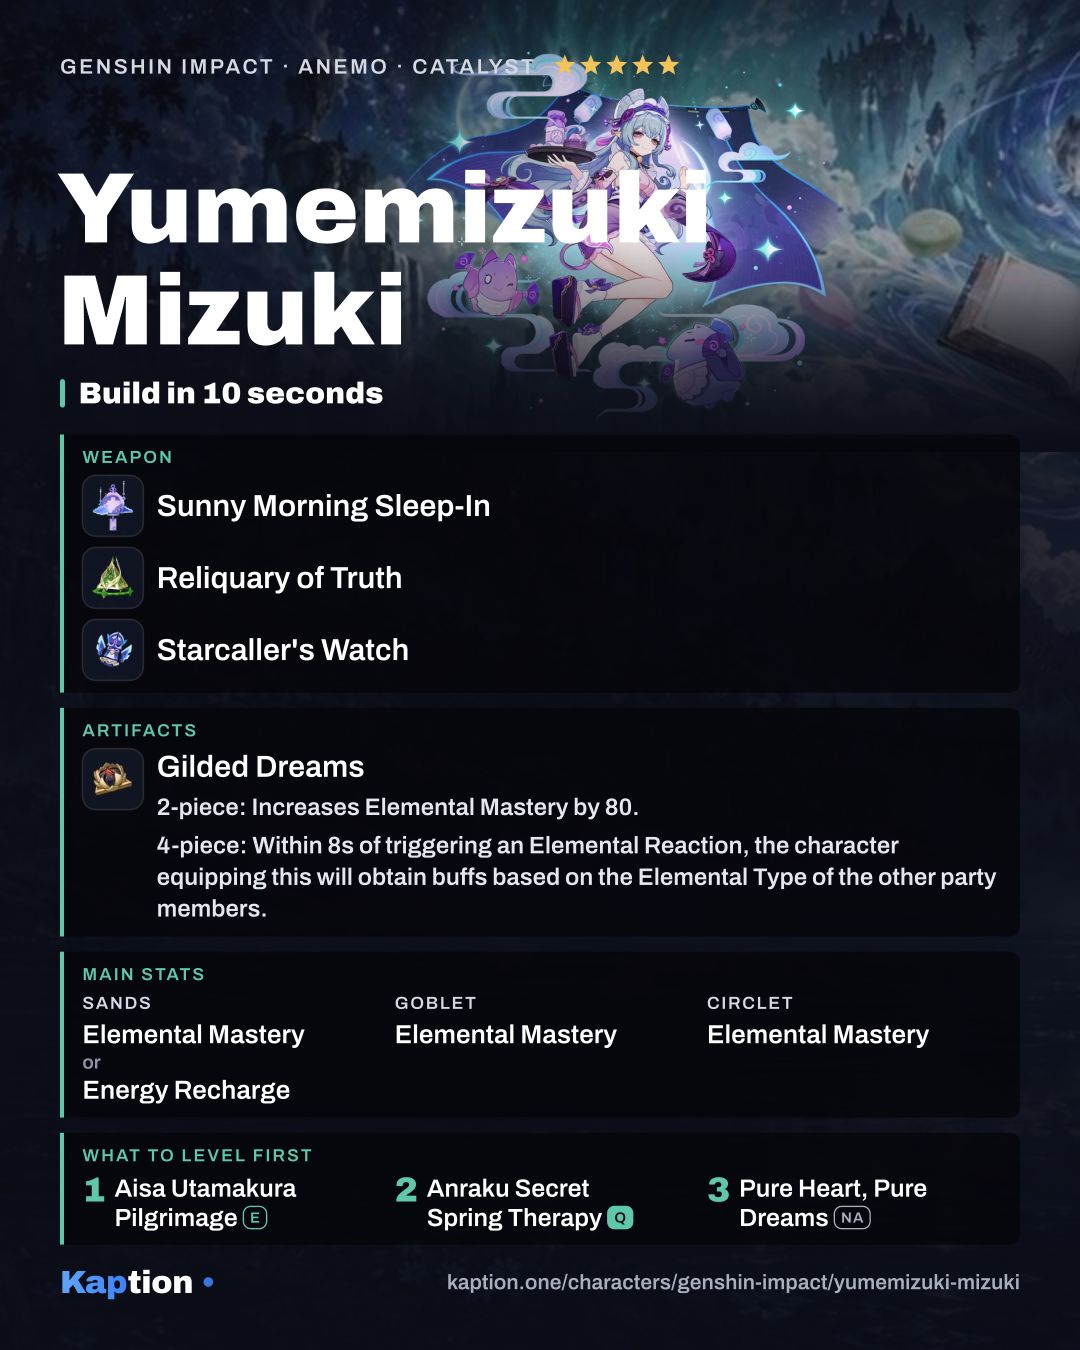
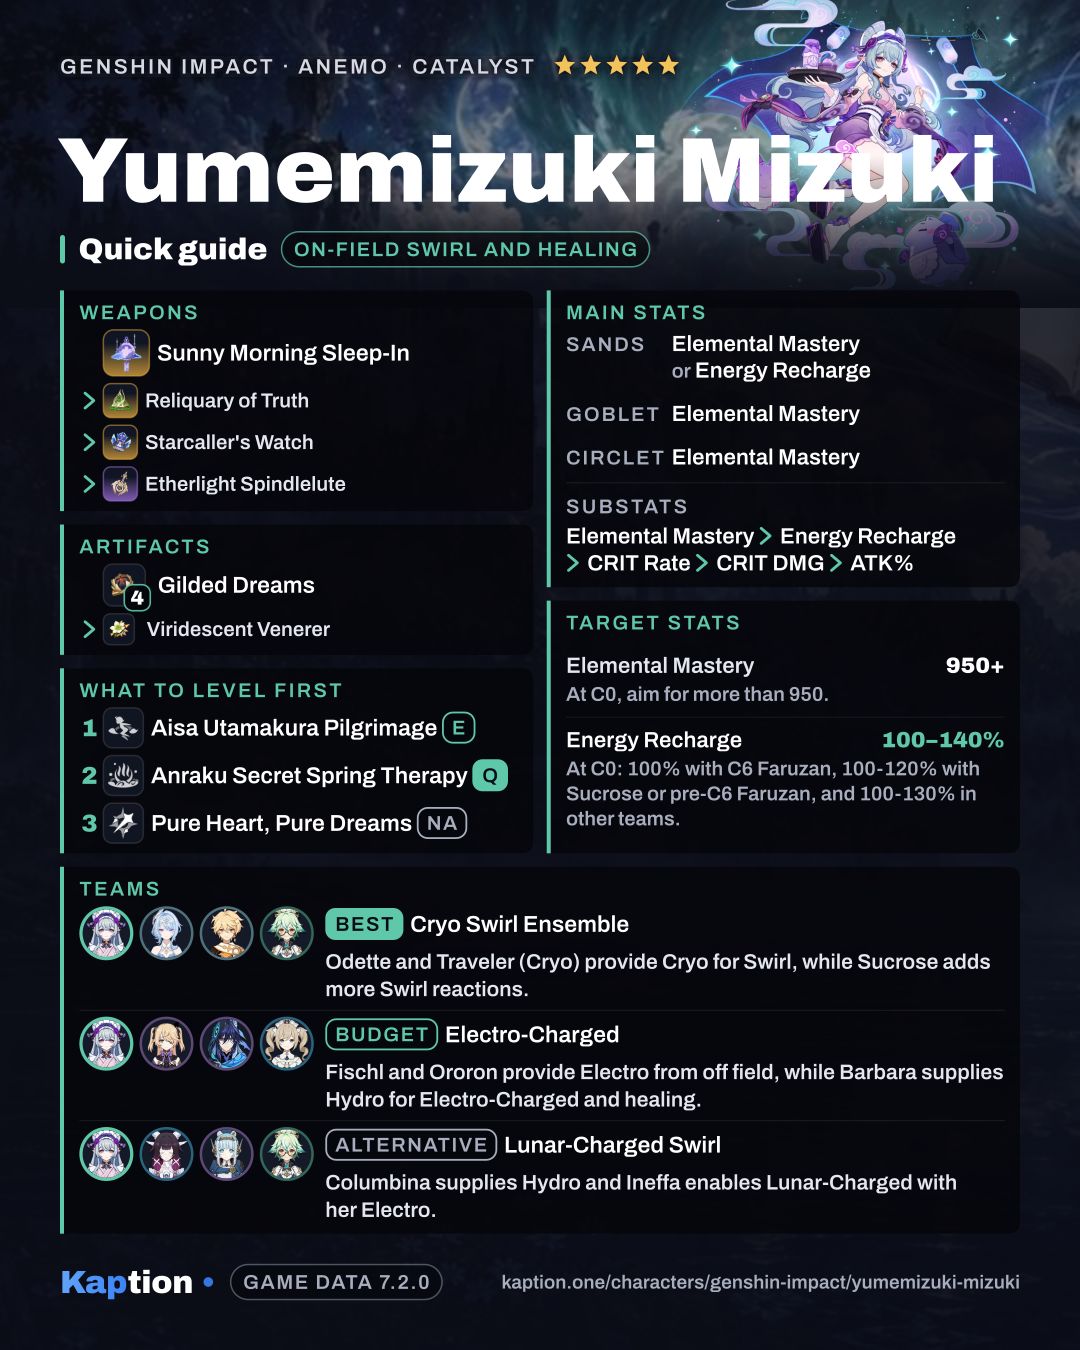
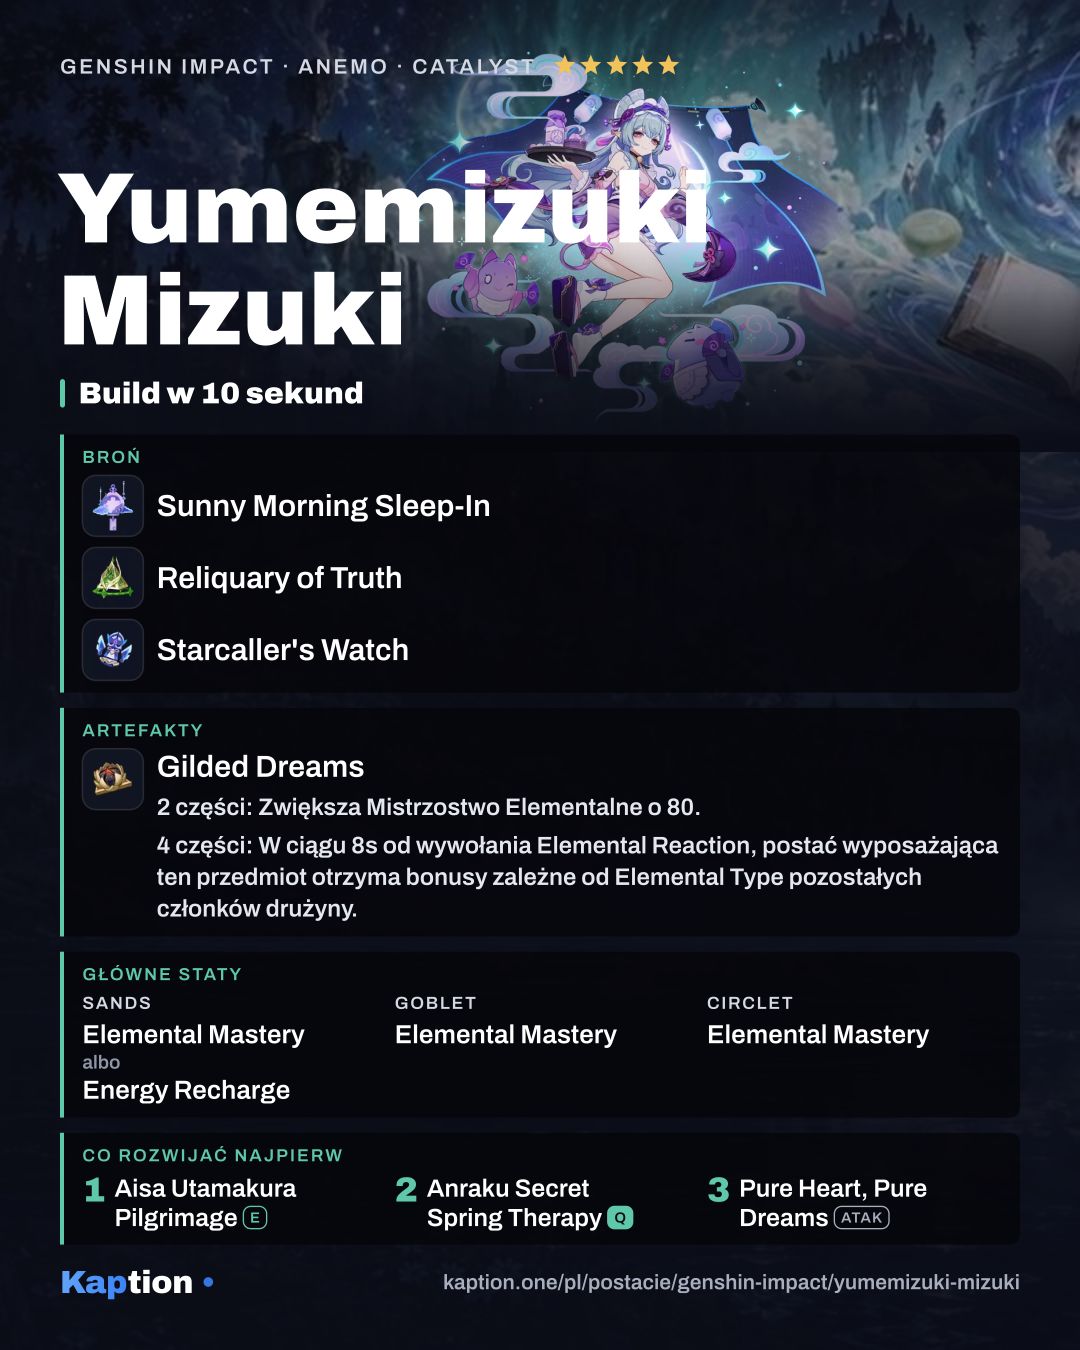
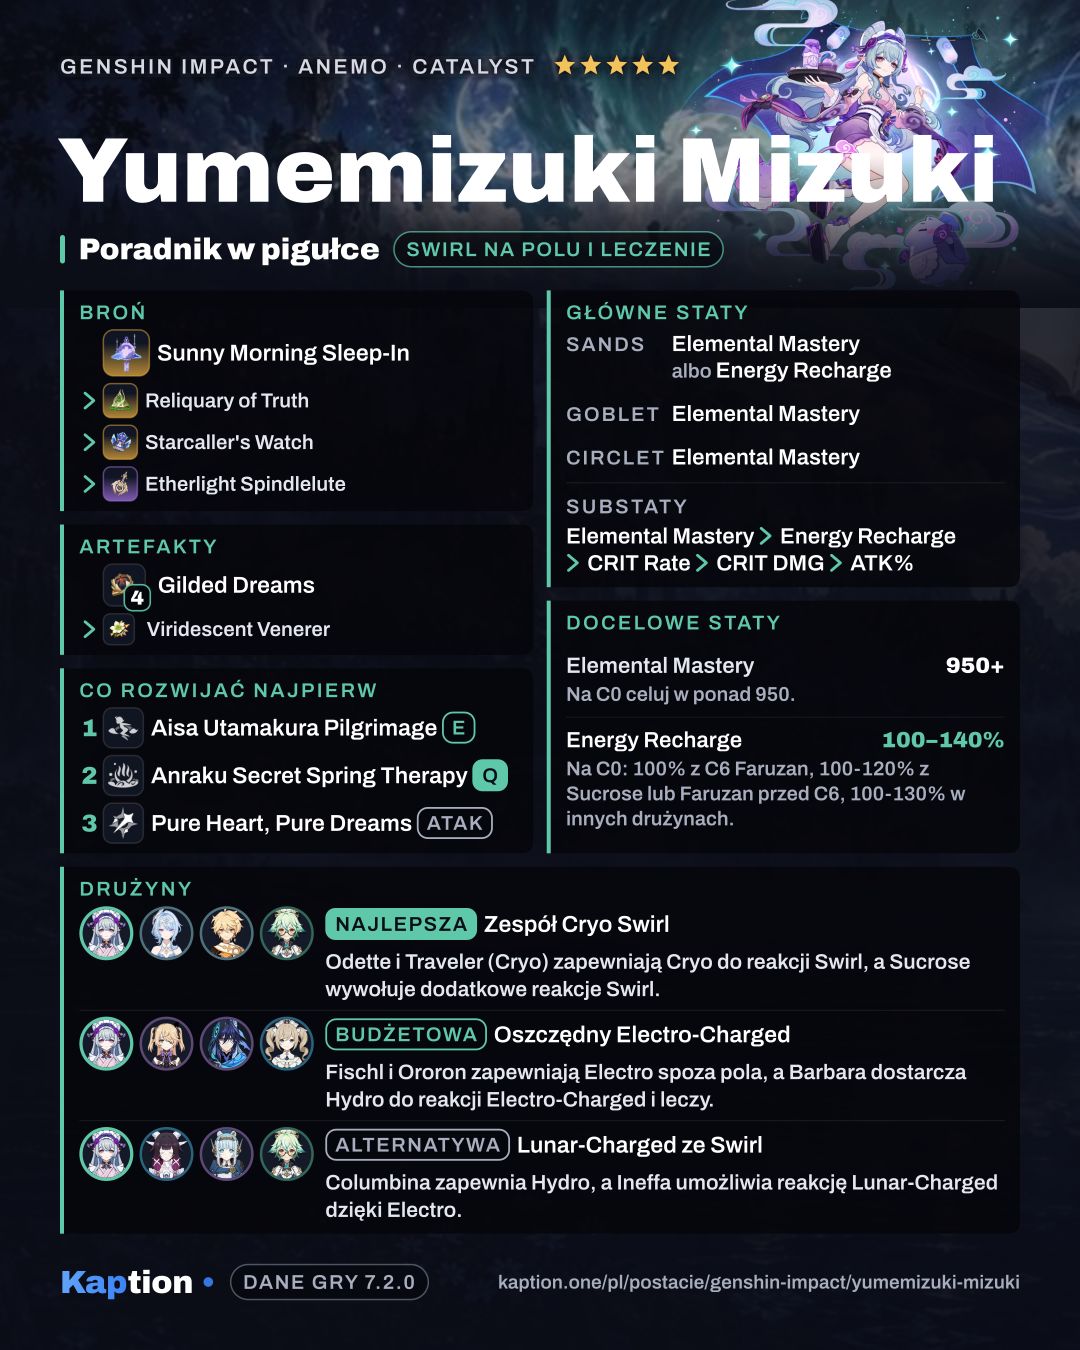
For artifacts, start with four pieces of Gilded Dreams. Its two-piece bonus gives 80 Elemental Mastery, and its four-piece effect can add more for party members of different elements after a reaction. Four pieces of Viridescent Venerer are another strong choice: they increase Swirl damage by 60% and reduce the RES of the element infused in Swirl by 40% for 10 seconds. Stellar Swirl also applies a 40% Cryo RES reduction.
Four pieces of Scarlet Proof are an option for a Stellar Swirl setup: triggering that reaction grants CRIT Rate and Stellar Swirl damage. As a temporary combination, two pieces each of Wanderer's Troupe and Instructor give 80 Elemental Mastery apiece.
Choose Elemental Mastery on the goblet and circlet. Use Elemental Mastery on the sands too, or Energy Recharge if you need more help using the Burst. For substats, look for Elemental Mastery first, then Energy Recharge; CRIT Rate, CRIT DMG and ATK Percentage are less important for this build.
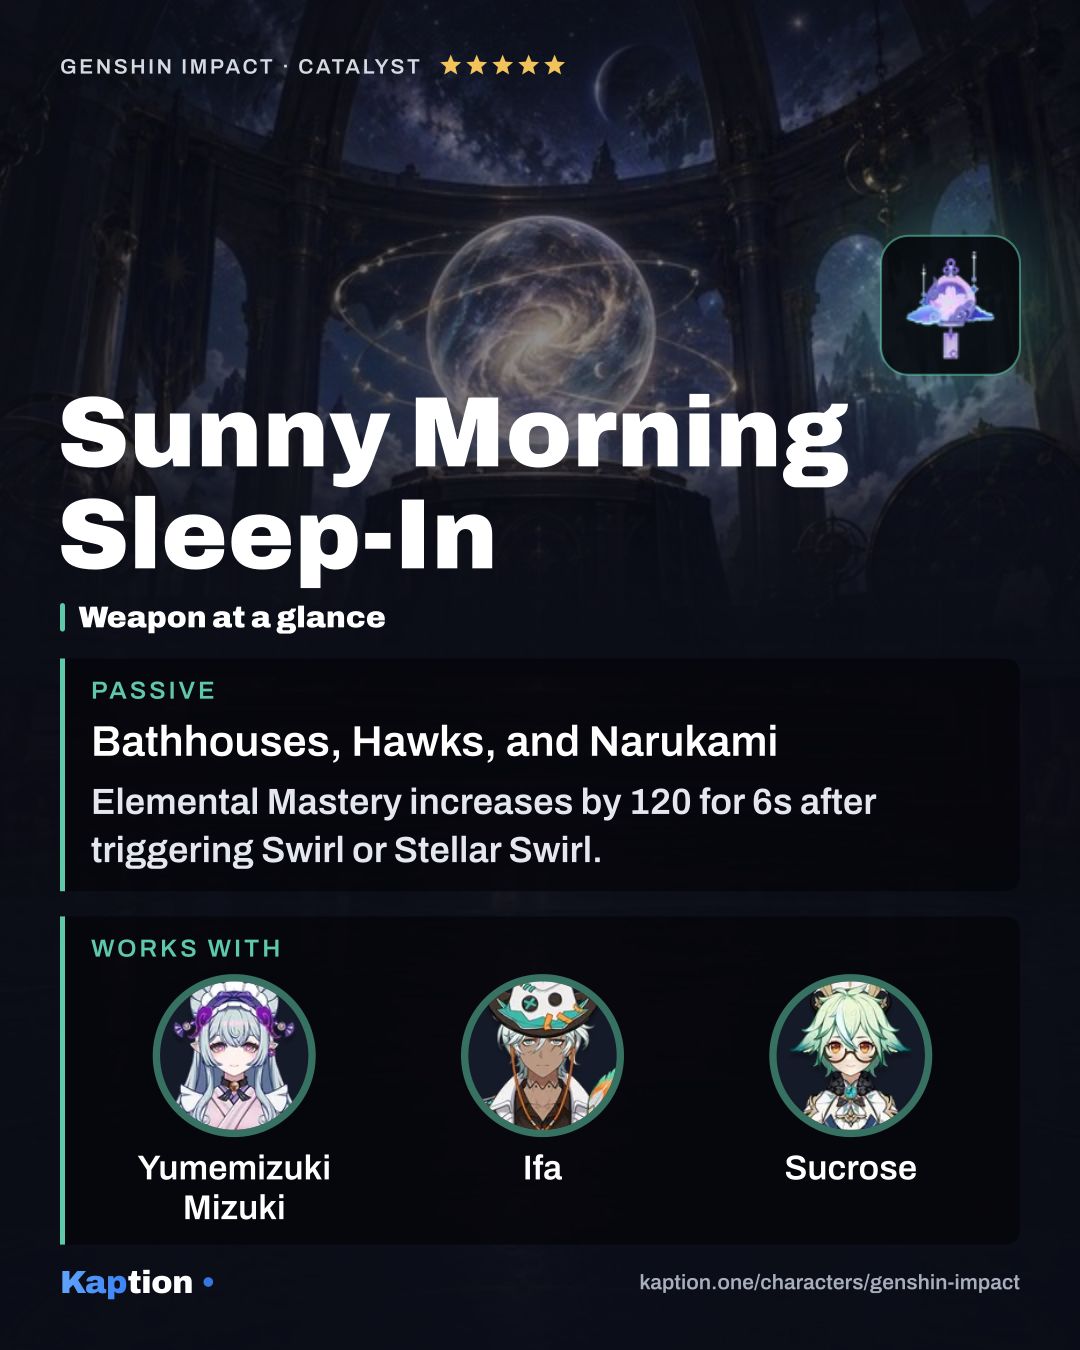
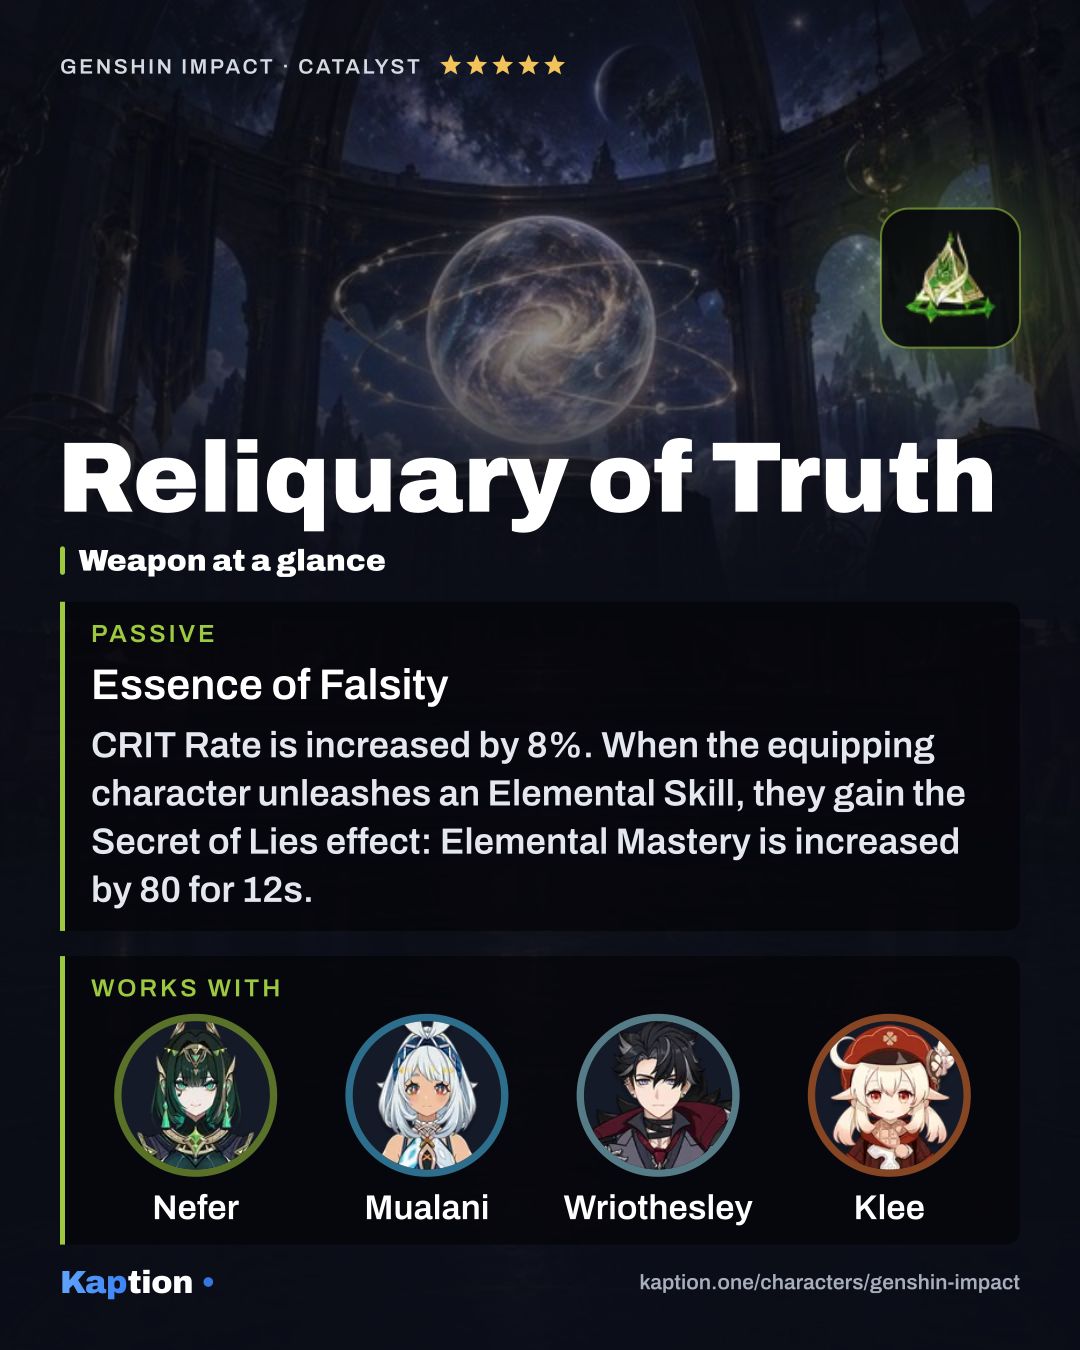
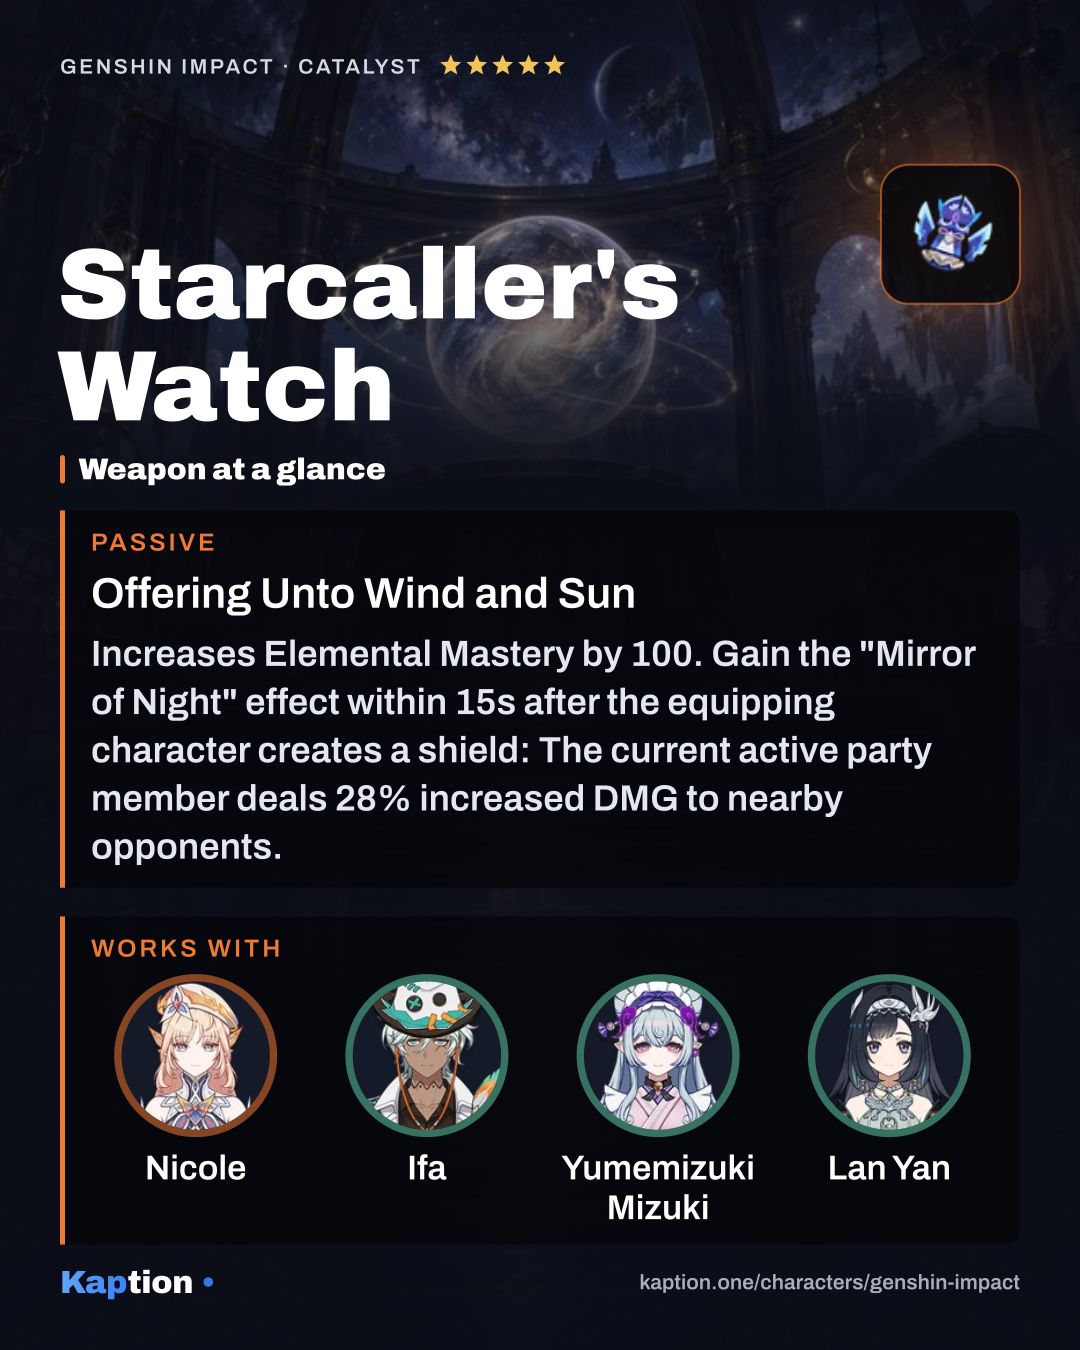
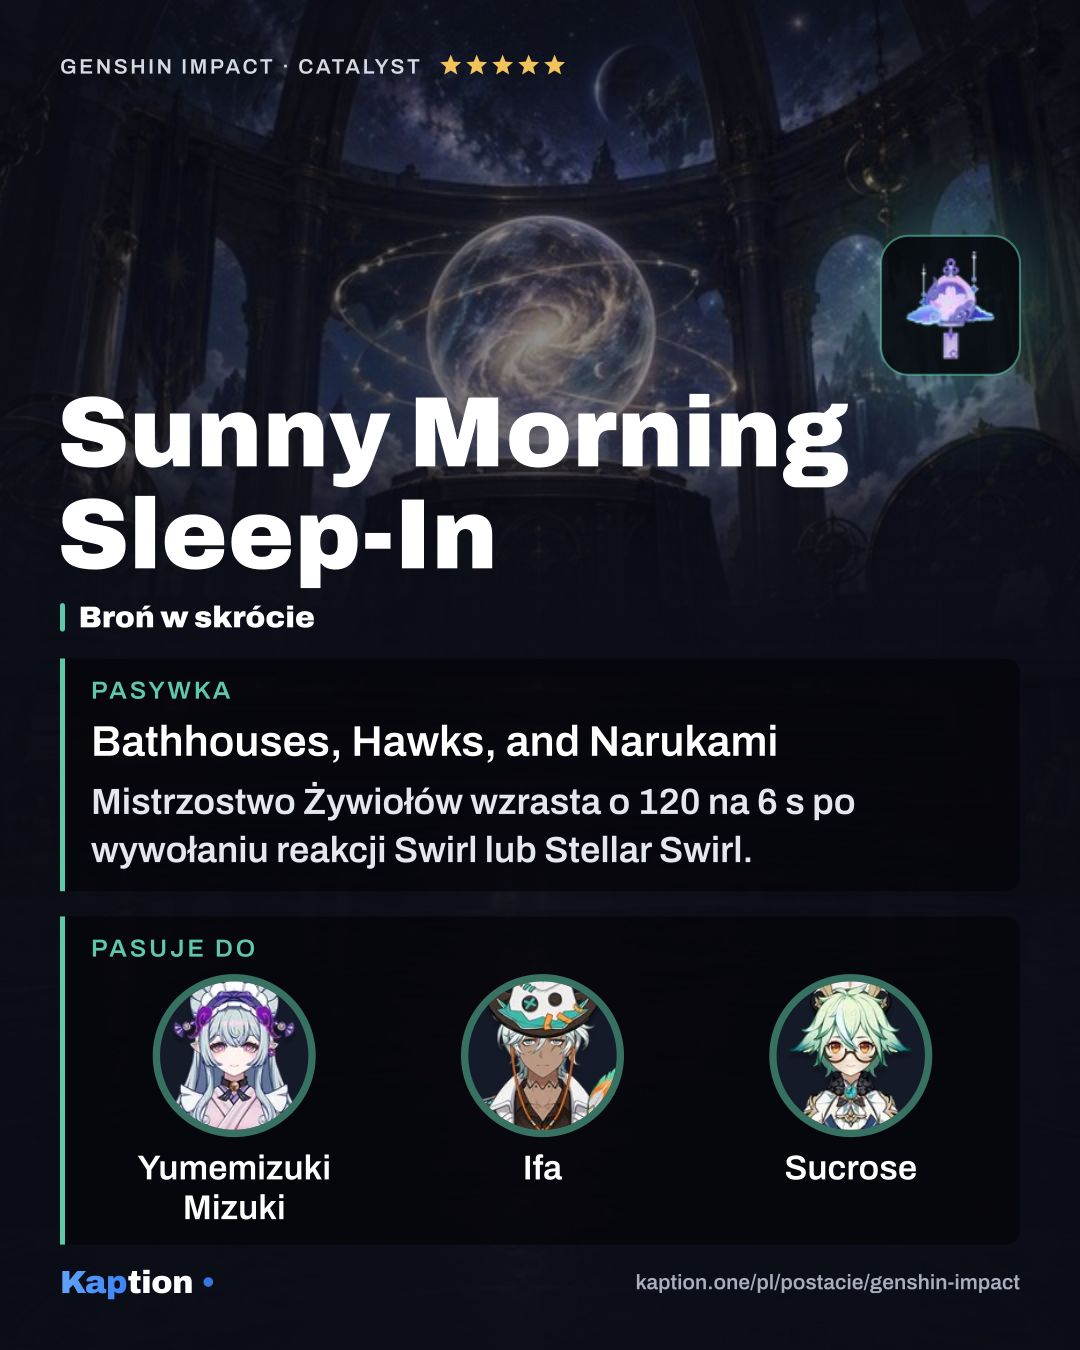
Sunny Morning Sleep-In is the first weapon choice. Swirl or Stellar Swirl, a skill hit and a Burst hit each grant Elemental Mastery. Reliquary of Truth gives Elemental Mastery after the skill and some CRIT Rate. Starcaller's Watch gives Elemental Mastery too, but its active-character damage bonus requires its wielder to create a shield, which Mizuki's kit does not do.
Leveling priority
A suggested talent order is Aisa Utamakura Pilgrimage first, Anraku Secret Spring Therapy second, then Pure Heart, Pure Dreams (NA). The skill supplies her periodic on-field damage and reaction bonus; the Burst provides healing and damage from snacks. Normal Attacks are less central to the floating playstyle.
For ascension, collect Mora, Sea Ganoderma, Vayuda Turquoise Sliver, Vayuda Turquoise Fragment, Vayuda Turquoise Chunk, Vayuda Turquoise Gemstone, Old Handguard, Kageuchi Handguard, Famed Handguard and Talisman of the Enigmatic Land.
Talent upgrades also use Mora and the three Handguard materials, along with Teachings of Transience, Guide to Transience, Philosophies of Transience, Fading Candle and Crown of Insight. You can save materials for the Normal Attack until the skill and Burst are at levels you are happy with.
Constellations worth it
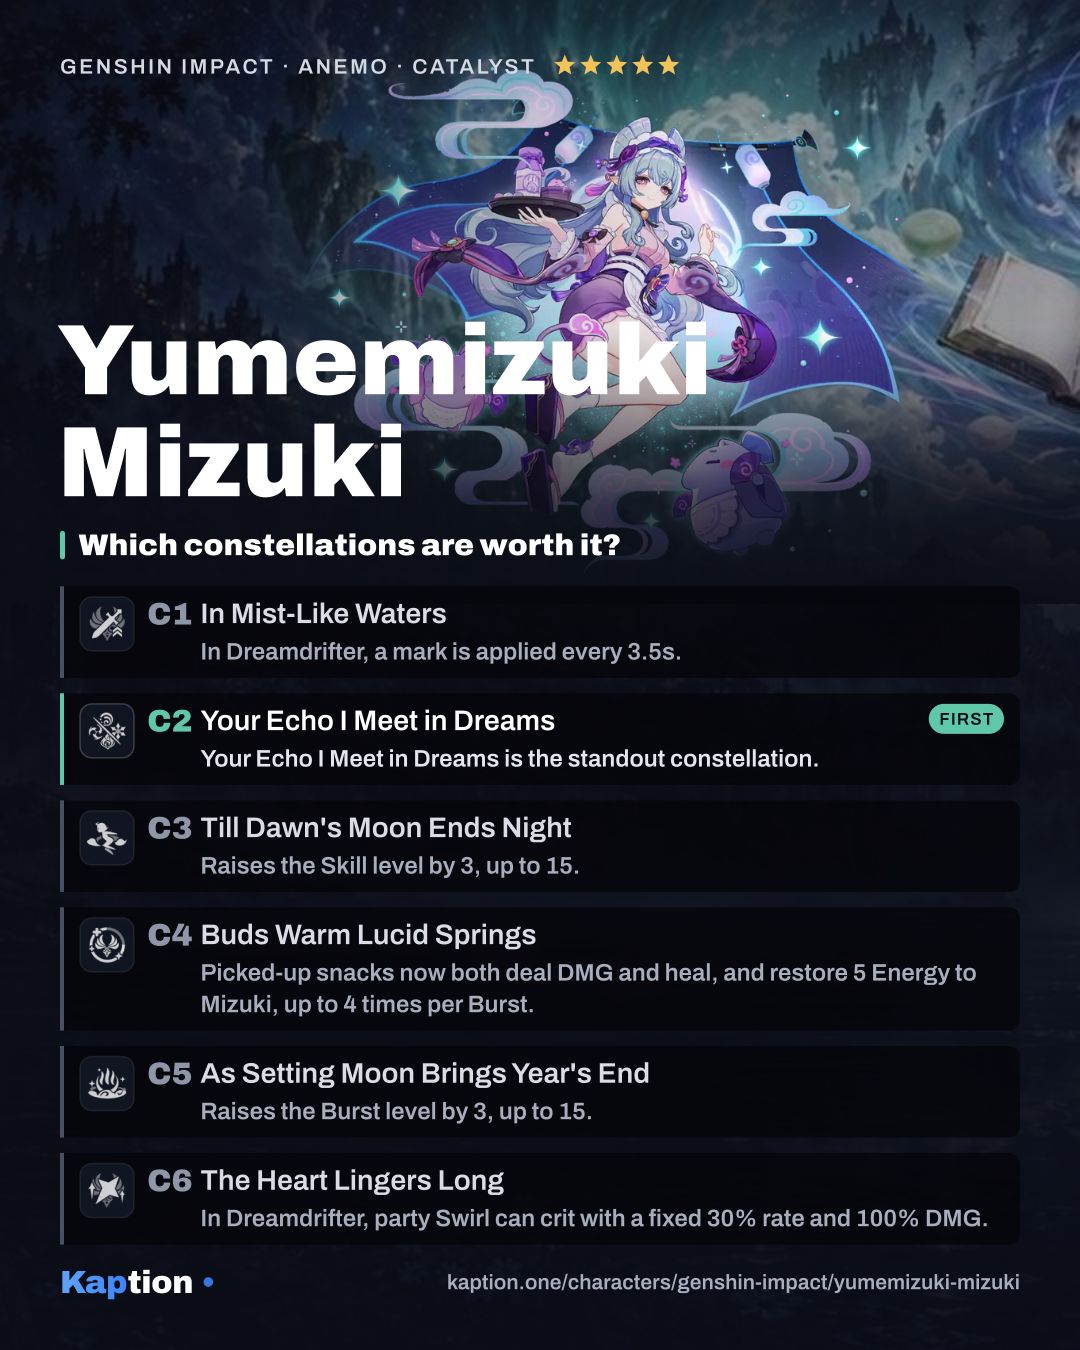
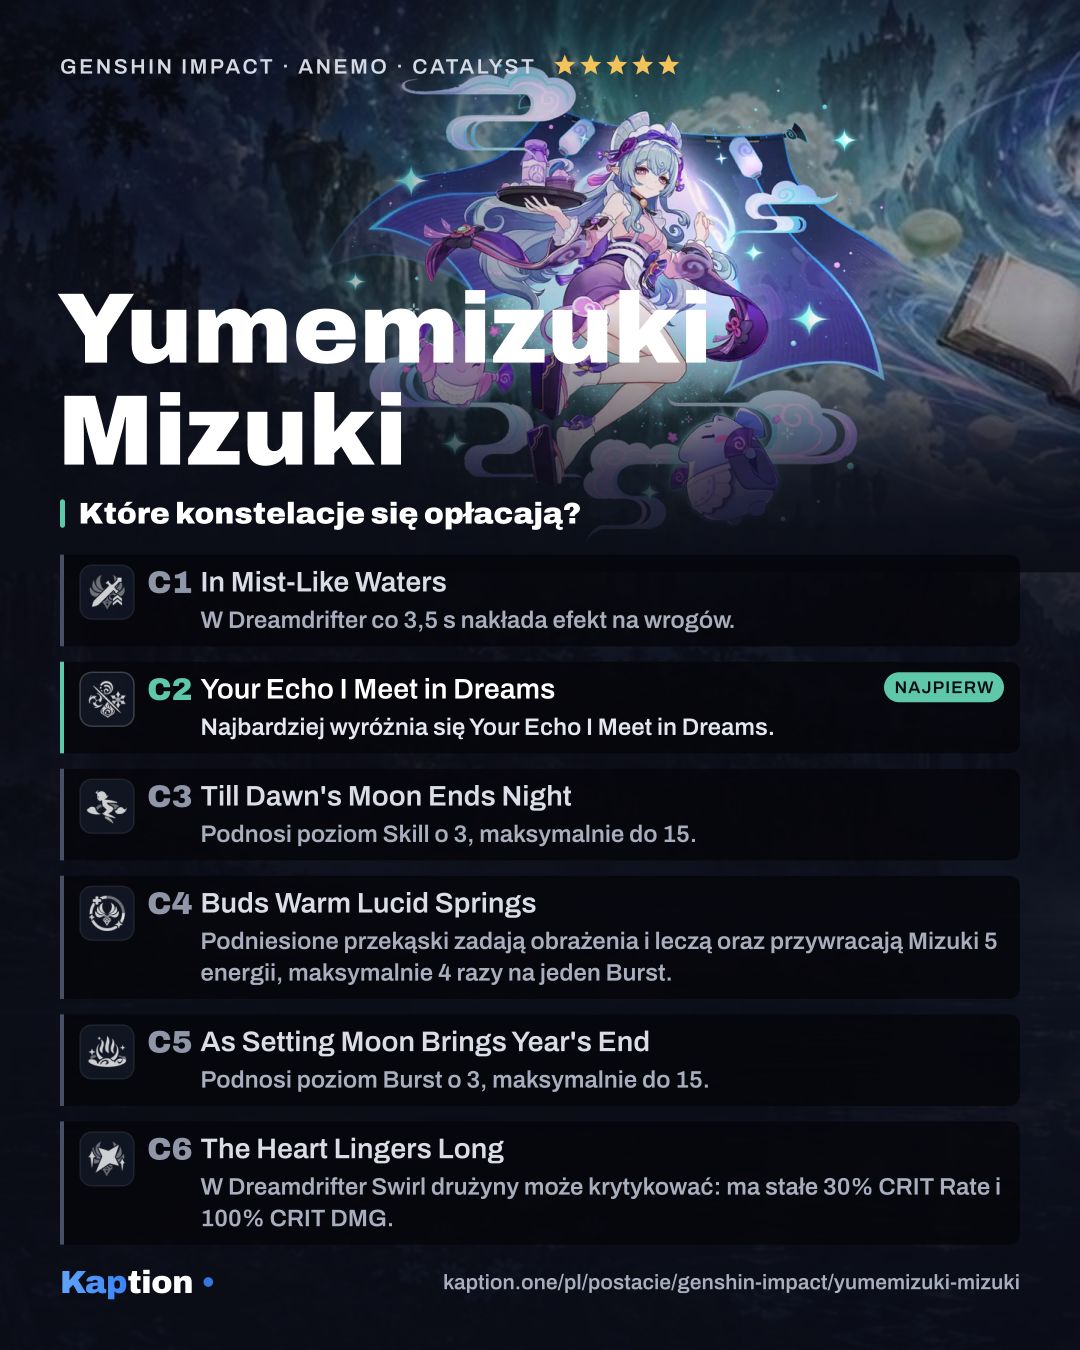
Your Echo I Meet in Dreams is the standout constellation. On entering Dreamdrifter, every point of Mizuki's Elemental Mastery gives nearby party members 0.04% Pyro, Hydro, Cryo and Electro DMG Bonus until the state ends. It adds a team damage bonus to a stat she already wants.
In Mist-Like Waters is an option for more reaction damage. It periodically marks nearby opponents during Dreamdrifter; a Swirl or Stellar Swirl triggered against a marked opponent consumes the mark and gains damage based on Mizuki's Elemental Mastery.
Buds Warm Lucid Springs lets a collected snack both heal and deal damage. Each pickup also restores 5 Energy to Mizuki, up to four times per Burst. The Heart Lingers Long lets nearby party members' Swirl damage CRIT during Dreamdrifter, with fixed 30% CRIT Rate and 100% CRIT DMG, and improves their Stellar Swirl CRIT stats.
The constellation levels in Till Dawn's Moon Ends Night and As Setting Moon Brings Year's End can be skipped if you are content with the base kit. They raise the skill and Burst levels respectively, rather than adding a new mechanic.
Teams
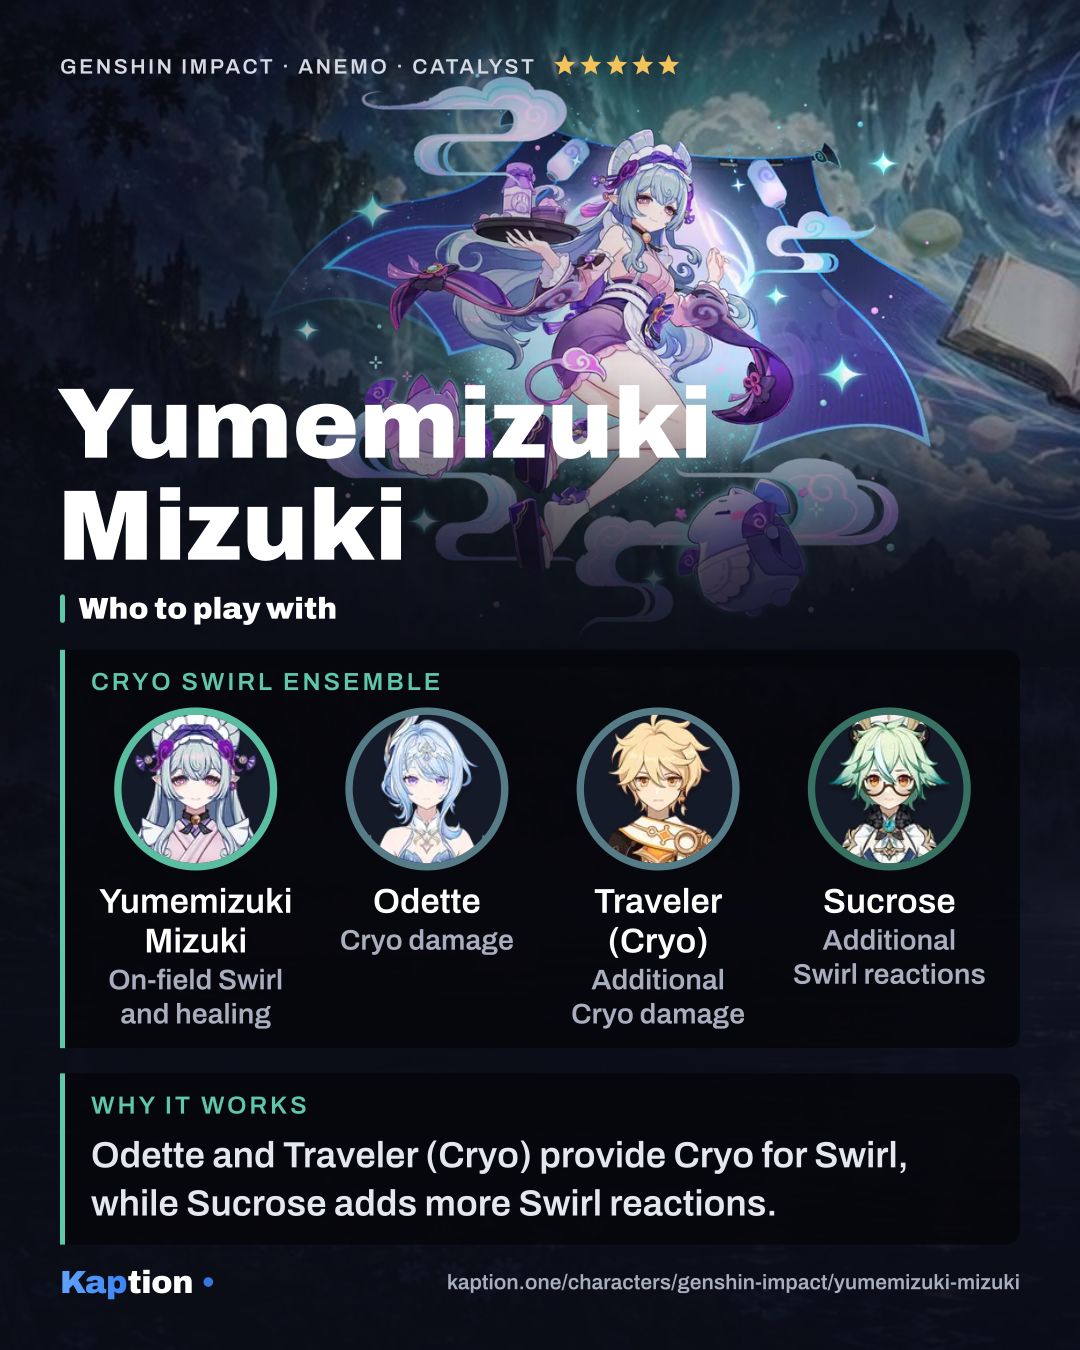
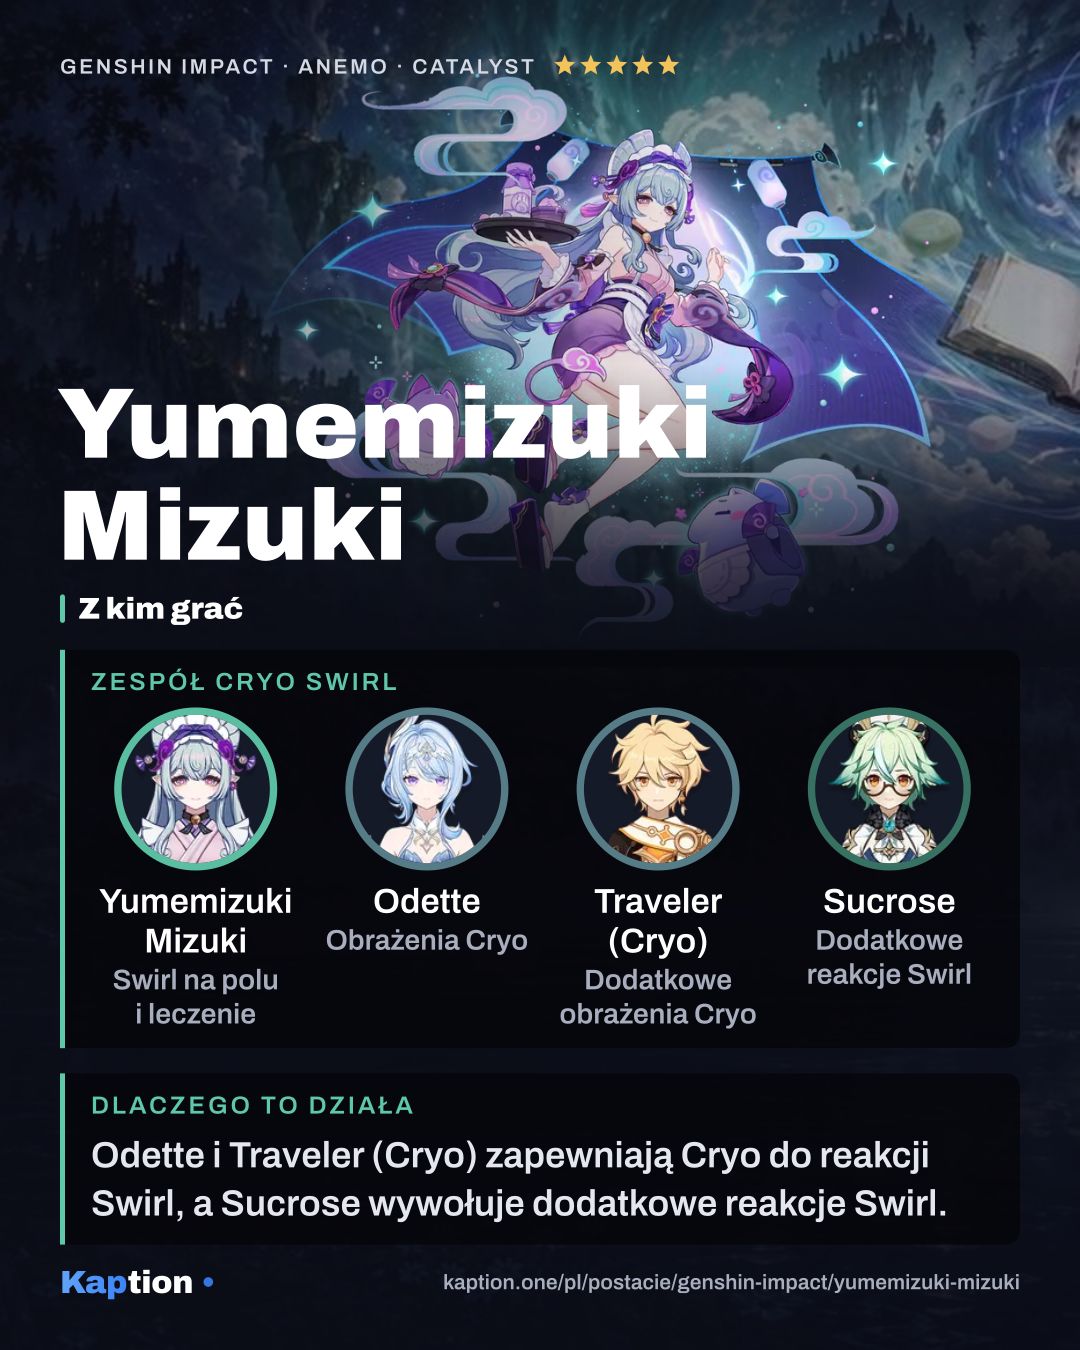
Bring characters who can supply Pyro, Hydro, Cryo or Electro attacks while Mizuki is on the field. Their hits can trigger her temporary Elemental Mastery bonus, and the elements give her opportunities to trigger Swirl. Attacks that continue while she drifts are especially convenient.
Common mistakes
Do not switch Mizuki out immediately after starting Aisa Utamakura Pilgrimage, or press it again by accident. Either action ends Dreamdrifter, cutting short her periodic damage and its reaction bonus.
Do not assume every snack from Anraku Secret Spring Therapy will heal. Check the active character's HP before picking one up: above 70% it deals damage instead, unless C4 is active. If you leave a snack on the ground too long, it explodes.
Do not stack CRIT stats at the expense of Elemental Mastery for the suggested reaction build. Also avoid treating Viridescent Venerer's resistance reductions as stackable debuffs of the same element. Pick a set and teammates that match the reactions you actually plan to trigger.