

































Genshin Impact character

Yae Miko (Genshin Impact)

Guide, build and skills

  • 5-star
  • Element Electro
  • Weapon Catalyst
  • Game data 7.2.0

Off-field Electro damage

Skill DMG bonuses strengthen the totem strikes, while Elemental Mastery adds another 0.15% DMG per point.

Yae Miko from Genshin Impact with a Kaption Polish subtitle
How Kaption shows Yae Miko in Polish: "Widzieliście to na własne oczy. Jestem pewien, że potraficie odgadnąć, jakiego ducha go opętał, prawda?"

At a glance

Yae Miko is a 5-star Electro character who uses a Catalyst. She places Sesshou Sakura that strike nearby opponents, then can leave the field while they keep attacking. Her Burst turns those constructs into a series of AoE Electro strikes.

She fits teams that want Electro damage from off-field and has an extra interaction with Superconduct and Stellar-Conduct. Her Skill needs some room between placements, and her Burst consumes the constructs, so getting used to replacing them is part of playing her.

Video guide

EVERYTHING You Need to Know About the Newly Buffed Yae Miko in 9 Minutes!

Video by Anddad on YouTube · 9 min · 68.6K views · June 2026

The YouTube player loads only after you click.

Build

Suggested build The game doesn't recommend a build for this character.

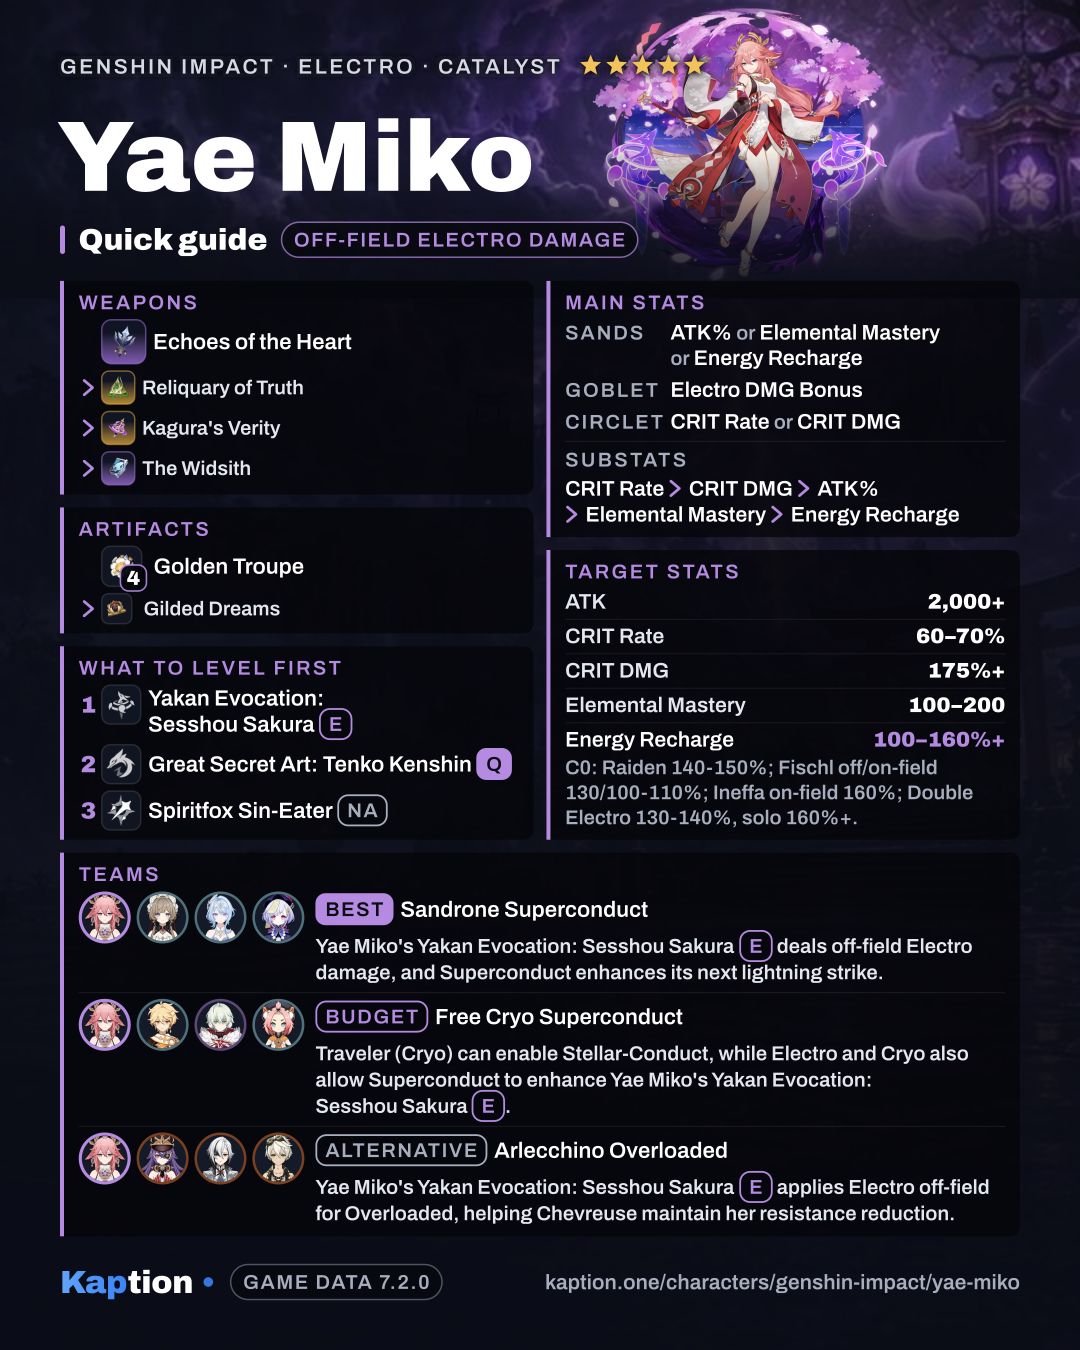
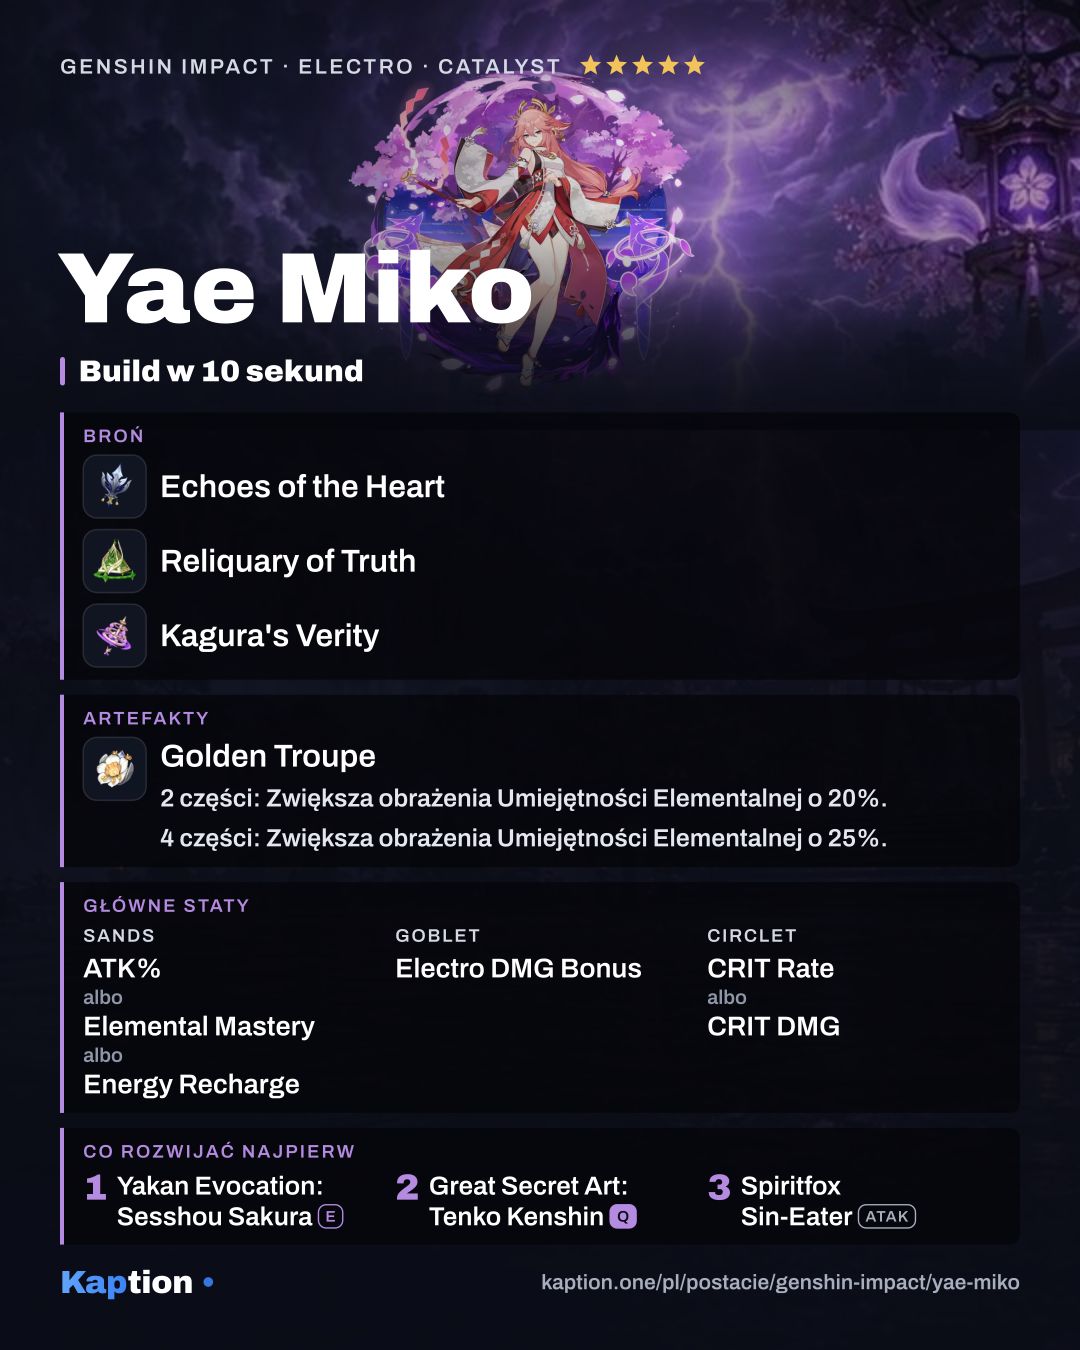
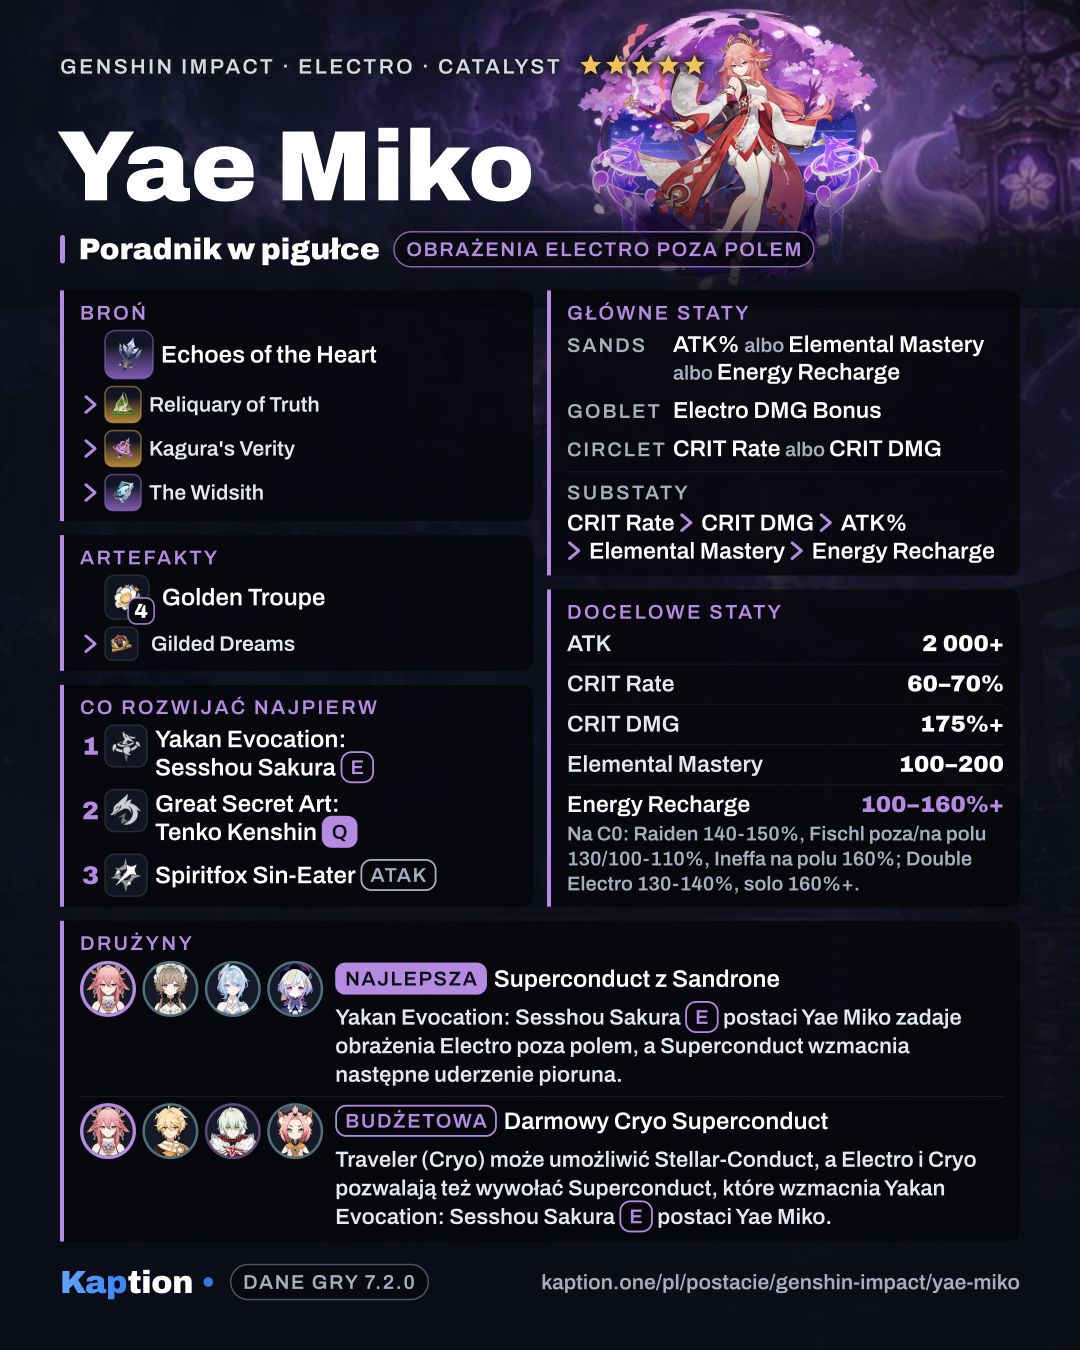
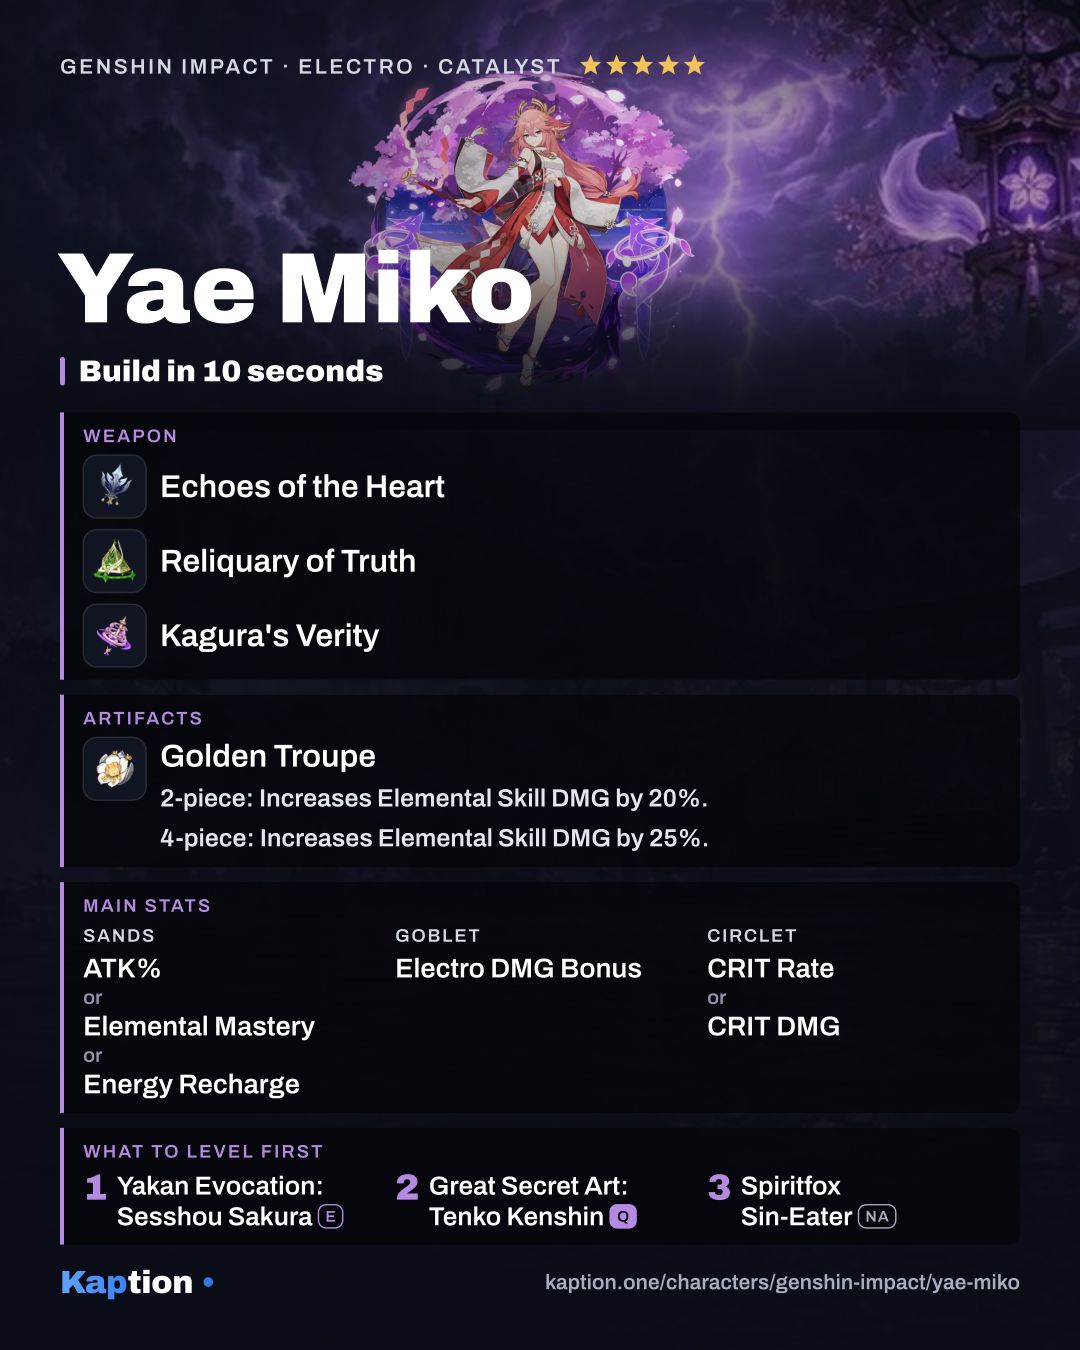
4× Golden Troupe · Sands ATK% or Elemental Mastery or Energy Recharge · Goblet Electro DMG Bonus · Circlet CRIT Rate or CRIT DMG · substats CRIT Rate > CRIT DMG > ATK% > Elemental Mastery > Energy Recharge

Skill DMG bonuses strengthen the totem strikes, while Elemental Mastery adds another 0.15% DMG per point.

Artifacts

Artifact set

  1. Disenchantment in Deep Shadow
    Disenchantment in Deep Shadow
    • 2-piece bonus: ATK +18%.
    Show effect
    • 4-piece bonus: Increases Superconduct Reaction DMG by 80% and Stellar-Conduct Reaction DMG by 40%. When the wielder attacks opponents affected by Superconduct or Stellar-Conduct, this attack's CRIT Rate is increased by 16%.

4 pieces · Artifact set

  1. Golden Troupe
    Golden Troupe
    • 2-piece bonus: Increases Elemental Skill DMG by 20%.
    Show effect
    • 4-piece bonus: Increases Elemental Skill DMG by 25%. Additionally, when not on the field, Elemental Skill DMG will be further increased by 25%. This effect will be cleared 2s after taking the field.

2 + 2 pieces · Artifact set

Wear both sets, 2 pieces each.

  1. Golden Troupe
    Golden Troupe
    • 2-piece bonus: Increases Elemental Skill DMG by 20%.
  2. Thundering Fury
    Thundering Fury
    • 2-piece bonus: Electro DMG Bonus +15%

4 pieces · Artifact set

  1. Gilded Dreams
    Gilded Dreams
    • 2-piece bonus: Increases Elemental Mastery by 80.
    Show effect
    • 4-piece bonus: Within 8s of triggering an Elemental Reaction, the character equipping this will obtain buffs based on the Elemental Type of the other party members. ATK is increased by 14% for each party member whose Elemental Type is the same as the equipping character, and Elemental Mastery is increased by 50 for every party member with a different Elemental Type. Each of the aforementioned buffs will count up to 3 characters. This effect can be triggered once every 8s. The character who equips this can still trigger its effects when not on the field.

Main stats

Sands
ATK% or Elemental Mastery or Energy Recharge
Goblet
Electro DMG Bonus
Circlet
CRIT Rate or CRIT DMG

Substats

  1. CRIT Rate
  2. CRIT DMG
  3. ATK%
  4. Elemental Mastery
  5. Energy Recharge

Target stats

Totals to aim for on the character's stat screen.

StatTarget
ATK 2,000+
CRIT Rate 60–70%
CRIT DMG 175%+
Elemental Mastery 100–200
Energy Recharge 100–160%+ C0: Raiden 140-150%; Fischl off/on-field 130/100-110%; Ineffa on-field 160%; Double Electro 130-140%, solo 160%+.

Recommended weapons

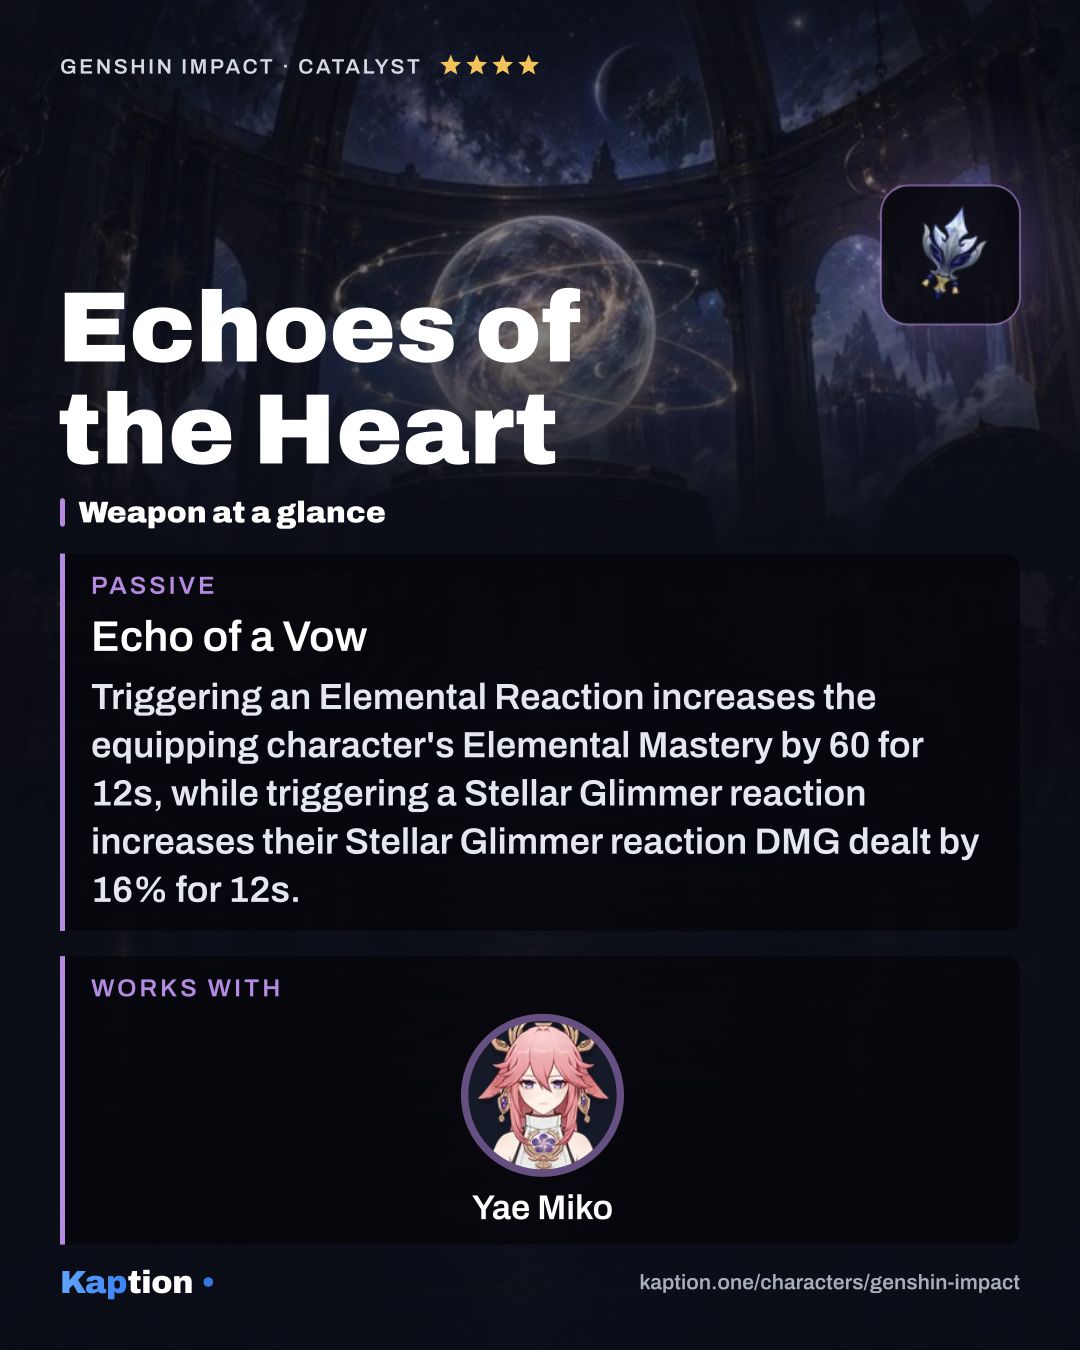
  1. Echoes of the Heart
    Echoes of the Heart 4-star
    Echo of a Vow Show effect

    Triggering an Elemental Reaction increases the equipping character's Elemental Mastery by 60 for 12s, while triggering a Stellar Glimmer reaction increases their Stellar Glimmer reaction DMG dealt by 16% for 12s. The aforementioned effects can trigger even when the character is not on the field.

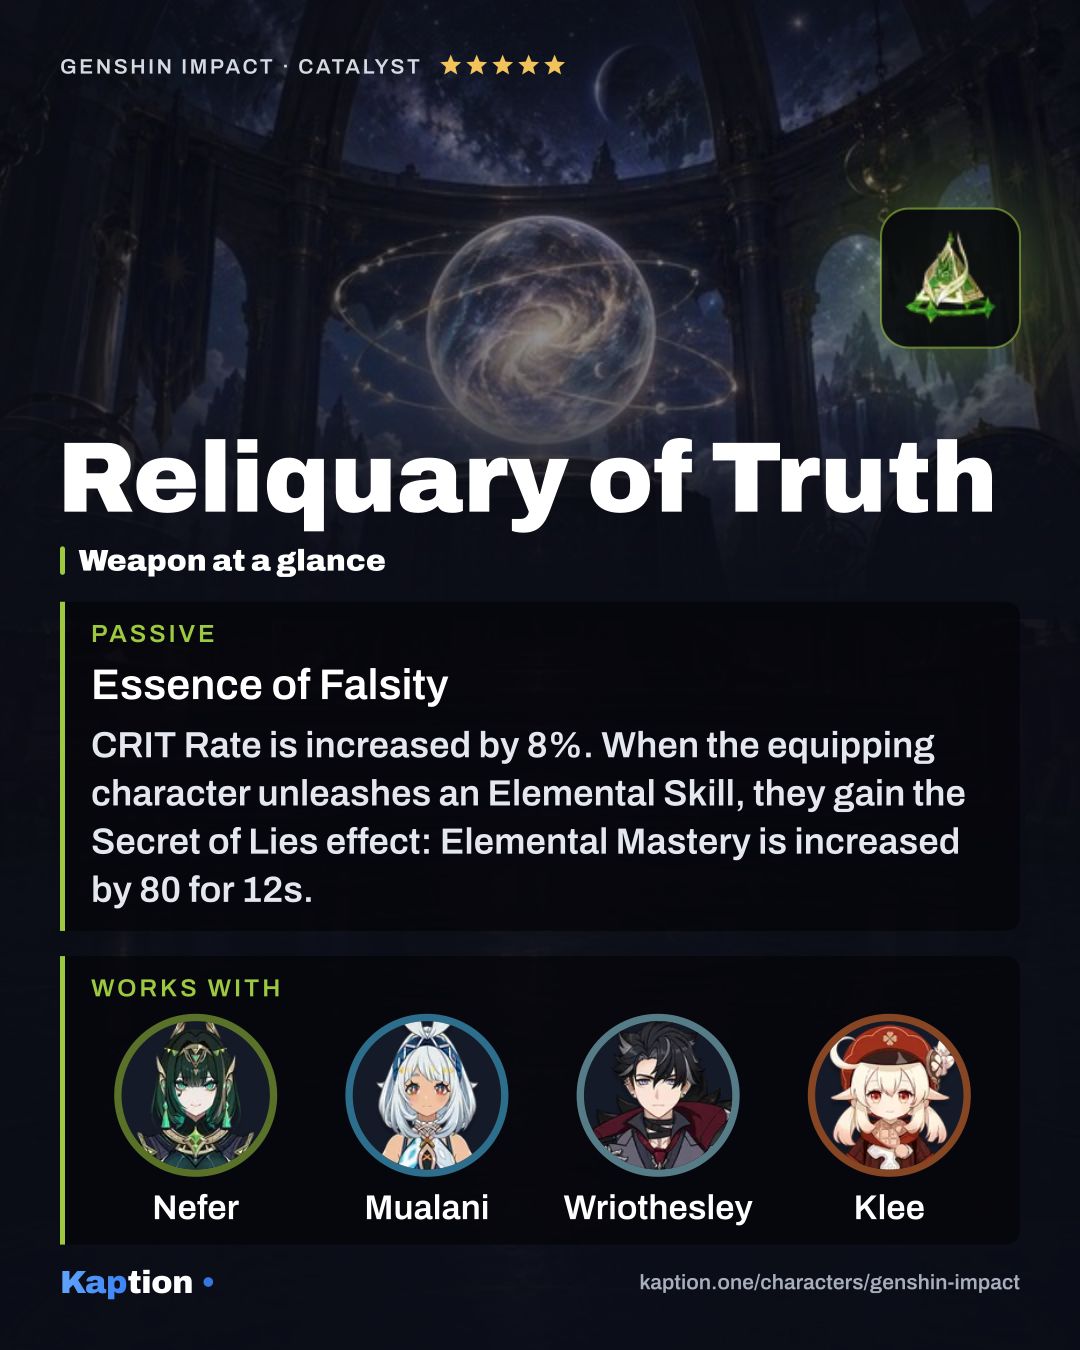
  2. Reliquary of Truth
    Reliquary of Truth 5-star
    Essence of Falsity Show effect

    CRIT Rate is increased by 8%. When the equipping character unleashes an Elemental Skill, they gain the Secret of Lies effect: Elemental Mastery is increased by 80 for 12s. When the equipping character deals Lunar-Bloom DMG to an opponent, they gain the Moon of Truth effect: CRIT DMG is increased by 24% for 4s. When both the Secret of Lies and Moon of Truth effects are active at the same time, the results of both effects will be increased by 50%.

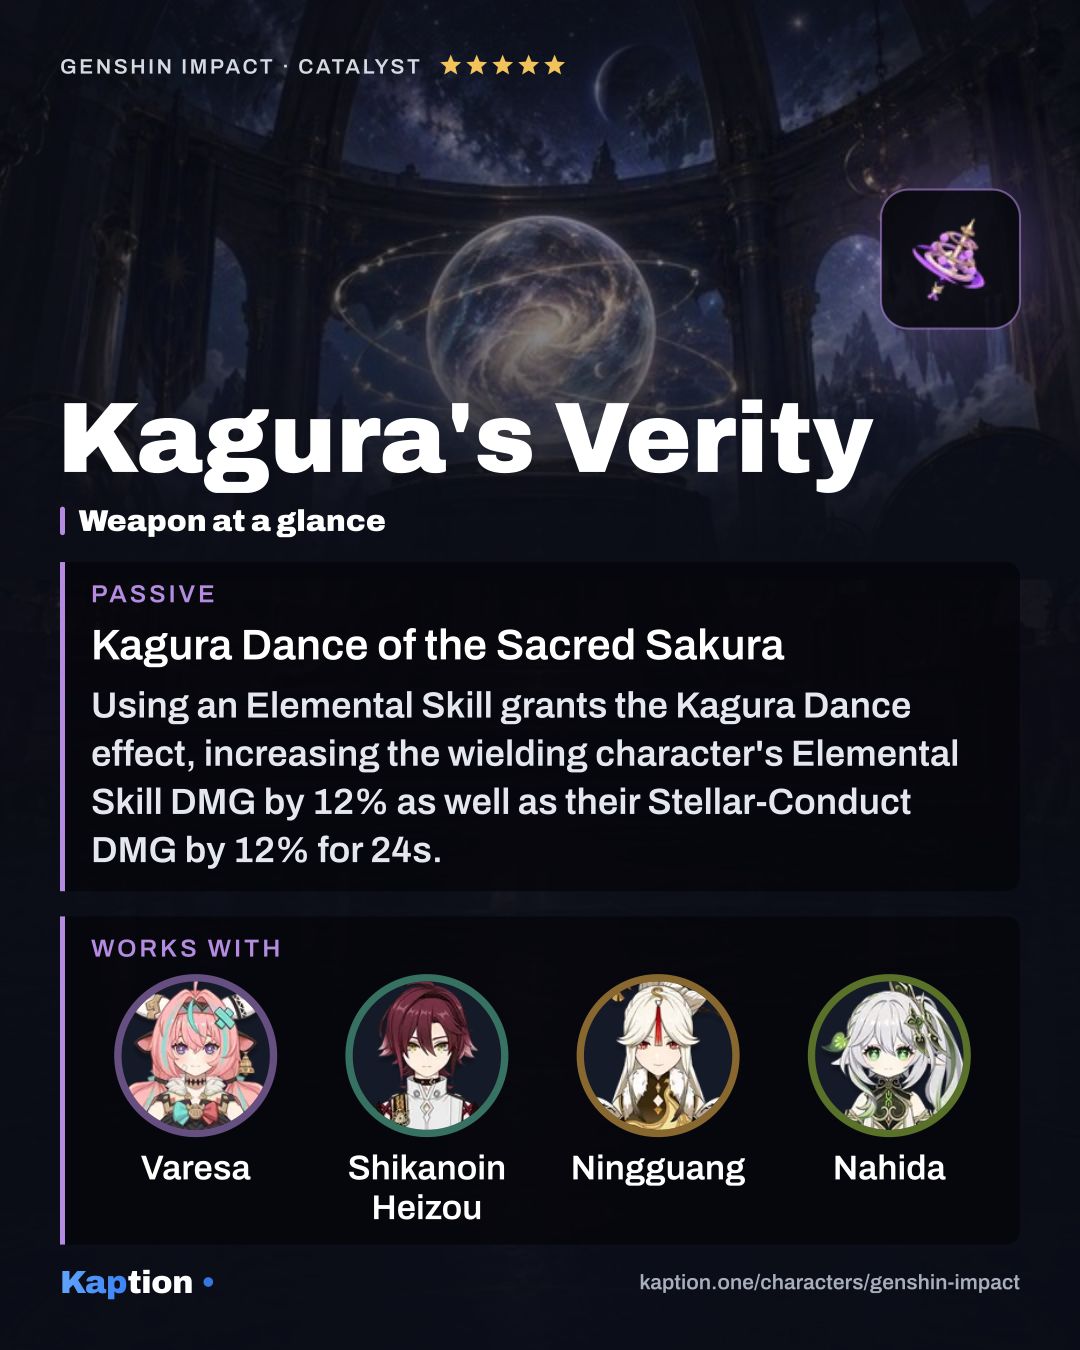
  3. Kagura's Verity
    Kagura's Verity 5-star
    Kagura Dance of the Sacred Sakura Show effect

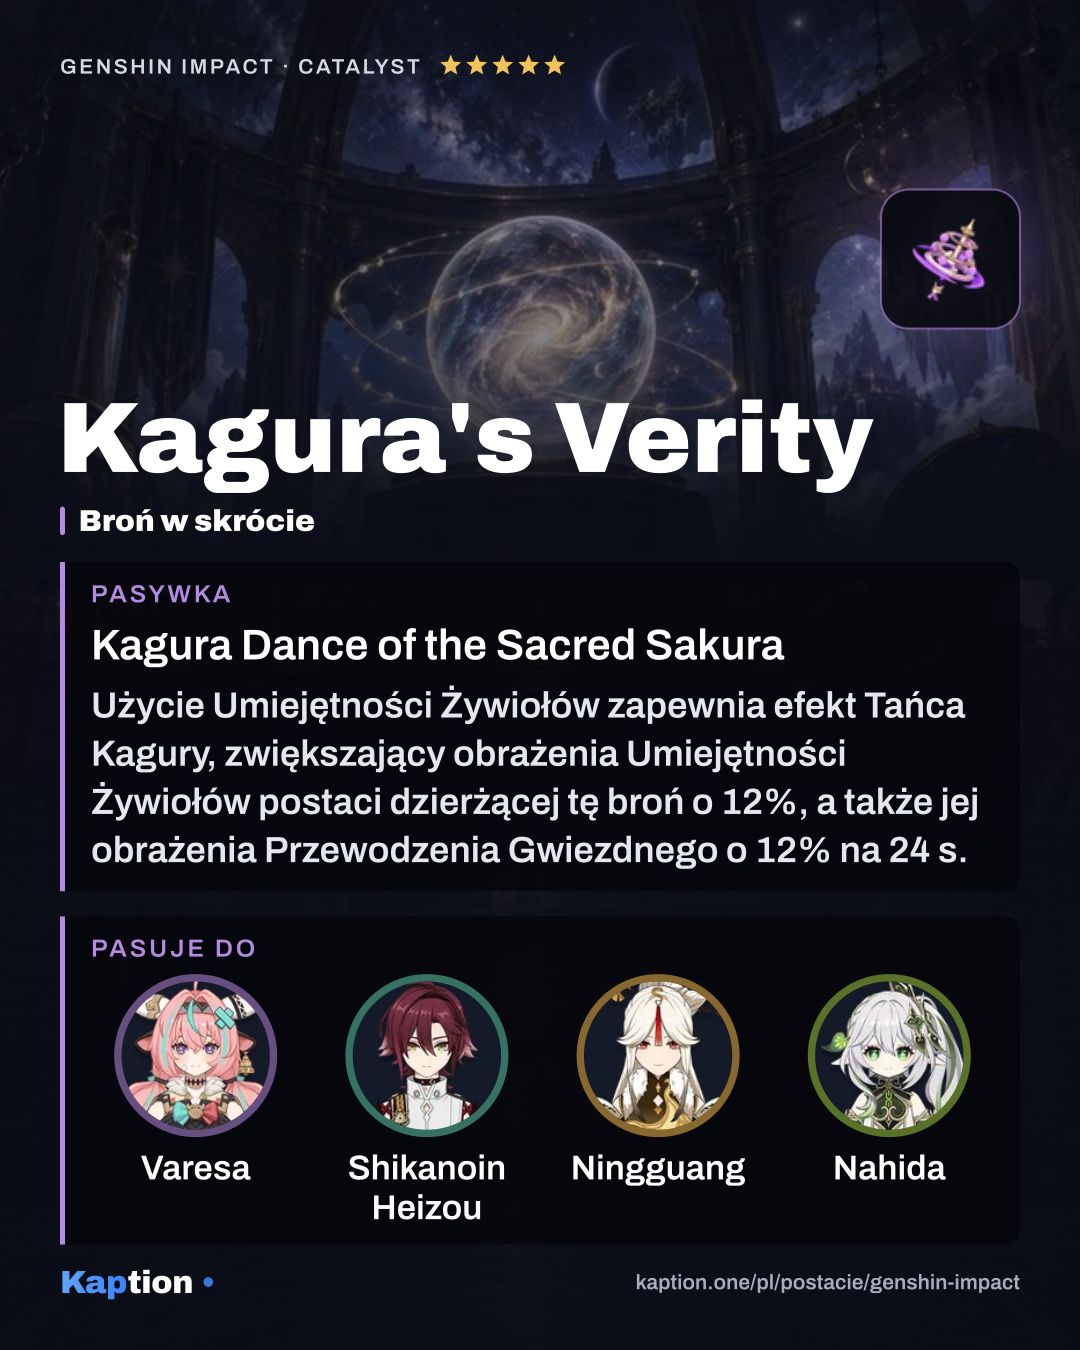
    Using an Elemental Skill grants the Kagura Dance effect, increasing the wielding character's Elemental Skill DMG by 12% as well as their Stellar-Conduct DMG by 12% for 24s. Max 3 stacks. This character will gain a 12% All Elemental DMG Bonus when they possess 3 stacks.

  4. The Widsith
    The Widsith 4-star
    Debut Show effect

    When the character takes the field, they will gain a random theme song for 10s. This can only occur once every 30s. Recitative: ATK is increased by 60%. Aria: Increases all Elemental DMG by 48%. Interlude: Elemental Mastery is increased by 240.

  5. A Thousand Floating Dreams
    A Thousand Floating Dreams 5-star
    A Thousand Nights' Dawnsong Show effect

    Party members other than the equipping character will provide the equipping character with buffs based on whether their Elemental Type is the same as the latter or not. If their Elemental Types are the same, increase Elemental Mastery by 32. If not, increase the equipping character's DMG Bonus from their Elemental Type by 10%. Each of the aforementioned effects can have up to 3 stacks. Additionally, all nearby party members other than the equipping character will have their Elemental Mastery increased by 40. Multiple such effects from multiple such weapons can stack.

  6. Skyward Atlas
    Skyward Atlas 5-star
    Wandering Clouds Show effect

    Increases Elemental DMG Bonus by 12%. Normal Attack hits have a 50% chance to earn the favor of the clouds, which actively seek out nearby opponents to attack for 15s, dealing 160% ATK DMG. Can only occur once every 30s.

  7. Sunny Morning Sleep-In
    Sunny Morning Sleep-In 5-star
    Bathhouses, Hawks, and Narukami Show effect

    Elemental Mastery increases by 120 for 6s after triggering Swirl or Stellar Swirl. Elemental Mastery increases by 96 for 9s after the wielder's Elemental Skill hits an opponent. Elemental Mastery increases by 32 for 30s after the wielder's Elemental Burst hits an opponent.

Have this character? Make a card of your own build from your UID Stats, artifacts, weapon and talents from your in-game showcase, as a PNG in a dozen layouts.

Teams

Show more teams (4)Show less

Also plays in

Other characters' teams with a place for Yae Miko.

Show more (10)

Skills

Names in English, as in the game · underlined ones open their card · Priority = level-up order

  1. Basic attack

    Spiritfox Sin-EaterAttack

    Level priority 3 of 3

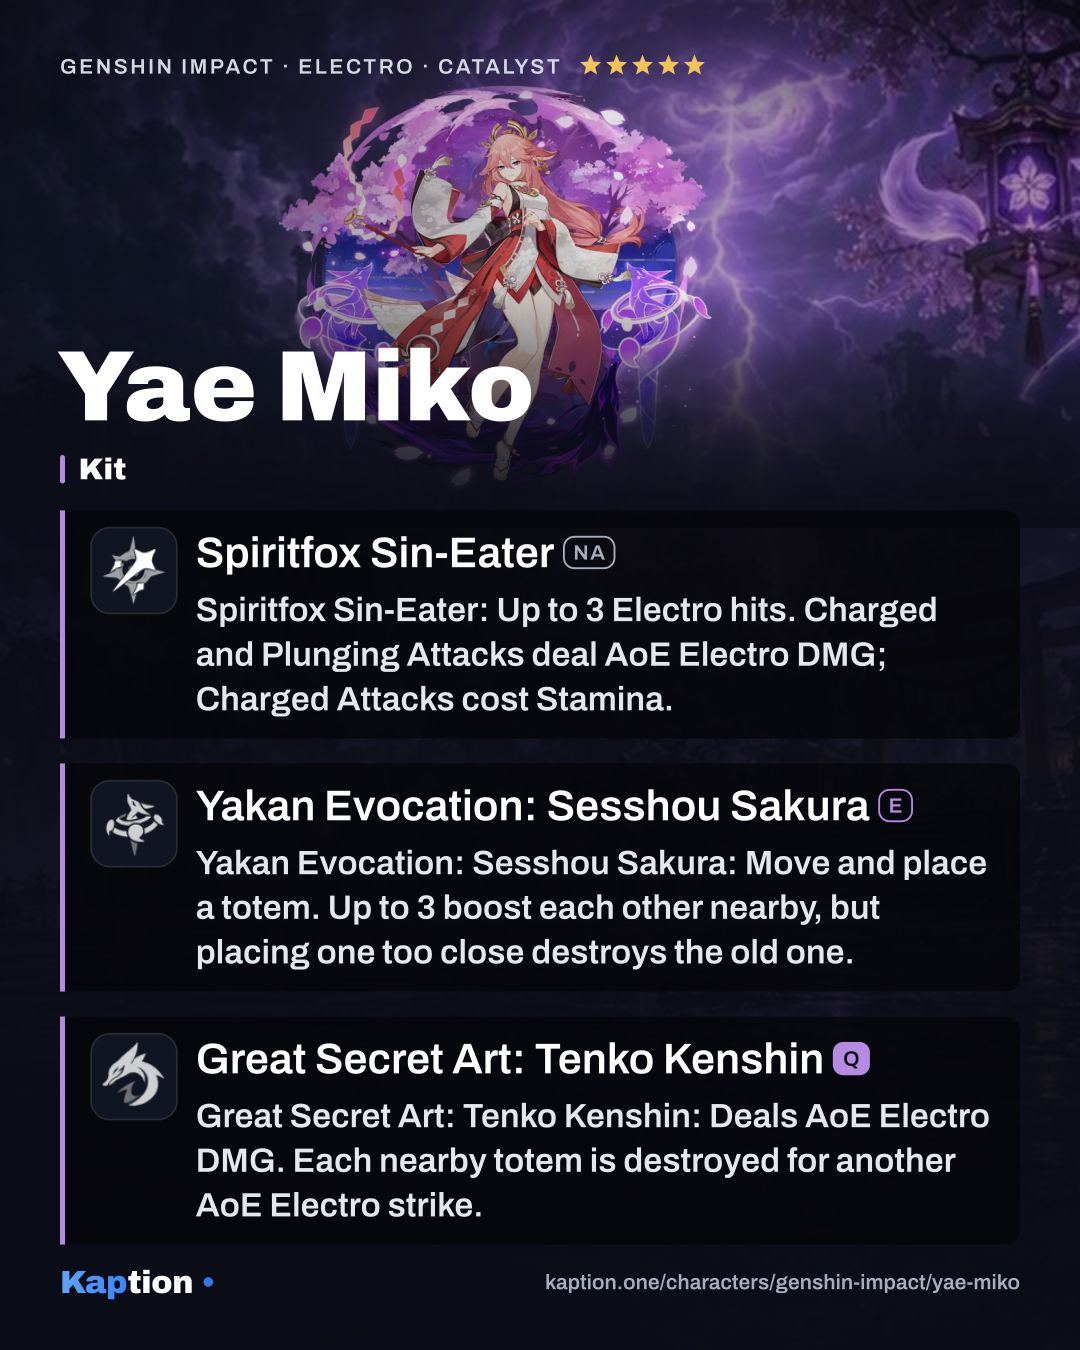
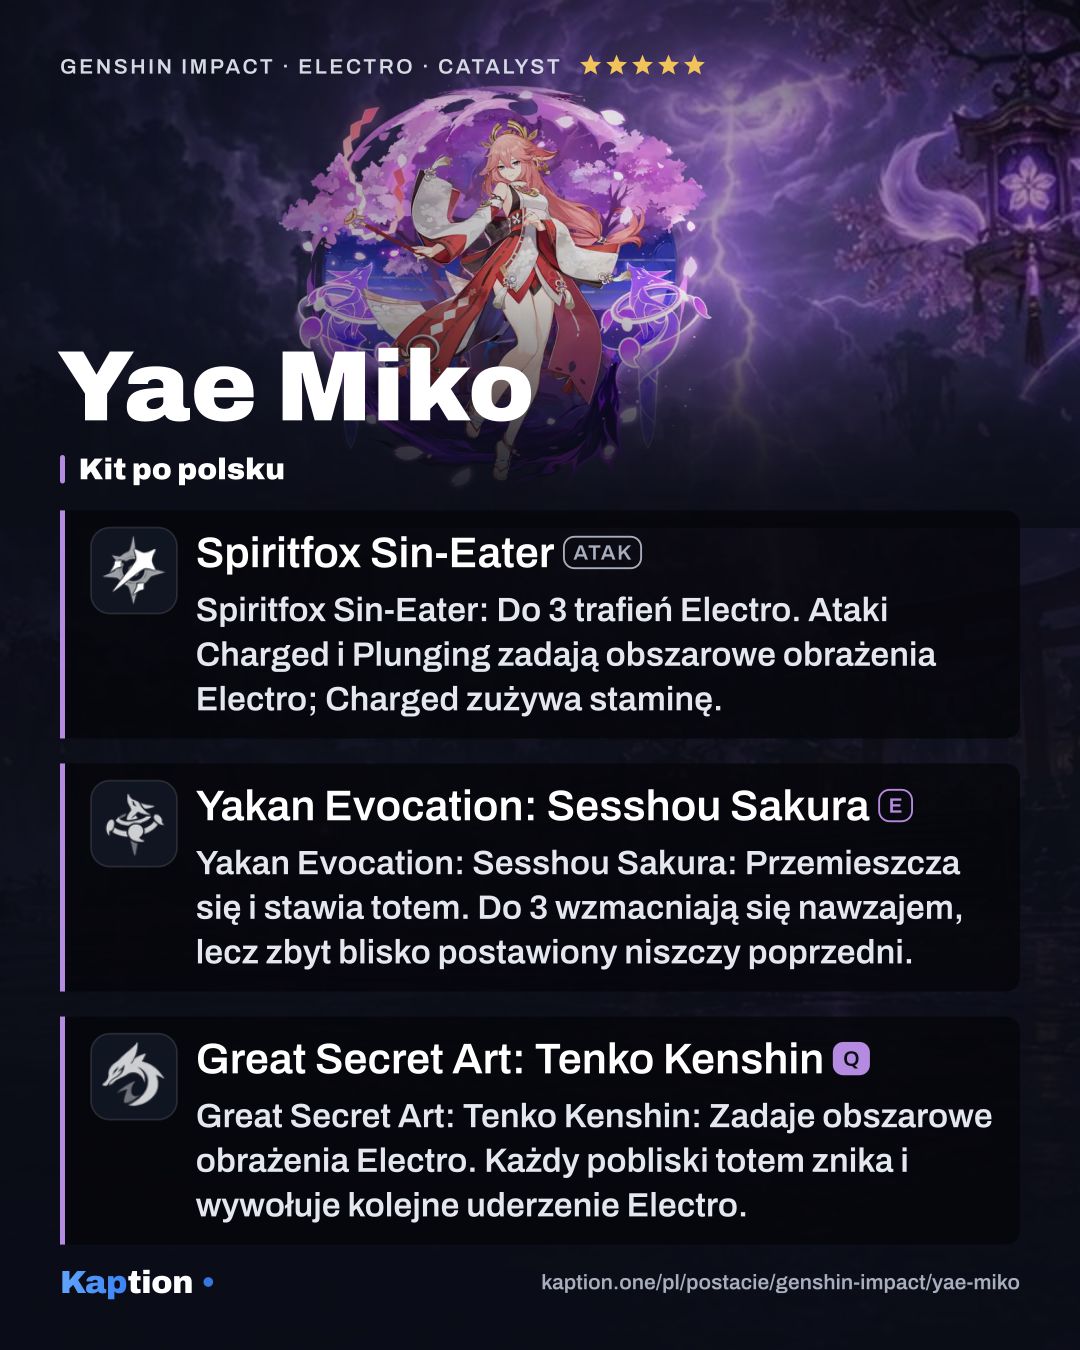
    Spiritfox Sin-Eater (NA): Up to 3 Electro hits. Charged and Plunging Attacks deal AoE Electro DMG; Charged Attacks cost Stamina.

    Normal Attack Summons forth kitsune spirits, initiating a maximum of 3 attacks that deal Electro DMG. Charged Attack Consumes a certain amount of Stamina to deal AoE Electro DMG after a short casting time. Plunging Attack Plunges towards the ground from mid-air, damaging all opponents in her path with thunderous might. Deals AoE Electro DMG upon impact with the ground.

  2. Skill

    Yakan Evocation: Sesshou SakuraE

    Level priority 1 of 3

    Yakan Evocation: Sesshou Sakura (E): Move and place a totem. Up to 3 boost each other nearby, but placing one too close destroys the old one.

    To Yae, such dull tasks as can be accomplished by driving spirits out need not be done personally. Moves swiftly, leaving a Sesshou Sakura behind. Sesshou Sakura Has the following properties: · Periodically strikes one nearby opponent with lightning, dealing Electro DMG · When there are other Sesshou Sakura nearby, their level will increase, boosting the DMG dealt by these lightning strikes. This skill has three charges. A maximum of 3 Sesshou Sakura can exist simultaneously. The initial level of each Sesshou Sakura is 1, and the initial highest level each sakura can reach is 3. If a new Sesshou Sakura is created too close to an existing one, the existing one will be destroyed. "The kitsune spirits sealed in the branches are all yakan who stooped to preying upon humans. The yakan are two grades lower than us Sky Kitsune, and so, I hardly see the problem with... asking that they do my bidding. Now, this doesn't mean that you humans should go learning from our grading systems, no indeed — and as for which of us, kitsune or human, is higher up in the pecking order... Heh, wouldn't you like to know?"

  3. Ultimate

    Great Secret Art: Tenko KenshinQ

    Level priority 2 of 3

    Great Secret Art: Tenko Kenshin (Q): Deals AoE Electro DMG. Each nearby totem is destroyed for another AoE Electro strike.

    Legends of "kitsunetsuki," or the manifestation of a kitsune's might, are common in Inazuma's folktales. One that particularly captures the imagination is that of the Sky Kitsune, said to cause lightning to fall down upon the foes of the Grand Narukami Shrine. Summons a lightning strike, dealing AoE Electro DMG. When she uses this skill, Yae Miko will unseal nearby Sesshou Sakura, destroying their outer forms and transforming them into Tenko Thunderbolts that descend from the skies, dealing AoE Electro DMG. Each Sesshou Sakura destroyed in this way will create one Tenko Thunderbolt. Only at times like these will Yae reveal her Sky Kitsune form and wield lightning itself. None have seen the Lady Guuji's tails and lived to tell the story... so remember, as far as you are concerned, Lady Yae does not have a tail.

Passives

  1. Passive

    The Shrine's Sacred ShadePassive

    The Shrine's Sacred Shade: Each totem destroyed by the Burst resets one Skill charge.

    When casting Great Secret Art: Tenko Kenshin, each Sesshou Sakura destroyed resets the cooldown for 1 charge of Yakan Evocation: Sesshou Sakura.

  2. Passive

    Enlightened BlessingPassive

    Enlightened Blessing: Each point of Elemental Mastery increases Sesshou Sakura DMG by 0.15%.

    Every point of Elemental Mastery Yae Miko possesses will increase Sesshou Sakura DMG by 0.15%.

  3. Passive

    Meditations of a YakoPassive

    Meditations of a Yako: Crafting has a 25% chance to give a regional talent material of the same rarity, excluding the base material.

    Has a 25% chance to get 1 regional Character Talent Material (base material excluded) when crafting. The rarity is that of the base material.

  4. Passive

    Edict of CleansingPassive

    Totems last 10s longer. Superconduct or Stellar-Conduct boosts the next hit by 80% ATK (2.5s CD); Radiance: Stellar-Conduct adds 200% ATK Electro DMG.

    Extends the duration of the Sesshou Sakura by 10s. When a nearby party member triggers a Superconduct or Stellar-Conduct reaction, the next instance of Sesshou Sakura lightning is enhanced as follows: DMG dealt is increased at 80% of Yae Miko's ATK. This effect can trigger once every 2.5s. Radiance: Stellar-Conduct: An enhanced Sesshou Sakura lightning bolt hit on an opponent will also cause an additional instance of Electro DMG at 200% of Yae Miko's ATK. This DMG is considered Stellar-Conduct DMG. Additionally, when inside a Polestar Field, Yae Miko will enter the Radiance: Stellar-Conduct state.

Constellations

  1. C1

    Yakan Offering

    Worth it

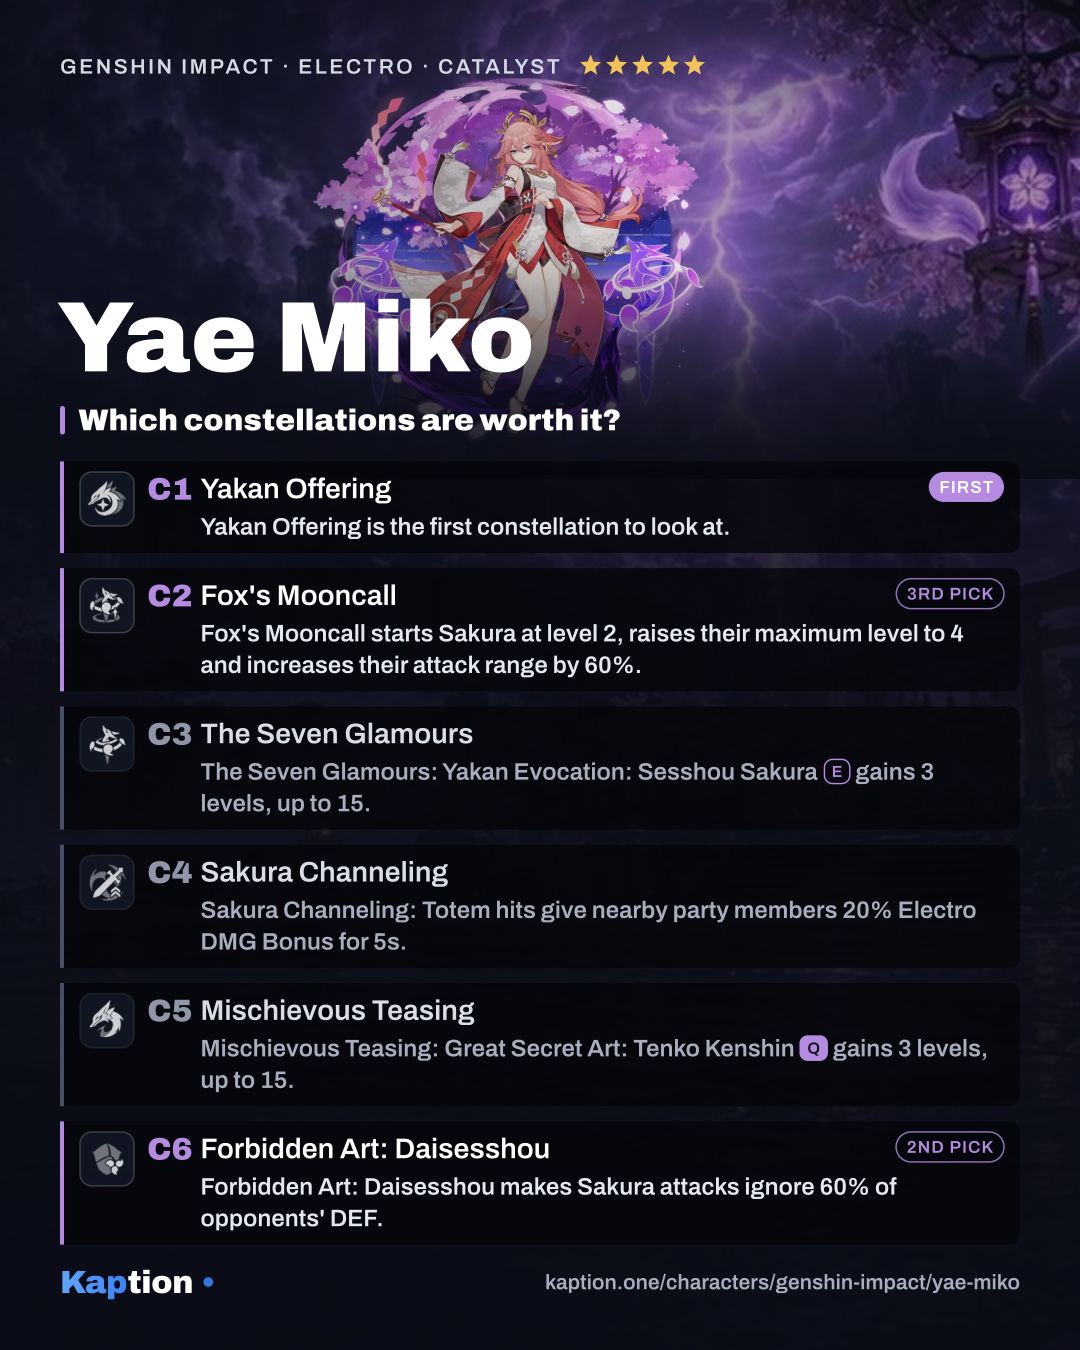
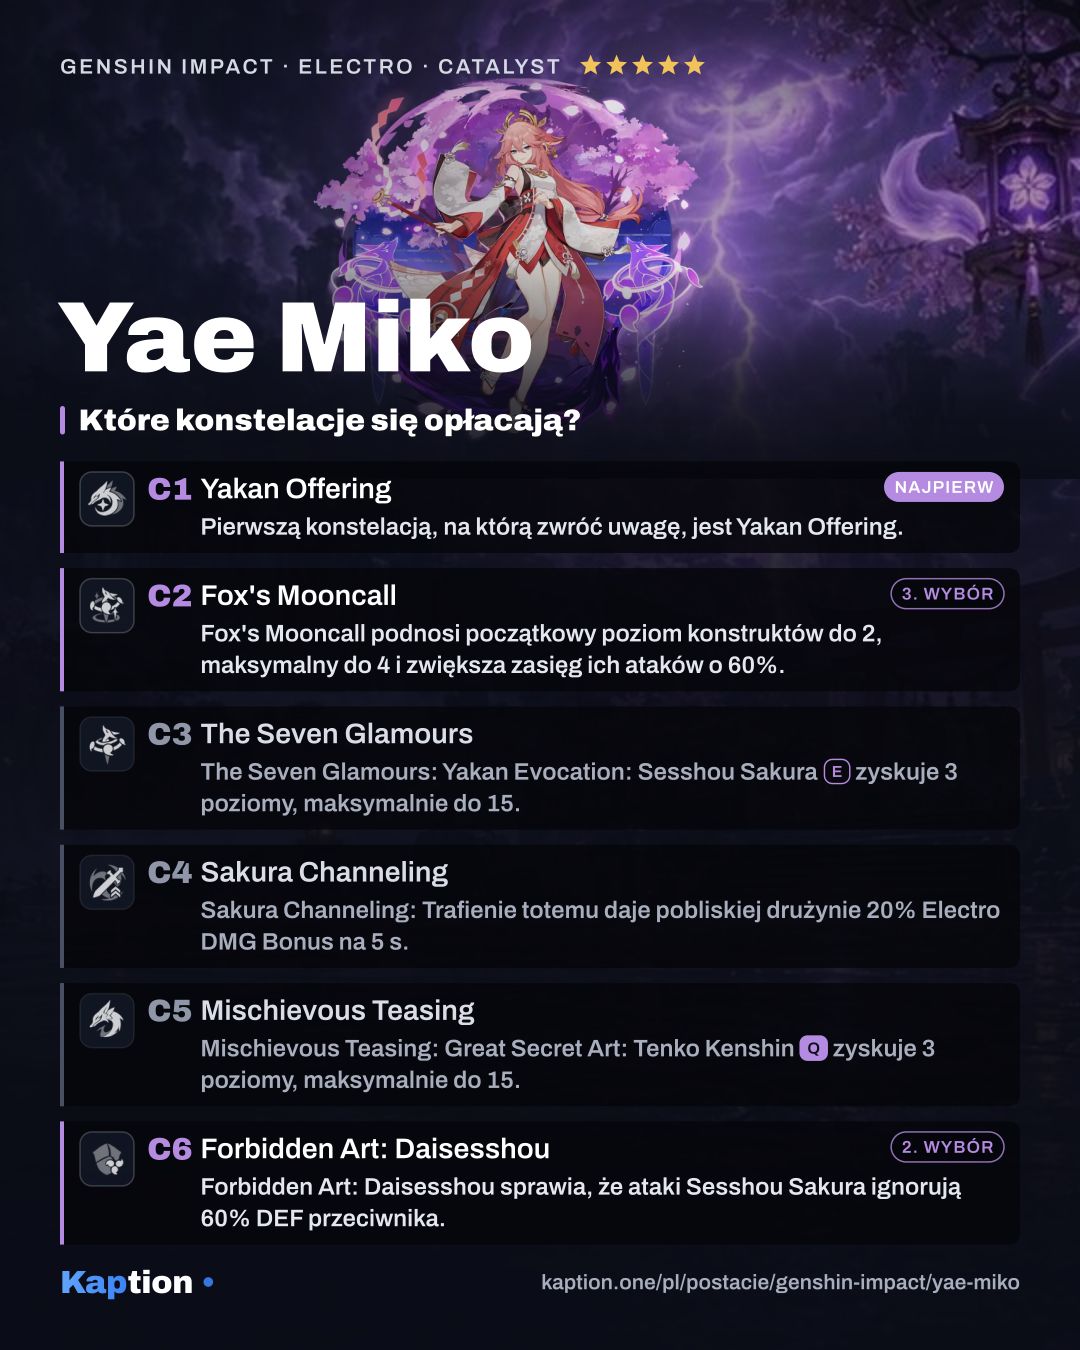
    Yakan Offering (C1) is the first constellation to look at.

    Each time Great Secret Art: Tenko Kenshin activates a Tenko Thunderbolt, Yae Miko will restore 8 Elemental Energy for herself.

  2. C2

    Fox's Mooncall

    Worth it

    Fox's Mooncall (C2) starts Sakura at level 2, raises their maximum level to 4 and increases their attack range by 60%.

    Sesshou Sakura start at Level 2 when created, their max level is increased to 4, and their attack range is increased by 60%.

  3. C3

    The Seven Glamours

    Increases the Level of Yakan Evocation: Sesshou Sakura by 3. Maximum upgrade level is 15.

  4. C4

    Sakura Channeling

    When Sesshou Sakura lightning hits opponents, the Electro DMG Bonus of all nearby party members is increased by 20% for 5s.

  5. C5

    Mischievous Teasing

    Increases the Level of Great Secret Art: Tenko Kenshin by 3. Maximum upgrade level is 15.

  6. C6

    Forbidden Art: Daisesshou

    Worth it

    Forbidden Art: Daisesshou (C6) makes Sakura attacks ignore 60% of opponents' DEF.

    The Sesshou Sakura's attacks will ignore 60% of the opponents' DEF.

Materials

Ascension, to max level

  • Mora Mora × 420,000
  • Sea Ganoderma Sea Ganoderma × 168
  • Vajrada Amethyst Sliver Vajrada Amethyst Sliver × 1
  • Vajrada Amethyst Fragment Vajrada Amethyst Fragment × 9
  • Vajrada Amethyst Chunk Vajrada Amethyst Chunk × 9
  • Vajrada Amethyst Gemstone Vajrada Amethyst Gemstone × 6
  • Old Handguard Old Handguard × 18
  • Kageuchi Handguard Kageuchi Handguard × 30
  • Famed Handguard Famed Handguard × 36
  • Dragonheir's False Fin Dragonheir's False Fin × 46

All skills to max

  • Mora Mora × 4,957,500
  • Crown of Insight Crown of Insight × 3
  • Teachings of Light Teachings of Light × 9
  • Guide to Light Guide to Light × 63
  • Philosophies of Light Philosophies of Light × 114
  • Old Handguard Old Handguard × 18
  • Kageuchi Handguard Kageuchi Handguard × 66
  • Famed Handguard Famed Handguard × 93
  • The Meaning of Aeons The Meaning of Aeons × 18

Guide

How the kit works

Start with Yakan Evocation: Sesshou Sakura. Each use moves Yae and leaves one Sakura behind; the Skill has three charges and up to three Sakura can exist at once. Nearby Sakura raise each other's level and lightning damage. Place them close enough to benefit from one another, but not so close that a new one destroys an existing one.

Use Great Secret Art: Tenko Kenshin with Sakura nearby. It deals AoE Electro DMG and destroys each nearby Sakura to create one more AoE Tenko Thunderbolt. The Shrine's Sacred Shade resets the cooldown of one Skill charge for each Sakura destroyed, so place them again after the Burst.

Edict of Cleansing extends Sakura duration by 10 seconds. When a nearby party member triggers Superconduct or Stellar-Conduct, the next Sakura lightning gains damage equal to 80% of Yae's ATK, once every 2.5 seconds. Inside a Polestar Field, Yae enters Radiance: Stellar-Conduct: an enhanced hit also deals Electro DMG equal to 200% of her ATK, counted as Stellar-Conduct DMG.

Enlightened Blessing increases Sakura damage by 0.15% per point of Elemental Mastery. Spiritfox Sin-Eater (NA) gives Yae Electro Normal and Charged Attacks when you want her on the field; her Charged Attack consumes Stamina.

Build and why

For a Superconduct or Stellar-Conduct team, start by considering four pieces of Disenchantment in Deep Shadow. It raises both reactions' damage and gives attacks 16% CRIT Rate against opponents affected by either reaction. For a more general off-field build, four pieces of Golden Troupe increase Skill damage, with another increase while Yae is off-field.

Four pieces of Gilded Dreams are another option: after a reaction, the set gives ATK for teammates of the same element and Elemental Mastery for teammates of different elements. As a mixed set, two pieces of Golden Troupe and two of Thundering Fury give Skill damage and Electro DMG Bonus.

Use ATK Percentage, Elemental Mastery or Energy Recharge on the sands, Electro DMG Bonus on the goblet, and CRIT Rate or CRIT DMG on the circlet. In substats, look for CRIT Rate and CRIT DMG first, then ATK Percentage, Elemental Mastery and Energy Recharge. Pick enough Energy Recharge for the Burst timing you want rather than ignoring her other damage stats.

Kagura's Verity is the first weapon to consider: using the Skill builds stacks of Skill damage, and three stacks give All Elemental DMG Bonus. Echoes of the Heart gives Elemental Mastery after a reaction and Stellar Glimmer reaction damage after its stated trigger. Reliquary of Truth gives CRIT Rate and grants Elemental Mastery on Skill use. A Thousand Floating Dreams and The Widsith are other options; the latter's buff is random and lasts 10 seconds.

Leveling priority

A good leveling order is Yakan Evocation: Sesshou Sakura first, then Great Secret Art: Tenko Kenshin, and Spiritfox Sin-Eater (NA) last. The Skill supplies the recurring Sakura strikes, while the Burst adds its own hit and a Thunderbolt for each Sakura consumed. Raise Normal Attacks sooner if you use Yae on-field often.

For maximum ascension, gather 168 Sea Ganoderma, 46 Dragonheir's False Fin, 1 Vajrada Amethyst Sliver, 9 Vajrada Amethyst Fragment, 9 Vajrada Amethyst Chunk and 6 Vajrada Amethyst Gemstone. You also need 18 Old Handguard, 30 Kageuchi Handguard, 36 Famed Handguard and 420,000 Mora.

To max all three talents, you need 9 Teachings of Light, 63 Guide to Light, 114 Philosophies of Light, 18 The Meaning of Aeons and 3 Crown of Insight. The talent costs also include 18 Old Handguard, 66 Kageuchi Handguard, 93 Famed Handguard and 4,957,500 Mora.

Constellations worth it

Yakan Offering is the first constellation to look at. Each Tenko Thunderbolt restores 8 Elemental Energy to Yae, so consuming three Sakura returns 24 Energy. That helps if you want to use her Burst regularly.

Forbidden Art: Daisesshou makes Sakura attacks ignore 60% of opponents' DEF. Fox's Mooncall starts Sakura at level 2, raises their maximum level to 4 and increases their attack range by 60%. Both strengthen the Skill, though C6 comes much later.

The Seven Glamours raises the Skill level by 3. Sakura Channeling gives nearby party members 20% Electro DMG Bonus for 5 seconds when Sakura lightning hits. Mischievous Teasing raises the Burst level by 3. These are optional stops rather than requirements for the basic rotation; you can leave Yae at C0 and still use the full Skill and Burst loop.

Teams

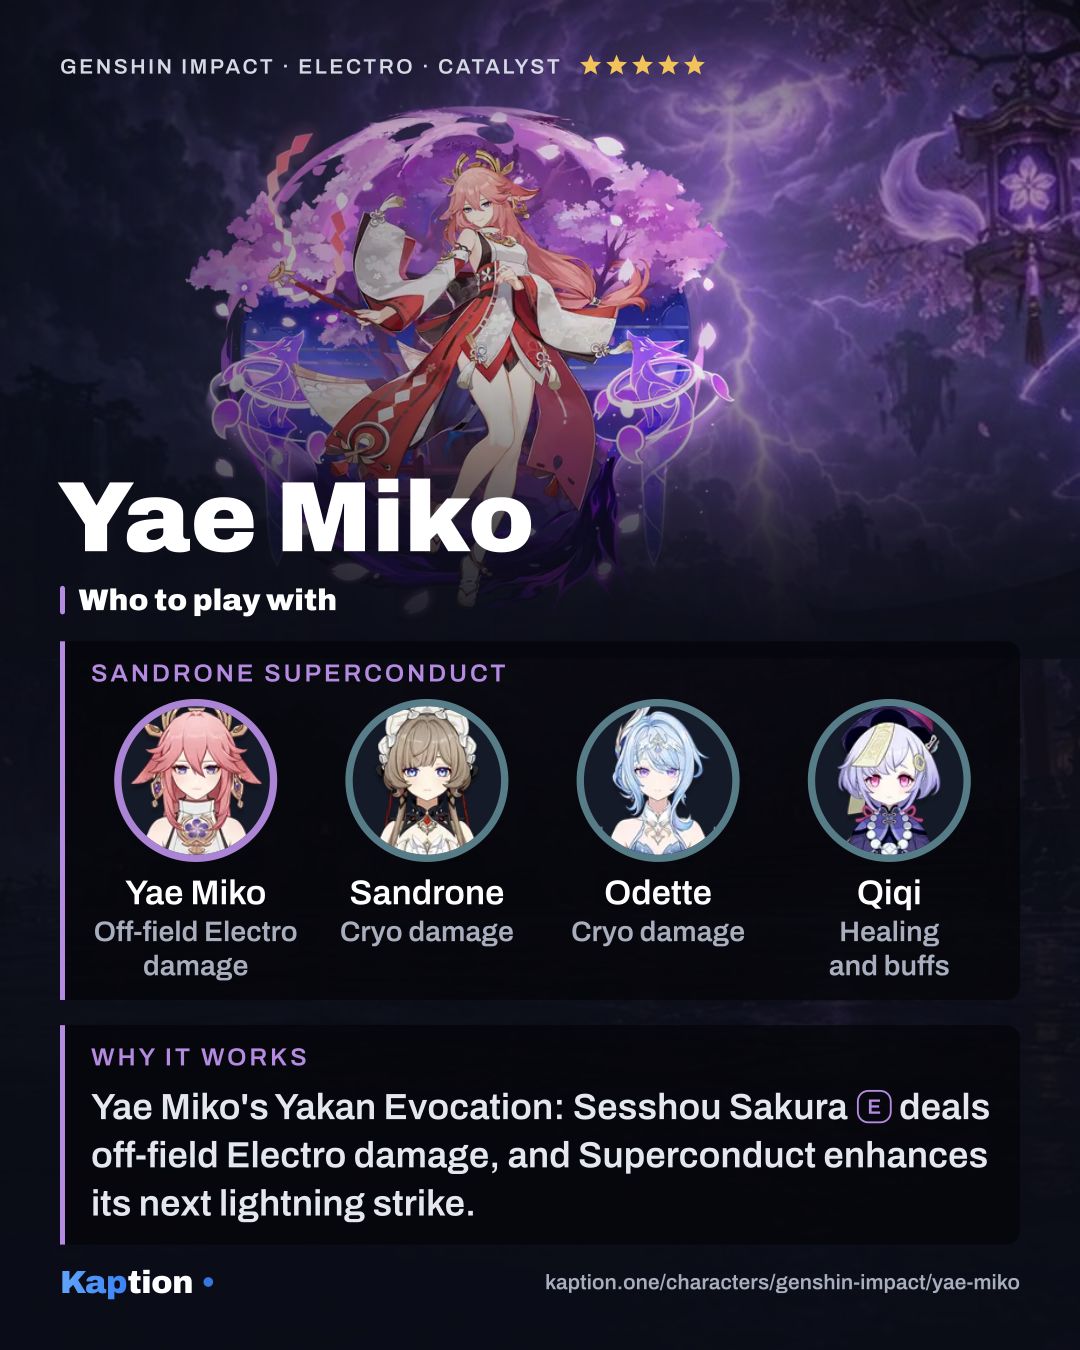
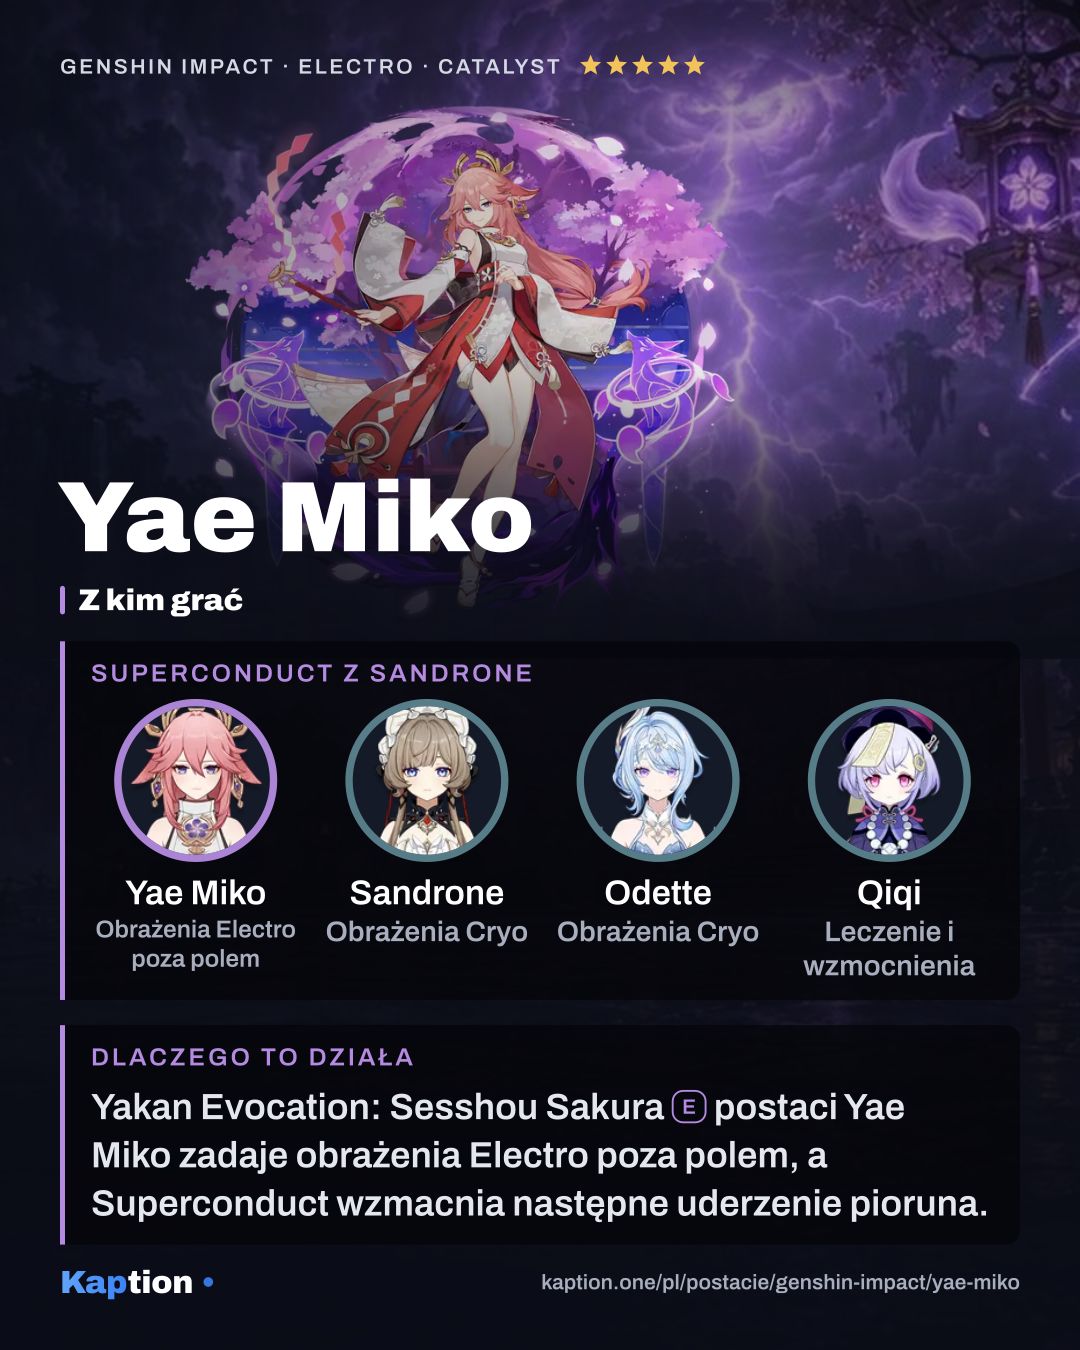
For Superconduct or Stellar-Conduct, pair Yae with a Cryo teammate. Sandrone, Qiqi and Traveler (Cryo) are options named for her; Qiqi can also cover healing. A nearby teammate needs to trigger the reaction to enhance the next Sakura lightning through Edict of Cleansing.

Alyosha is an Electro healer option, while Fischl is another Electro teammate with an off-field role. Sucrose offers Anemo and Swirl. In a Dendro team, Nahida is an option for playing around reactions such as Aggravate. Xilonen is another healer option.

Yae contributes recurring Electro strikes while another character is active. Build the rest of the team around the reaction you want and make room for healing or a shield; Yae's listed kit does not provide either.

Common mistakes

Do not put all three Sakura on top of each other. A new one created too close to an existing one destroys it, leaving you with fewer constructs. Check their spacing before switching away.

Do not assume the Sakura survive Great Secret Art: Tenko Kenshin. The Burst consumes nearby constructs for Thunderbolts; use the reset charges of Yakan Evocation: Sesshou Sakura to place them again.

Do not treat Elemental Mastery as the only useful stat. It increases Sakura damage through Enlightened Blessing, but CRIT, ATK and enough Energy Recharge still matter. Likewise, Disenchantment in Deep Shadow's reaction bonuses need the relevant reactions, while Golden Troupe directly rewards Skill damage and time off-field.

Do not expect every Superconduct or Stellar-Conduct trigger to add the Radiance hit. The enhanced lightning has a 2.5-second trigger limit, and Yae enters Radiance: Stellar-Conduct while inside a Polestar Field.

Yae Miko in Polish

Story lines the way Kaption shows them in Polish, with the English original underneath.

  • Yae Miko · Mysterious Urban Legend Widzieliście to na własne oczy. Jestem pewien, że potraficie odgadnąć, jakiego ducha go opętał, prawda? You saw it all for yourselves. I'm sure you can figure out what kind of spirit had possessed him, can't you?
  • Yae Miko · Friendship in Writing Szybciej, rozdział drugi, chodźmy. Nie widzisz, że Satomi czeka? Hurry, chapter two, let's go. Can't you see that Satomi is waiting?
  • Yae Miko · A Centuries-Long Dream Cóż za życzenie musiałoby być spełnione, by przywołać autora "Przewodnika po przywoływaniu duchów z pierwszej ręki"? Ktoś ma pomysł? Now, what kind of wish do we think it would take to summon forth the author of "A Firsthand Guide to Summoning Spirits"? Anyone?
  • Yae Miko · Mysterious Urban Legend Nie wiesz? Ale przecież powinieneś mieć większy wgląd niż ktokolwiek inny, jak twój brat stał się takim? You don't know? But surely you should have more insight than anyone else into how your brother came to be this way?
  • Yae Miko · Friendship in Writing Oczywiście. Za każdą książką, która trafia na rynek, stoi autor, prawda? Of course. Behind every book that hits the market lies an author, right?
  • Yae Miko · Friendship in Writing Historia na pewno idzie w nieortodoksyjnym kierunku. A smocza dziewczyna wydaje się być skazana na bycie popularną postacią. Zatwierdzone! The story certainly goes in an unorthodox direction. And the dragon-girl sounds destined to be a hit character. Approved!
  • Yae Miko · Banquet of Parting Kiedy nadejdzie czas, wszyscy dołożymy się i pomożemy w ich pożegnaniu! When that time comes, let's all pitch in and help send them on their way!
  • Yae Miko · A Centuries-Long Dream Pfft, przed chwilą świetnie bawiłeś się, wcielając się w złoczyńcę. Teraz próbujesz zrzucić na mnie winę? Pfft, you were having plenty of fun playing the bad guy a moment ago. Now you're trying blame it all on me?

Frequently asked questions

What's the best build for Yae Miko?

Artifacts: Disenchantment in Deep Shadow, Golden Troupe ×4 or Golden Troupe ×2 + Thundering Fury ×2. Main stats: Sands: ATK%, Elemental Mastery or Energy Recharge, Goblet: Electro DMG Bonus, Circlet: CRIT Rate or CRIT DMG. Recommended weapons: Echoes of the Heart, Reliquary of Truth or Kagura's Verity.

What should I level first on Yae Miko?

Yakan Evocation: Sesshou SakuraE first, then Great Secret Art: Tenko KenshinQ and Spiritfox Sin-EaterAttack.

Which constellations are worth getting for Yae Miko?

The biggest upgrades: C1 Yakan Offering, C6 Forbidden Art: Daisesshou and C2 Fox's Mooncall.

Who should Yae Miko team up with?

Good teammates: Sandrone, Odette and Qiqi.

Is Yae Miko in Polish in Genshin Impact?

The game has no Polish language option. Kaption shows Polish subtitles for the dialogue right on the game screen, so Yae Miko's lines read in Polish. Skill and item names stay in English, as in the game.

Share

Ready-made cards for Instagram, TikTok, X or Discord, in English or Polish.

4:5 for Instagram and Facebook · 9:16 for Stories, TikTok and Shorts · 16:9 for X and Discord

The build cards and quick guides of every Genshin Impact character (131) in one ZIP: 4:5 (45 MB) 9:16 (60 MB) 16:9 (31 MB)

On Discord, paste the copied link or drag the downloaded file into the chat.

Game data version 7.2.0.

← All Genshin Impact characters