
















Genshin Impact character

Yoimiya (Genshin Impact)

Guide, build and skills

  • 5-star
  • Element Pyro
  • Weapon Bow
  • Game data 7.2.0

On-field Pyro damage

The first set boosts Normal Attacks for 10s after the skill, but requires and consumes 15 Energy.

Yoimiya from Genshin Impact with a Kaption Polish subtitle
How Kaption shows Yoimiya in Polish: "Ale jeśli pojawi się okazja, dlaczego nie spróbować pokazać, na co cię stać, prawda?"

At a glance

Yoimiya is a Pyro Bow character who spends her field time firing Normal Attacks. Her Elemental Skill turns those shots into stronger Pyro arrows, so she is a good option when you want to focus damage on a target from a distance.

Her Elemental Burst deals AoE Pyro DMG and marks one opponent. Other party members can hit that opponent to trigger further explosions. After Yoimiya finishes shooting, you can switch to her teammates and make use of the mark.

Video guide

After 3 Years The Perfect Yoimiya Has Finally Been Completed...

Video by weightless on YouTube · 24 min · 105.9K views · July 2025

The YouTube player loads only after you click.

Build

Suggested build The game doesn't recommend a build for this character.

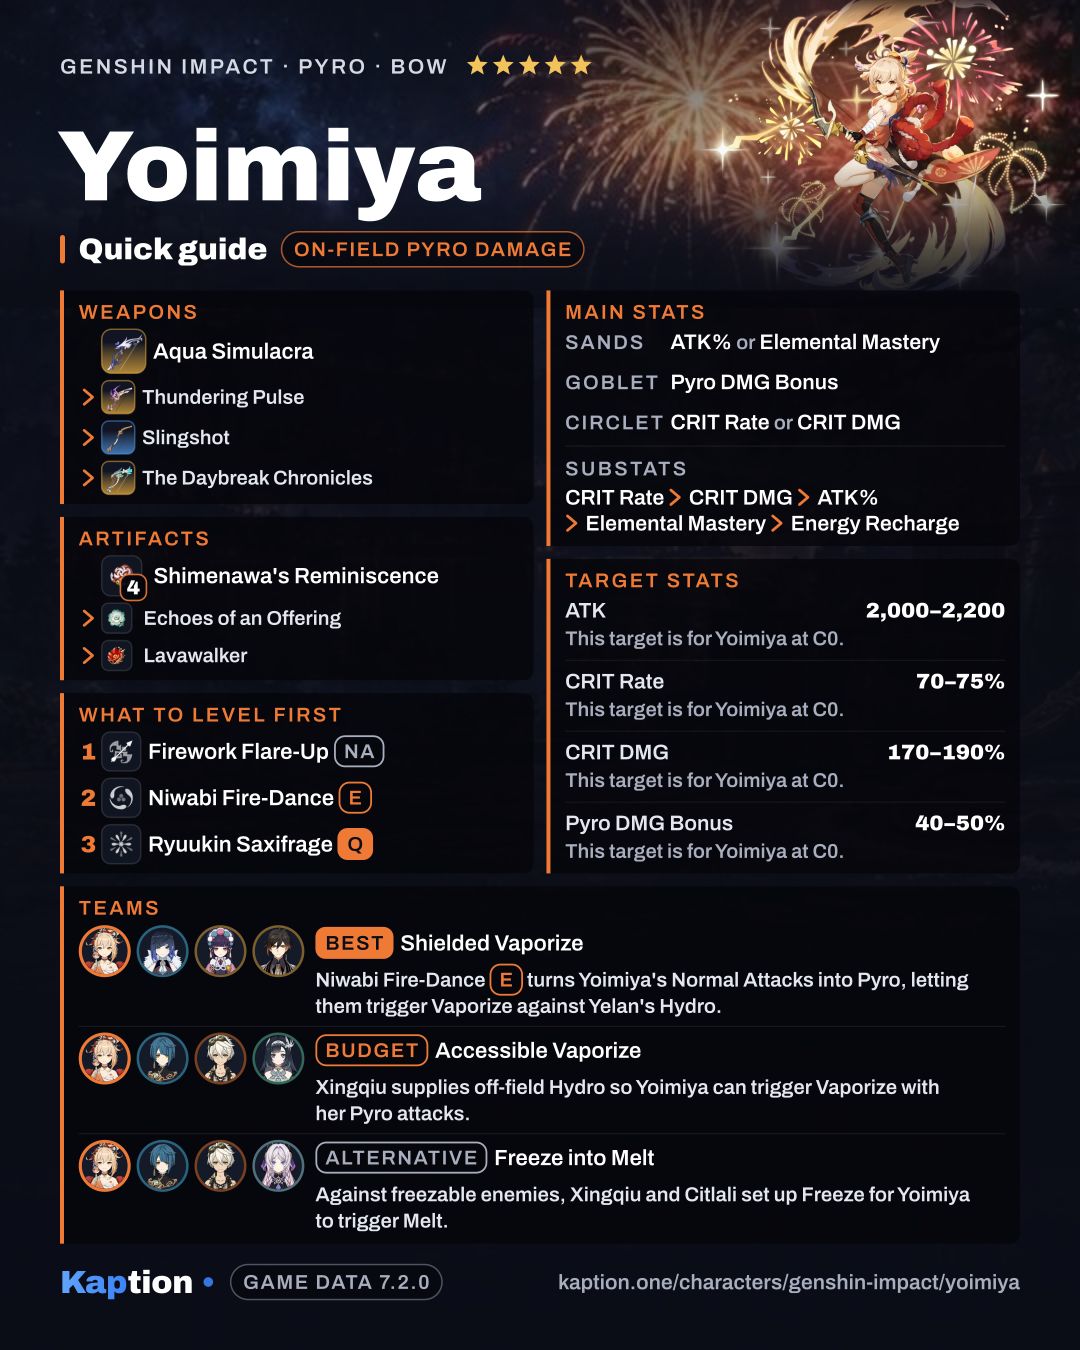
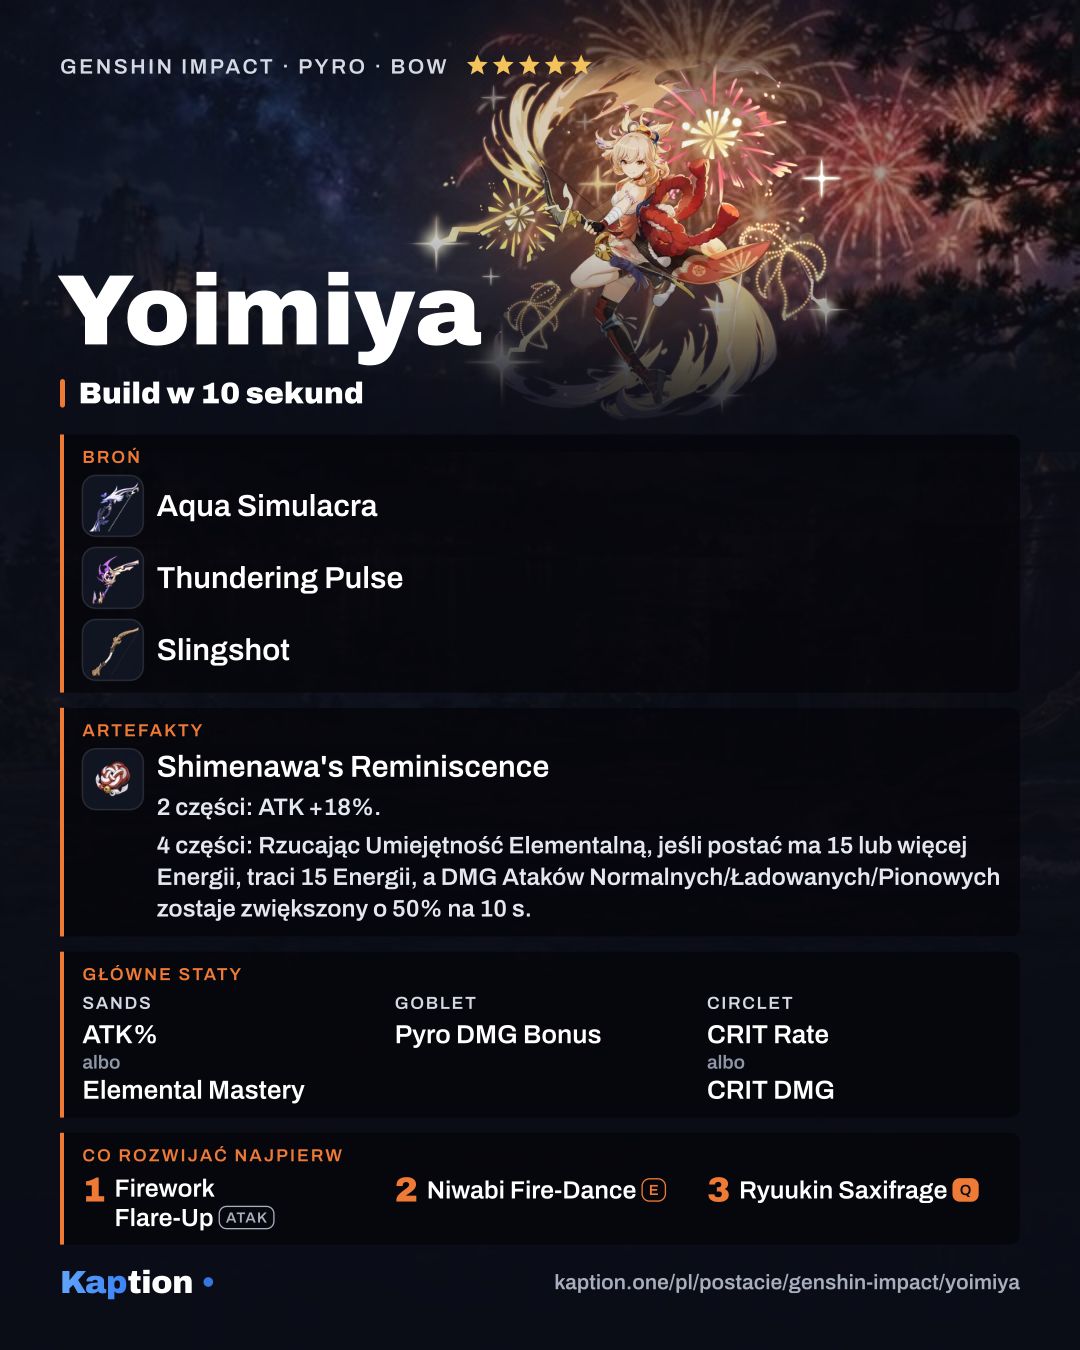
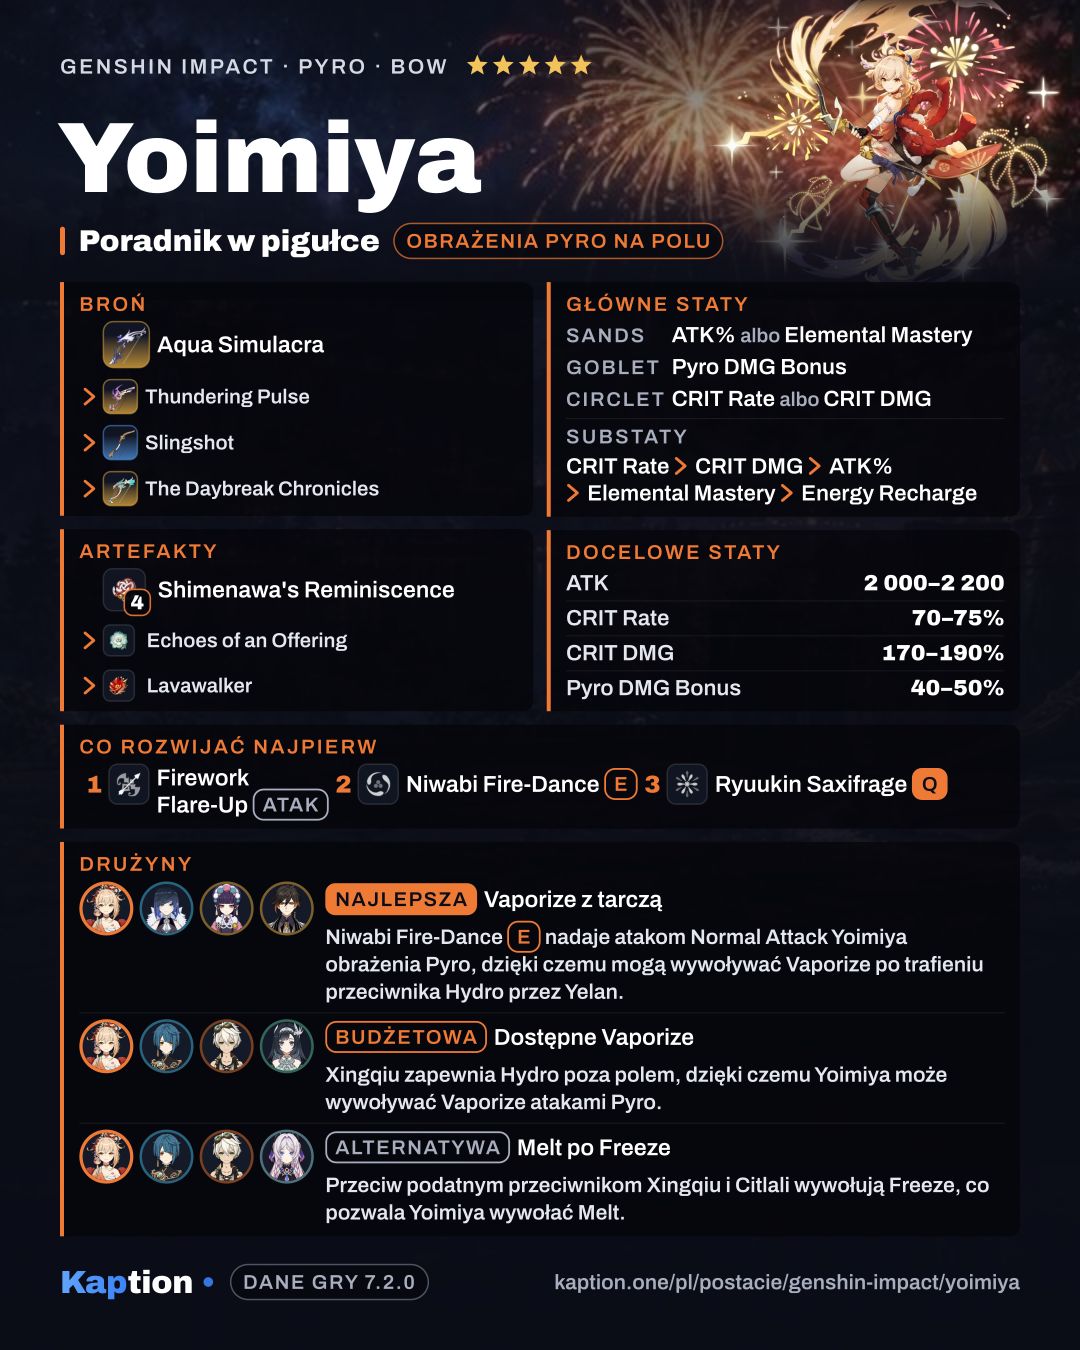
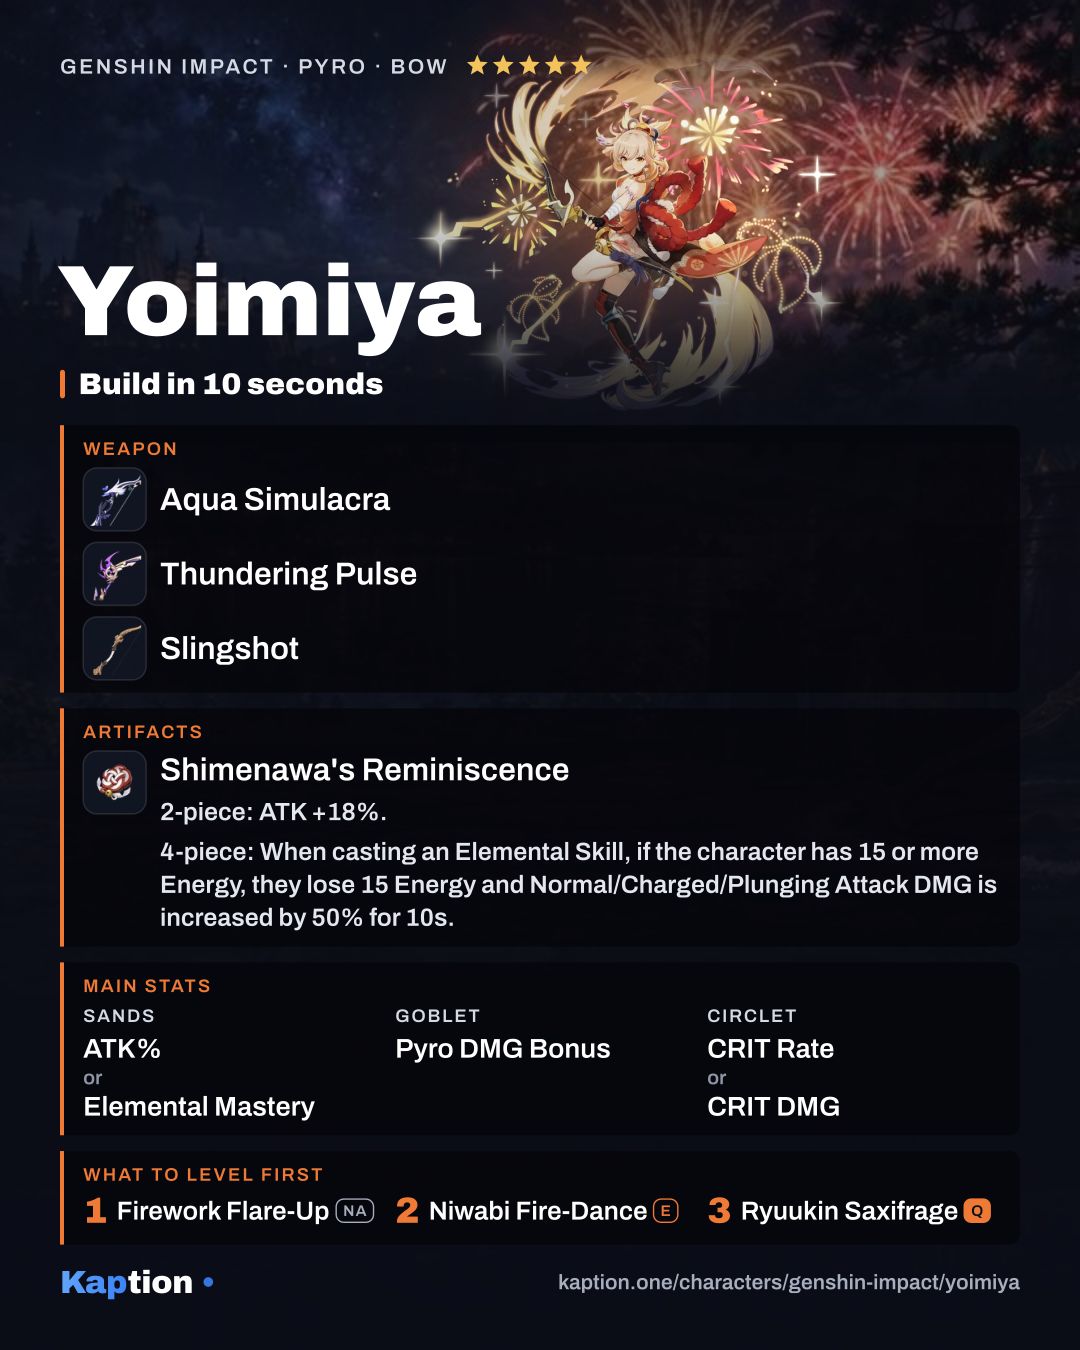
4× Shimenawa's Reminiscence · Sands ATK% or Elemental Mastery · Goblet Pyro DMG Bonus · Circlet CRIT Rate or CRIT DMG · substats CRIT Rate > CRIT DMG > ATK% > Elemental Mastery > Energy Recharge

The first set boosts Normal Attacks for 10s after the skill, but requires and consumes 15 Energy.

Artifacts

Artifact set

  1. Crimson Witch of Flames
    Crimson Witch of Flames
    • 2-piece bonus: Pyro DMG Bonus +15%
    Show effect
    • 4-piece bonus: Increases Overloaded, Burning, and Burgeon DMG by 40%. Increases Vaporize and Melt DMG by 15%. Using Elemental Skill increases the 2-Piece Set Bonus by 50% of its starting value for 10s. Max 3 stacks.

4 pieces · Artifact set

  1. Shimenawa's Reminiscence
    Shimenawa's Reminiscence
    • 2-piece bonus: ATK +18%.
    Show effect
    • 4-piece bonus: When casting an Elemental Skill, if the character has 15 or more Energy, they lose 15 Energy and Normal/Charged/Plunging Attack DMG is increased by 50% for 10s. This effect will not trigger again during that duration.

4 pieces · Artifact set

  1. Echoes of an Offering
    Echoes of an Offering
    • 2-piece bonus: ATK +18%.
    Show effect
    • 4-piece bonus: When Normal Attacks hit opponents, there is a 36% chance that it will trigger Valley Rite, which will increase Normal Attack DMG by 70% of ATK. This effect will be dispelled 0.05s after a Normal Attack deals DMG. If a Normal Attack fails to trigger Valley Rite, the odds of it triggering the next time will increase by 20%. This trigger can occur once every 0.2s.

4 pieces · Artifact set

  1. Lavawalker
    Lavawalker
    • 2-piece bonus: Pyro RES increased by 40%.
    Show effect
    • 4-piece bonus: Increases DMG against opponents affected by Pyro by 35%.

Main stats

Sands
ATK% or Elemental Mastery
Goblet
Pyro DMG Bonus
Circlet
CRIT Rate or CRIT DMG

Substats

  1. CRIT Rate
  2. CRIT DMG
  3. ATK%
  4. Elemental Mastery
  5. Energy Recharge

Target stats

Totals to aim for on the character's stat screen.

StatTarget
ATK 2,000–2,200 This target is for Yoimiya at C0.
CRIT Rate 70–75% This target is for Yoimiya at C0.
CRIT DMG 170–190% This target is for Yoimiya at C0.
Pyro DMG Bonus 40–50% This target is for Yoimiya at C0.

Recommended weapons

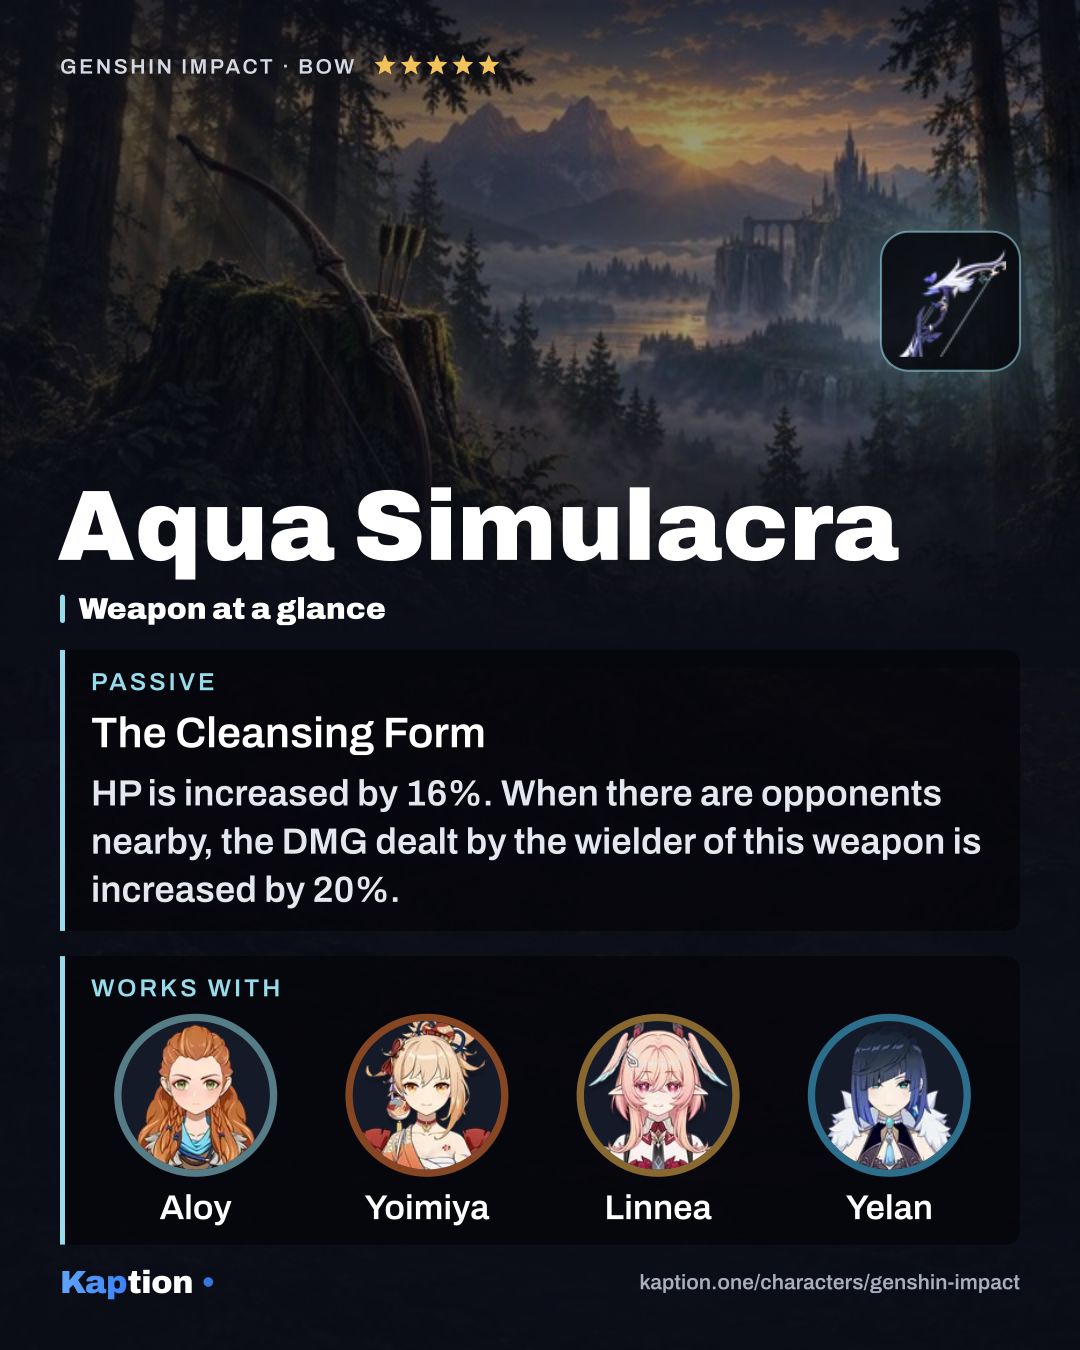
  1. Aqua Simulacra
    Aqua Simulacra 5-star
    The Cleansing Form Show effect

    HP is increased by 16%. When there are opponents nearby, the DMG dealt by the wielder of this weapon is increased by 20%. This will take effect whether the character is on-field or not.

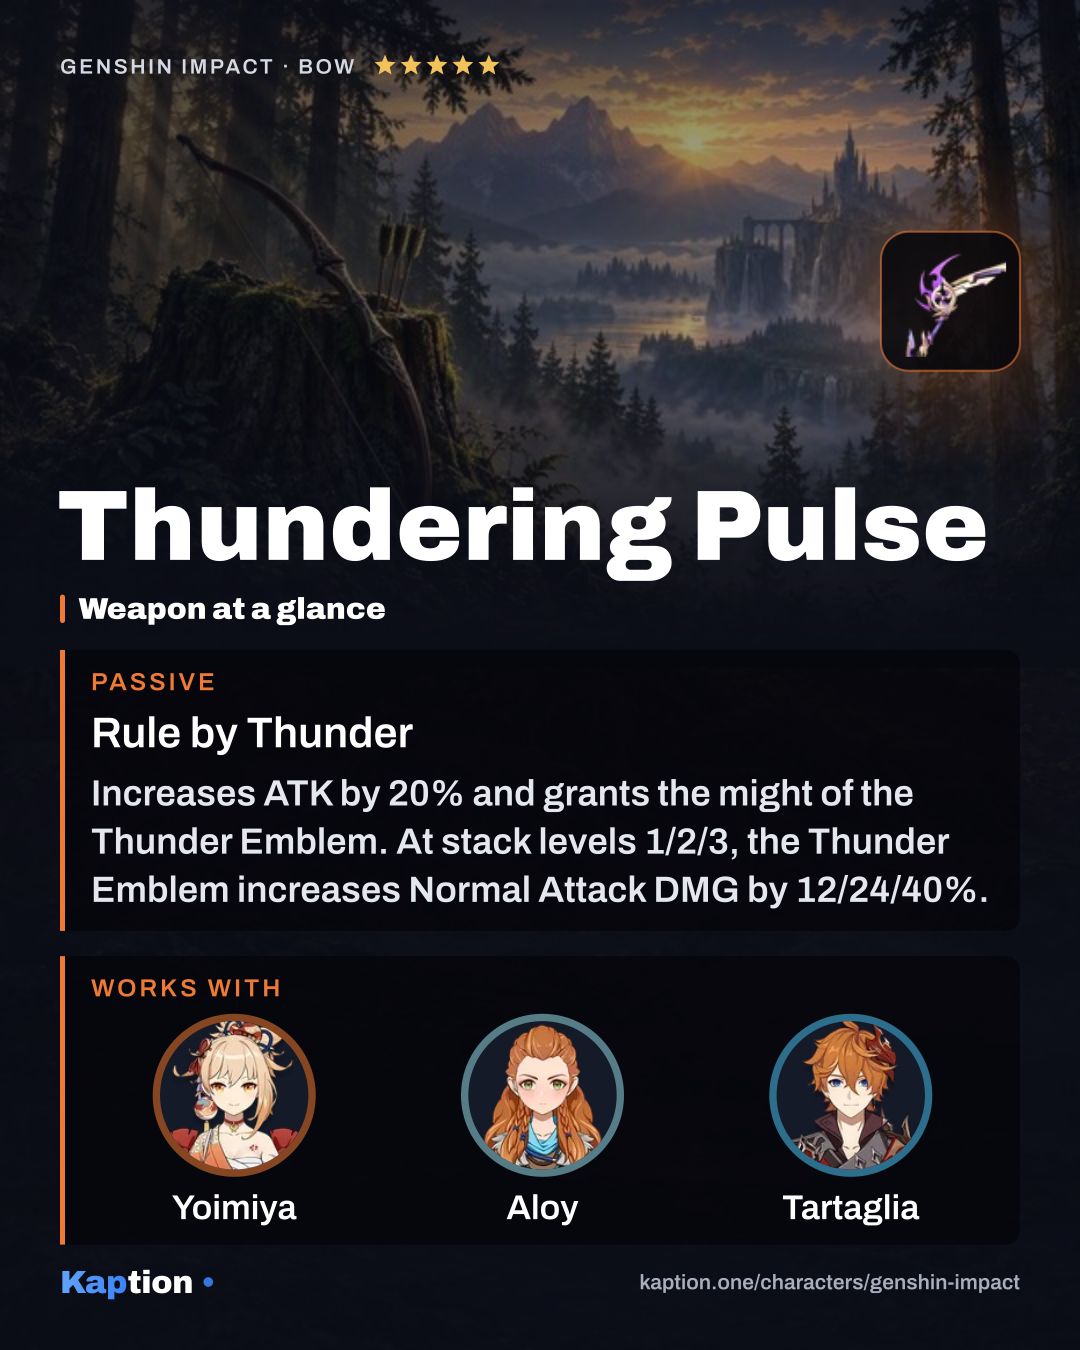
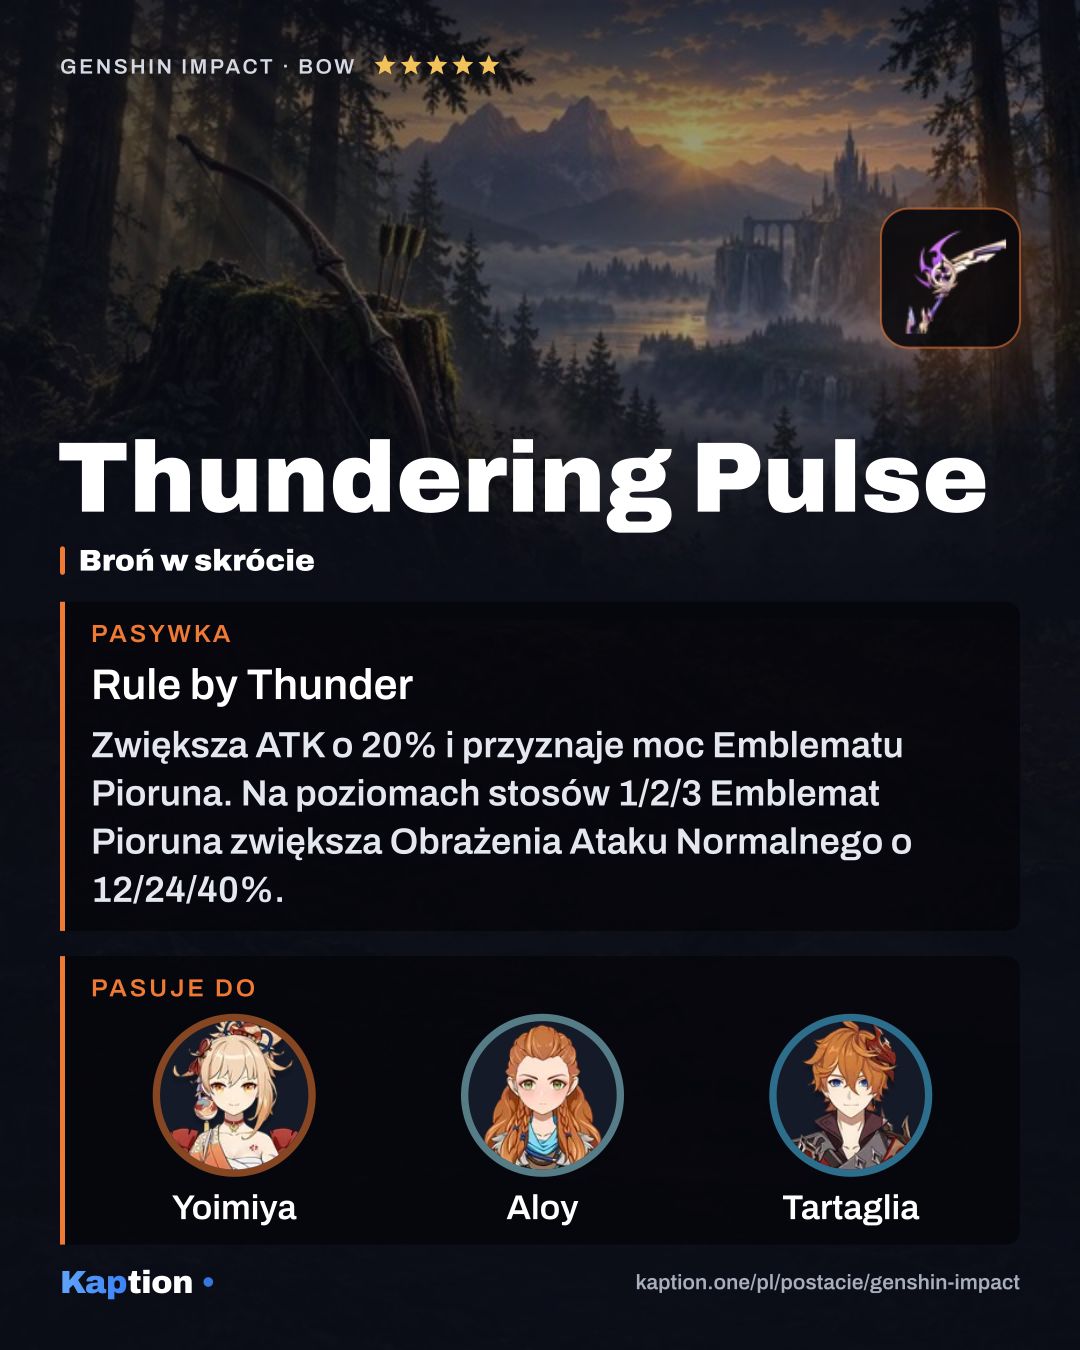
  2. Thundering Pulse
    Thundering Pulse 5-star
    Rule by Thunder Show effect

    Increases ATK by 20% and grants the might of the Thunder Emblem. At stack levels 1/2/3, the Thunder Emblem increases Normal Attack DMG by 12/24/40%. The character will obtain 1 stack of Thunder Emblem in each of the following scenarios: Normal Attack deals DMG (stack lasts 5s), casting Elemental Skill (stack lasts 10s); Energy is less than 100% (stack disappears when Energy is full). Each stack's duration is calculated independently.

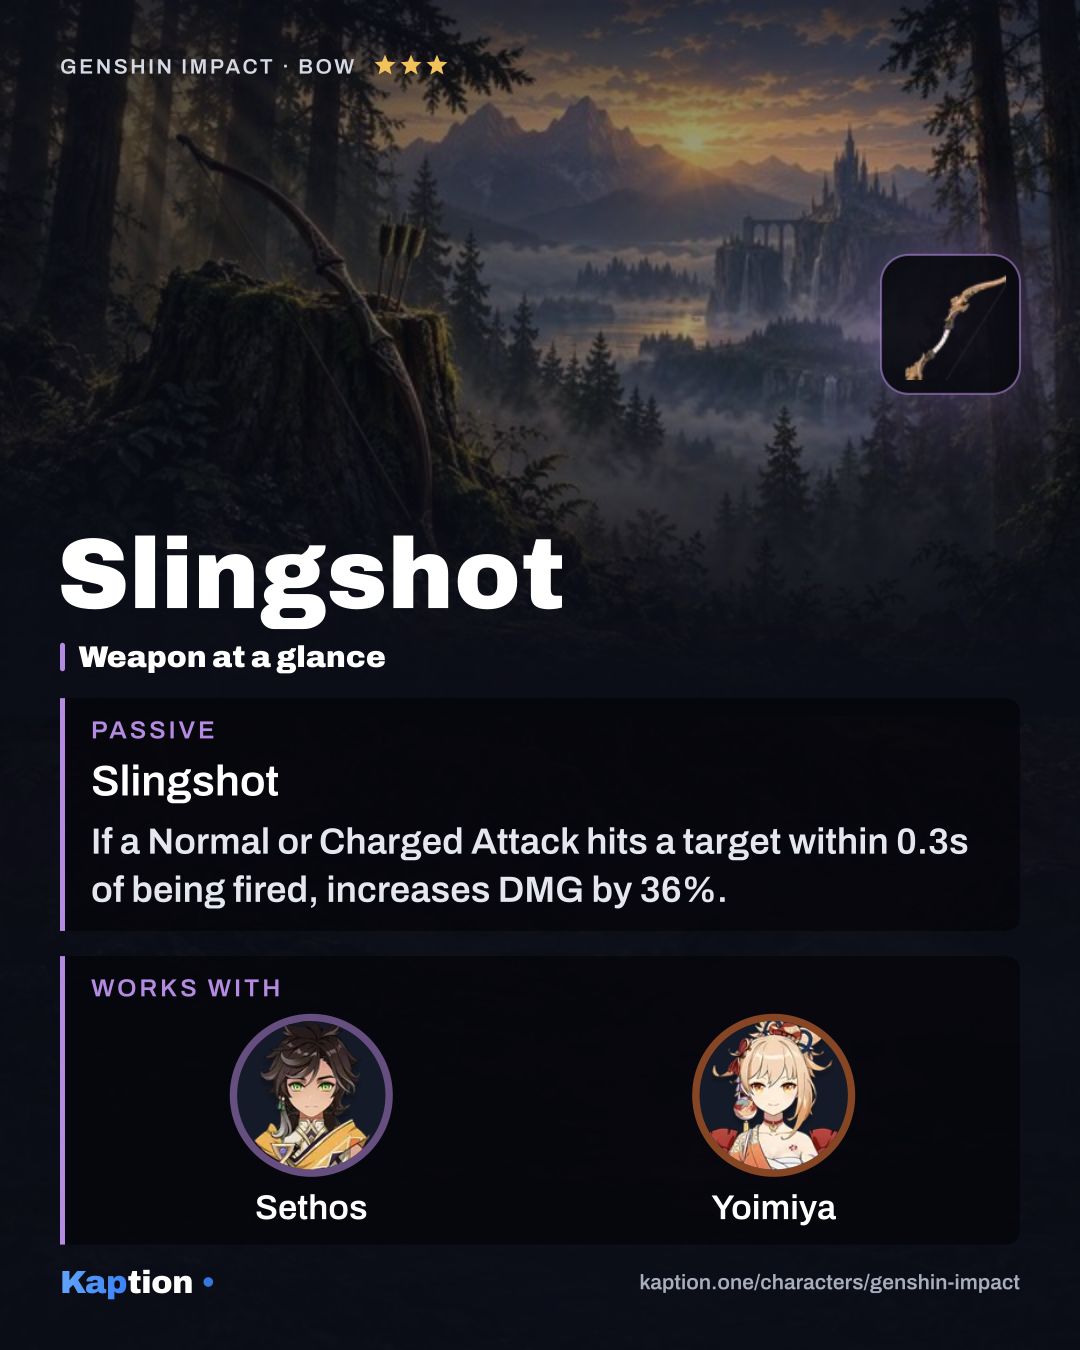
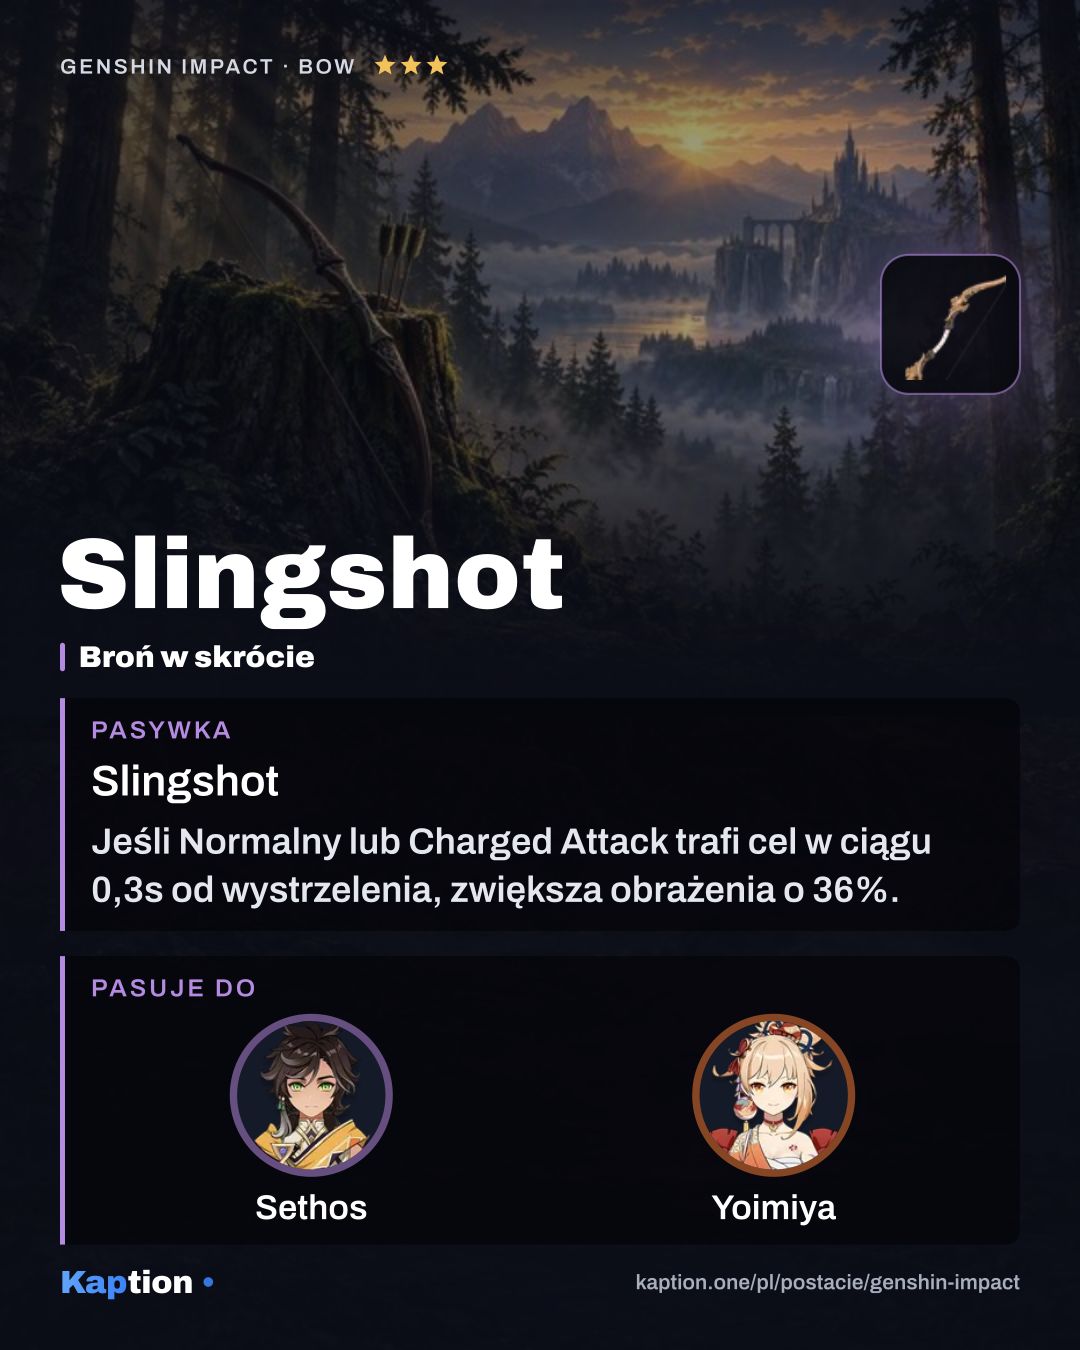
  3. Slingshot
    Slingshot 3-star
    Slingshot Show effect

    If a Normal or Charged Attack hits a target within 0.3s of being fired, increases DMG by 36%. Otherwise, decreases DMG by 10%.

  4. The Daybreak Chronicles
    The Daybreak Chronicles 5-star
    Ode Beyond Time Show effect

    The equipping character gains Stirring Dawn Breeze: 3s after leaving combat, Normal Attack, Elemental Skill, and Elemental Burst DMG is increased by 60%. While in combat, this DMG Bonus will decrease by 10% per second until it reaches 0%. When the equipping character's Normal Attacks, Elemental Skills, or Elemental Bursts hit an opponent, the DMG Bonus for the corresponding DMG type is increased by 10% until it reaches 60%. This effect can be triggered once every 0.1s for each of the attack types mentioned above. This effect can be triggered even if the equipping character is off-field. Additionally, when the party possesses Hexerei: Secret Rite effects, when the equipping character's Normal Attacks, Elemental Skills, or Elemental Bursts hit an opponent, the DMG Bonus for all these DMG types is increased by 20% instead.

  5. Amos' Bow
    Amos' Bow 5-star
    Strong-Willed Show effect

    Increases Normal and Charged Attack DMG by 12%. After a Normal or Charged Attack is fired, DMG dealt increases by a further 8% every 0.1s the arrow is in the air for up to 5 times.

  6. Rust
    Rust 4-star
    Rapid Firing Show effect

    Increases Normal Attack DMG by 40% but decreases Charged Attack DMG by 10%.

Have this character? Make a card of your own build from your UID Stats, artifacts, weapon and talents from your in-game showcase, as a PNG in a dozen layouts.

Teams

Show more teams (4)Show less

Also plays in

Other characters' teams with a place for Yoimiya.

Skills

Names in English, as in the game · underlined ones open their card · Priority = level-up order

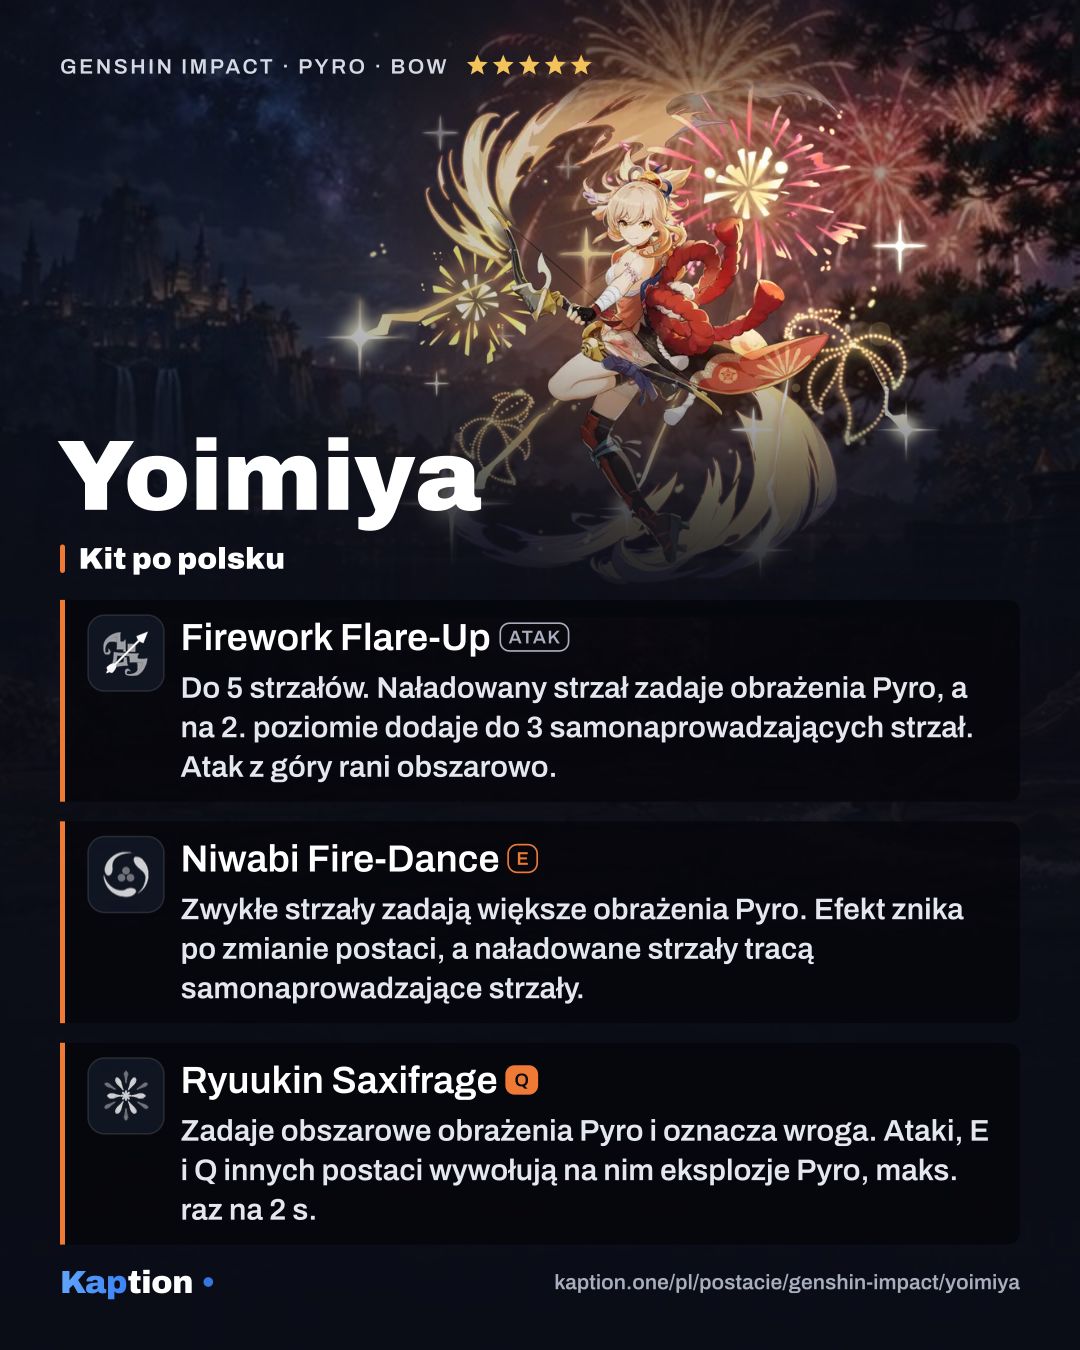
  1. Basic attack

    Firework Flare-UpAttack

    Level priority 1 of 3

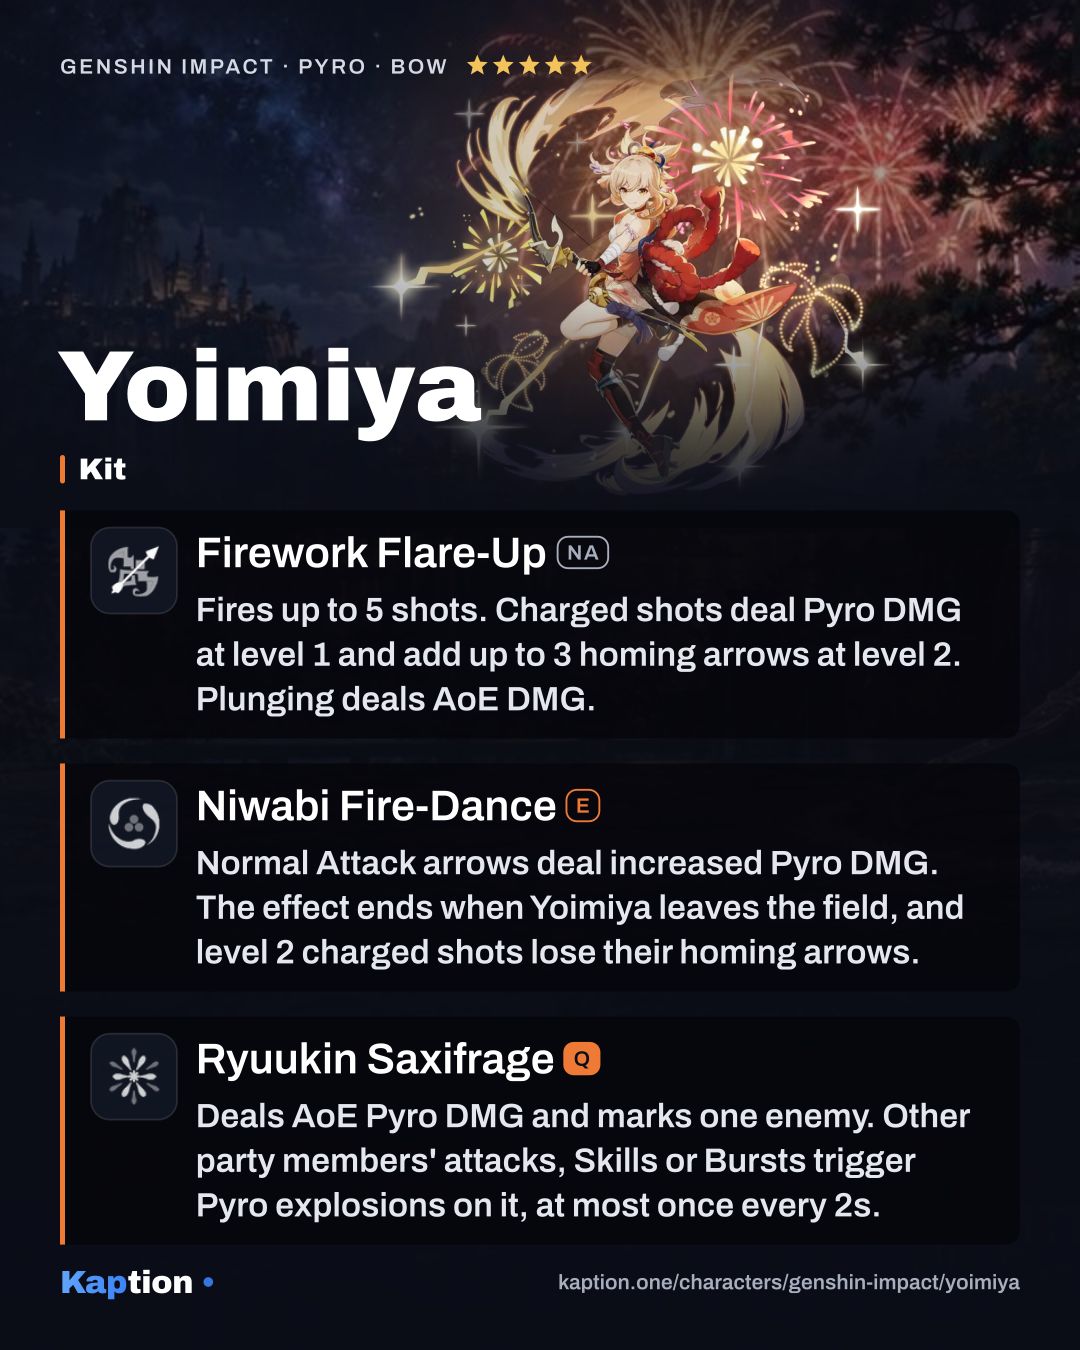
    Fires up to 5 shots. Charged shots deal Pyro DMG at level 1 and add up to 3 homing arrows at level 2. Plunging deals AoE DMG.

    Normal Attack Performs up to 5 consecutive shots with a bow. Charged Attack Performs a more precise Aimed Shot with increased DMG. While aiming, flames will accumulate on the arrowhead before being fired off as an attack. Has different effects based on how long the energy has been charged: ·Charge Level 1: Fires off a flaming arrow that deals Pyro DMG. ·Charge Level 2: Generates a maximum of 3 Kindling Arrows based on time spent charging, releasing them as part of this Aimed Shot. Kindling Arrows will home in on nearby opponents, dealing Pyro DMG on hit. Plunging Attack Fires off a shower of arrows in mid-air before falling and striking the ground, dealing AoE DMG upon impact.

  2. Skill

    Niwabi Fire-DanceE

    Level priority 2 of 3

    Normal Attack arrows deal increased Pyro DMG. The effect ends when Yoimiya leaves the field, and level 2 charged shots lose their homing arrows.

    Yoimiya waves a sparkler and causes a ring of saltpeter to surround her. Niwabi Enshou During this time, arrows fired by Yoimiya's Normal Attack will be Blazing Arrows, and their DMG will be increased and converted to Pyro DMG. During this time, Normal Attack: Firework Flare-Up will not generate Kindling Arrows at Charge Level 2. This effect will deactivate when Yoimiya leaves the field. "Niwabi" is a form of incense firework created by Yoimiya herself. Its ability to be lit without any prior training or preparation has made it a real hit. After many fire-related incidents, the Tenryou Commission ordered the use of "Niwabi" banned, but small, bright sparks can often still be seen springing up at night. If seen from above, they look almost like little twinkling stars.

  3. Ultimate

    Ryuukin SaxifrageQ

    Level priority 3 of 3

    Deals AoE Pyro DMG and marks one enemy. Other party members' attacks, Skills or Bursts trigger Pyro explosions on it, at most once every 2s.

    Yoimiya leaps into the air along with her original creation, the "Ryuukin Saxifrage," and fires forth blazing rockets bursting with surprises that deal AoE Pyro DMG and mark one of the hit opponents with Aurous Blaze. Aurous Blaze All Normal/Charged/Plunging Attacks, Elemental Skills, and Elemental Bursts by any party member other than Yoimiya that hit an opponent marked by Aurous Blaze will trigger an explosion, dealing AoE Pyro DMG. When an opponent affected by Aurous Blaze is defeated before its duration expires, the effect will pass on to another nearby opponent, who will inherit the remaining duration. One Aurous Blaze explosion can be triggered every 2s. When Yoimiya is down, Aurous Blaze effects created through her skills will be deactivated. Fireworks are man-made starlight, comets fired into the sky. Though they last for but an instant, the memory of their brilliance shall surely live on.

Passives

  1. Passive

    Tricks of the Trouble-MakerPassive

    During the skill, each Normal Attack hit grants 2% Pyro DMG Bonus for 3s, up to 10 stacks.

    During Niwabi Fire-Dance, shots from Yoimiya's Normal Attack will increase her Pyro DMG Bonus by 2% on hit. This effect lasts for 3s and can have a maximum of 10 stacks.

  2. Passive

    Summer Night's DawnPassive

    Q gives nearby party members 10% ATK for 15s, plus 1% per stack from Normal Attack hits during the skill. Yoimiya doesn't get the bonus.

    Using Ryuukin Saxifrage causes nearby party members (not including Yoimiya) to gain a 10% ATK increase for 15s. Additionally, a further ATK Bonus will be added on based on the number of Ascension Talent "Tricks of the Trouble-Maker" stacks Yoimiya possesses when using Ryuukin Saxifrage. Each stack increases this ATK Bonus by 1%.

  3. Passive

    Blazing MatchPassive

    Crafting Decoration, Ornament or Landscape furnishings always refunds a portion of the materials used.

    When Yoimiya crafts Decoration, Ornament, and Landscape-type Furnishings, she has a 100% chance to refund a portion of the materials used.

Constellations

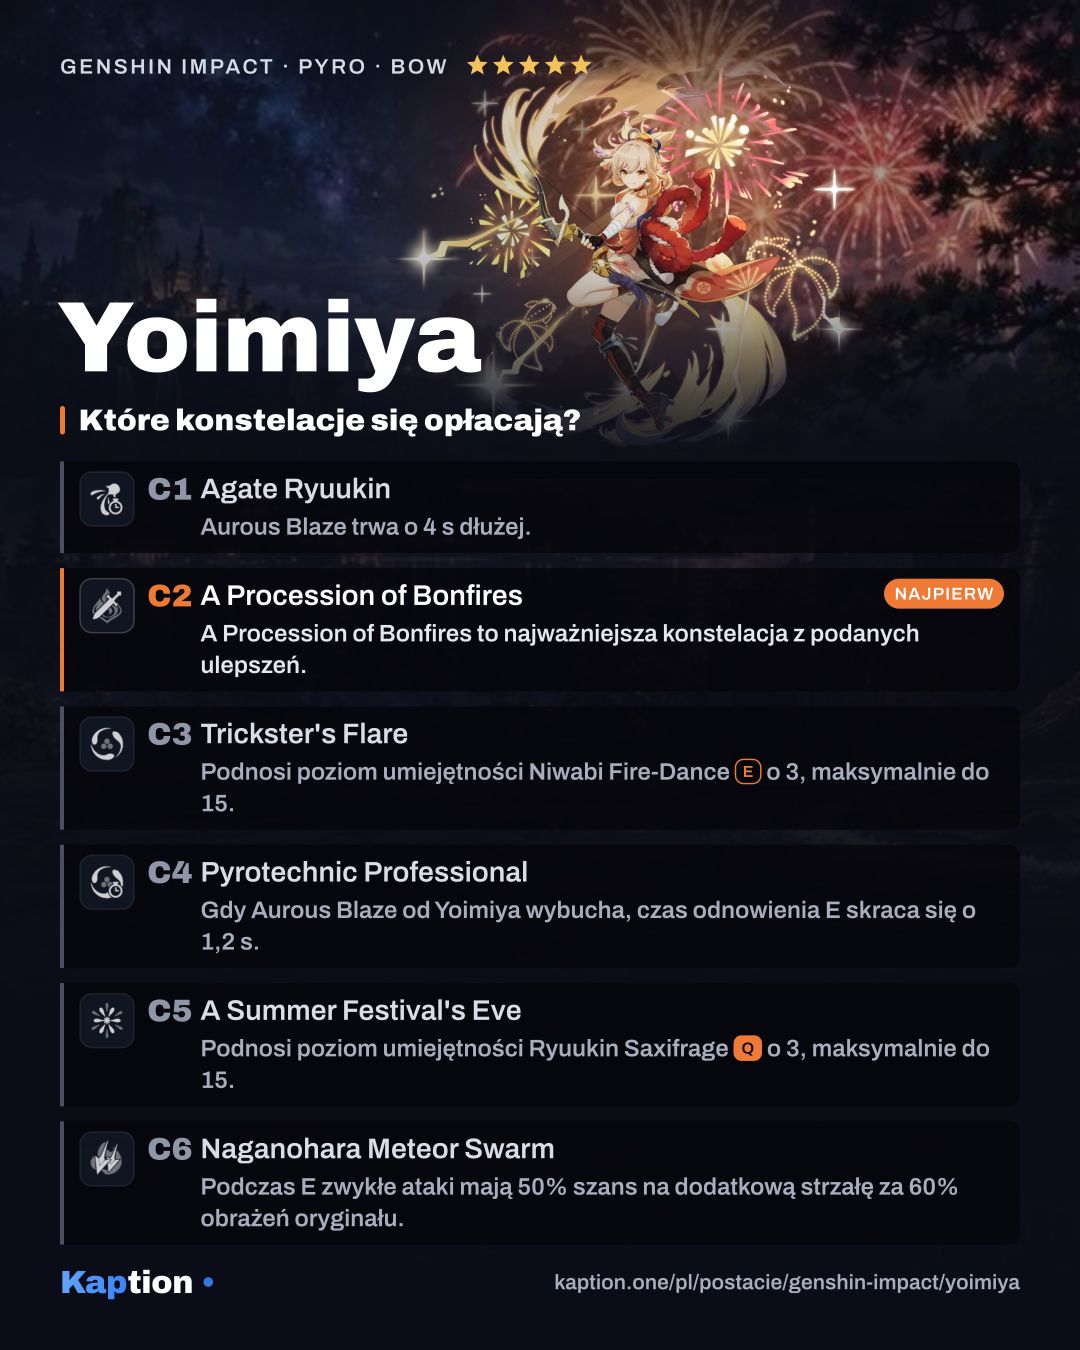
  1. C1

    Agate Ryuukin

    The Aurous Blaze created by Ryuukin Saxifrage lasts for an extra 4s. Additionally, when an opponent affected by Aurous Blaze is defeated within its duration, Yoimiya's ATK is increased by 20% for 20s.

  2. C2

    A Procession of Bonfires

    Worth it

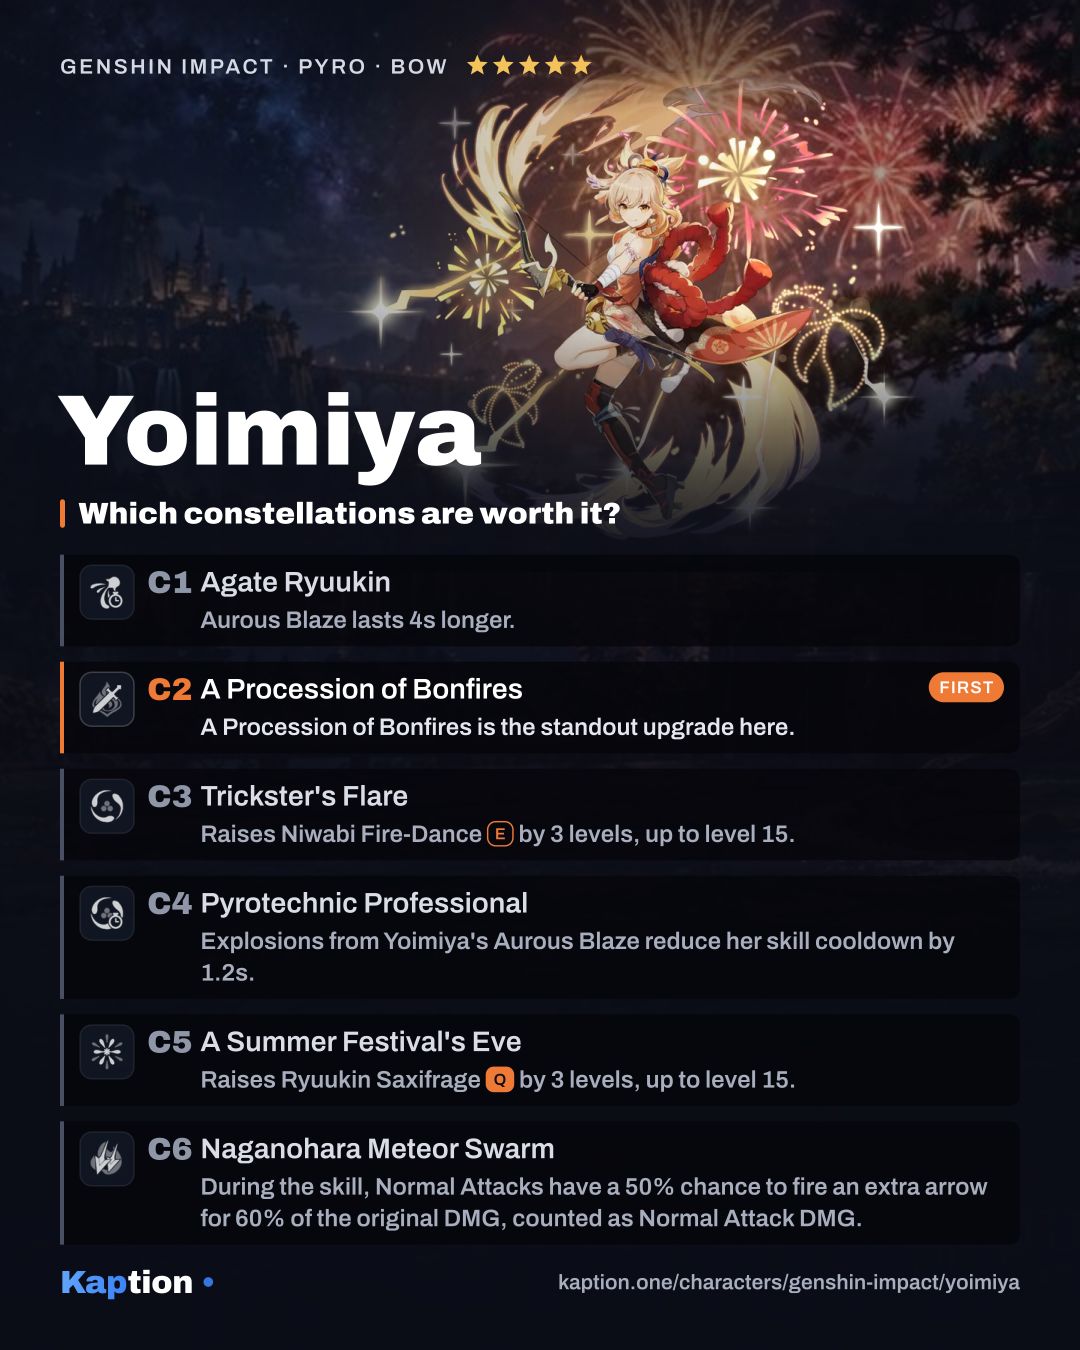
    A Procession of Bonfires (C2) is the standout upgrade here.

    When Yoimiya's Pyro DMG scores a CRIT Hit, Yoimiya will gain a 25% Pyro DMG Bonus for 6s. This effect can be triggered even when Yoimiya is not the active character.

  3. C3

    Trickster's Flare

    Increases the Level of Niwabi Fire-Dance by 3. Maximum upgrade level is 15.

  4. C4

    Pyrotechnic Professional

    When Yoimiya's own Aurous Blaze triggers an explosion, Niwabi Fire-Dance's CD is decreased by 1.2s.

  5. C5

    A Summer Festival's Eve

    Increases the Level of Ryuukin Saxifrage by 3. Maximum upgrade level is 15.

  6. C6

    Naganohara Meteor Swarm

    During Niwabi Fire-Dance, Yoimiya's Normal Attacks have a 50% chance of firing an extra Blazing Arrow that deals 60% of its original DMG. This DMG is considered Normal Attack DMG.

Materials

Ascension, to max level

  • Mora Mora × 420,000
  • Naku Weed Naku Weed × 168
  • Agnidus Agate Sliver Agnidus Agate Sliver × 1
  • Agnidus Agate Fragment Agnidus Agate Fragment × 9
  • Agnidus Agate Chunk Agnidus Agate Chunk × 9
  • Agnidus Agate Gemstone Agnidus Agate Gemstone × 6
  • Divining Scroll Divining Scroll × 18
  • Sealed Scroll Sealed Scroll × 30
  • Forbidden Curse Scroll Forbidden Curse Scroll × 36
  • Smoldering Pearl Smoldering Pearl × 46

All skills to max

  • Mora Mora × 4,957,500
  • Crown of Insight Crown of Insight × 3
  • Teachings of Transience Teachings of Transience × 9
  • Guide to Transience Guide to Transience × 63
  • Philosophies of Transience Philosophies of Transience × 114
  • Divining Scroll Divining Scroll × 18
  • Sealed Scroll Sealed Scroll × 66
  • Forbidden Curse Scroll Forbidden Curse Scroll × 93
  • Dragon Lord's Crown Dragon Lord's Crown × 18

Guide

How the kit works

Start Yoimiya's field time with Niwabi Fire-Dance. It converts the arrows from her Normal Attacks into Blazing Arrows, increases their DMG and makes them deal Pyro DMG. The effect ends if she leaves the field, so stay on her and shoot.

Firework Flare-Up (NA) has a chain of up to five Normal Attacks. Hitting with those shots during the Skill also gives Yoimiya 2% Pyro DMG Bonus per stack, up to 10 stacks. Each stack lasts 3 seconds, so keep attacking to maintain the bonus.

When you are ready to switch, use Ryuukin Saxifrage. It deals AoE Pyro DMG and applies Aurous Blaze to one enemy hit. Another party member's attack, Skill or Burst can trigger an AoE Pyro explosion on that enemy once every 2 seconds. If the marked enemy is defeated, the mark can pass to a nearby opponent for its remaining duration.

The Burst also gives nearby teammates 10% ATK for 15 seconds, plus 1% for each Pyro DMG Bonus stack Yoimiya has when she casts it. Outside her Skill, a fully charged Aimed Shot can release up to three homing Kindling Arrows. During the Skill, it cannot generate them.

Build and why

Use four pieces of Shimenawa's Reminiscence for a Normal Attack build. Its two-piece effect gives 18% ATK. If Yoimiya has at least 15 Energy when she casts her Skill, the four-piece effect consumes 15 Energy and increases Normal, Charged and Plunging Attack DMG by 50% for 10 seconds. Check her Energy before casting if you want the bonus.

Four pieces of Echoes of an Offering are another option. Normal Attack hits have a 36% chance to trigger a bonus equal to 70% of ATK. When a hit fails to trigger it, the chance increases by 20% for the next attempt. For reaction teams, consider Crimson Witch of Flames: its four-piece effect increases Vaporize and Melt DMG by 15%, while its two-piece effect gives 15% Pyro DMG Bonus.

Choose ATK Percentage or Elemental Mastery on the sands, Pyro DMG Bonus on the goblet, and CRIT Rate or CRIT DMG on the circlet. Elemental Mastery is worth considering when Yoimiya triggers reactions; ATK Percentage is a direct option for her attacks. For substats, look for CRIT Rate and CRIT DMG first, followed by ATK Percentage, Elemental Mastery and Energy Recharge.

Thundering Pulse is the first weapon choice. It gives 20% ATK and increases Normal Attack DMG by 12%, 24% or 40% at one, two or three Thunder Emblem stacks. Yoimiya gains stacks from Normal Attack DMG, casting her Skill and having less than full Energy; the last stack disappears when her Energy is full.

Aqua Simulacra is another option: it increases the wielder's DMG by 20% when opponents are nearby. Slingshot is a lower-rarity choice that increases Normal or Charged Attack DMG by 36% if the arrow hits within 0.3 seconds. If it takes longer, the weapon instead decreases that DMG by 10%.

Leveling priority

A sensible leveling order is Firework Flare-Up (NA), then Niwabi Fire-Dance, then Ryuukin Saxifrage. The Normal Attack is first because those are the shots Yoimiya repeatedly fires during her Skill. Level the Skill next to improve the ability that powers that field time, then the Burst for its damage.

For maximum ascension, collect 420,000 Mora, 168 Naku Weed, 1 Agnidus Agate Sliver, 9 Agnidus Agate Fragment, 9 Agnidus Agate Chunk, 6 Agnidus Agate Gemstone, 18 Divining Scroll, 30 Sealed Scroll, 36 Forbidden Curse Scroll and 46 Smoldering Pearl.

To take all three talents to maximum, the listed total is 4,957,500 Mora, 3 Crown of Insight, 9 Teachings of Transience, 63 Guide to Transience, 114 Philosophies of Transience, 18 Divining Scroll, 66 Sealed Scroll, 93 Forbidden Curse Scroll and 18 Dragon Lord's Crown.

Constellations worth it

A Procession of Bonfires is the standout upgrade here. When Yoimiya's Pyro DMG scores a critical hit, she gains 25% Pyro DMG Bonus for 6 seconds. It can also trigger while she is off-field.

If you are considering later constellations, Naganohara Meteor Swarm adds a 50% chance for each Normal Attack during her Skill to fire an extra Blazing Arrow. That arrow deals 60% of the original DMG and counts as Normal Attack DMG. Trickster's Flare is also worth considering because it adds three levels to her Skill.

You can stop at C2 or C3 rather than continue to Pyrotechnic Professional and A Summer Festival's Eve. C4 reduces the Skill cooldown by 1.2 seconds when Yoimiya's Aurous Blaze triggers an explosion, while C5 adds three Burst levels. Both lie on the way to C6, so you cannot skip them if you choose to reach it.

Teams

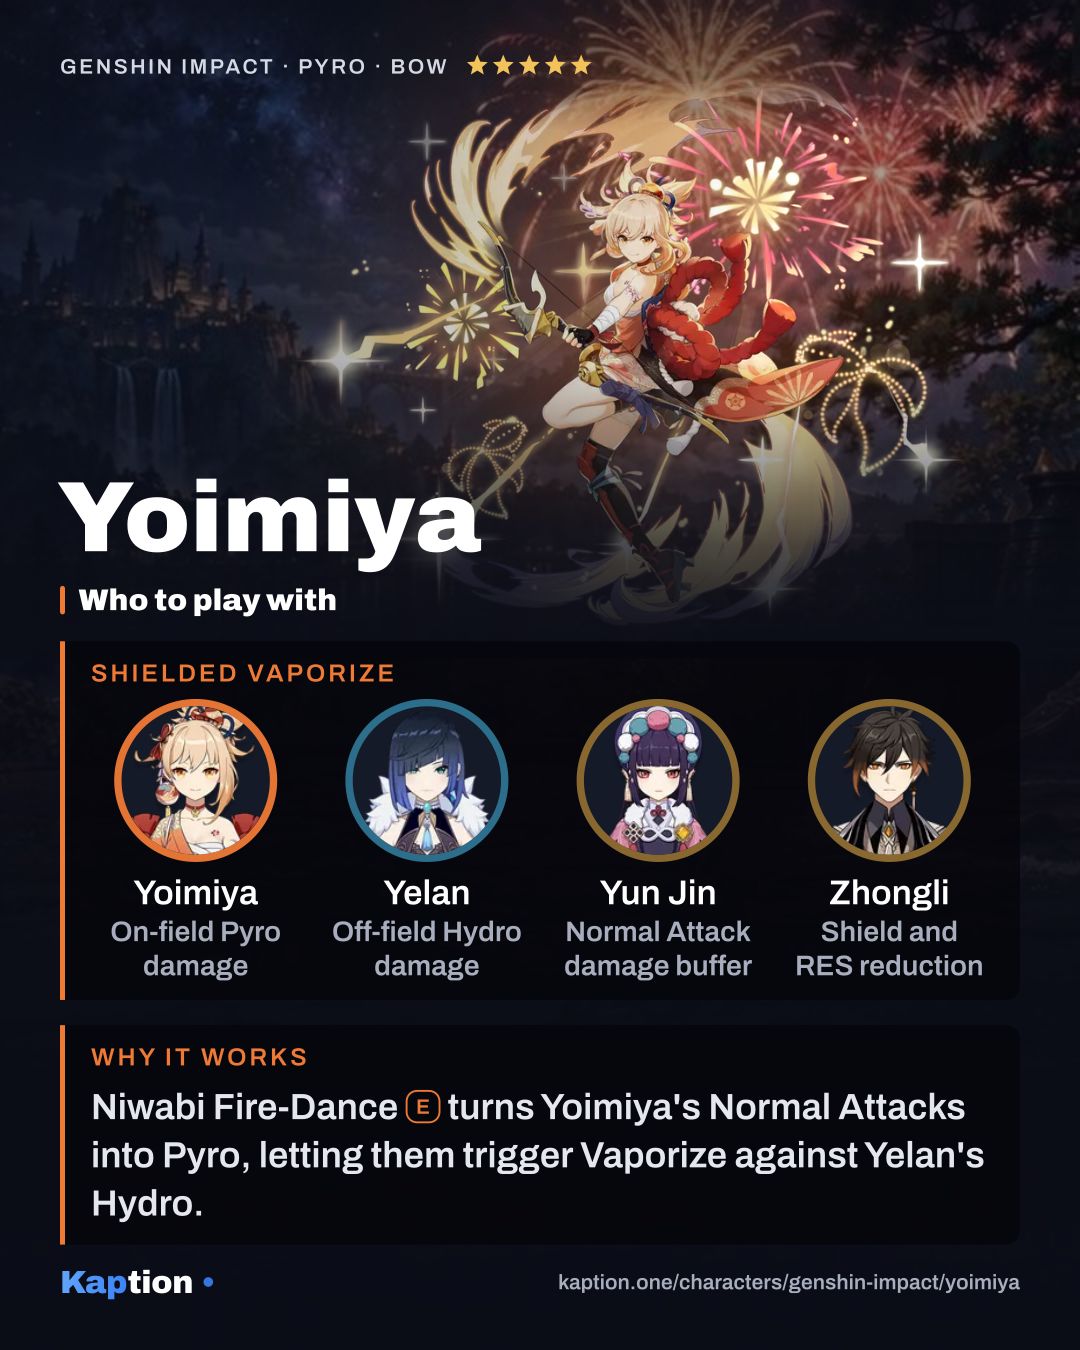
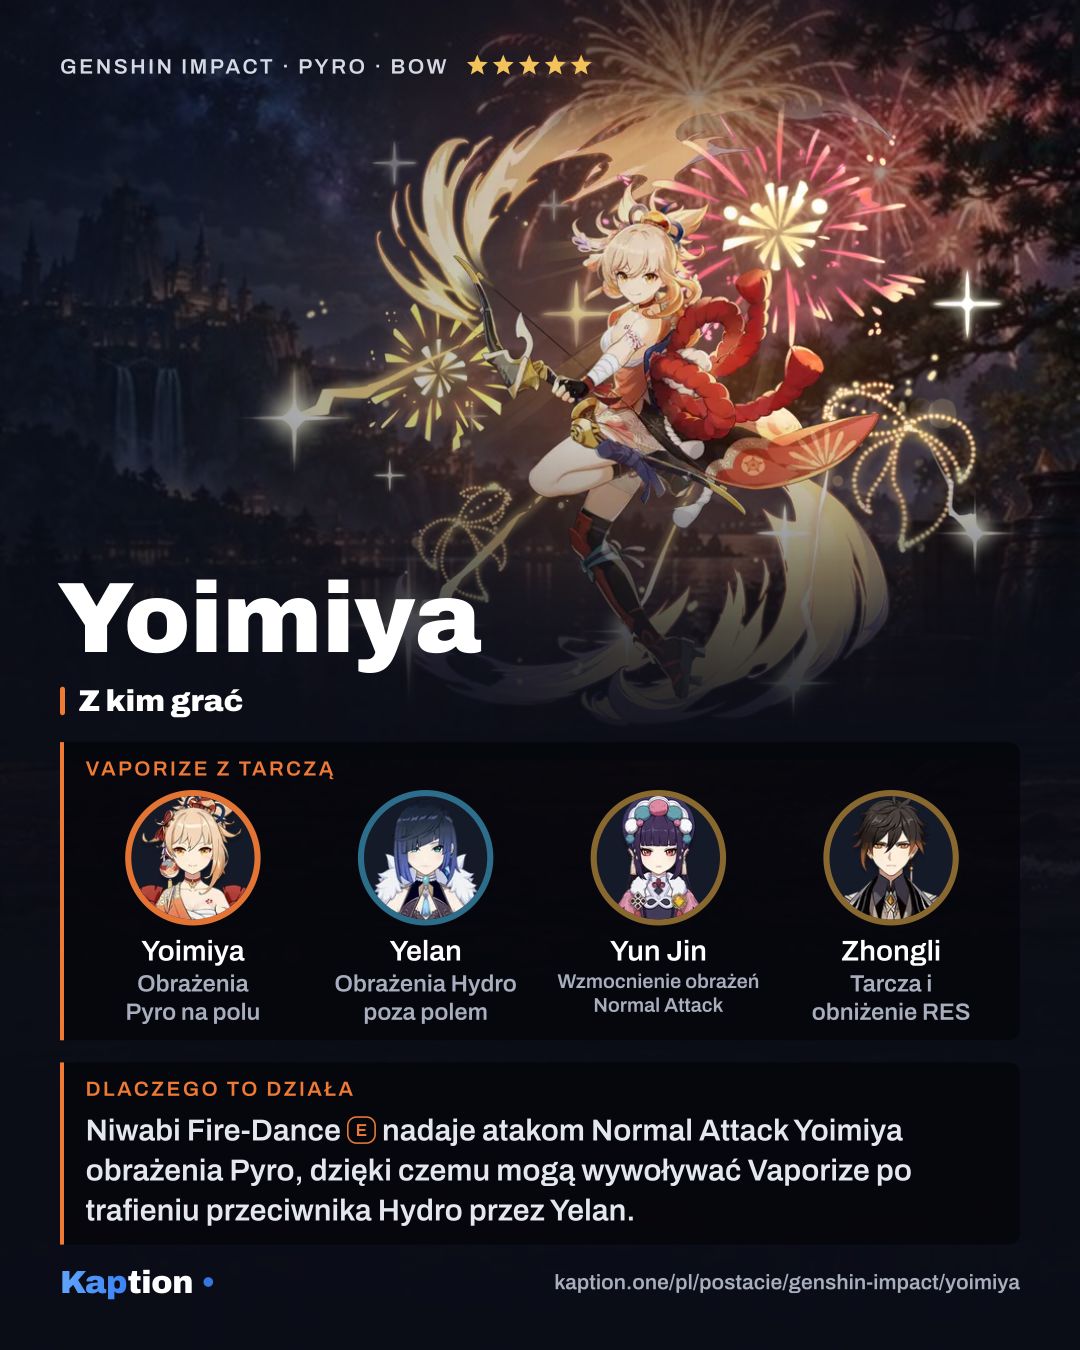
Yoimiya wants teammates who can contribute while she shoots, plus protection or healing to help her stay on the field. Yelan and Xingqiu are Hydro options with off-field roles. Xingqiu is also a healing option; their Hydro element gives you a route to Vaporize teams.

For protection, consider Zhongli or Citlali as shield options. Citlali brings Cryo, giving the team an element to use alongside Pyro for Melt. Furina is another Hydro option with an off-field role and healing.

For an Overloaded team, Fischl brings Electro and an off-field role, while Chevreuse brings Pyro and healing. Kaedehara Kazuha is an Anemo option for Swirl. Whichever team you choose, the ATK bonus from Yoimiya's Burst goes to nearby teammates rather than Yoimiya herself, and their hits can trigger her mark.

Common mistakes

Do not switch Yoimiya out immediately after using her Skill. Its Pyro conversion ends when she leaves the field, so you would lose the effect before using her Normal Attacks.

Do not expect Yoimiya's own hits to trigger her Burst's mark. Another party member has to hit the marked opponent. Cast the Burst when you can make use of both the mark and the teammate ATK bonus.

With Shimenawa's Reminiscence, casting the Skill below 15 Energy will not activate the four-piece attack bonus. The set also consumes Energy when it does activate, so account for that when deciding whether to use the Burst first. With Slingshot, watch the distance: an arrow that takes longer than 0.3 seconds to hit loses DMG instead of gaining it.

Yoimiya in Polish

Story lines the way Kaption shows them in Polish, with the English original underneath.

  • Yoimiya · The Seeker of a Meteor Shower Ale jeśli pojawi się okazja, dlaczego nie spróbować pokazać, na co cię stać, prawda? But if an opportunity presents itself, why not try to show your stuff, right?
  • Yoimiya · Together Under the Fireworks O czym ty mówisz? I kogo ty chcesz oszukać?! What are you talking about? And just who do you think you're kidding!?
  • Yoimiya · A Flower that Blooms Across the Sky Dziękuję. Nie spodziewałam się, że rozwiążemy nasz problem w ten sposób. Dobra, czas spróbować! Thank you. I didn't expect us to solve our problem like this. Alright, time to give it a go!
  • Yoimiya · All Things Flawless and Pure Dobra, chodźmy. Hehehe, to będzie niezła historia! Alright, let's go. Hehehe, now this'll make for quite the story!
  • Yoimiya · Expectations Not to Be Betrayed Wy jesteście podróżnikami, prawda? Gdzie byliście zanim przybyliście do Inazumy? You guys are travelers, right? So, where else did you go before coming to Inazuma?
  • Yoimiya · Expectations Not to Be Betrayed A tak w ogóle, odnośnie współpracy... też przecież pomagałeś, prawda? And anyway, to your point about collaboration... you've been helping out too, right?
  • Yoimiya · All Things Flawless and Pure Zrozumiałem. To było tam, prawda? Idziemy teraz. Dzięki! Got it. It was over there, right? We'll be going now. Thanks!
  • Yoimiya · The Firework Girl's Strange Stories Dając im złowrogie spojrzenie i każąc spadać z mojego pola widzenia! Bo... argh, to po prostu takie irytujące! I'd give them the evil eyes and tell them to get the heck out of my face! Because... grr, it's just so annoying!

Frequently asked questions

What's the best build for Yoimiya?

Artifacts: Crimson Witch of Flames, Shimenawa's Reminiscence ×4 or Echoes of an Offering ×4. Main stats: Sands: ATK% or Elemental Mastery, Goblet: Pyro DMG Bonus, Circlet: CRIT Rate or CRIT DMG. Recommended weapons: Aqua Simulacra, Thundering Pulse or Slingshot.

What should I level first on Yoimiya?

Firework Flare-UpAttack first, then Niwabi Fire-DanceE and Ryuukin SaxifrageQ.

Which constellations are worth getting for Yoimiya?

The biggest upgrades: C2 A Procession of Bonfires.

Who should Yoimiya team up with?

Good teammates: Yelan, Yun Jin and Zhongli.

Is Yoimiya in Polish in Genshin Impact?

The game has no Polish language option. Kaption shows Polish subtitles for the dialogue right on the game screen, so Yoimiya's lines read in Polish. Skill and item names stay in English, as in the game.

Share

Ready-made cards for Instagram, TikTok, X or Discord, in English or Polish.

4:5 for Instagram and Facebook · 9:16 for Stories, TikTok and Shorts · 16:9 for X and Discord

The build cards and quick guides of every Genshin Impact character (131) in one ZIP: 4:5 (45 MB) 9:16 (60 MB) 16:9 (31 MB)

On Discord, paste the copied link or drag the downloaded file into the chat.

Game data version 7.2.0.

← All Genshin Impact characters