



























Genshin Impact character

Sayu (Genshin Impact)

Guide, build and skills

  • 4-star
  • Element Anemo
  • Weapon Claymore
  • Game data 7.2.0

Swirl and party healing

Energy Recharge helps keep the Burst ready, Elemental Mastery boosts Swirl healing, and ATK boosts Burst healing.

Sayu from Genshin Impact with a Kaption Polish subtitle
How Kaption shows Sayu in Polish: "Wszystkie te jedzenie trochę mi ciąży, ale myślę, że damy sobie z nimi radę."

At a glance

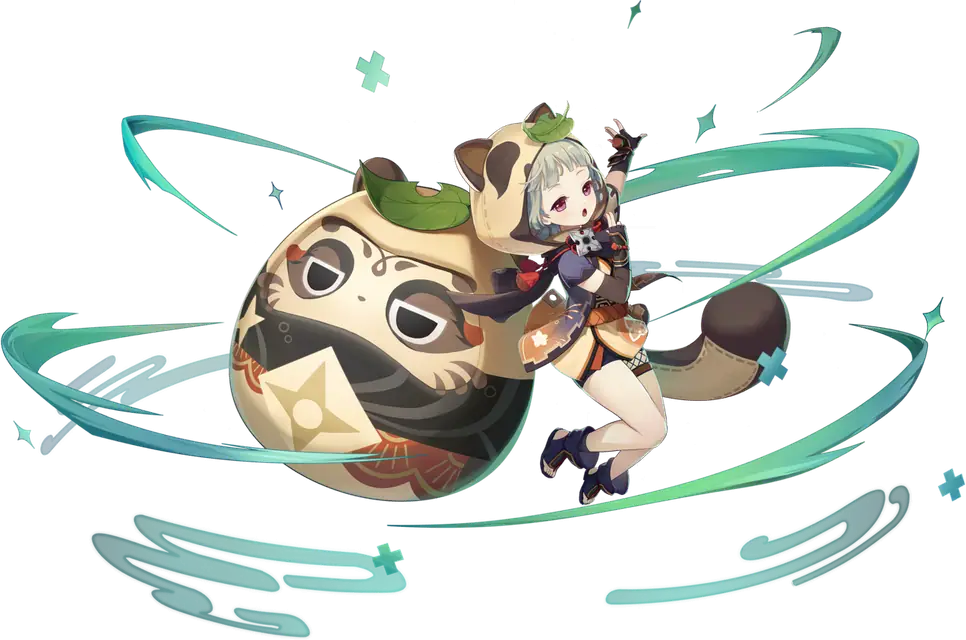
Sayu is a 4-star Anemo Claymore character who heals while helping the team deal elemental damage. Her Skill lets her roll through opponents, and her Burst heals the party before leaving a Daruma that can heal or attack.

She fits teams that can give her Hydro, Pyro, Cryo or Electro to react with. Triggering Swirl while Sayu is active also heals the party, so her time on the field can contribute to recovery as well as damage.

Video guide

COMPLETE SAYU GUIDE! Best Sayu Build - Artifacts, Weapons, Teams & Showcase | Genshin Impact

Video by Zy0x on YouTube · 22 min · 810.1K views · August 2021

The YouTube player loads only after you click.

Build

Suggested build The game doesn't recommend a build for this character.

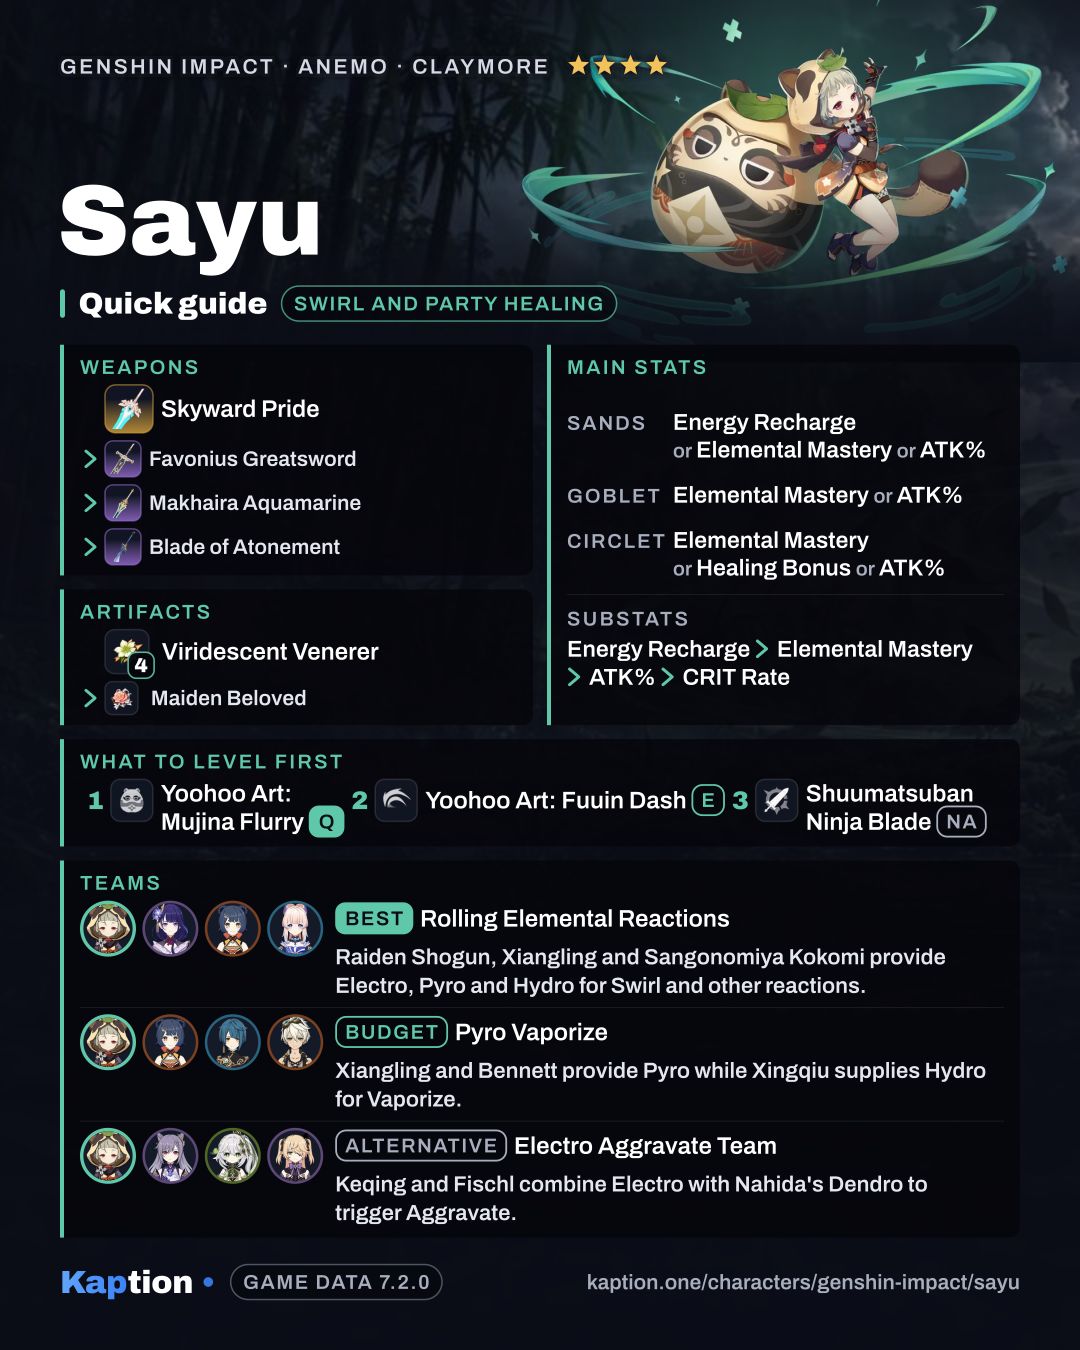
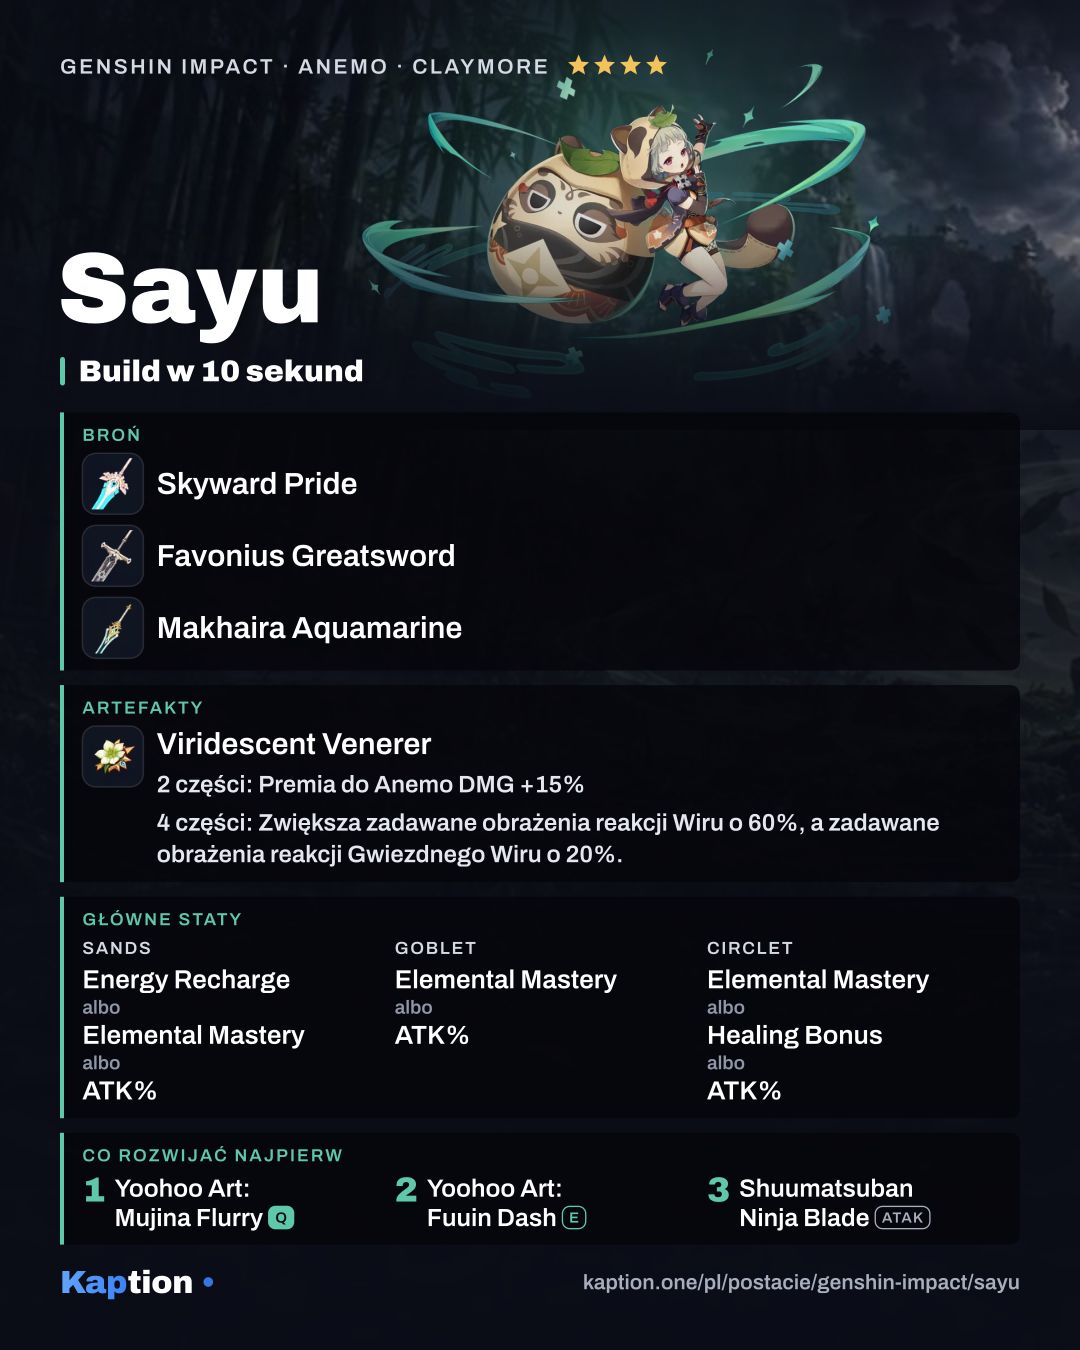
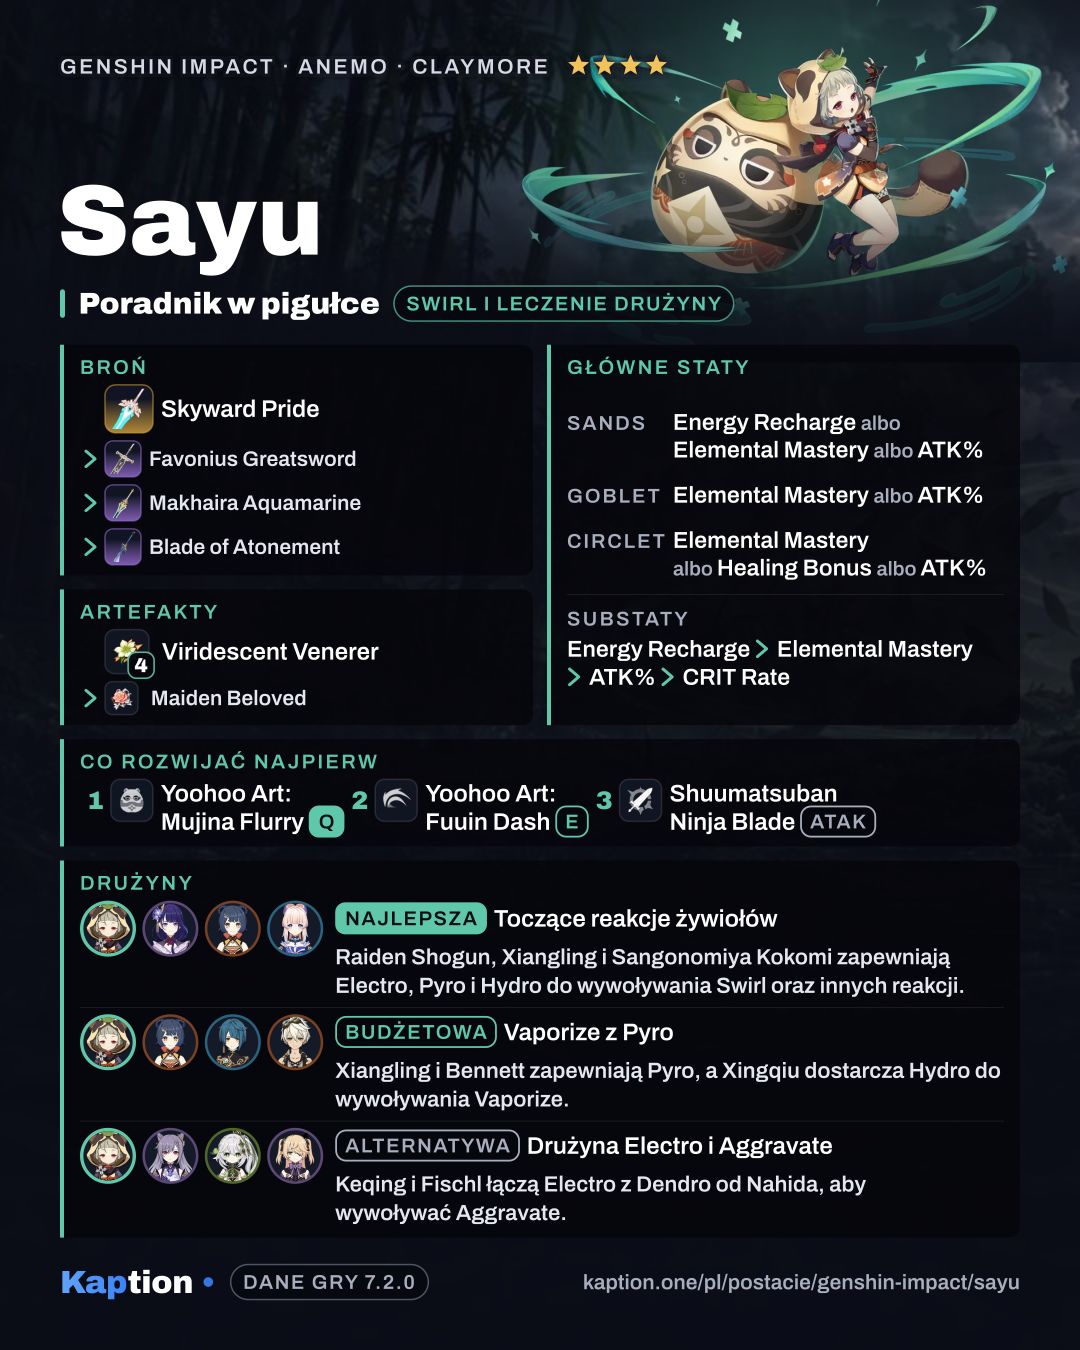
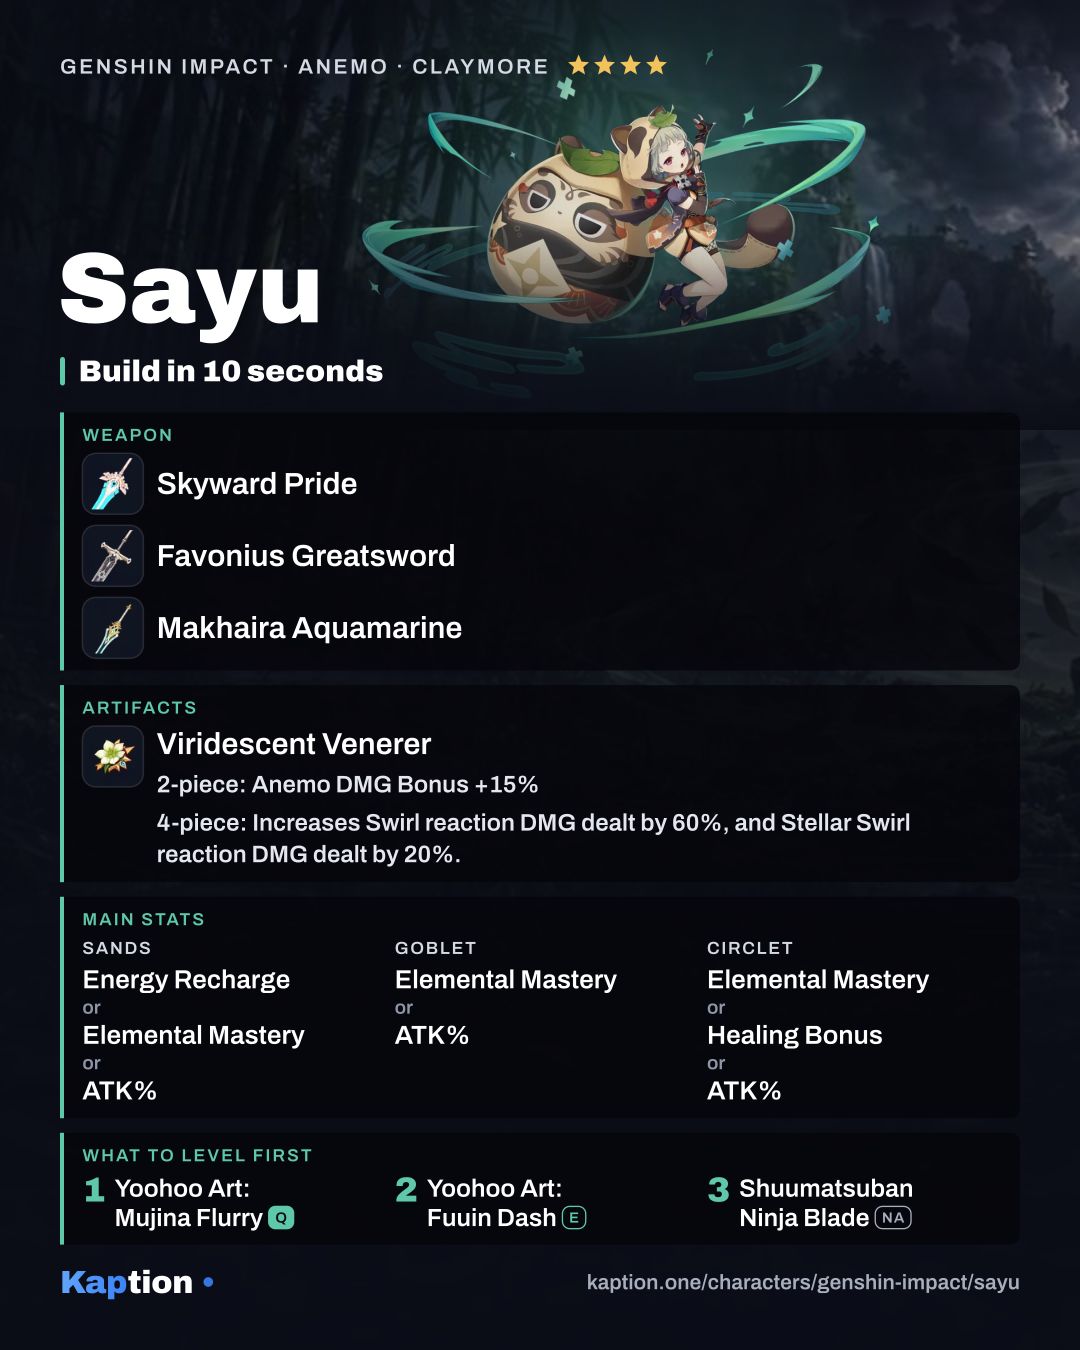
4× Viridescent Venerer · Sands Energy Recharge or Elemental Mastery or ATK% · Goblet Elemental Mastery or ATK% · Circlet Elemental Mastery or Healing Bonus or ATK% · substats Energy Recharge > Elemental Mastery > ATK% > CRIT Rate

Energy Recharge helps keep the Burst ready, Elemental Mastery boosts Swirl healing, and ATK boosts Burst healing.

Artifacts

Artifact set

Pick one. The first is the top pick.

  1. Noblesse Oblige
    Noblesse Oblige
    • 2-piece bonus: Elemental Burst DMG +20%
    Show effect
    • 4-piece bonus: Using an Elemental Burst increases all party members' ATK by 20% for 12s. This effect cannot stack.
  2. Ocean-Hued Clam
    Ocean-Hued Clam
    • 2-piece bonus: Healing Bonus +15%.
    Show effect
    • 4-piece bonus: When the character equipping this artifact set heals a character in the party, a Sea-Dyed Foam will appear for 3 seconds, accumulating the amount of HP recovered from healing (including overflow healing). At the end of the duration, the Sea-Dyed Foam will explode, dealing DMG to nearby opponents based on 90% of the accumulated healing. (This DMG is calculated similarly to Reactions such as Electro-Charged, and Superconduct, but is not affected by Elemental Mastery, Character Levels, or Reaction DMG Bonuses). Only one Sea-Dyed Foam can be produced every 3.5 seconds. Each Sea-Dyed Foam can accumulate up to 30,000 HP (including overflow healing). There can be no more than one Sea-Dyed Foam active at any given time. This effect can still be triggered even when the character who is using this artifact set is not on the field.

4 pieces · Artifact set

  1. Viridescent Venerer
    Viridescent Venerer
    • 2-piece bonus: Anemo DMG Bonus +15%
    Show effect
    • 4-piece bonus: Increases Swirl reaction DMG dealt by 60%, and Stellar Swirl reaction DMG dealt by 20%. Decreases opponent's Elemental RES to the element infused in the Swirl by 40% for 10s. Upon triggering a Stellar Swirl in the opponent, will also decrease their Cryo RES by 40%. RES debuffs of the same elemental type do not stack.

4 pieces · Artifact set

  1. Maiden Beloved
    Maiden Beloved
    • 2-piece bonus: Character Healing Effectiveness +15%
    Show effect
    • 4-piece bonus: Using an Elemental Skill or Burst increases healing received by all party members by 20% for 10s.

2 + 2 pieces · Artifact set

Wear both sets, 2 pieces each.

  1. Instructor
    Instructor
    • 2-piece bonus: Increases Elemental Mastery by 80.
  2. The Exile
    The Exile
    • 2-piece bonus: Energy Recharge +20%

Main stats

Sands
Energy Recharge or Elemental Mastery or ATK%
Goblet
Elemental Mastery or ATK%
Circlet
Elemental Mastery or Healing Bonus or ATK%

Substats

  1. Energy Recharge
  2. Elemental Mastery
  3. ATK%
  4. CRIT Rate

Recommended weapons

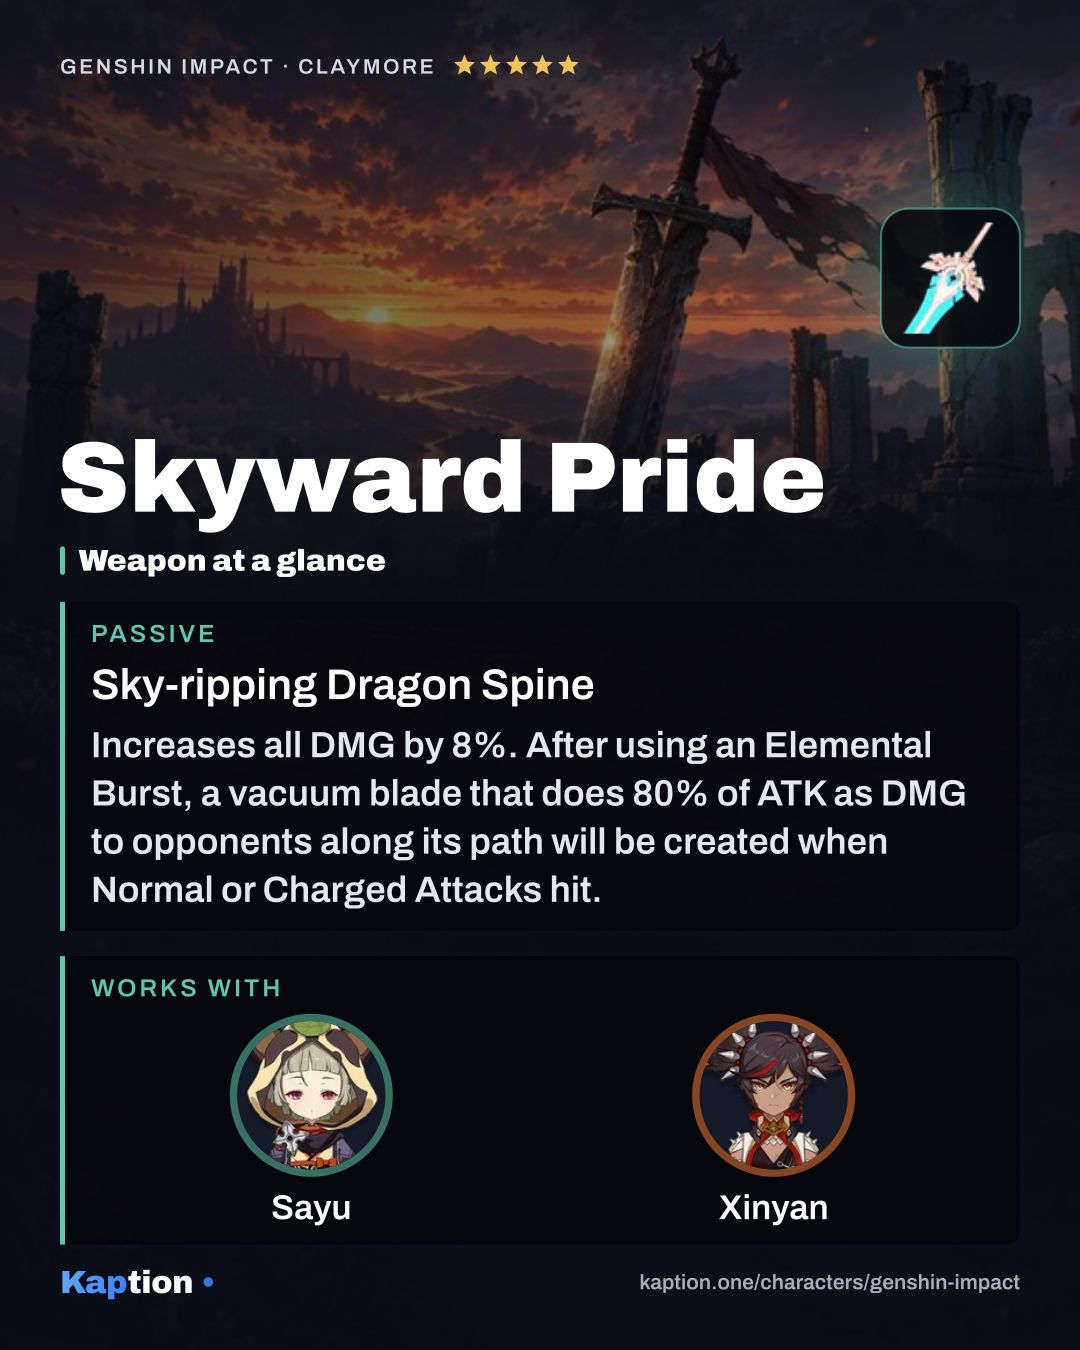
  1. Skyward Pride
    Skyward Pride 5-star
    Sky-ripping Dragon Spine Show effect

    Increases all DMG by 8%. After using an Elemental Burst, a vacuum blade that does 80% of ATK as DMG to opponents along its path will be created when Normal or Charged Attacks hit. Lasts for 20s or 8 vacuum blades.

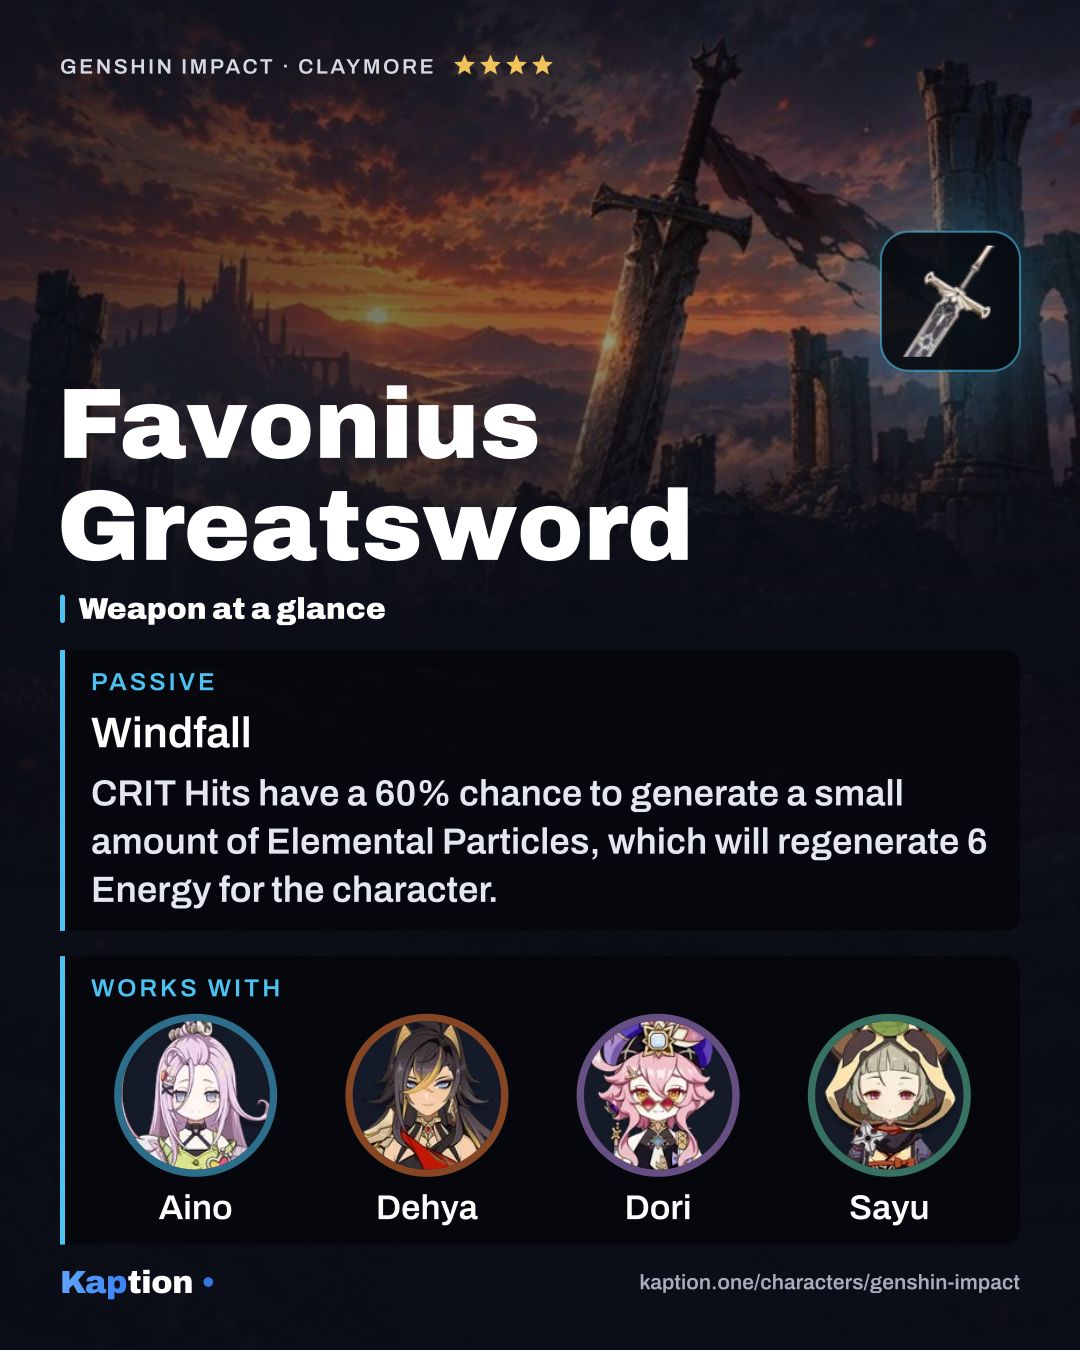
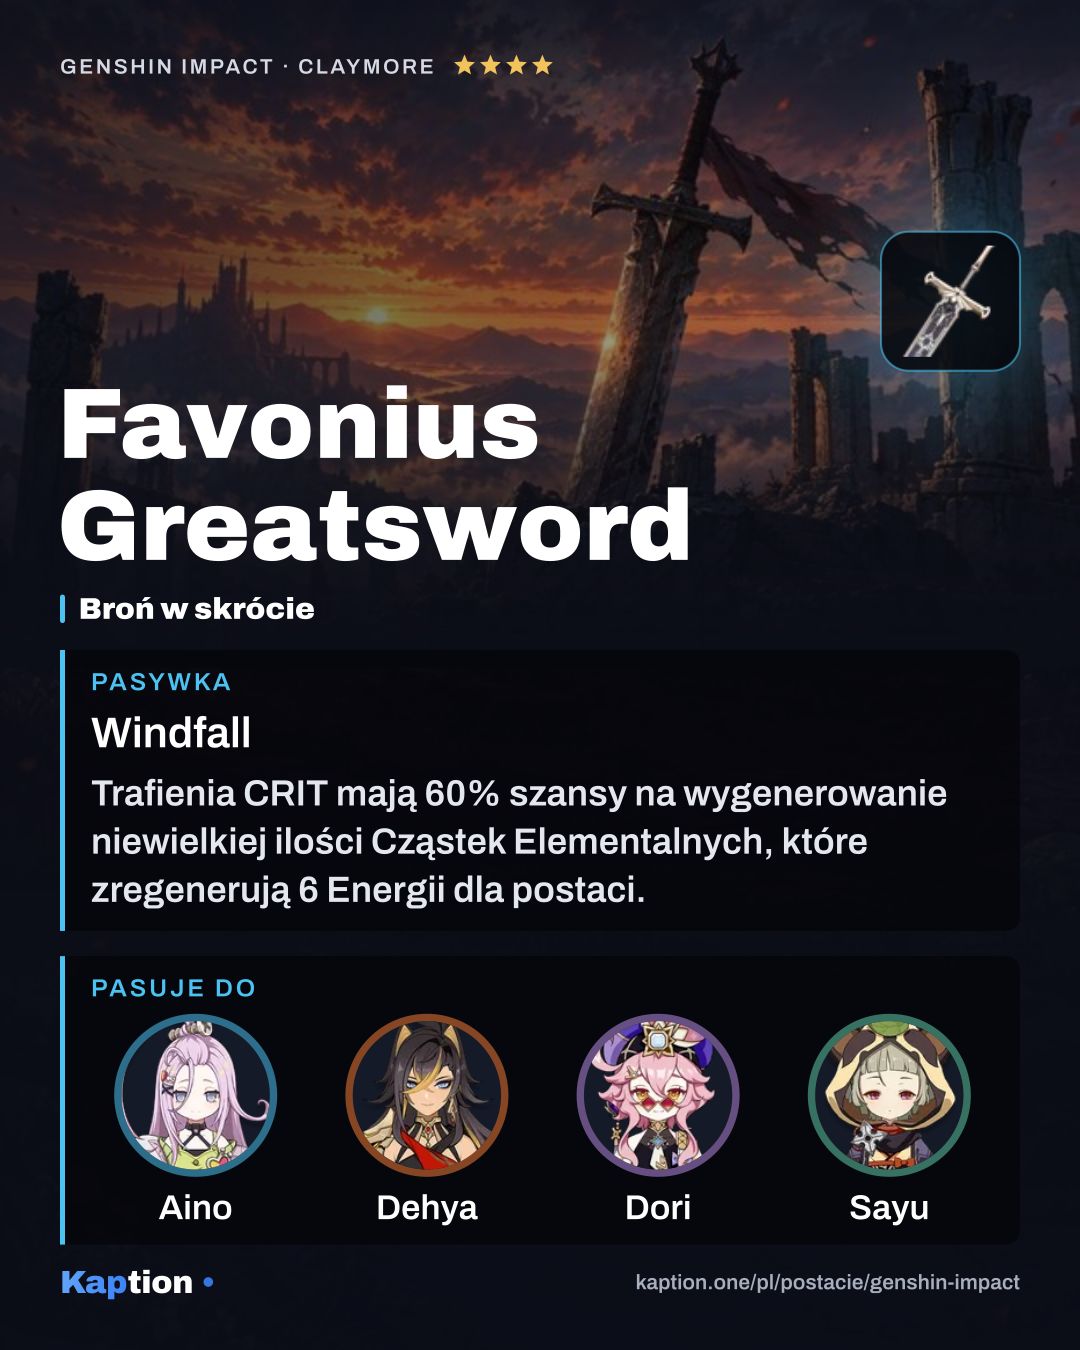
  2. Favonius Greatsword
    Favonius Greatsword 4-star
    Windfall Show effect

    CRIT Hits have a 60% chance to generate a small amount of Elemental Particles, which will regenerate 6 Energy for the character. Can only occur once every 12s.

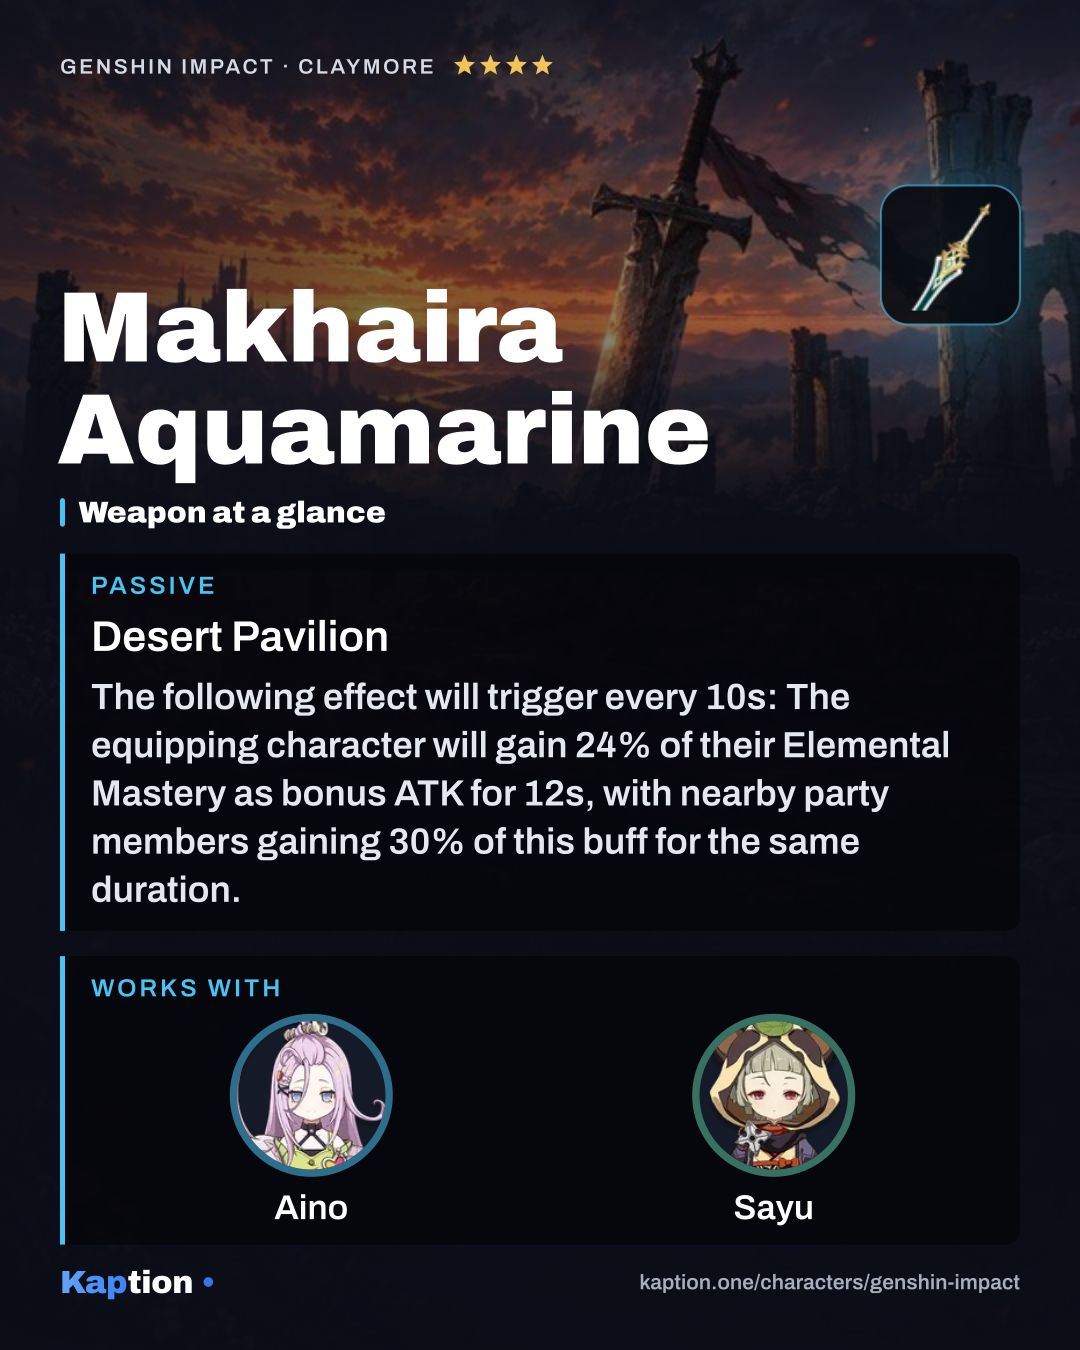
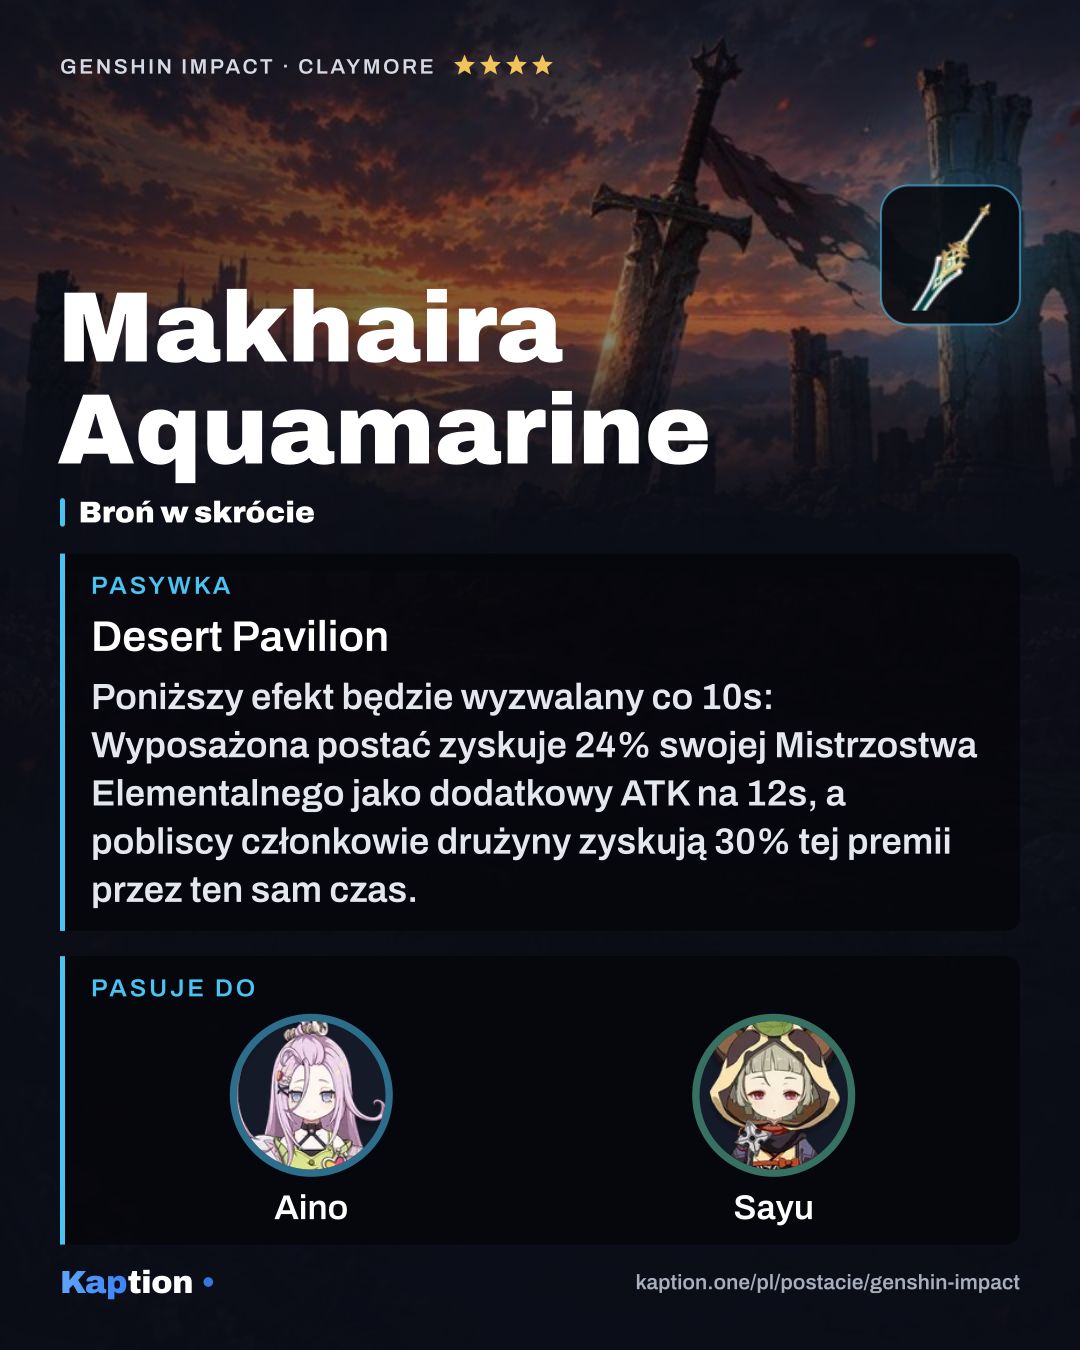
  3. Makhaira Aquamarine
    Makhaira Aquamarine 4-star
    Desert Pavilion Show effect

    The following effect will trigger every 10s: The equipping character will gain 24% of their Elemental Mastery as bonus ATK for 12s, with nearby party members gaining 30% of this buff for the same duration. Multiple instances of this weapon can allow this buff to stack. This effect will still trigger even if the character is not on the field.

  4. Blade of Atonement
    Blade of Atonement 4-star
    Repentance and Redemption Show effect

    Triggering an Elemental Reaction increases the equipping character's Elemental Mastery by 64 for 12s, while triggering a Stellar Glimmer reaction increases their ATK by 16% for 12s. The aforementioned effects can trigger even when the character is not on the field.

  5. Mailed Flower
    Mailed Flower 4-star
    Whispers of Wind and Flower Show effect

    Within 8s after the character's Elemental Skill hits an opponent or the character triggers an Elemental Reaction, their ATK and Elemental Mastery will be increased by 12% and 48 respectively.

  6. Wolf's Gravestone
    Wolf's Gravestone 5-star
    Wolfish Tracker Show effect

    Increases ATK by 20%. On hit, attacks against opponents with less than 30% HP increase all party members' ATK by 40% for 12s. Can only occur once every 30s.

Have this character? Make a card of your own build from your UID Stats, artifacts, weapon and talents from your in-game showcase, as a PNG in a dozen layouts.

Teams

Show more teams (4)Show less

Also plays in

Other characters' teams with a place for Sayu.

Skills

Names in English, as in the game · underlined ones open their card · Priority = level-up order

  1. Basic attack

    Shuumatsuban Ninja BladeAttack

    Level priority 3 of 3

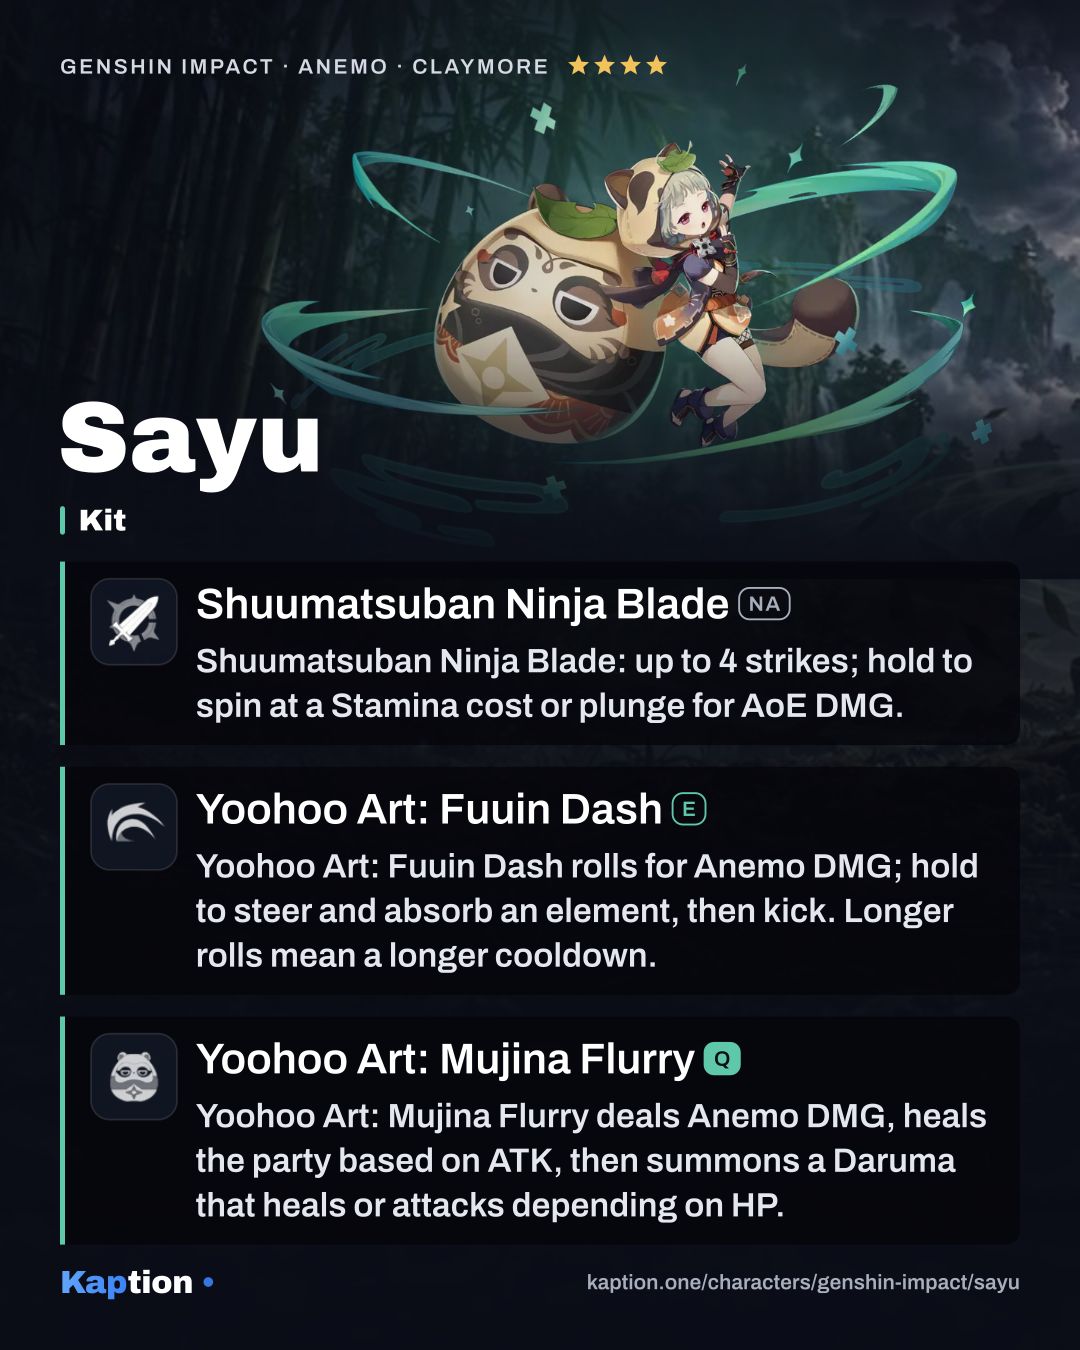
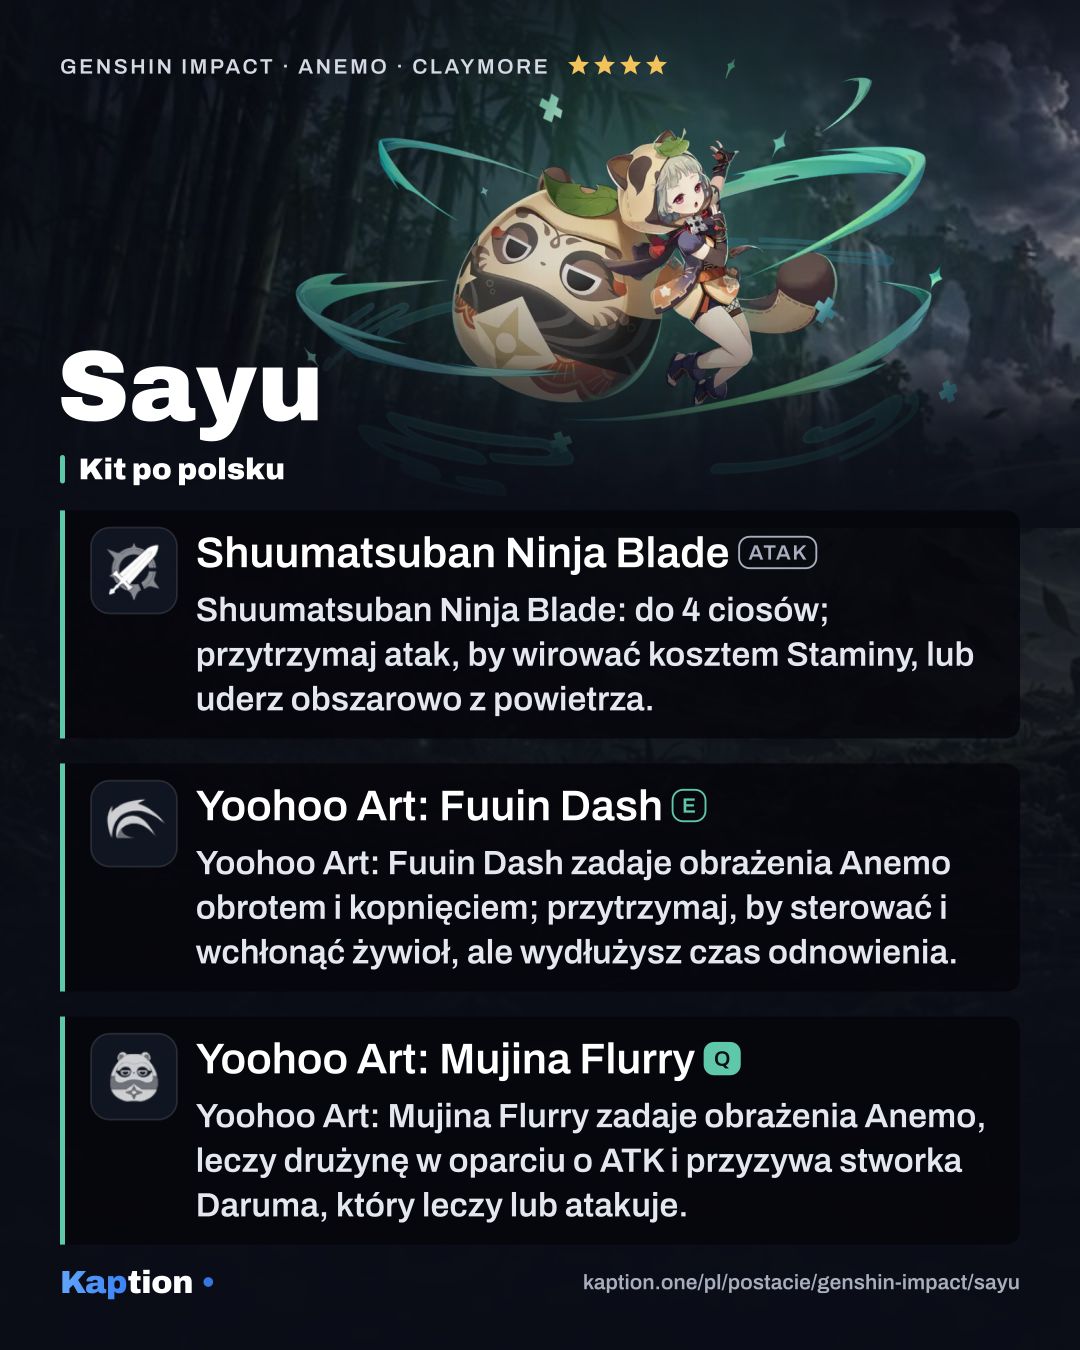
    Shuumatsuban Ninja Blade (NA): up to 4 strikes; hold to spin at a Stamina cost or plunge for AoE DMG.

    Normal Attack Performs up to 4 consecutive strikes. Charged Attack Drains Stamina over time to perform continuous spinning attacks against all nearby opponents. At the end of the sequence, performs a more powerful slash. Plunging Attack Plunges from mid-air to strike the ground below, damaging opponents along the path and dealing AoE DMG upon impact.

  2. Skill

    Yoohoo Art: Fuuin DashE

    Level priority 2 of 3

    Yoohoo Art: Fuuin Dash (E) rolls for Anemo DMG; hold to steer and absorb an element, then kick. Longer rolls mean a longer cooldown.

    The special technique of the Yoohoo Ninja Arts! Sayu curls up into a rolling Fuufuu Windwheel and smashes into opponents at high speed, dealing Anemo DMG. When the duration ends, she unleashes a Fuufuu Whirlwind Kick, dealing AoE Anemo DMG. Press Enters the Fuufuu Windwheel state, rolling forward a short distance before using the Fuufuu Whirlwind Kick. Hold Rolls about continuously in the Fuufuu Windwheel state, increasing Sayu's resistance to interruption while within that state. During this time, Sayu can control the direction of her roll, and can use the skill again to end her Windwheel state early and unleash a stronger version of the Fuufuu Whirlwind Kick. The Hold version of this skill can trigger Elemental Absorption. This skill has a maximum duration of 10s and enters CD once its effects end. The longer Sayu remains in her Windwheel state, the longer the CD. Elemental Absorption If Sayu comes into contact with Hydro/Pyro/Cryo/Electro while in her Windwheel state, she will deal additional elemental DMG of that type. Elemental Absorption may only occur once per use of this skill. Sayu can pull this skill off with her eyes closed. This technique was originally created for escaping, but now that she's got a Vision, might as well make her foes eat dirt while she's at it.

  3. Ultimate

    Yoohoo Art: Mujina FlurryQ

    Level priority 1 of 3

    Yoohoo Art: Mujina Flurry (Q) deals Anemo DMG, heals the party based on ATK, then summons a Daruma that heals or attacks depending on HP.

    The other super special technique of the Yoohoo Ninja Arts! It summons a pair of helping hands for Sayu. Deals Anemo DMG to nearby opponents and heals all nearby party members. The amount of HP restored is based on Sayu's ATK. This skill then summons a Muji-Muji Daruma. Muji-Muji Daruma At specific intervals, the Daruma will take one of several actions based on the situation around it: ·If the HP of nearby characters is above 70%, it will attack a nearby opponent, dealing Anemo DMG. ·If there are active characters with 70% or less HP nearby, it will heal the active character with the lowest percentage HP left. If there are no opponents nearby, it will heal active characters nearby even if they have 70% HP or more. People who don't know the first thing about ninjutsu love to watch Sayu show off this skill, and some have tried to learn it from her. But Sayu just wants to sleep and not be disturbed.

Passives

  1. Passive

    Someone More CapablePassive

    On-field Swirl or Stellar Swirl heals the party and nearby allies for 300 HP plus 1.2 per Elemental Mastery, once every 2s.

    When Sayu triggers a Swirl or Stellar Swirl reaction while active, she heals all your characters and nearby allies for 300 HP. She will also heal an additional 1.2 HP for every point of Elemental Mastery she has. This effect can be triggered once every 2s.

  2. Passive

    No Work Today!Passive

    The Daruma heals characters near its target for 20% of its healing and attacks over a wider area.

    The Muji-Muji Daruma created by Yoohoo Art: Mujina Flurry gains the following effects: ·When healing a character, it will also heal characters near that healed character for 20% the amount of HP. ·Increases the AoE of its attack against opponents.

  3. Passive

    Yoohoo Art: Silencer's SecretPassive

    With Sayu in the party, approaching Crystalflies and certain other animals won't startle them.

    When Sayu is in the party, your characters will not startle Crystalflies and certain other animals when getting near them. Check the "Other" sub-category of the "Living Beings / Wildlife" section in the Archive for creatures this skill works on.

Constellations

  1. C1

    Multi-Task no Jutsu

    Worth it

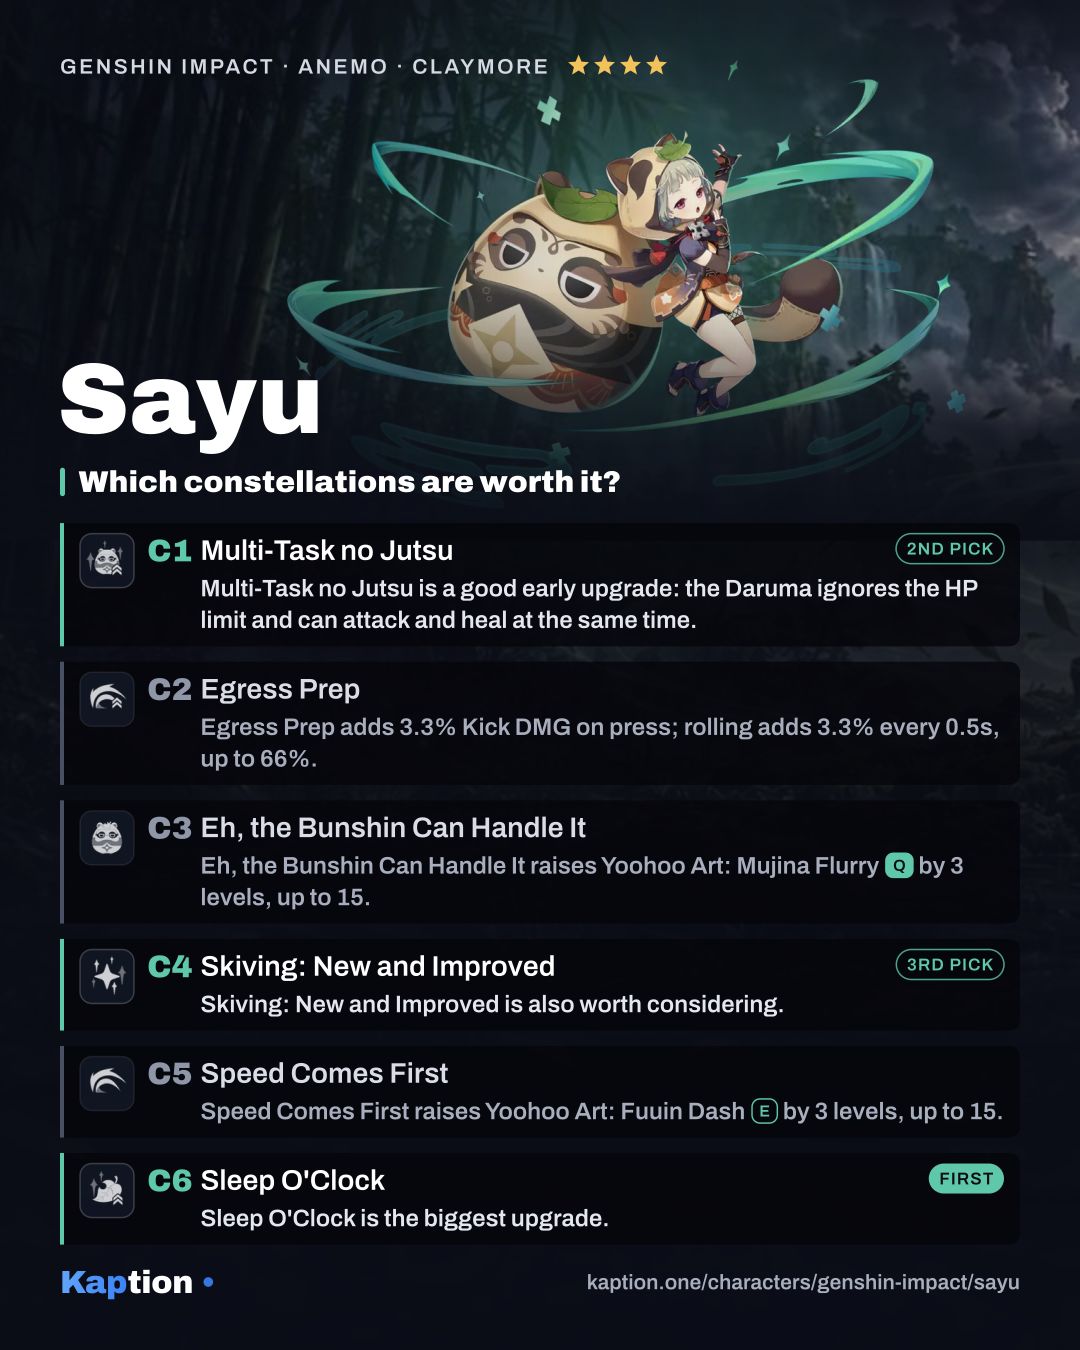
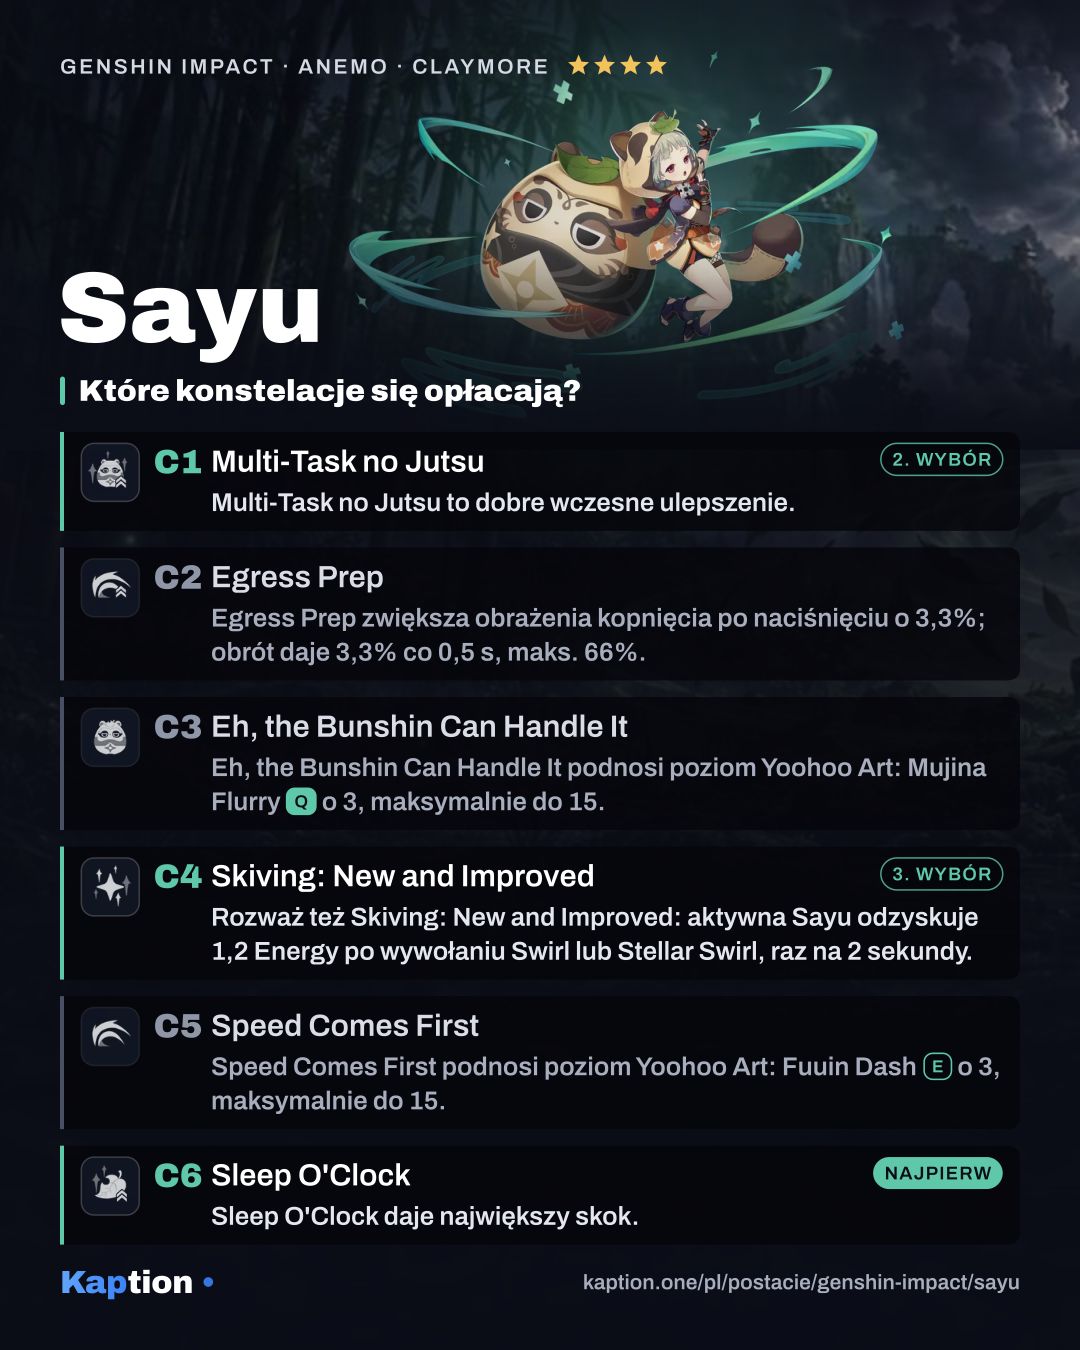
    Multi-Task no Jutsu (C1) is a good early upgrade: the Daruma ignores the HP limit and can attack and heal at the same time.

    The Muji-Muji Daruma created by Yoohoo Art: Mujina Flurry will ignore HP limits and can simultaneously attack nearby opponents and heal characters.

  2. C2

    Egress Prep

    Yoohoo Art: Fuuin Dash gains the following effects: ·DMG of Fuufuu Whirlwind Kick in Press Mode increased by 3.3%. ·Every 0.5s in the Fuufuu Windwheel state will increase the DMG of this Fuufuu Whirlwind Kick by 3.3%. The maximum DMG increase possible through this method is 66%.

  3. C3

    Eh, the Bunshin Can Handle It

    Increases the Level of Yoohoo Art: Mujina Flurry by 3. Maximum upgrade level is 15.

  4. C4

    Skiving: New and Improved

    Worth it

    Skiving: New and Improved (C4) is also worth considering.

    Sayu recovers 1.2 Energy when she triggers a Swirl or Stellar Swirl reaction while on-field. This effect occurs once every 2s.

  5. C5

    Speed Comes First

    Increases the Level of Yoohoo Art: Fuuin Dash by 3. Maximum upgrade level is 15.

  6. C6

    Sleep O'Clock

    Worth it

    Sleep O'Clock (C6) is the biggest upgrade.

    The Muji-Muji Daruma created by Sayu's Yoohoo Art: Mujina Flurry will now also benefit from her Elemental Mastery. Each point of Sayu's Elemental Mastery will produce the following effects: ·Increases the damage dealt by the Muji-Muji Daruma's attacks by 0.2% ATK. A maximum DMG increase of 400% ATK can be gained via this method. ·Increases the HP restored by the Muji-Muji Daruma by 3. A maximum of 6,000 additional HP can be restored in this manner.

Materials

Ascension, to max level

  • Mora Mora × 420,000
  • Crystal Marrow Crystal Marrow × 168
  • Vayuda Turquoise Sliver Vayuda Turquoise Sliver × 1
  • Vayuda Turquoise Fragment Vayuda Turquoise Fragment × 9
  • Vayuda Turquoise Chunk Vayuda Turquoise Chunk × 9
  • Vayuda Turquoise Gemstone Vayuda Turquoise Gemstone × 6
  • Whopperflower Nectar Whopperflower Nectar × 18
  • Shimmering Nectar Shimmering Nectar × 30
  • Energy Nectar Energy Nectar × 36
  • Marionette Core Marionette Core × 46

All skills to max

  • Mora Mora × 4,957,500
  • Crown of Insight Crown of Insight × 3
  • Teachings of Light Teachings of Light × 9
  • Guide to Light Guide to Light × 63
  • Philosophies of Light Philosophies of Light × 114
  • Whopperflower Nectar Whopperflower Nectar × 18
  • Shimmering Nectar Shimmering Nectar × 66
  • Energy Nectar Energy Nectar × 93
  • Gilded Scale Gilded Scale × 18

Guide

How the kit works

Start by giving Sayu an element to react with, then use Yoohoo Art: Fuuin Dash. A press rolls a short distance and ends with a kick. Holding it lets you steer for up to 10 seconds, with increased interruption resistance. Use the Skill again to finish early with the stronger kick.

During a held roll, contact with Hydro, Pyro, Cryo or Electro adds damage of that element. Absorption happens at most once per use. The cooldown begins when the Skill ends and gets longer the longer you roll, so you do not have to hold it for the full duration every time.

Use Yoohoo Art: Mujina Flurry when the team needs healing or you want the Daruma on the field. The initial cast deals Anemo damage and heals nearby party members based on Sayu's ATK. At intervals, the Daruma attacks if nearby characters are above 70% HP, or heals the active character with the lowest HP percentage when an active character nearby is at 70% or less. With no opponents nearby, it can heal even above that threshold.

Someone More Capable heals your characters and nearby allies when active Sayu triggers Swirl or Stellar Swirl: 300 HP plus 1.2 HP per point of Elemental Mastery, once every 2 seconds. No Work Today! lets the Daruma heal characters near its target for 20% of that heal and increases its attack area. Shuumatsuban Ninja Blade (NA) gives Sayu up to four normal strikes; its charged attack spins and drains Stamina.

Build and why

Use four pieces of Viridescent Venerer for the main support build. The set increases Swirl damage by 60% and lowers an opponent's resistance to the element infused in Swirl by 40% for 10 seconds. Its two-piece bonus also gives Sayu 15% Anemo DMG Bonus.

Noblesse Oblige is another team option: four pieces give the party 20% ATK for 12 seconds after Sayu uses her Burst. Ocean-Hued Clam is worth considering for a healing-focused build. It records healing, including overflow, and its Foam deals damage based on 90% of the accumulated amount. Maiden Beloved is an option if you want more healing.

For a mixed early setup, two pieces of Instructor give 80 Elemental Mastery and two pieces of The Exile give 20% Energy Recharge. This combination gives up a four-piece effect, so switch when a complete set better suits the team.

For main stats, use Energy Recharge, Elemental Mastery or ATK Percentage on the sands; Elemental Mastery or ATK Percentage on the goblet; and Elemental Mastery, Healing Bonus or ATK Percentage on the circlet. Energy Recharge helps keep the Burst ready. Elemental Mastery improves Sayu's passive reaction healing, while ATK improves Burst healing. For substats, look for Energy Recharge first, followed by Elemental Mastery, ATK Percentage and CRIT Rate.

Favonius Greatsword is the first weapon choice: its CRIT Hits have a 60% chance to generate particles that restore 6 Energy to a character, once every 12 seconds. Skyward Pride is another option that increases all damage; after the Burst, normal or charged hits can create vacuum blades. Makhaira Aquamarine converts 24% of Sayu's Elemental Mastery into bonus ATK and gives nearby party members 30% of that buff.

Leveling priority

A practical leveling order is Yoohoo Art: Mujina Flurry first, because it is the source of Sayu's Burst healing and the Daruma. Level Yoohoo Art: Fuuin Dash next for its Anemo damage. Leave Shuumatsuban Ninja Blade (NA) until last if you mainly use Sayu for healing and reactions.

For ascension, gather Crystal Marrow and Marionette Core, along with Vayuda Turquoise Sliver, Vayuda Turquoise Fragment, Vayuda Turquoise Chunk and Vayuda Turquoise Gemstone. You also need Whopperflower Nectar, Shimmering Nectar, Energy Nectar and Mora.

Talent upgrades use Teachings of Light, Guide to Light and Philosophies of Light, plus the same three Nectar materials and Mora. Gilded Scale is also needed, and taking all three talents to their maximum uses three Crown of Insight.

Constellations worth it

Sleep O'Clock is the biggest upgrade. Each point of Elemental Mastery adds 0.2% ATK to the Daruma's attack damage, up to 400% ATK, and adds 3 HP to its healing, up to 6,000 HP. It gives Elemental Mastery another direct use in the Burst.

Multi-Task no Jutsu is a good early upgrade: the Daruma ignores the HP limit and can attack and heal at the same time. Skiving: New and Improved is also worth considering. It restores 1.2 Energy when on-field Sayu triggers Swirl or Stellar Swirl, once every 2 seconds.

Egress Prep increases kick damage, while Speed Comes First adds three Skill levels. You can skip pursuing either for a healing-focused build. Eh, the Bunshin Can Handle It adds three Burst levels, but you do not need to target it separately to use Sayu as a healer.

Teams

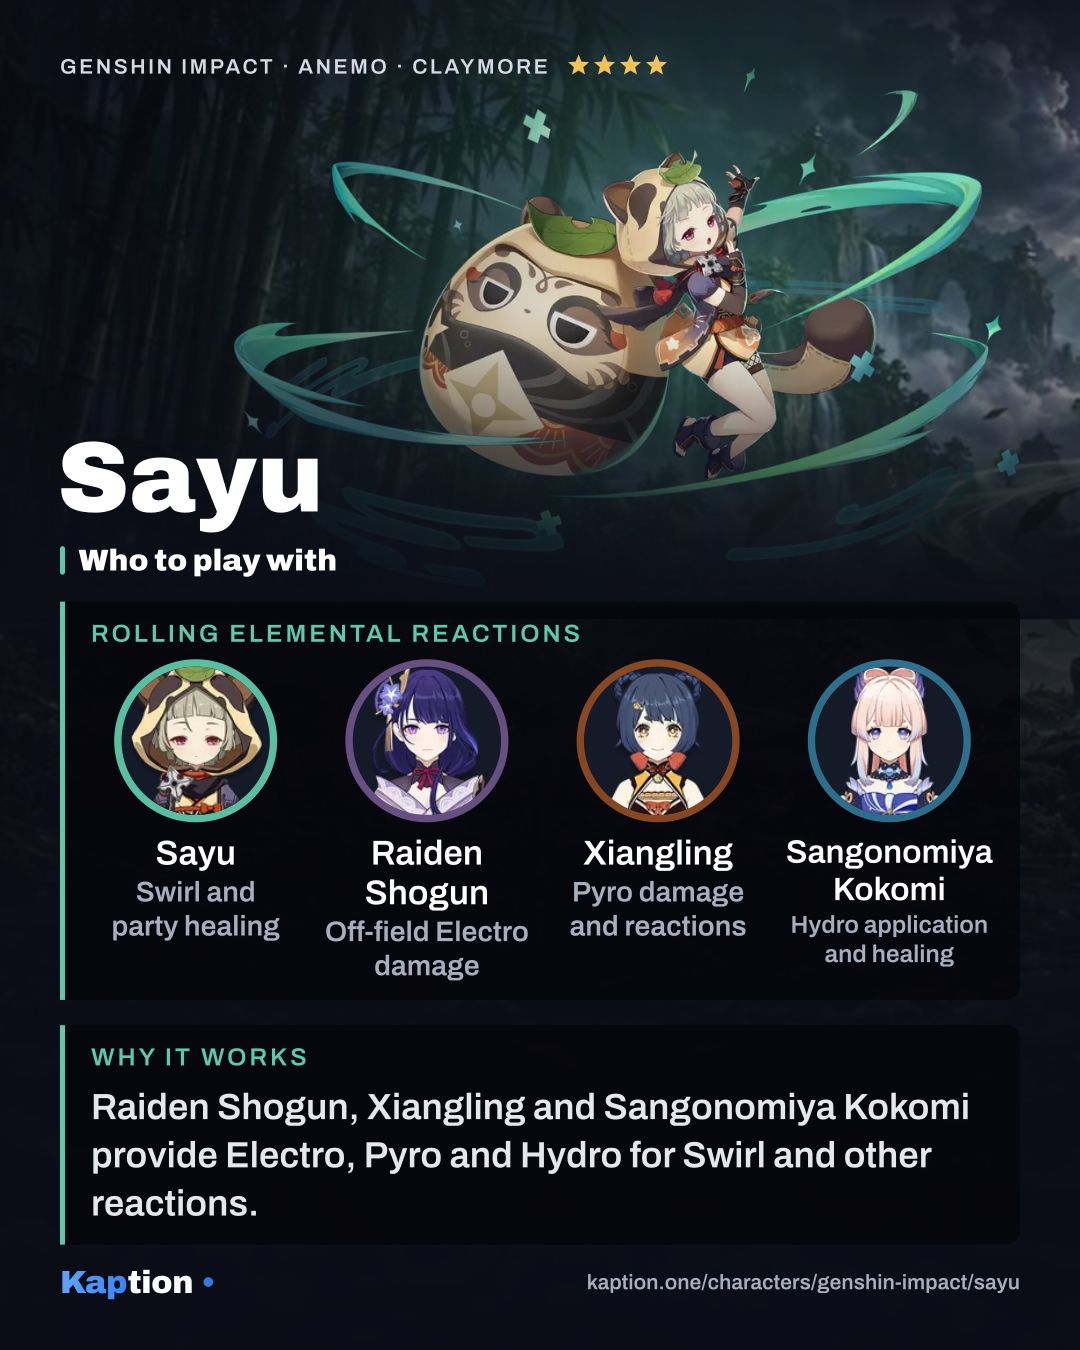
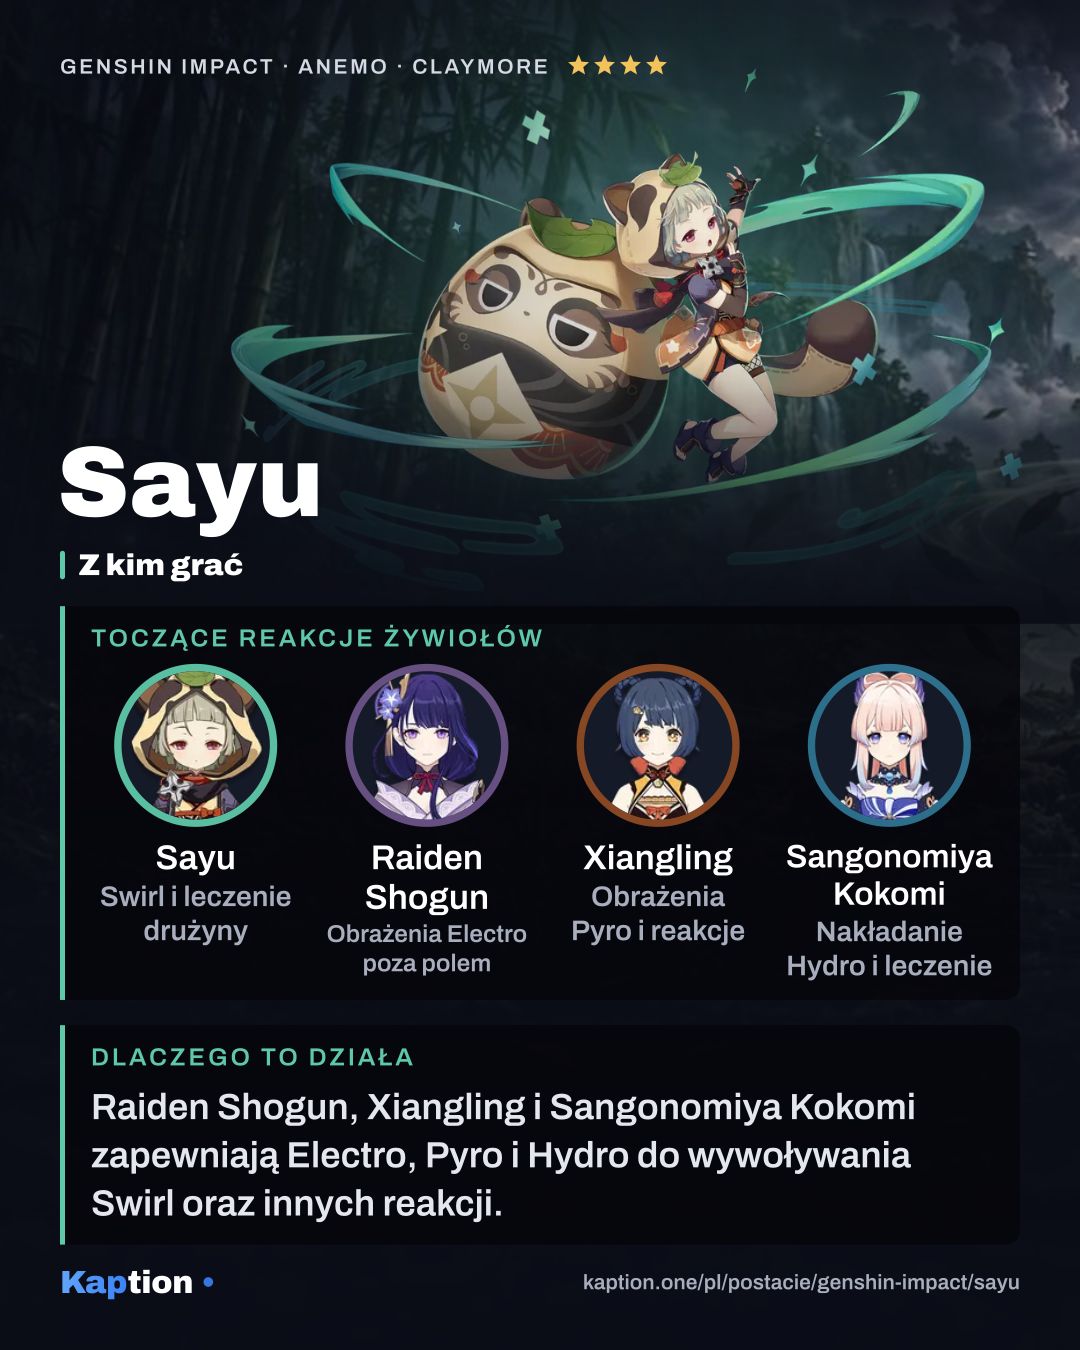
Give Sayu teammates with elements she can absorb and use for Swirl. Xiangling supplies Pyro, while Fischl or Raiden Shogun brings Electro and an off-field presence. Xingqiu is a Hydro option with an off-field role. Sayu gives these teams healing and, with Viridescent Venerer, a way to lower resistance to the element involved in Swirl.

For a Cryo team, Kamisato Ayaka or Ganyu can take the damage role alongside Sayu. Rosaria is another Cryo option. Make sure Sayu triggers the reaction with the element whose resistance you want to lower; the set does not lower every elemental resistance at once.

Sangonomiya Kokomi is a Hydro healer option if you want another source of healing. That overlaps with Sayu's job, so consider whether the team needs both or would rather use the slot for another role.

Common mistakes

Do not roll for the maximum duration by default. A longer roll means a longer cooldown after it ends, and you can end the held Skill early. Use the extra time when steering or absorbing an element is useful.

Do not expect the Daruma to attack and heal simultaneously before C1. Watch the 70% HP threshold and remember that the initial Burst heal works differently from the Daruma's later actions.

Do not stack Elemental Mastery while ignoring Energy Recharge if your Burst is often unavailable. Also, the passive reaction heal requires Sayu to be active when she triggers the reaction; a teammate's reaction does not meet that condition. With Favonius Greatsword, some CRIT Rate helps you use its particle effect.

For exploration, remember that Yoohoo Art: Silencer's Secret keeps Crystalflies and certain other animals from being startled when party members approach. The Archive lists which wildlife it covers.
Sayu in Polish

Story lines the way Kaption shows them in Polish, with the English original underneath.

  • Sayu · Bottleneck Breaking Wszystkie te jedzenie trochę mi ciąży, ale myślę, że damy sobie z nimi radę. All that food we just ate is weighing me down a bit, but I think we can still handle them.
  • Sayu Gdyby tylko podróż łodzią tutaj nie była tak długa i mogłem codziennie wystarczająco się wyspać... może odwiedzałbym Klee częściej! If only the boat ride here wasn't so long, and I could get enough sleep every day... maybe I'd visit Klee more often!
  • Sayu Będę mógł też trenować w innych miejscach. Pójdę gdzie chcę i będę spać gdzie chcę! I'll even be able to visit other places for training. I'll go wherever I want and sleep wherever I want!
  • Sayu Jak ninja mogli zostawić swój sprzęt treningowy po prostu tutaj? Czy nie wiedzą, że to niebezpieczne? How could the ninja leave their training equipment just sitting out here like this? Don't they know that it's dangerous?
  • Sayu Czy mógłbyś? Och, dzięki! Spróbuj ją stąd odciągnąć! Would you? Oh, thanks! Just see if you can lure her away from here!
  • Sayu · If You Should Forget the Entrance to Dreams Szybko, wszyscy, chowajcie się! Zakryjcie głowy! Jeśli da wam przytulankę, nigdy nie urosną wasze włosy! Quick, everyone, hide! Cover your heads! If he gives you a noogie, you'll never get taller!
  • Sayu To oznacza, że Klee prawdopodobnie jest równie silna jak ich Mistrz — a jej słowa liczą się tak samo! That means Klee's probably just as strong as their Master — and her words count just as much!
  • Sayu Może mi pomożesz! Pomimo że ostatnio więcej śpię, wcale nie urosłam. Masz jakiś pomysł? Maybe you can help me! Even though I've been getting more sleep recently, I haven't gained any height at all. Any ideas?

Frequently asked questions

What's the best build for Sayu?

Artifacts: Noblesse Oblige, Viridescent Venerer ×4 or Maiden Beloved ×4. Main stats: Sands: Energy Recharge, Elemental Mastery or ATK%, Goblet: Elemental Mastery or ATK%, Circlet: Elemental Mastery, Healing Bonus or ATK%. Recommended weapons: Skyward Pride, Favonius Greatsword or Makhaira Aquamarine.

What should I level first on Sayu?

Yoohoo Art: Mujina FlurryQ first, then Yoohoo Art: Fuuin DashE and Shuumatsuban Ninja BladeAttack.

Which constellations are worth getting for Sayu?

The biggest upgrades: C6 Sleep O'Clock, C1 Multi-Task no Jutsu and C4 Skiving: New and Improved.

Who should Sayu team up with?

Good teammates: Raiden Shogun, Xiangling and Sangonomiya Kokomi.

Is Sayu in Polish in Genshin Impact?

The game has no Polish language option. Kaption shows Polish subtitles for the dialogue right on the game screen, so Sayu's lines read in Polish. Skill and item names stay in English, as in the game.

Share

Ready-made cards for Instagram, TikTok, X or Discord, in English or Polish.

4:5 for Instagram and Facebook · 9:16 for Stories, TikTok and Shorts · 16:9 for X and Discord

The build cards and quick guides of every Genshin Impact character (131) in one ZIP: 4:5 (45 MB) 9:16 (60 MB) 16:9 (31 MB)

On Discord, paste the copied link or drag the downloaded file into the chat.

Game data version 7.2.0.

← All Genshin Impact characters