



























Genshin Impact character

Mona (Genshin Impact)

Guide, build and skills

  • 5-star
  • Element Hydro
  • Weapon Catalyst
  • Game data 7.2.0

Hydro and Omen support

Energy Recharge increases Mona's Hydro DMG Bonus, while Emblem of Severed Fate adds Burst damage.

Mona from Genshin Impact with a Kaption Polish subtitle
How Kaption shows Mona in Polish: "O czym ty mówisz? Główną rzeczą tutaj jest wykorzystać tę okazję, by udowodnić potęgę i status astrologii!"

At a glance

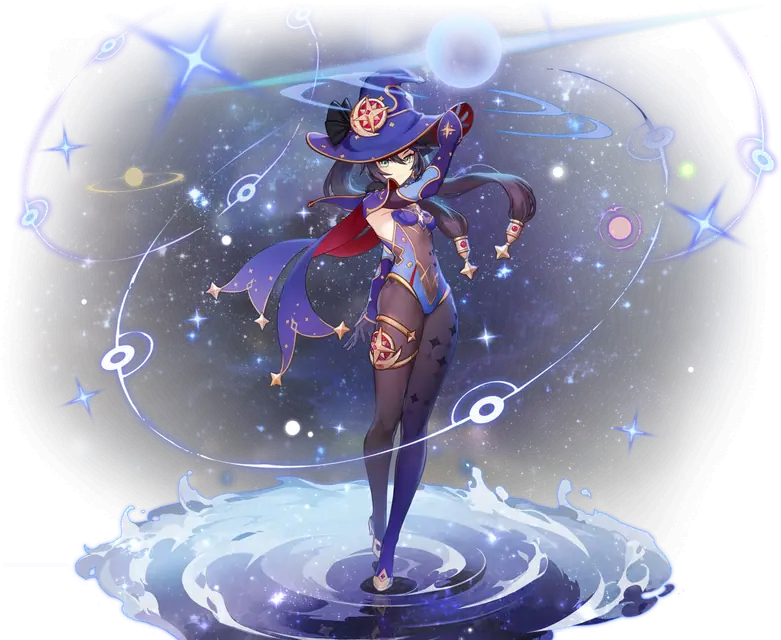
Mona is a 5-star Hydro Catalyst character who helps the team deal damage while applying Hydro. Her Burst traps opponents in an Illusory Bubble, then applies an Omen that makes them take more damage. Her Skill creates a Phantom that draws nearby enemies' attention and deals Hydro damage.

She can spend a short time on the field before switching to a teammate who attacks the marked opponents. She can also stay on the field to use Normal and Charged Attacks, especially when her Hexerei effect is active. Energy Recharge is useful because it supports her Burst and also contributes to her Hydro DMG Bonus.

Video guide

Mona is COMPLETELY Transformed! Hexerei SAVED Her! Updated Mona Build Guide | Genshin Impact

Video by JJJackal on YouTube · 13 min · 72.9K views · May 2026

The YouTube player loads only after you click.

Build

Suggested build The game doesn't recommend a build for this character.

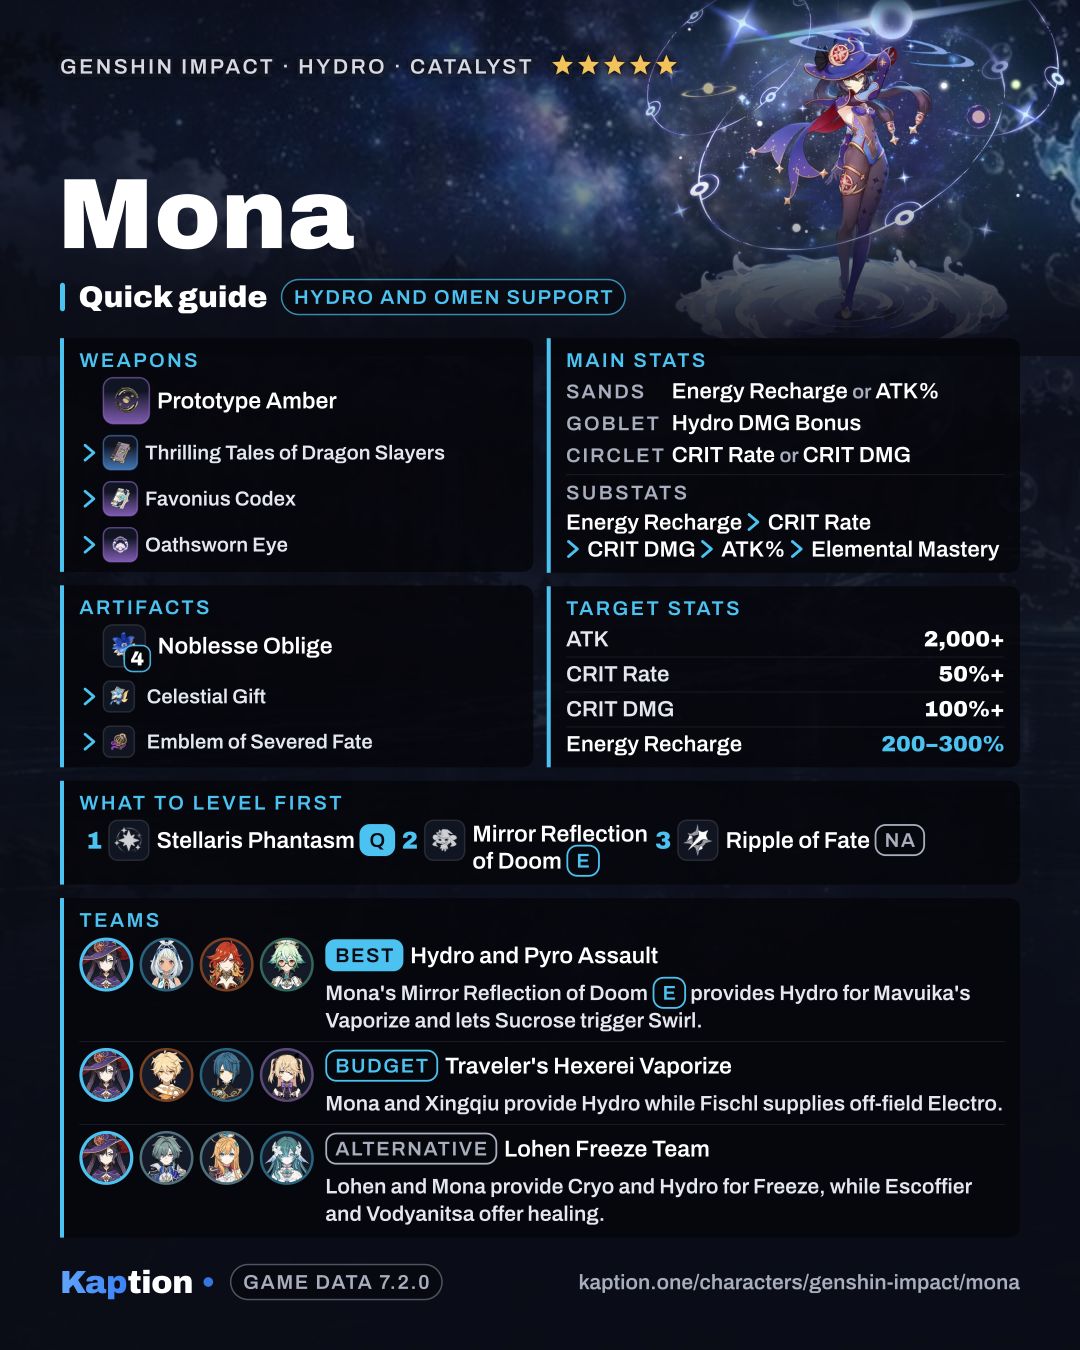
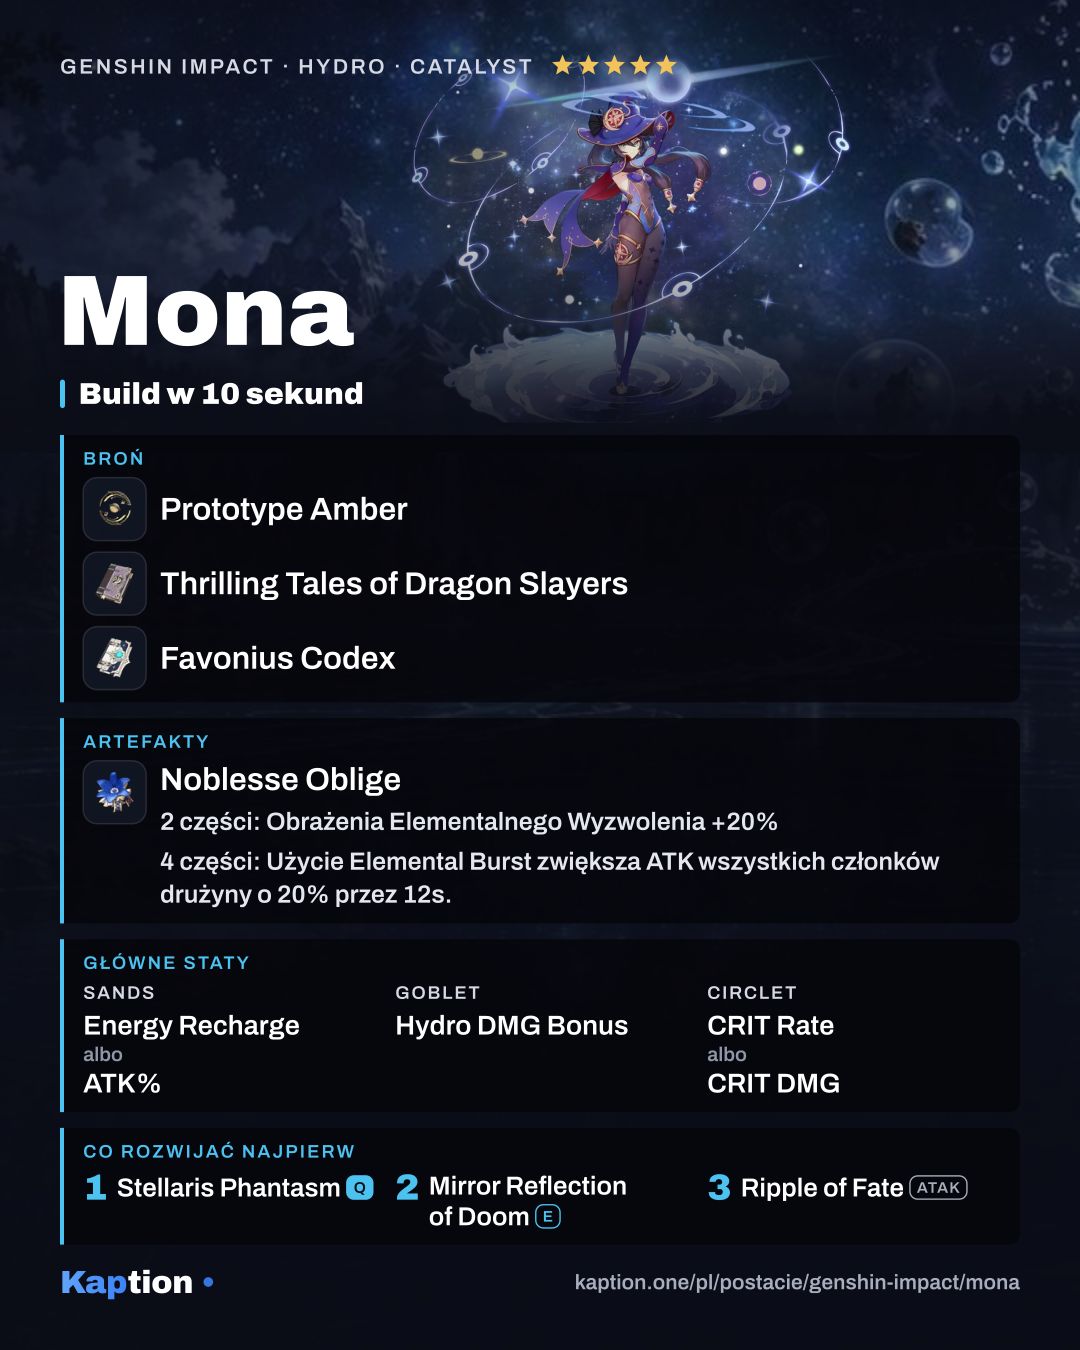
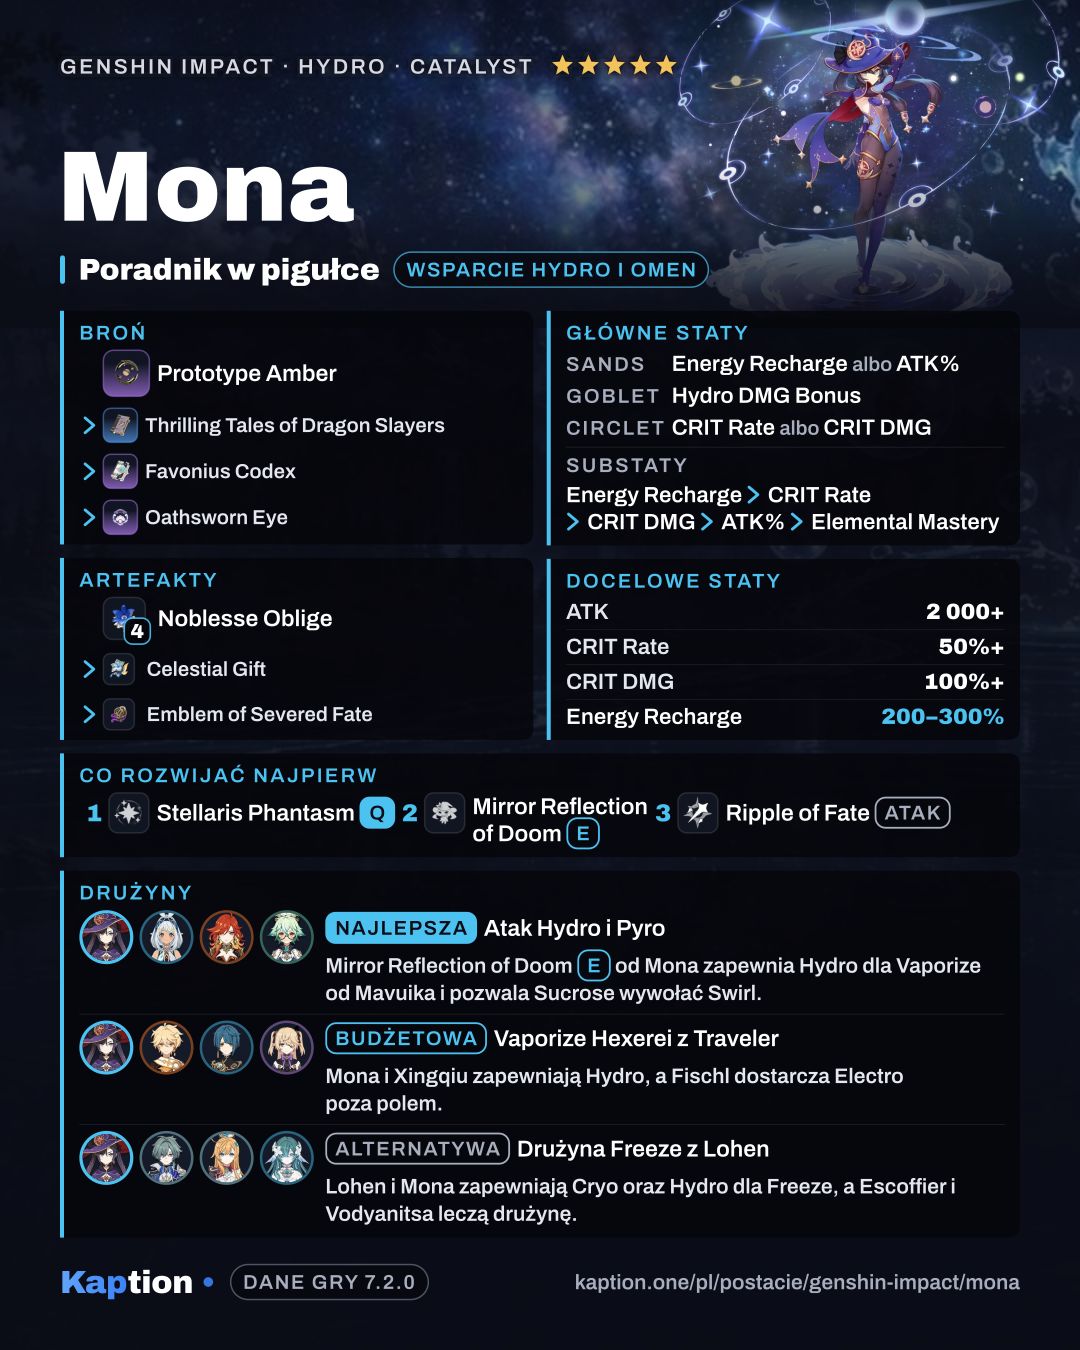
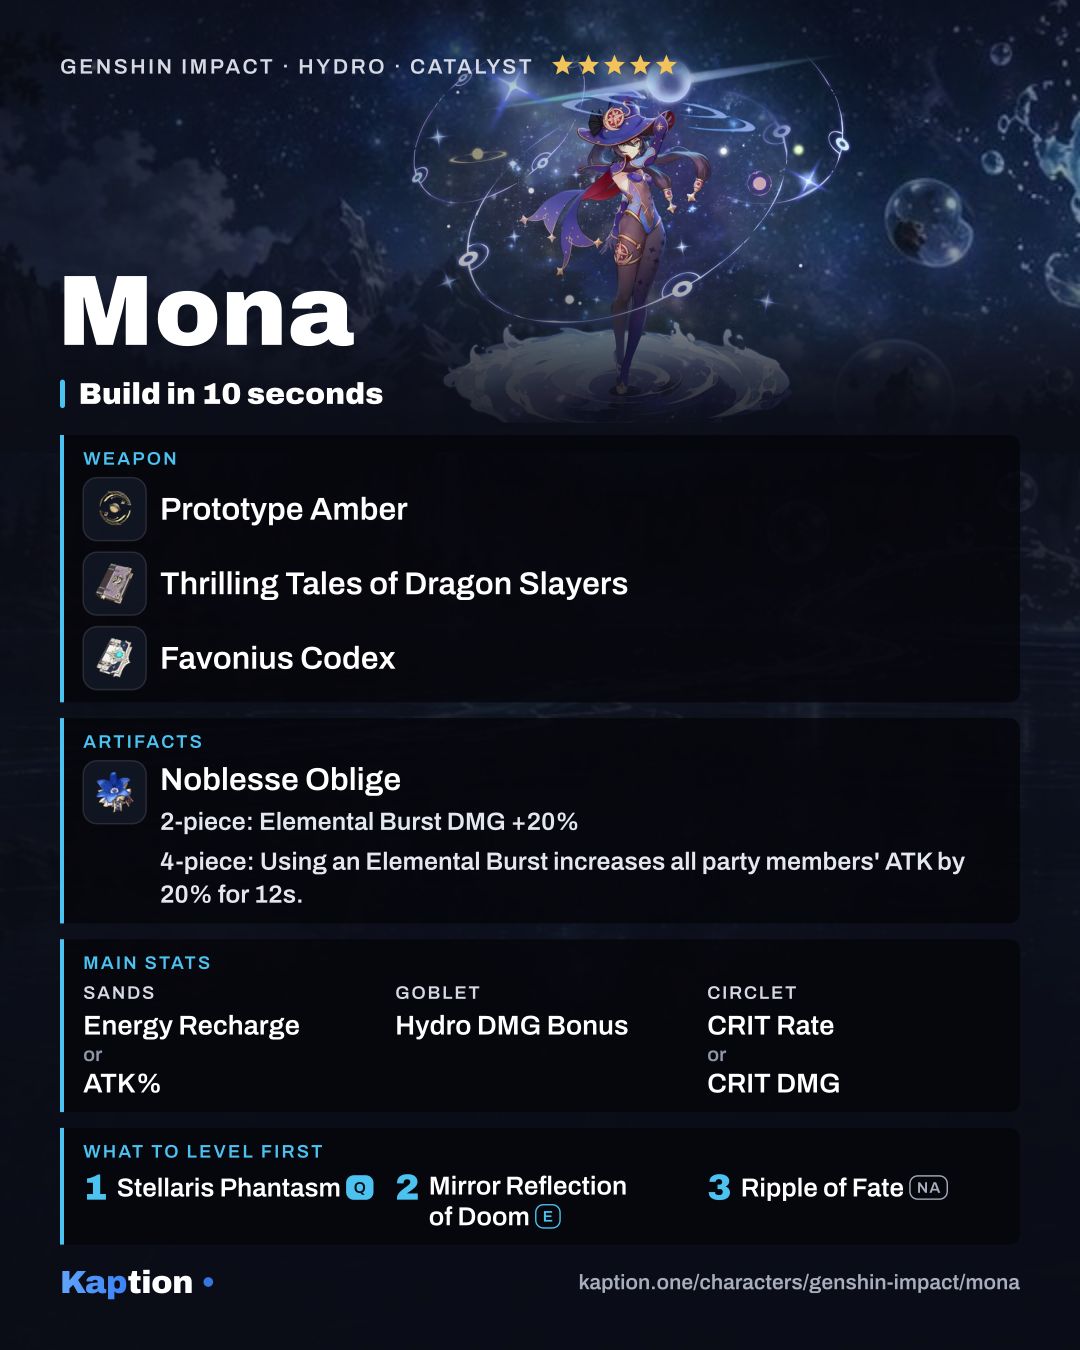
4× Noblesse Oblige · Sands Energy Recharge or ATK% · Goblet Hydro DMG Bonus · Circlet CRIT Rate or CRIT DMG · substats Energy Recharge > CRIT Rate > CRIT DMG > ATK% > Elemental Mastery

Energy Recharge increases Mona's Hydro DMG Bonus, while Emblem of Severed Fate adds Burst damage.

Artifacts

Artifact set

  1. Tenacity of the Millelith
    Tenacity of the Millelith
    • 2-piece bonus: HP +20%
    Show effect
    • 4-piece bonus: When an Elemental Skill hits an opponent, the ATK of all nearby party members is increased by 20% and their Shield Strength is increased by 30% for 3s. This effect can be triggered once every 0.5s. This effect can still be triggered even when the character who is using this artifact set is not on the field.

4 pieces · Artifact set

  1. Noblesse Oblige
    Noblesse Oblige
    • 2-piece bonus: Elemental Burst DMG +20%
    Show effect
    • 4-piece bonus: Using an Elemental Burst increases all party members' ATK by 20% for 12s. This effect cannot stack.

4 pieces · Artifact set

  1. Celestial Gift
    Celestial Gift
    • 2-piece bonus: Energy Recharge +20%.
    Show effect
    • 4-piece bonus: If the equipping character has completed Witch's Homework, after they use an Elemental Skill, they gain "Light's Guidance" for 20s: All nearby party members gain a 20% Elemental DMG Bonus corresponding to the equipping character's Elemental Type. The equipping character can trigger this effect while off-field. DMG Bonuses provided by Artifact Sets with the same name do not stack. · When your party has the Hexerei: Secret Rite effect, Light's Guidance is upgraded to "Mortal Hymn": All nearby party members gain a 40% Elemental DMG Bonus corresponding to both the equipping character and the current active party member's Elemental Type instead. If both characters have the same Elemental Type, these bonuses will not stack.

4 pieces · Artifact set

  1. Emblem of Severed Fate
    Emblem of Severed Fate
    • 2-piece bonus: Energy Recharge +20%
    Show effect
    • 4-piece bonus: Increases Elemental Burst DMG by 25% of Energy Recharge. A maximum of 75% bonus DMG can be obtained in this way.

Main stats

Sands
Energy Recharge or ATK%
Goblet
Hydro DMG Bonus
Circlet
CRIT Rate or CRIT DMG

Substats

  1. Energy Recharge
  2. CRIT Rate
  3. CRIT DMG
  4. ATK%
  5. Elemental Mastery

Target stats

Totals to aim for on the character's stat screen.

StatTarget
ATK 2,000+
CRIT Rate 50%+
CRIT DMG 100%+
Energy Recharge 200–300%

Recommended weapons

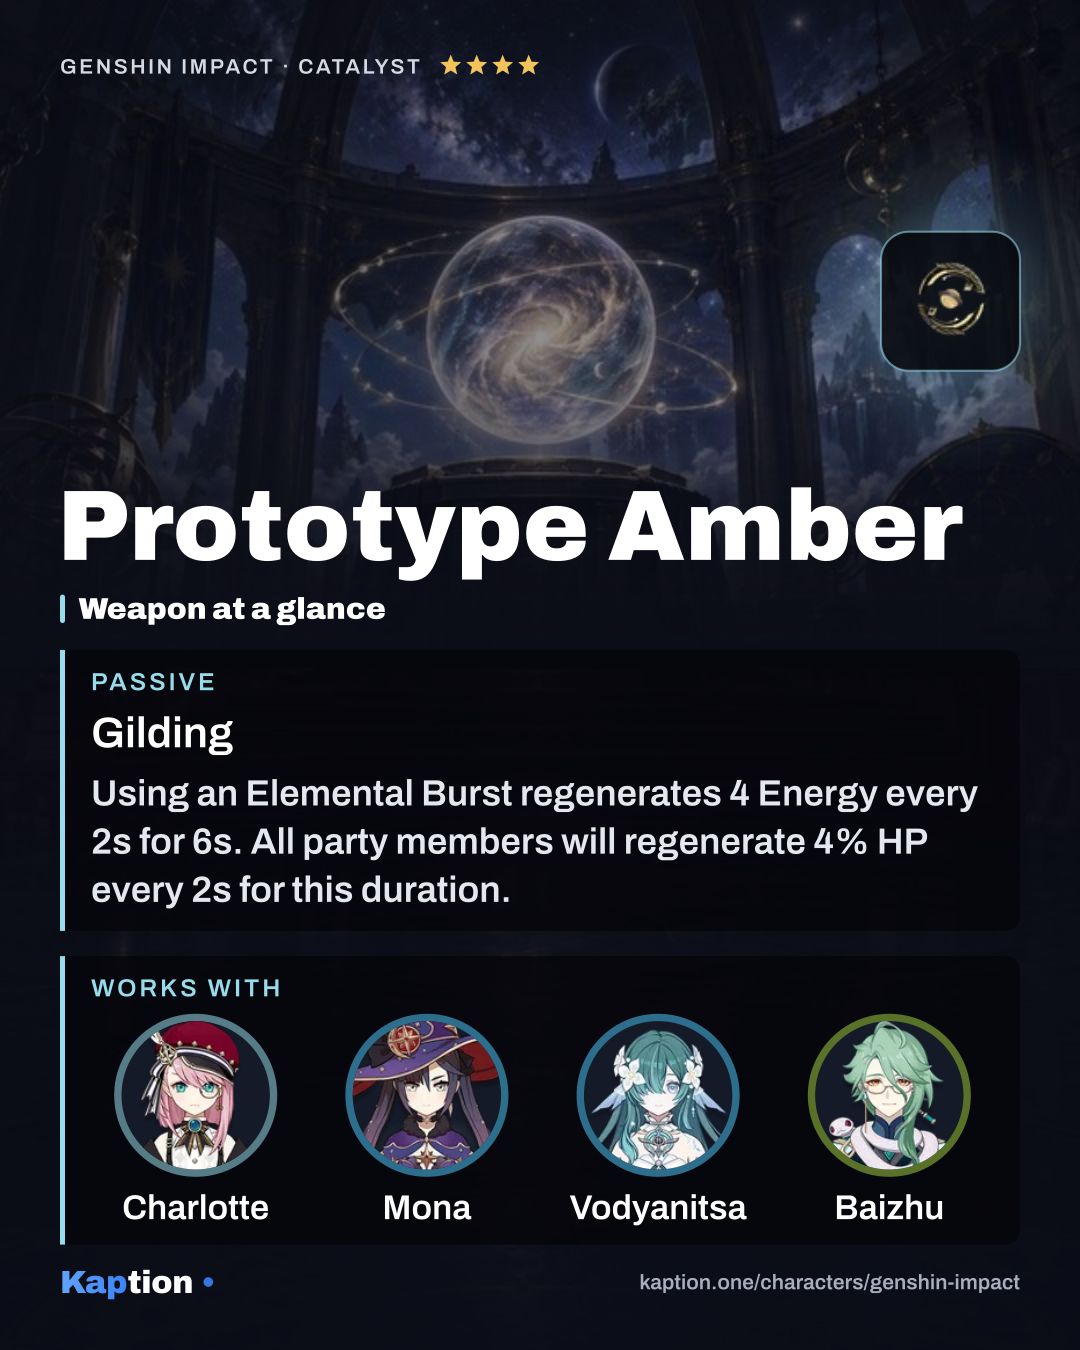
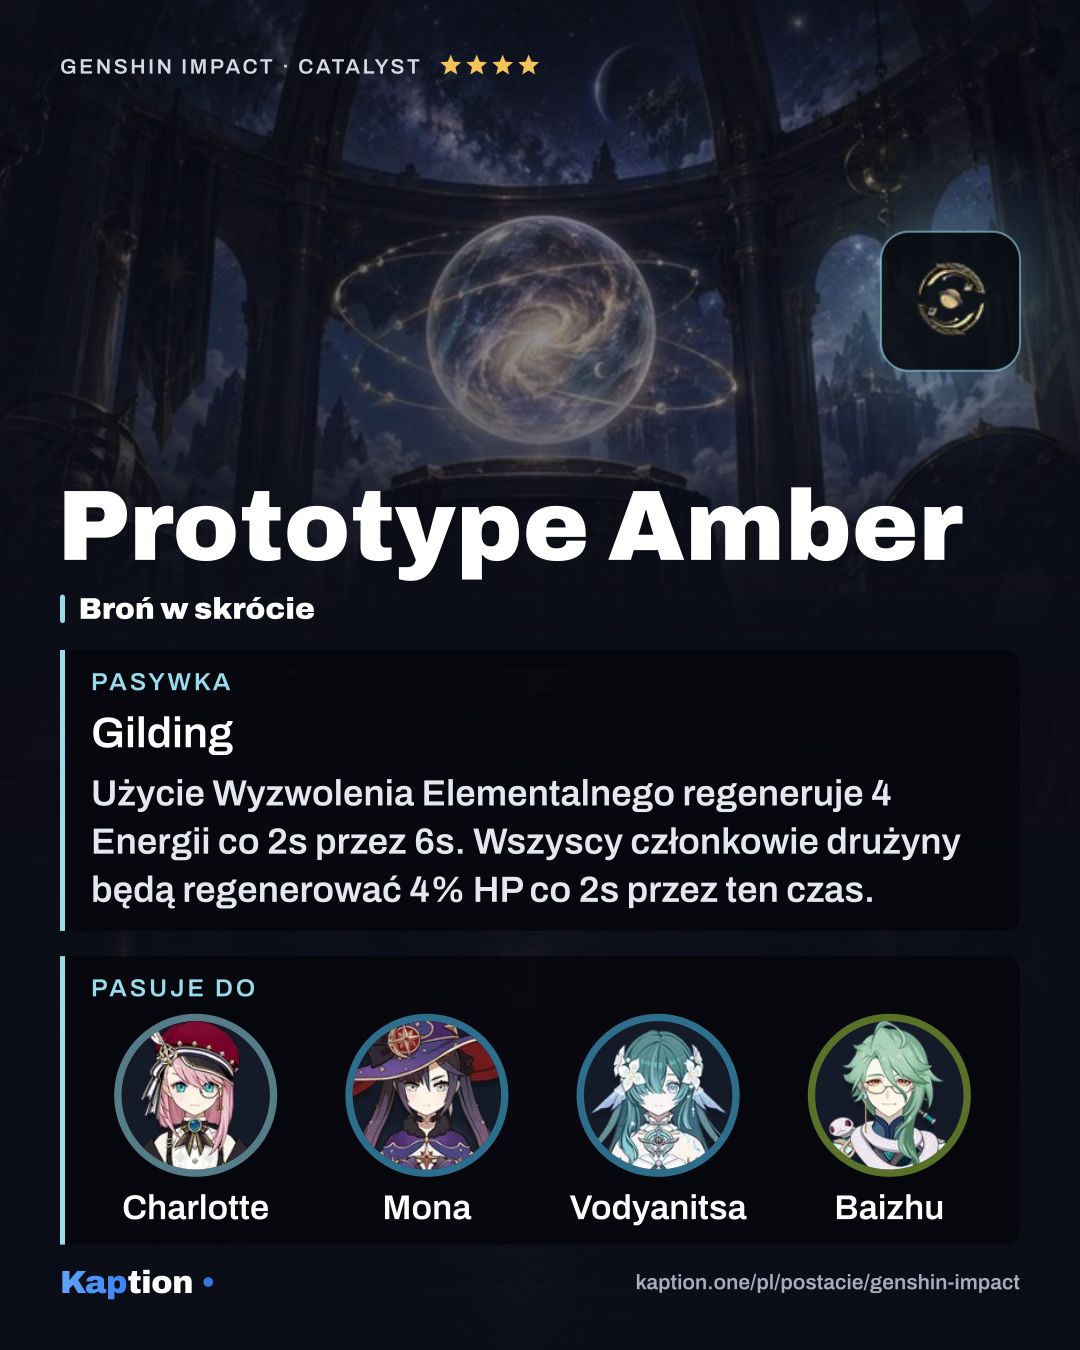
  1. Prototype Amber
    Prototype Amber 4-star
    Gilding Show effect

    Using an Elemental Burst regenerates 4 Energy every 2s for 6s. All party members will regenerate 4% HP every 2s for this duration.

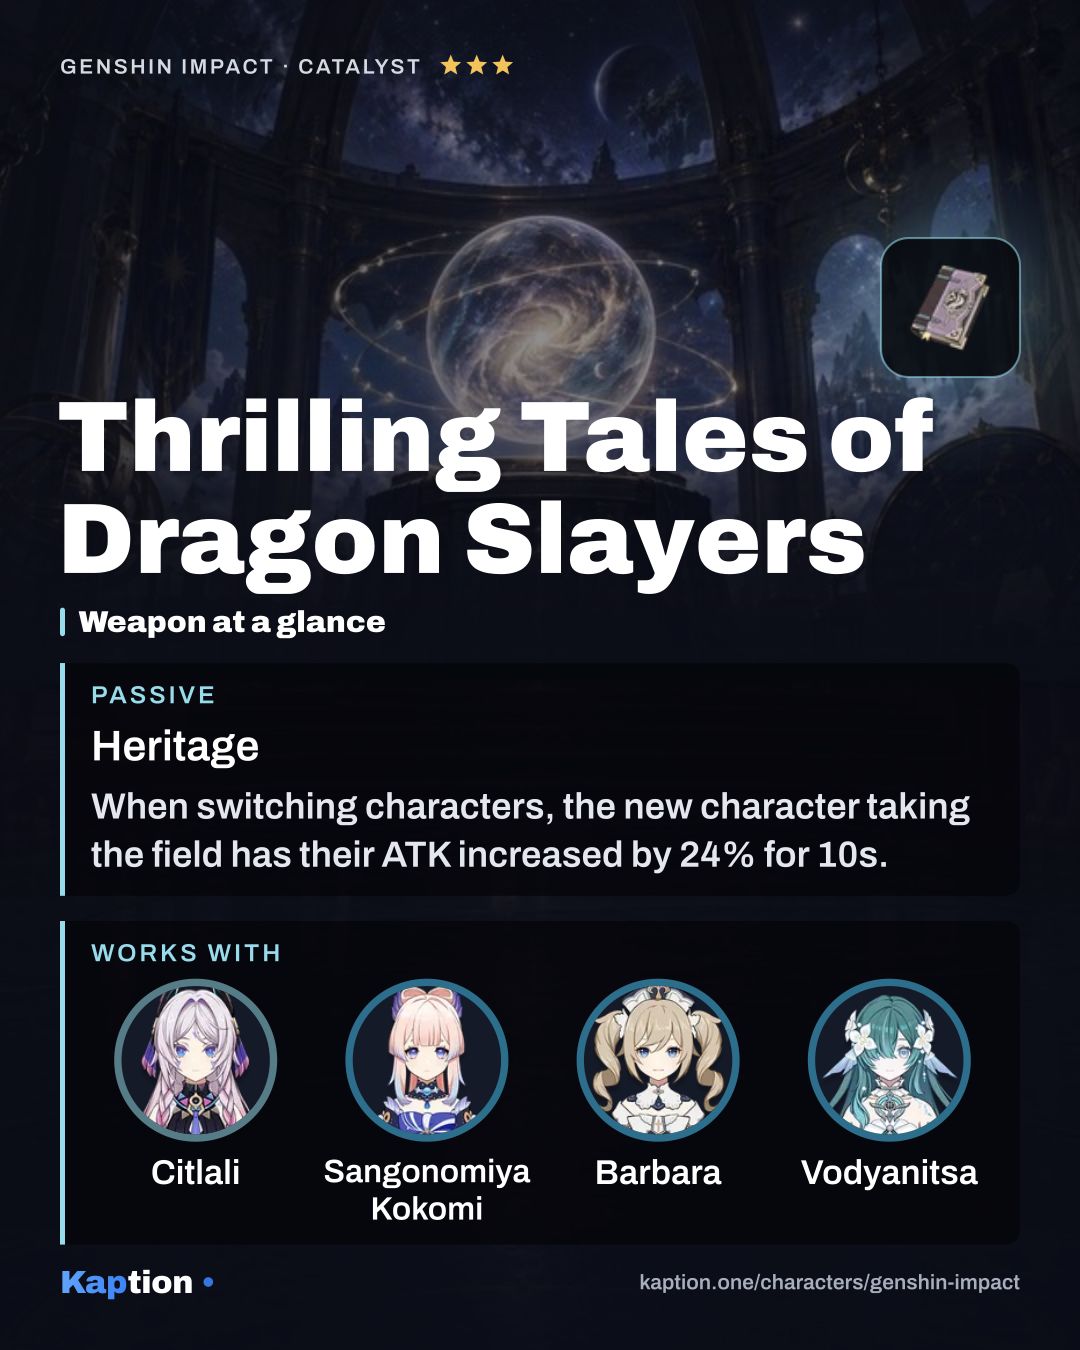
  2. Thrilling Tales of Dragon Slayers
    Thrilling Tales of Dragon Slayers 3-star
    Heritage Show effect

    When switching characters, the new character taking the field has their ATK increased by 24% for 10s. This effect can only occur once every 20s.

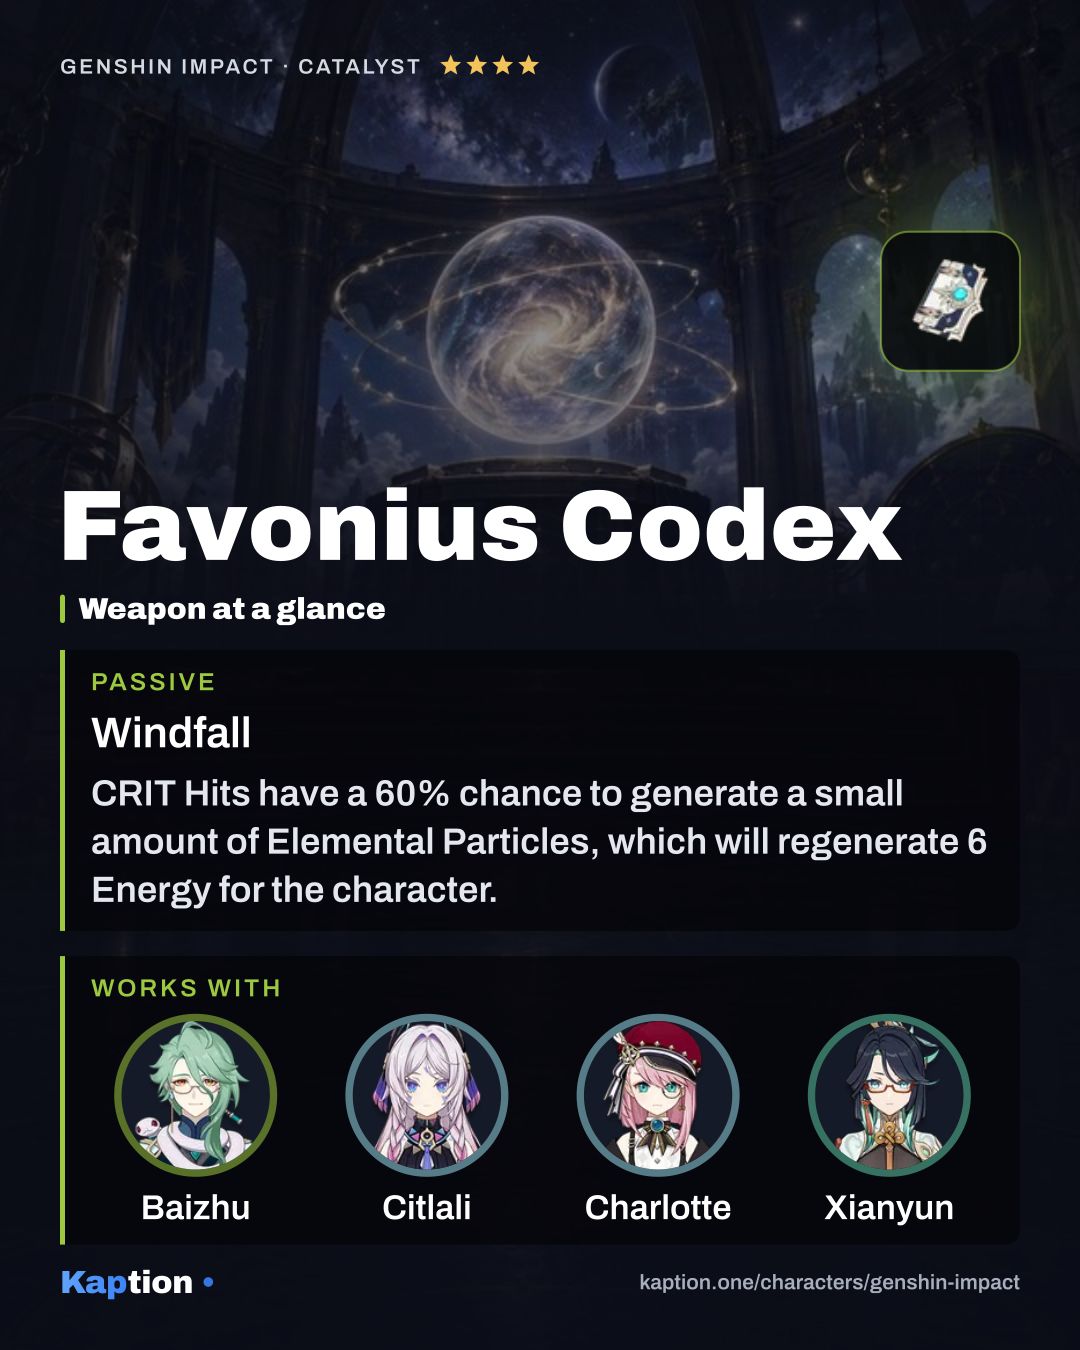
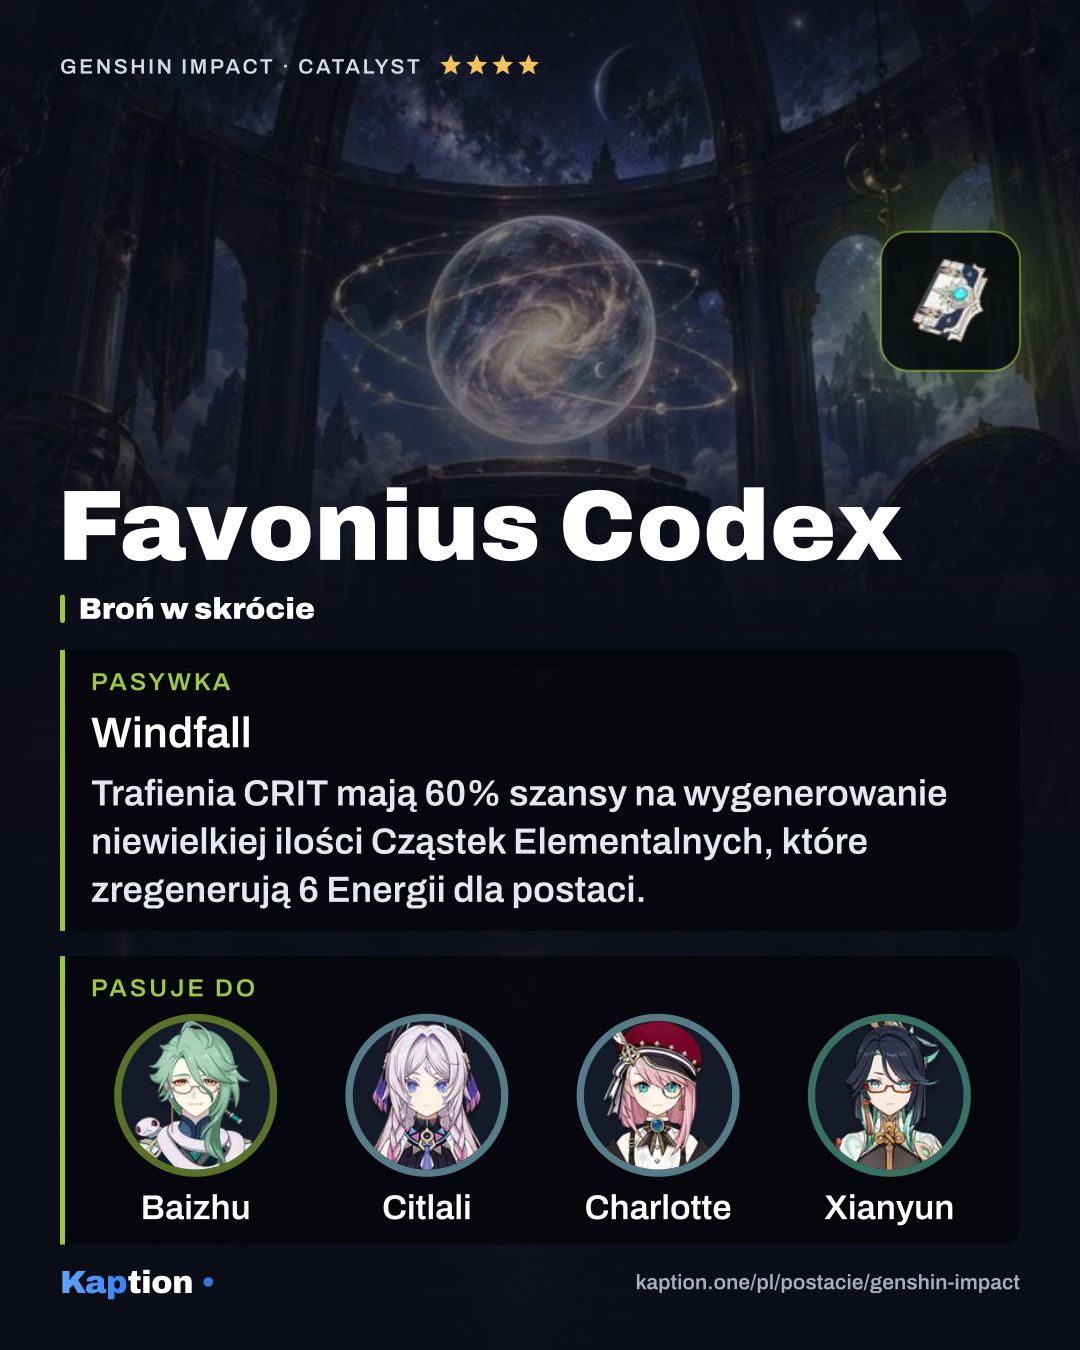
  3. Favonius Codex
    Favonius Codex 4-star
    Windfall Show effect

    CRIT Hits have a 60% chance to generate a small amount of Elemental Particles, which will regenerate 6 Energy for the character. Can only occur once every 12s.

  4. Oathsworn Eye
    Oathsworn Eye 4-star
    People of the Faltering Light Show effect

    Increases Energy Recharge by 24% for 10s after using an Elemental Skill.

  5. The Widsith
    The Widsith 4-star
    Debut Show effect

    When the character takes the field, they will gain a random theme song for 10s. This can only occur once every 30s. Recitative: ATK is increased by 60%. Aria: Increases all Elemental DMG by 48%. Interlude: Elemental Mastery is increased by 240.

  6. Skyward Atlas
    Skyward Atlas 5-star
    Wandering Clouds Show effect

    Increases Elemental DMG Bonus by 12%. Normal Attack hits have a 50% chance to earn the favor of the clouds, which actively seek out nearby opponents to attack for 15s, dealing 160% ATK DMG. Can only occur once every 30s.

Have this character? Make a card of your own build from your UID Stats, artifacts, weapon and talents from your in-game showcase, as a PNG in a dozen layouts.

Teams

Show more teams (4)Show less

Also plays in

Other characters' teams with a place for Mona.

Show more (4)

Skills

Names in English, as in the game · underlined ones open their card · Priority = level-up order

  1. Basic attack

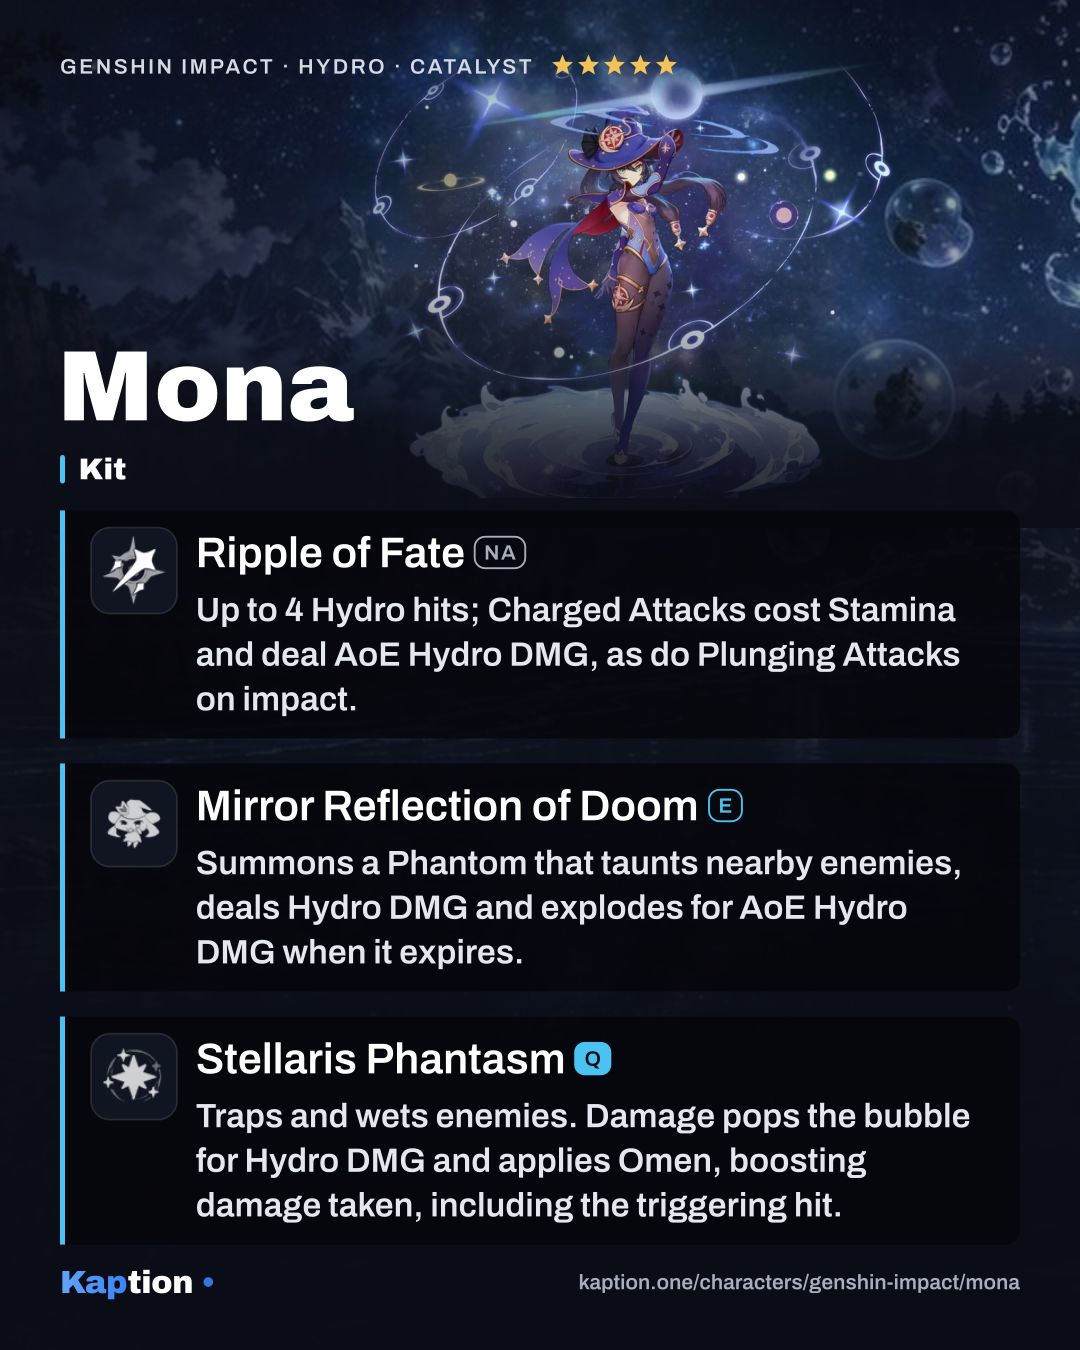
    Ripple of FateAttack

    Level priority 3 of 3

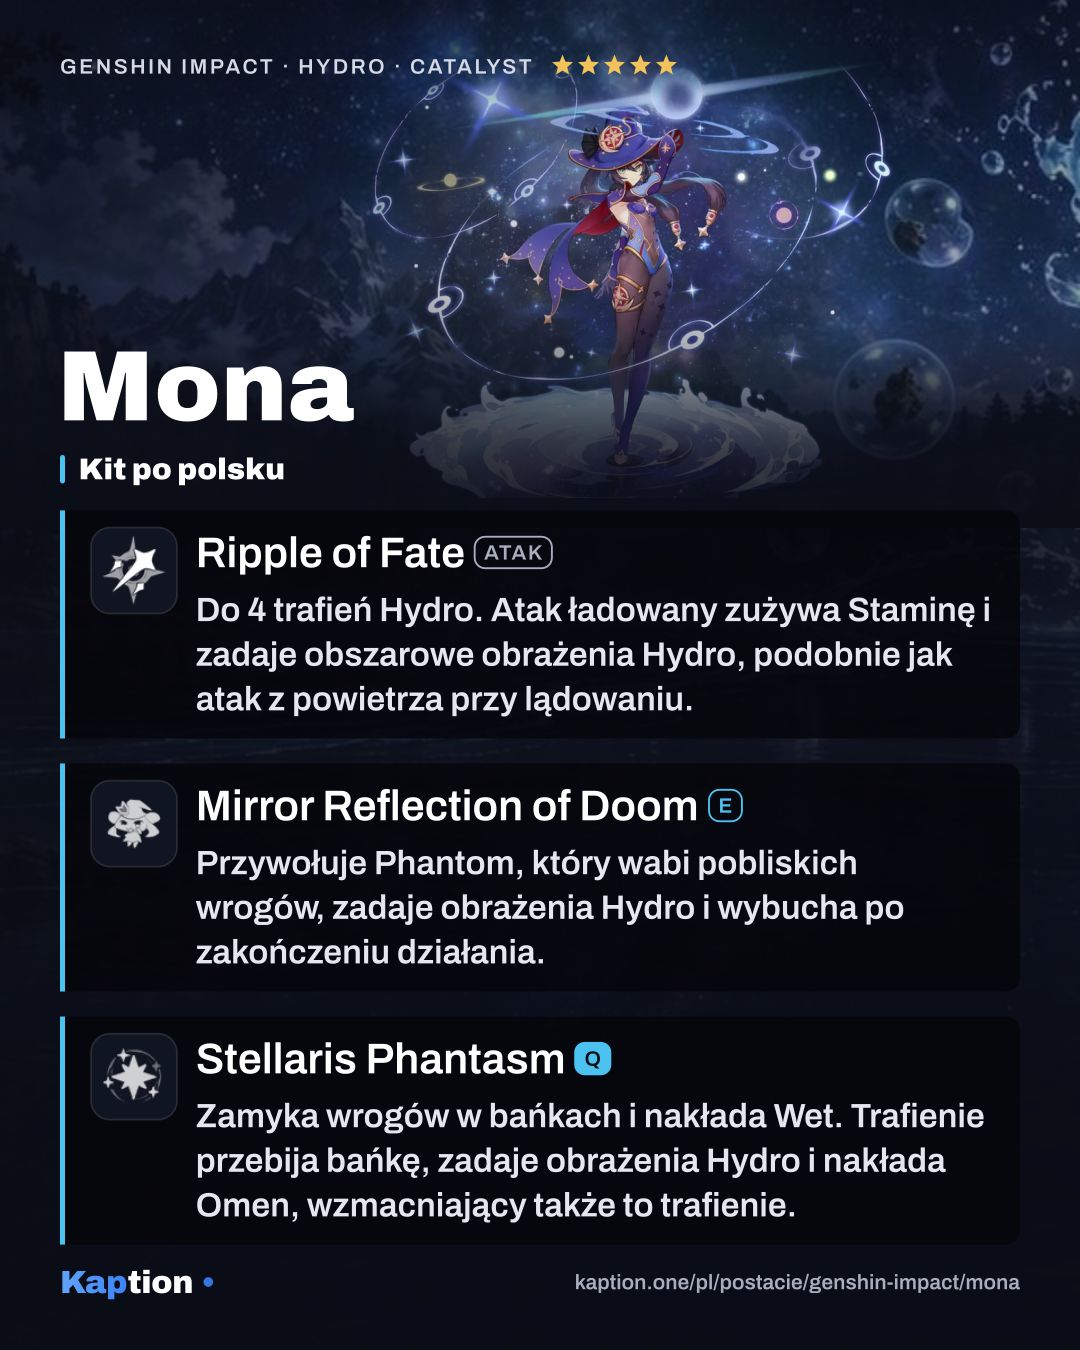
    Up to 4 Hydro hits; Charged Attacks cost Stamina and deal AoE Hydro DMG, as do Plunging Attacks on impact.

    Normal Attack Performs up to 4 water splash attacks that deal Hydro DMG. Charged Attack Consumes a certain amount of Stamina to deal AoE Hydro DMG after a short casting time. Plunging Attack Gathering the might of Hydro, Mona plunges towards the ground from mid-air, damaging all opponents in her path. Deals AoE Hydro DMG upon impact with the ground.

  2. Skill

    Mirror Reflection of DoomE

    Level priority 2 of 3

    Summons a Phantom that taunts nearby enemies, deals Hydro DMG and explodes for AoE Hydro DMG when it expires.

    Creates an illusory Phantom of Fate from coalesced waterspouts. Phantom Has the following special properties: ·Continuously taunts nearby opponents, attracting their fire. ·Continuously deals Hydro DMG to nearby opponents. ·When its duration expires, the Phantom explodes, dealing AoE Hydro DMG. Hold Utilizes water currents to move backwards swiftly before conjuring a Phantom. Only one Phantom created by Mirror Reflection of Doom can exist at any time. Skilled astrologers have always dreamed of using a phantom facsimile of themselves to ward off imminent ill fate, but Mona must be the first to make such a mockery of it in all of Teyvat.

  3. Special

    Illusory TorrentSpecial

    Alternate Sprint consumes Stamina and moves quickly over water. Reappearing applies Wet to nearby enemies.

    Alternate Sprint Mona cloaks herself within the water's flow, consuming Stamina to move rapidly. When under the effect of Illusory Torrent, Mona can move at high speed on water. Applies the Wet status to nearby opponents when she reappears. This is something that Mona can do, but her teacher cannot. Well, but it's not as if her teacher would pursue any matter concerning Hydro Visions anyway...

  4. Ultimate

    Stellaris PhantasmQ

    Level priority 1 of 3

    Traps and wets enemies. Damage pops the bubble for Hydro DMG and applies Omen, boosting damage taken, including the triggering hit.

    Mona summons the sparkling waves and creates a reflection of the starry sky, applying the Illusory Bubble status to opponents in a large AoE. Illusory Bubble Traps opponents inside a pocket of destiny and also makes them Wet. Renders weaker opponents immobile. When an opponent affected by Illusory Bubble sustains DMG, it has the following effects: ·Applies an Omen to the opponent, which gives a DMG Bonus, also increasing the DMG of the attack that causes it. ·Removes the Illusory Bubble, dealing Hydro DMG in the process. Omen During its duration, increases DMG taken by opponents. It was from the time that gods first traced the lights in the heavens with their eyes that the notion of "fate" was born.

Passives

  1. Passive

    "Come 'n' Get Me, Hag!"Passive

    After 2s of alternate sprint near an enemy, creates a 2s Phantom whose explosion deals 50% of the Skill Phantom's explosion DMG.

    After she has used Illusory Torrent for 2s, if there are any opponents nearby, Mona will automatically create a Phantom. A Phantom created in this manner lasts for 2s, and its explosion DMG is equal to 50% of Mirror Reflection of Doom.

  2. Passive

    Waterborne DestinyPassive

    Mona gains Hydro DMG Bonus equal to 20% of her Energy Recharge.

    Increases Mona's Hydro DMG Bonus by a degree equivalent to 20% of her Energy Recharge rate.

  3. Passive

    Principium of AstrologyPassive

    When crafting Weapon Ascension Materials, has a 25% chance to refund some of the materials used.

    When Mona crafts Weapon Ascension Materials, she has a 25% chance to refund a portion of the crafting materials used.

  4. Passive

    Witch's Eve Rite: Genesis of StarsignsPassive

    With Hexerei: Secret Rite, Normal and Charged hits build up to 3 stacks; another party member's Vaporize consumes them for 5% reaction DMG each.

    After completing Witch's Homework: Of Untested Insight, Mona will become a Hexerei character. When the party includes at least 2 Hexerei characters, you will gain the Hexerei: Secret Rite effect, which enhances Hexerei characters. Hexerei: Secret Rite When Mona's Normal Attacks or Charged Attacks hit an opponent, she gains 1 stack of Astral Glow of Mercury, for 8s. Max 3 stacks. This effect can grant at most one stack every 0.1s. When other party members trigger a Vaporize reaction on an enemy, all Astral Glow of Mercury stacks are consumed. Each stack consumed increases the damage of that Vaporize reaction by 5%. Additionally, when Mona's Normal Attacks or Charged Attacks hit an opponent, the enemy's Omen duration is extended by 2s. This effect can trigger at most once every 0.5s, and can extend the Omen by up to 8s through this method.

Constellations

  1. C1

    Prophecy of Submersion

    Worth it

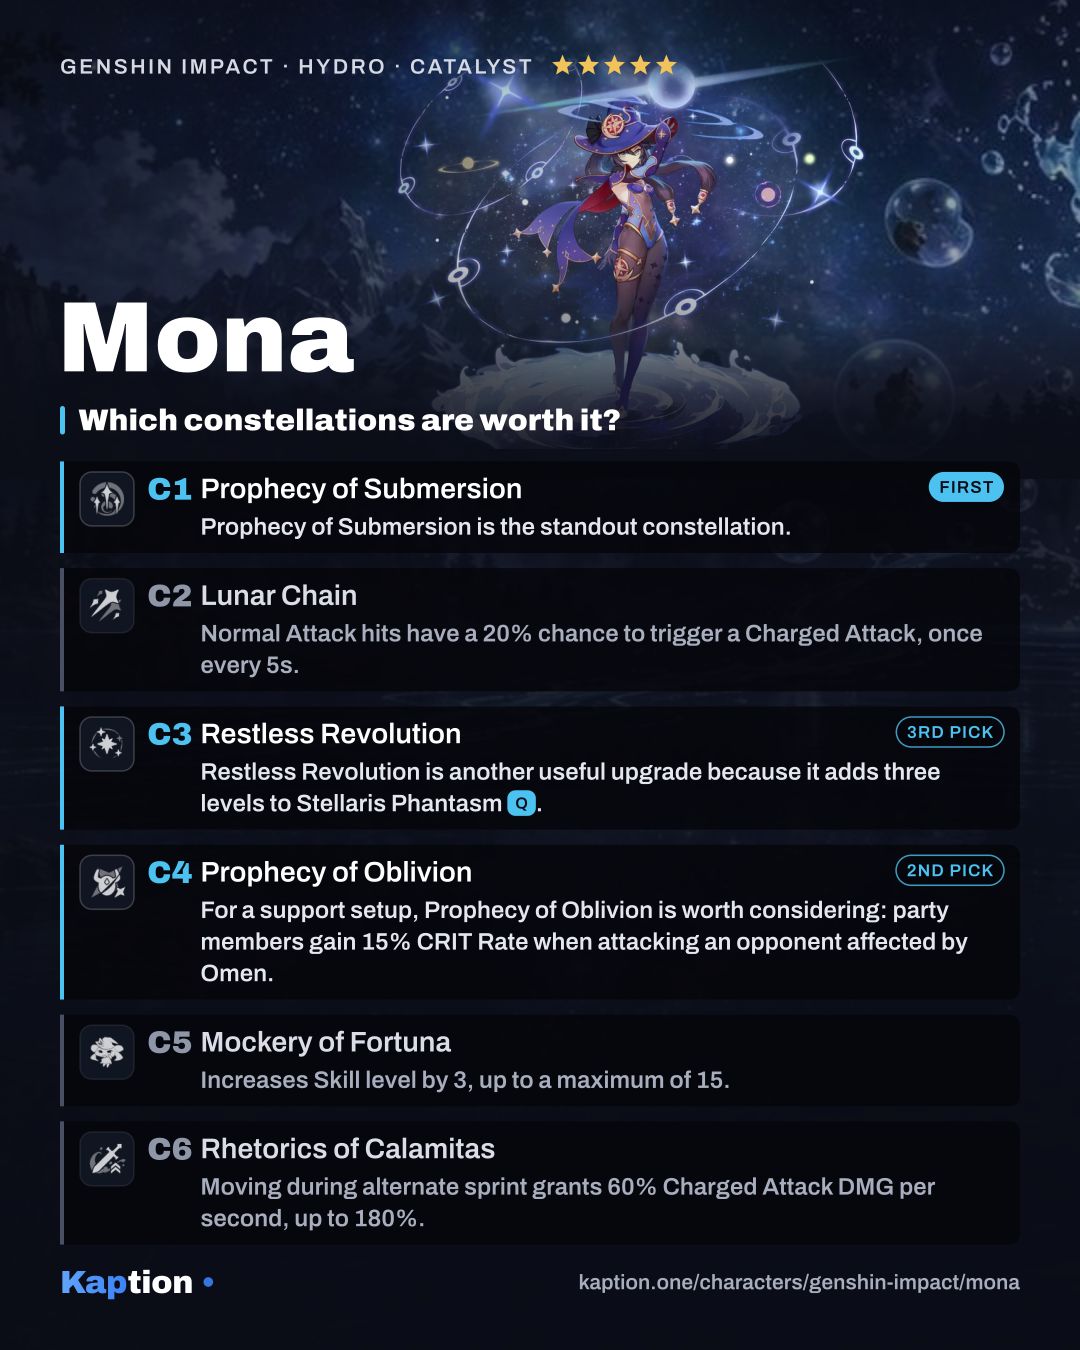
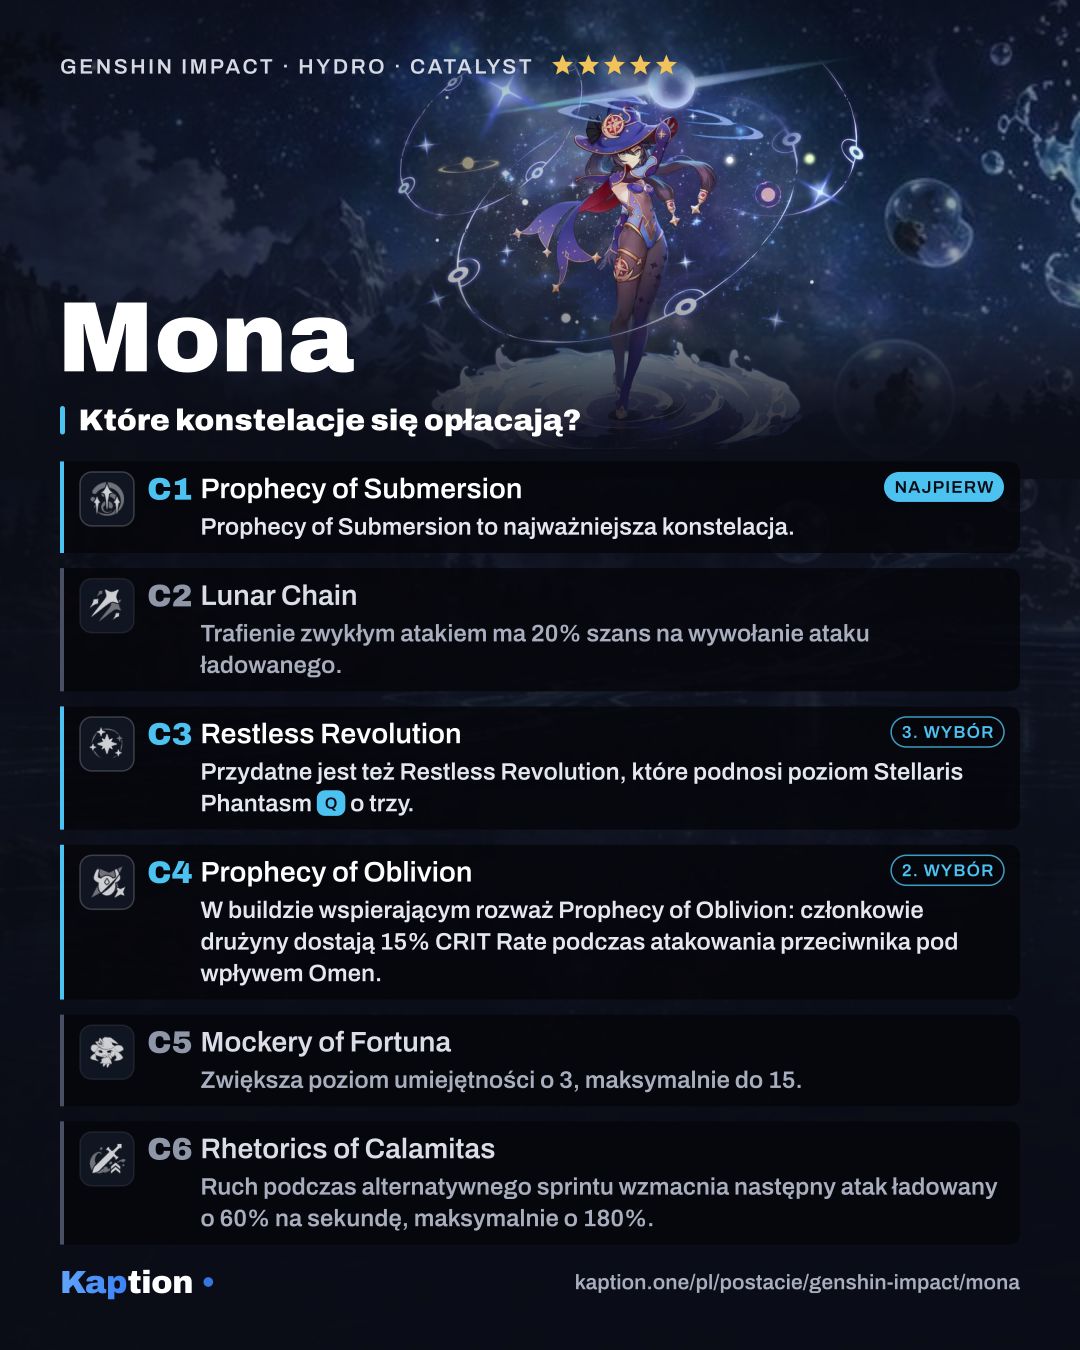
    Prophecy of Submersion (C1) is the standout constellation.

    When any of your own party members hits an opponent affected by an Omen, the effects of Hydro-related Elemental Reactions are enhanced for 8s: · Electro-Charged DMG increases by 15%, Lunar-Charged DMG increases by 15%, Vaporize DMG increases by 15%, Hydro Swirl DMG increases by 15%, Lunar-Crystallize DMG increases by 15%. · Frozen duration is extended by 15%.

  2. C2

    Lunar Chain

    When a Normal Attack hits, there is a 20% chance that it will be automatically followed by a Charged Attack. This effect can only occur once every 5s.

  3. C3

    Restless Revolution

    Worth it

    Restless Revolution (C3) is another useful upgrade because it adds three levels to Stellaris Phantasm.

    Increases the Level of Stellaris Phantasm by 3. Maximum upgrade level is 15.

  4. C4

    Prophecy of Oblivion

    Worth it

    For a support setup, Prophecy of Oblivion (C4) is worth considering: party members gain 15% CRIT Rate when attacking an opponent affected by Omen.

    When any party member attacks an opponent affected by an Omen, their CRIT Rate is increased by 15%.

  5. C5

    Mockery of Fortuna

    Increases the Level of Mirror Reflection of Doom by 3. Maximum upgrade level is 15.

  6. C6

    Rhetorics of Calamitas

    Upon entering Illusory Torrent, Mona gains a 60% increase to the DMG of her next Charged Attack per second of movement. A maximum DMG Bonus of 180% can be achieved in this manner. The effect lasts for no more than 8s.

Materials

Ascension, to max level

  • Mora Mora × 420,000
  • Philanemo Mushroom Philanemo Mushroom × 168
  • Varunada Lazurite Sliver Varunada Lazurite Sliver × 1
  • Varunada Lazurite Fragment Varunada Lazurite Fragment × 9
  • Varunada Lazurite Chunk Varunada Lazurite Chunk × 9
  • Varunada Lazurite Gemstone Varunada Lazurite Gemstone × 6
  • Whopperflower Nectar Whopperflower Nectar × 18
  • Shimmering Nectar Shimmering Nectar × 30
  • Energy Nectar Energy Nectar × 36
  • Cleansing Heart Cleansing Heart × 46

All skills to max

  • Mora Mora × 4,957,500
  • Teachings of Resistance Teachings of Resistance × 9
  • Guide to Resistance Guide to Resistance × 63
  • Philosophies of Resistance Philosophies of Resistance × 114
  • Crown of Insight Crown of Insight × 3
  • Whopperflower Nectar Whopperflower Nectar × 18
  • Shimmering Nectar Shimmering Nectar × 66
  • Energy Nectar Energy Nectar × 93
  • Ring of Boreas Ring of Boreas × 18

Guide

How the kit works

Start with Mirror Reflection of Doom to create a Phantom. It taunts nearby opponents and repeatedly deals Hydro damage, then explodes for AoE Hydro damage when its duration ends. Holding the Skill moves Mona backward before creating it. Only one Phantom from this Skill can exist at a time.

Use Stellaris Phantasm to apply Illusory Bubble in a large area. The Bubble makes opponents Wet and immobilizes weaker ones. When a bubbled opponent takes damage, the Bubble breaks, deals Hydro damage and applies Omen. The attack that breaks it also gets the damage bonus, so follow the Burst with an attack from the character you want to benefit.

Ripple of Fate (NA) gives Mona up to four Hydro Normal Attacks. Her Charged Attack costs Stamina and deals AoE Hydro damage after a short cast. Illusory Torrent is her alternate sprint: it consumes Stamina, travels over water and makes nearby opponents Wet when she reappears. After two seconds of sprinting near opponents, her passive creates a Phantom lasting two seconds; its explosion deals 50% of the Skill Phantom's explosion damage.

After completing her Witch's Homework and having at least two Hexerei characters in the party, Mona gains stacks when her Normal or Charged Attacks hit. Another party member's Vaporize consumes them for 5% more reaction damage per stack, up to three stacks. Her attacks can also extend Omen by two seconds per trigger, up to eight seconds.

Build and why

For team support, use four pieces of Noblesse Oblige. Its two-piece bonus adds 20% Burst damage, and using the Burst with four pieces gives the party 20% ATK for 12 seconds. The four-piece effect does not stack, so check whether another teammate already carries it.

Four pieces of Celestial Gift are another option. After Mona completes her Witch's Homework, using her Skill gives nearby party members 20% Hydro DMG Bonus for 20 seconds. With Hexerei: Secret Rite active, the effect instead gives 40% bonuses for Mona's element and the active character's element; bonuses for the same element do not stack. Tenacity of the Millelith is useful for its team ATK bonus when the Skill hits. For Mona's own Burst damage, consider four pieces of Emblem of Severed Fate.

Pick Energy Recharge or ATK Percentage on the sands, Hydro DMG Bonus on the goblet and CRIT Rate or CRIT DMG on the circlet. Look for Energy Recharge first in substats, followed by CRIT Rate, CRIT DMG, ATK Percentage and Elemental Mastery. Mona gains Hydro DMG Bonus equal to 20% of her Energy Recharge rate.

Thrilling Tales of Dragon Slayers gives the incoming character 24% ATK for 10 seconds when Mona switches out. Favonius Codex can generate particles on a CRIT hit, so give Mona some CRIT Rate if you use it. Prototype Amber is an option for restoring Mona's Energy and healing the party after her Burst.

Leveling priority

For a support build, I would level Stellaris Phantasm first because the Burst applies Omen and deals Hydro damage when the Bubble breaks. Level Mirror Reflection of Doom next for the Phantom's damage. Leave Ripple of Fate (NA) until later if Mona spends little time attacking on the field; move it up if you use her attacks often.

For ascension, collect Philanemo Mushroom and Cleansing Heart, along with Varunada Lazurite Sliver, Varunada Lazurite Fragment, Varunada Lazurite Chunk and Varunada Lazurite Gemstone. You also need Whopperflower Nectar, Shimmering Nectar, Energy Nectar and Mora.

For talents, gather Teachings of Resistance, Guide to Resistance and Philosophies of Resistance, plus the same three Nectar materials, Ring of Boreas and Mora. Crown of Insight is needed for the final talent level. Mona also has a 25% chance to refund a portion of the materials when she crafts Weapon Ascension Materials.

Constellations worth it

Prophecy of Submersion is the standout constellation. When a party member hits an opponent affected by Omen, it strengthens several Hydro-related reactions for eight seconds. Vaporize and Electro-Charged damage, for example, increase by 15%, while Frozen duration is extended by 15%.

For a support setup, Prophecy of Oblivion is worth considering: party members gain 15% CRIT Rate when attacking an opponent affected by Omen. Restless Revolution is another useful upgrade because it adds three levels to Stellaris Phantasm.

Lunar Chain has a 20% chance to follow a Normal Attack hit with a Charged Attack, once every five seconds. Rhetorics of Calamitas boosts the next Charged Attack after time spent moving in Illusory Torrent. Both matter less if you switch Mona out quickly. Mockery of Fortuna adds three Skill levels, so it is less relevant if your focus is the Burst's team benefit.

Common mistakes

Do not cast Stellaris Phantasm and then leave the Bubble untouched. An opponent must take damage for the Bubble to break and apply Omen. Plan who attacks next, especially with Thrilling Tales of Dragon Slayers equipped, because its ATK bonus goes to the character who takes the field.

Do not ignore Energy Recharge while chasing damage stats. Mona's passive also turns part of it into Hydro DMG Bonus. If you use Favonius Codex, remember that its particle effect needs a CRIT hit. Check your teammates' artifact sets too: two copies of the Noblesse Oblige four-piece effect do not stack.

Do not expect the Hexerei attack effects without completing Mona's Witch's Homework and meeting the party requirement. Her stacks boost Vaporize triggered by other party members, not a Vaporize attributed to Mona.
Mona in Polish

Story lines the way Kaption shows them in Polish, with the English original underneath.

  • Mona · Astrology and the 50-Year Pact O czym ty mówisz? Główną rzeczą tutaj jest wykorzystać tę okazję, by udowodnić potęgę i status astrologii! What are you talking about? The main thing here is to use this chance to prove the power and status of astrology!
  • Mona · A Bewildering Fate Moje odczyty mówiły mi to samo. Ale zanim odeszła, na pewno przekazała ci swe mistyczne sztuki, prawda? My readings told me as much. But before she left, she must have imparted her mystical arts to you, surely?
  • Mona · Astrology and the 50-Year Pact Gdybym miał przyprowadzić mojego ucznia, by się z nią spotkać, wówczas prowadzenie już jest moje, prawda? If I were to bring my disciple to meet her, then the lead is already mine, no?
  • Mona · Astrology and the 50-Year Pact Wolałbym jednak zapewnić sobie zwycięstwo w tym konkursie i po przemyśleniu pomyślałem o tobie! But I would prefer to assure my victory in this contest, and upon giving it some thought, you came to mind!
  • Mona · A Bewildering Fate Rzecz, którą chciała odzyskać po 50 latach, to mroczna historia jej młodości? The thing she wanted back after 50 years was the dark history of her youth?
  • Mona · To Mondstadt W—Wszystkie? Mamy tylko trzy... Nie, dwie i pół osoby? Czy to nie za dużo jedzenia? A—All of them? We only have three... No, two and a half people? Isn't that too much food?
  • Mona · A Bewildering Fate Ale moje przewidywania nie mogą się mylić... Cóż, upewnijmy się. Twoja matka ma na imię Alice, prawda? But my predictions can't be mistaken... Well, let's make sure. Your mother's name is Alice, isn't it?
  • Mona · A Bewildering Fate Gildia Poszukiwaczy Przygód? Ach, tak, możesz wykonywać dla nich zlecenia w zamian za... wiesz, o co chodzi, prawda? The Adventurers' Guild? Ah, right, you can do commissions for them in exchange for... you know what I mean, don't you?

Frequently asked questions

What's the best build for Mona?

Artifacts: Tenacity of the Millelith, Noblesse Oblige ×4 or Celestial Gift ×4. Main stats: Sands: Energy Recharge or ATK%, Goblet: Hydro DMG Bonus, Circlet: CRIT Rate or CRIT DMG. Recommended weapons: Prototype Amber, Thrilling Tales of Dragon Slayers or Favonius Codex.

What should I level first on Mona?

Stellaris PhantasmQ first, then Mirror Reflection of DoomE and Ripple of FateAttack.

Which constellations are worth getting for Mona?

The biggest upgrades: C1 Prophecy of Submersion, C4 Prophecy of Oblivion and C3 Restless Revolution.

Who should Mona team up with?

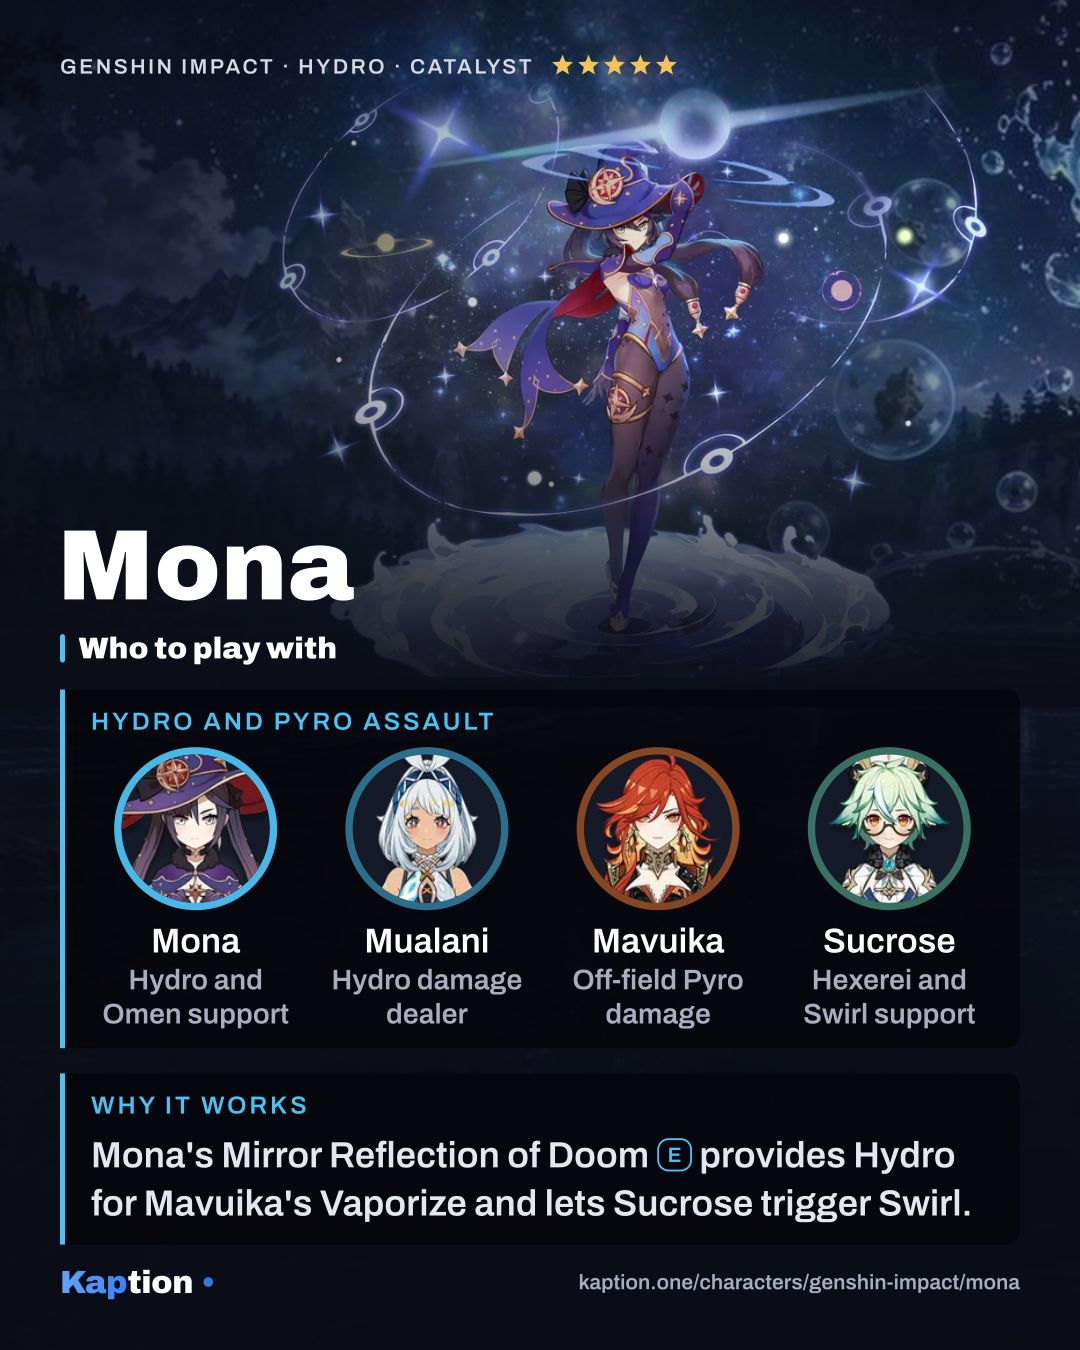
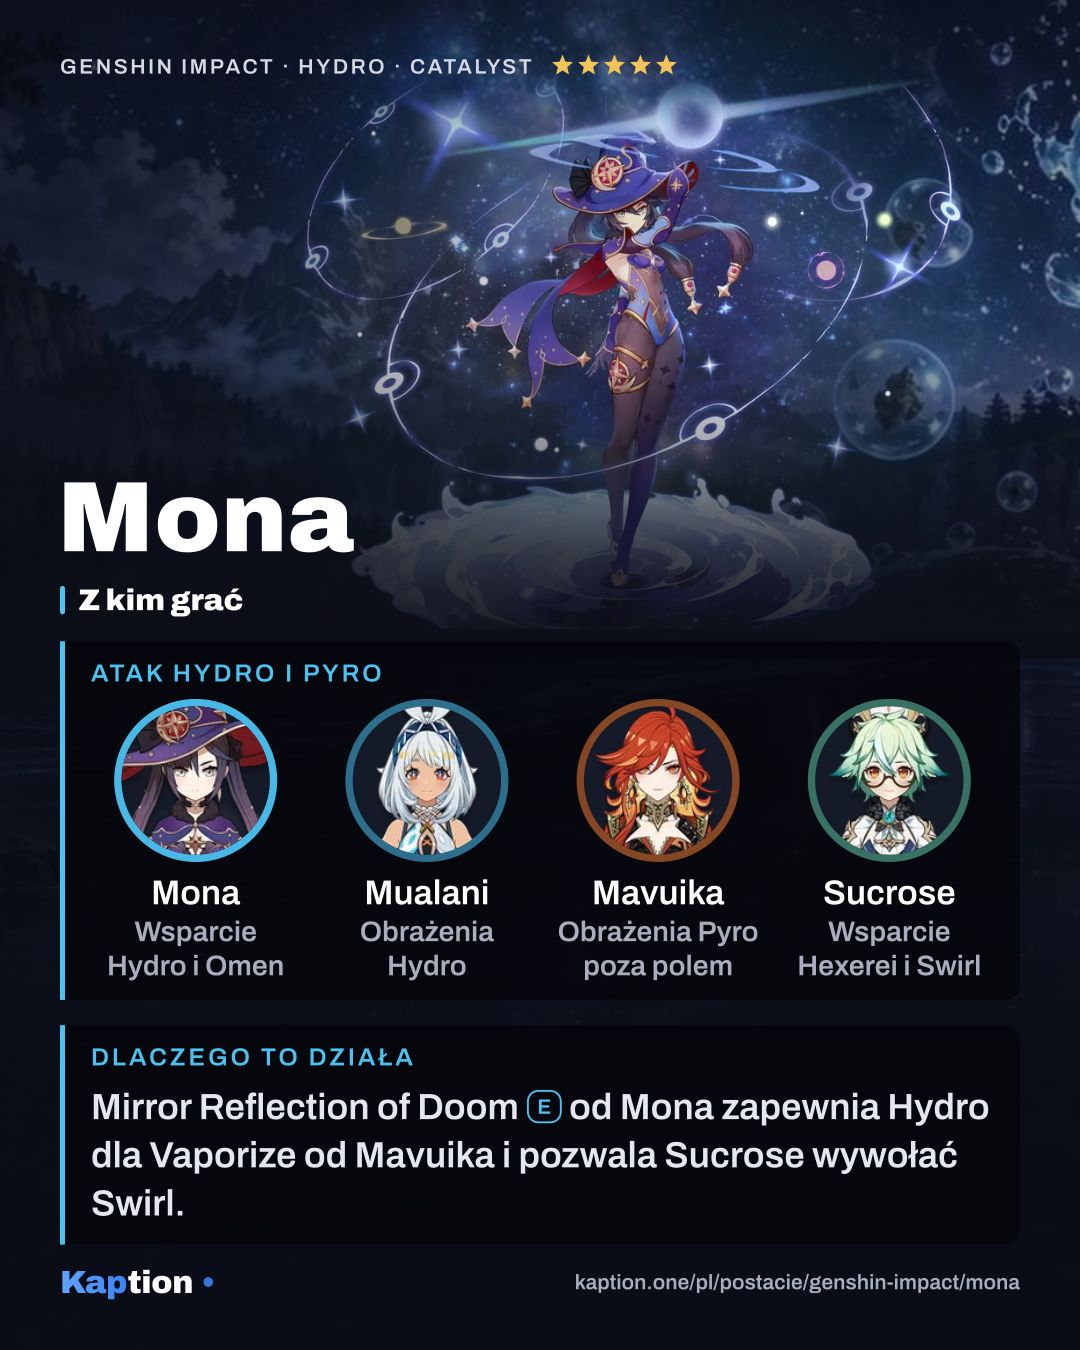
Good teammates: Mualani, Mavuika and Sucrose.

Is Mona in Polish in Genshin Impact?

The game has no Polish language option. Kaption shows Polish subtitles for the dialogue right on the game screen, so Mona's lines read in Polish. Skill and item names stay in English, as in the game.

Share

Ready-made cards for Instagram, TikTok, X or Discord, in English or Polish.

4:5 for Instagram and Facebook · 9:16 for Stories, TikTok and Shorts · 16:9 for X and Discord

The build cards and quick guides of every Genshin Impact character (131) in one ZIP: 4:5 (45 MB) 9:16 (60 MB) 16:9 (31 MB)

On Discord, paste the copied link or drag the downloaded file into the chat.

Game data version 7.2.0.

← All Genshin Impact characters