






































Guide
How the kit works
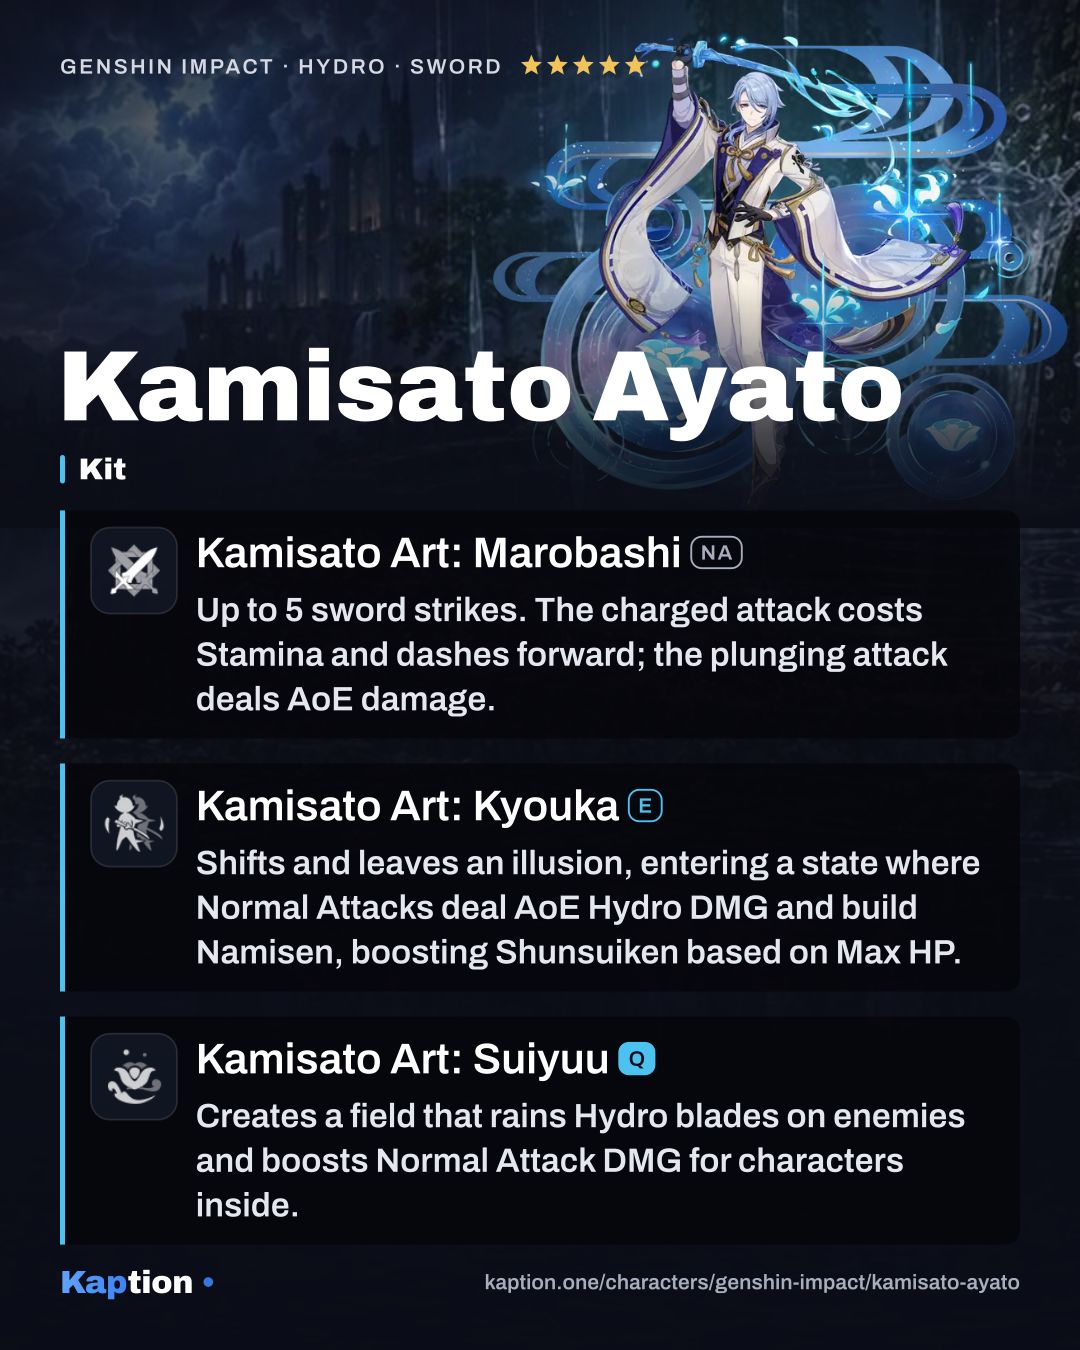
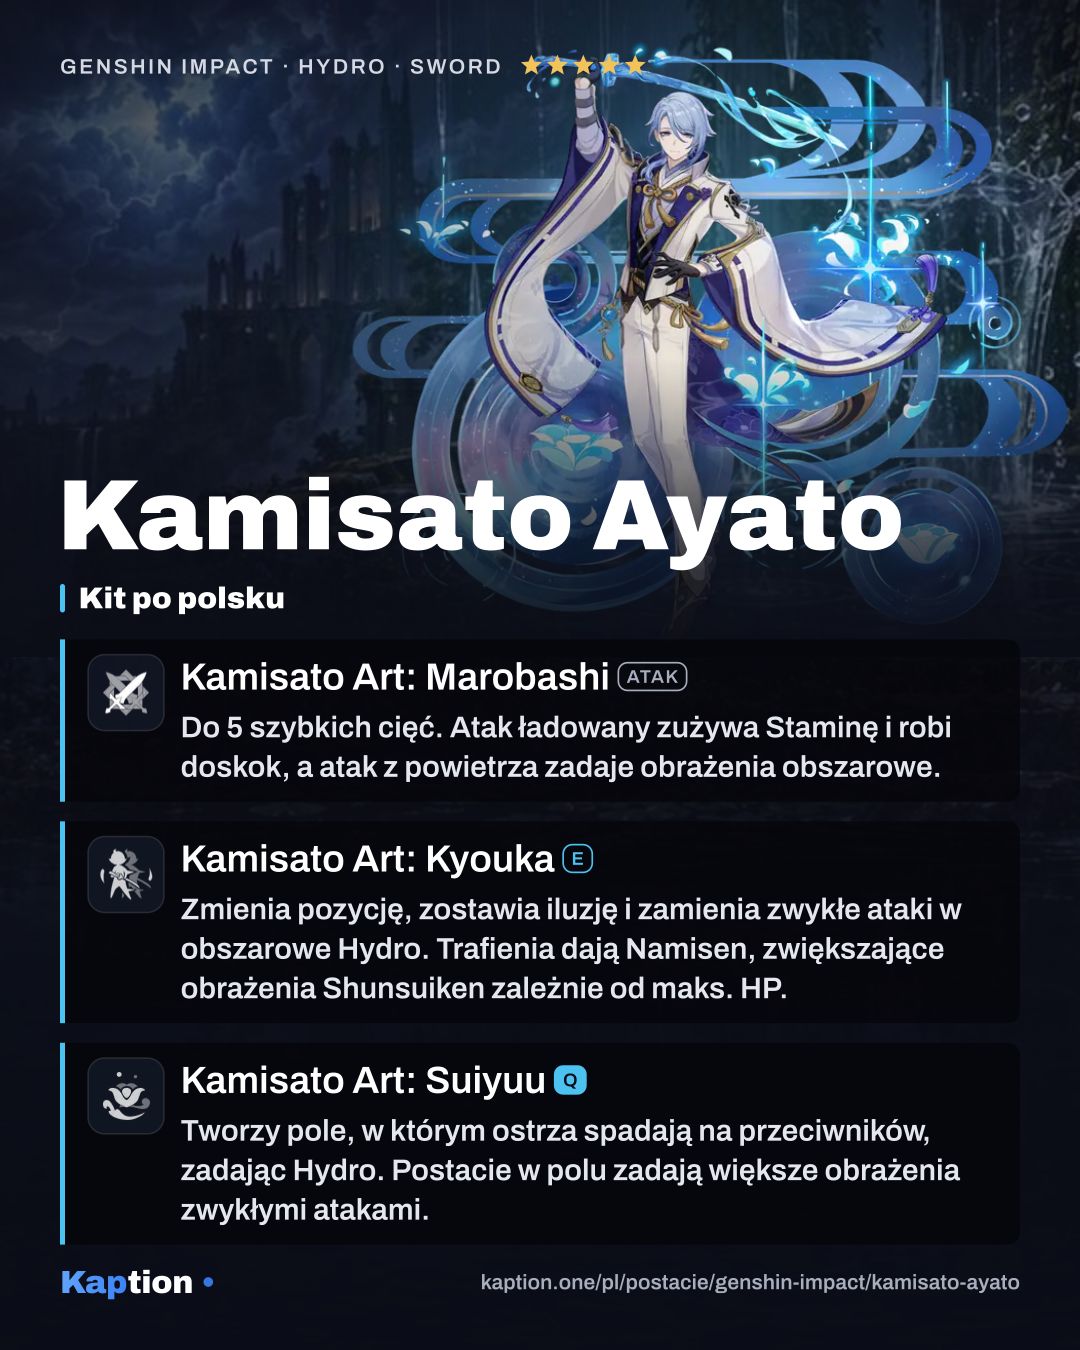
When his Burst is available, use Kamisato Art: Suiyuu to create an area where Bloomwater Blades repeatedly hit opponents with Hydro. Characters inside the area also gain Normal Attack DMG, so Ayato can use the bonus during his own field time.
Use Kamisato Art: Kyouka to shift position and enter Takimeguri Kanka. A watery illusion remains where Ayato started and explodes when opponents are nearby or its duration ends. In the new state, his Normal Attacks become AoE Hydro Shunsuiken strikes. The conversion cannot be overridden.
Shunsuiken hits grant Namisen stacks, which increase their DMG based on Ayato's current Max HP. The starting limit is four stacks, and hits can grant one every 0.1 seconds. A passive gives him two stacks when he uses the Skill and the maximum number when the illusion explodes. He also gains interruption resistance, but cannot use Charged or Plunging Attacks in this state.
Finish the attacks before switching out: leaving the field clears Takimeguri Kanka and Namisen. Using the Skill again during the state replaces it. While Ayato is off-field with less than 40 Energy, another passive restores 2 Energy to him each second.
Build and why
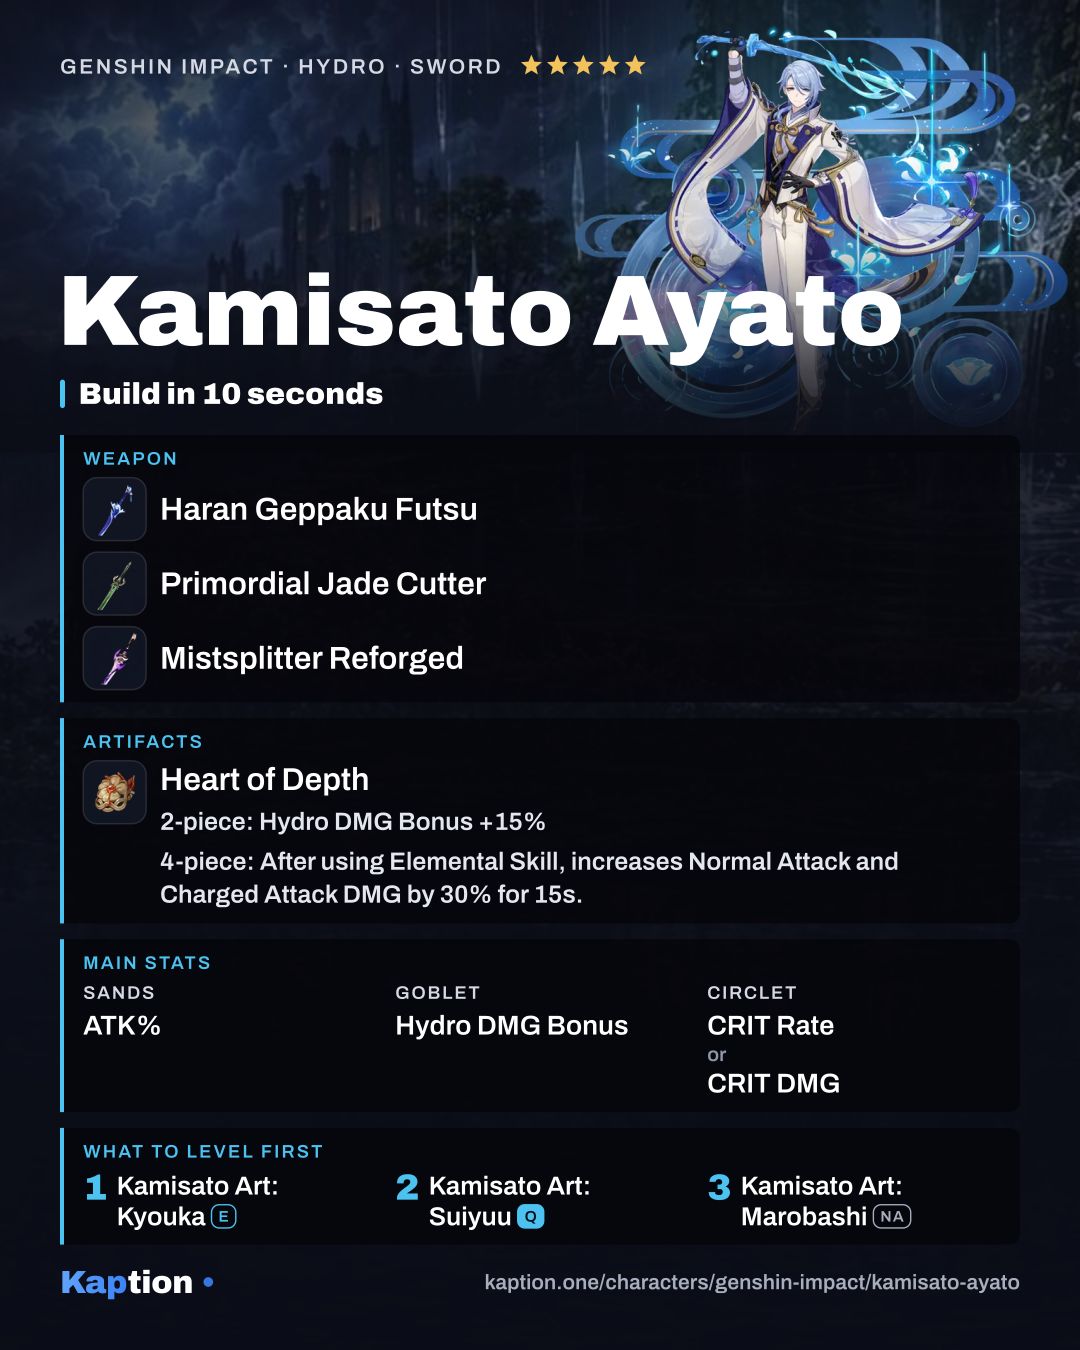
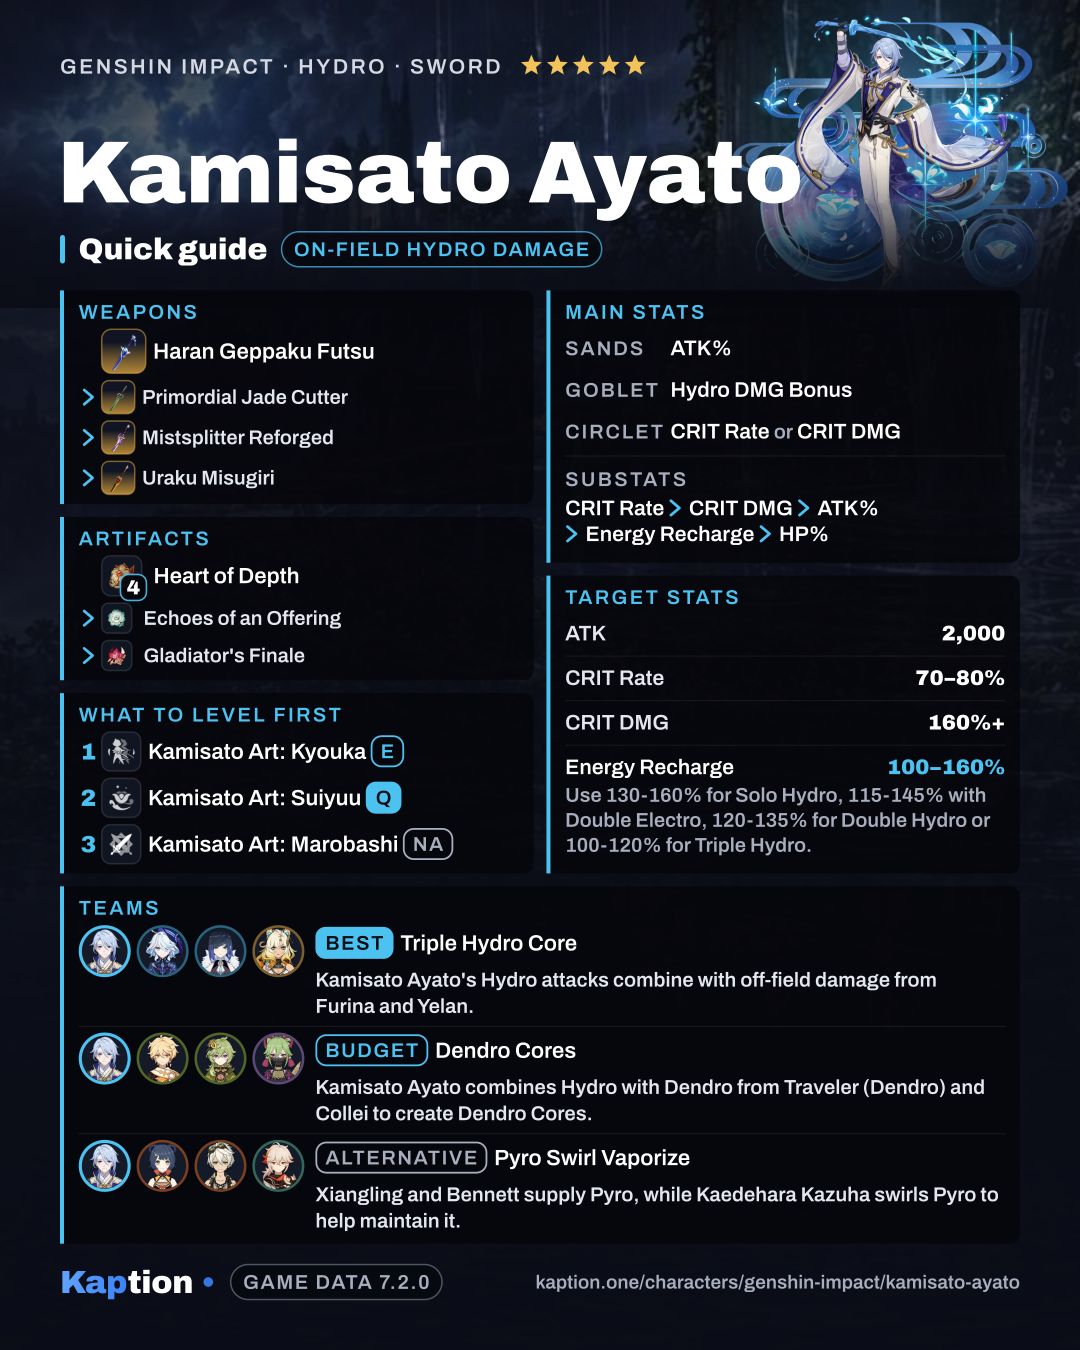
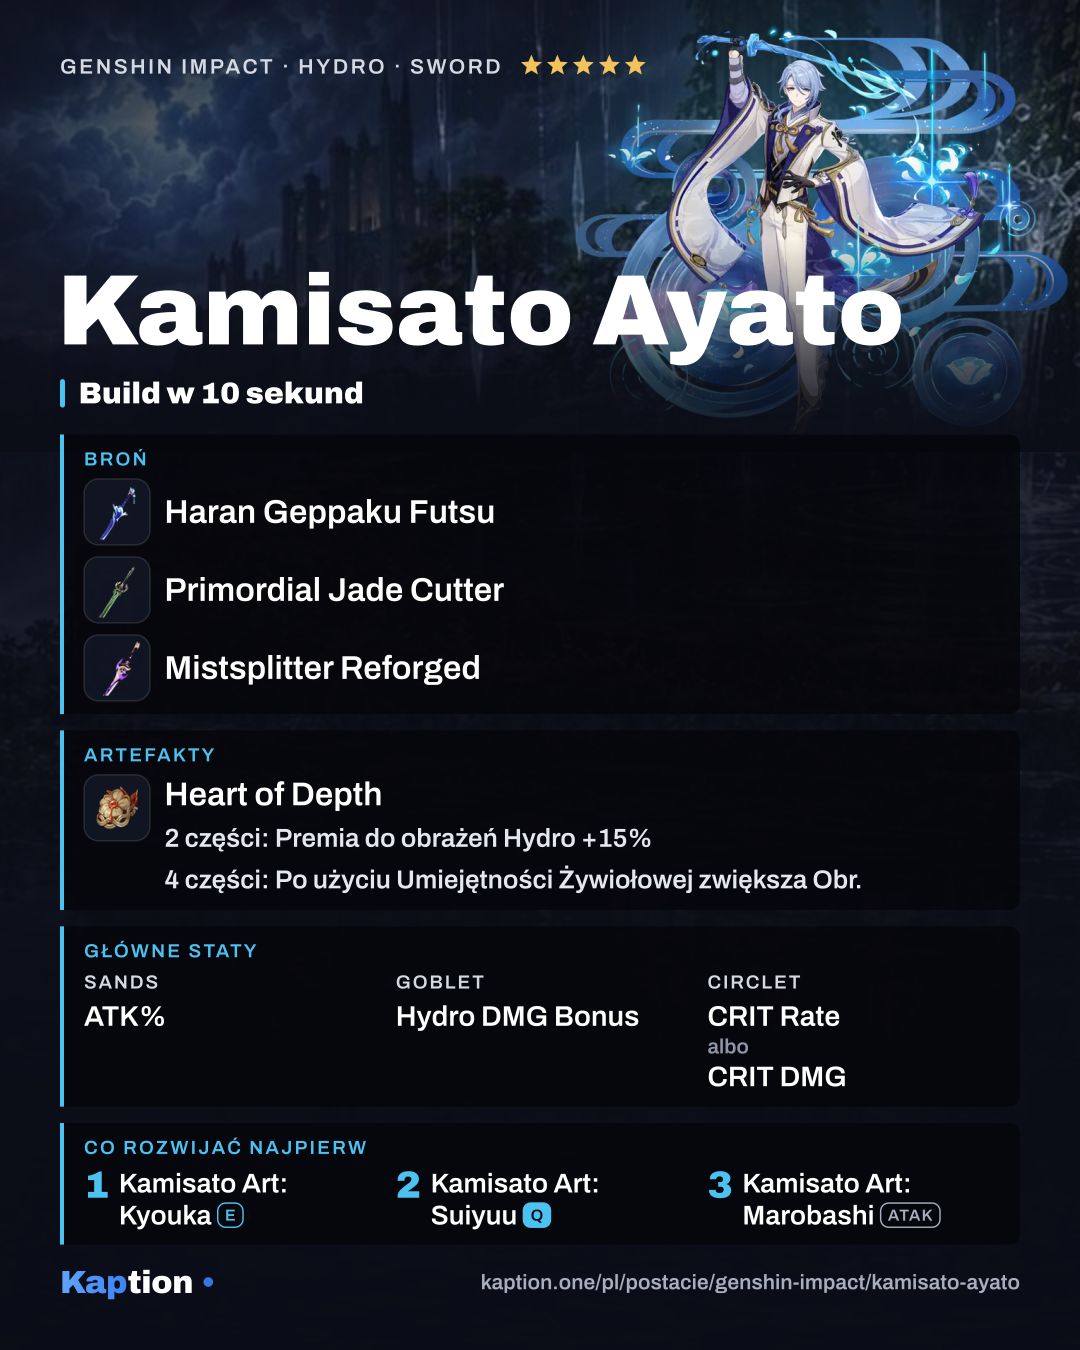
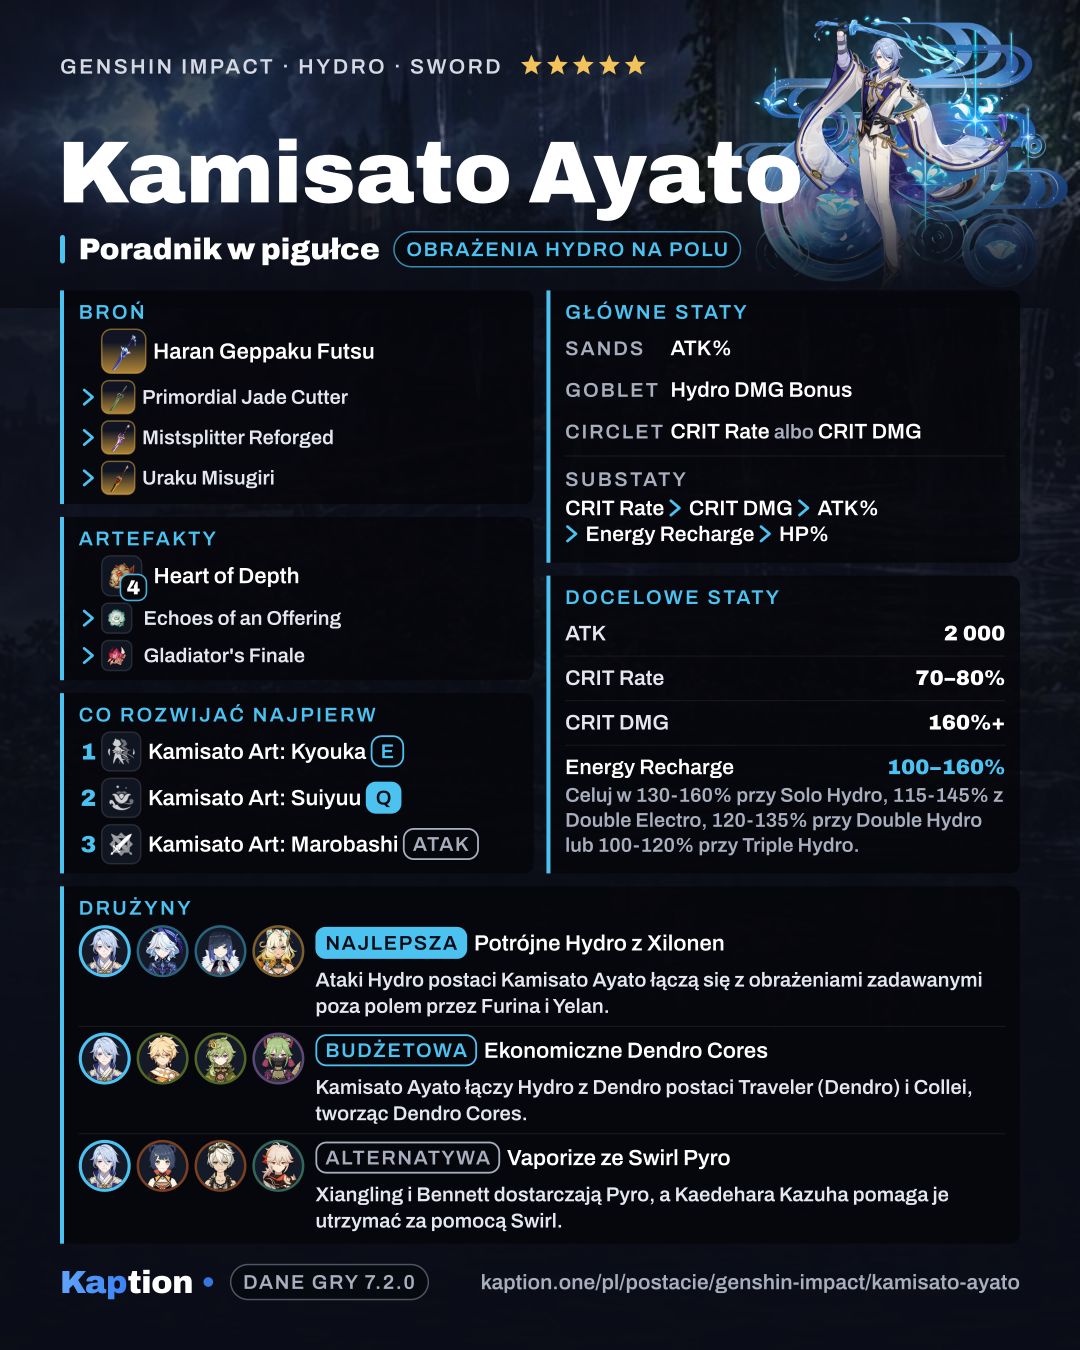
For an on-field build, start with four pieces of Heart of Depth. Its two-piece effect gives 15% Hydro DMG Bonus, and its four-piece effect gives 30% Normal and Charged Attack DMG for 15 seconds after the Skill. Both bonuses fit the Hydro Normal Attacks from Kamisato Art: Kyouka.
Four pieces of Echoes of an Offering are another option. Normal Attack hits have a 36% chance to trigger Valley Rite, increasing Normal Attack DMG by 70% of ATK. Four pieces of Gladiator's Finale are also worth considering: Ayato uses a Sword, so he gets its 35% Normal Attack DMG bonus.
Choose ATK Percentage on the sands, Hydro DMG Bonus on the goblet, and CRIT Rate or CRIT DMG on the circlet. For substats, look for CRIT Rate and CRIT DMG first, followed by ATK Percentage, Energy Recharge and HP Percentage. HP helps Namisen, but it is lower in this suggested substat order.
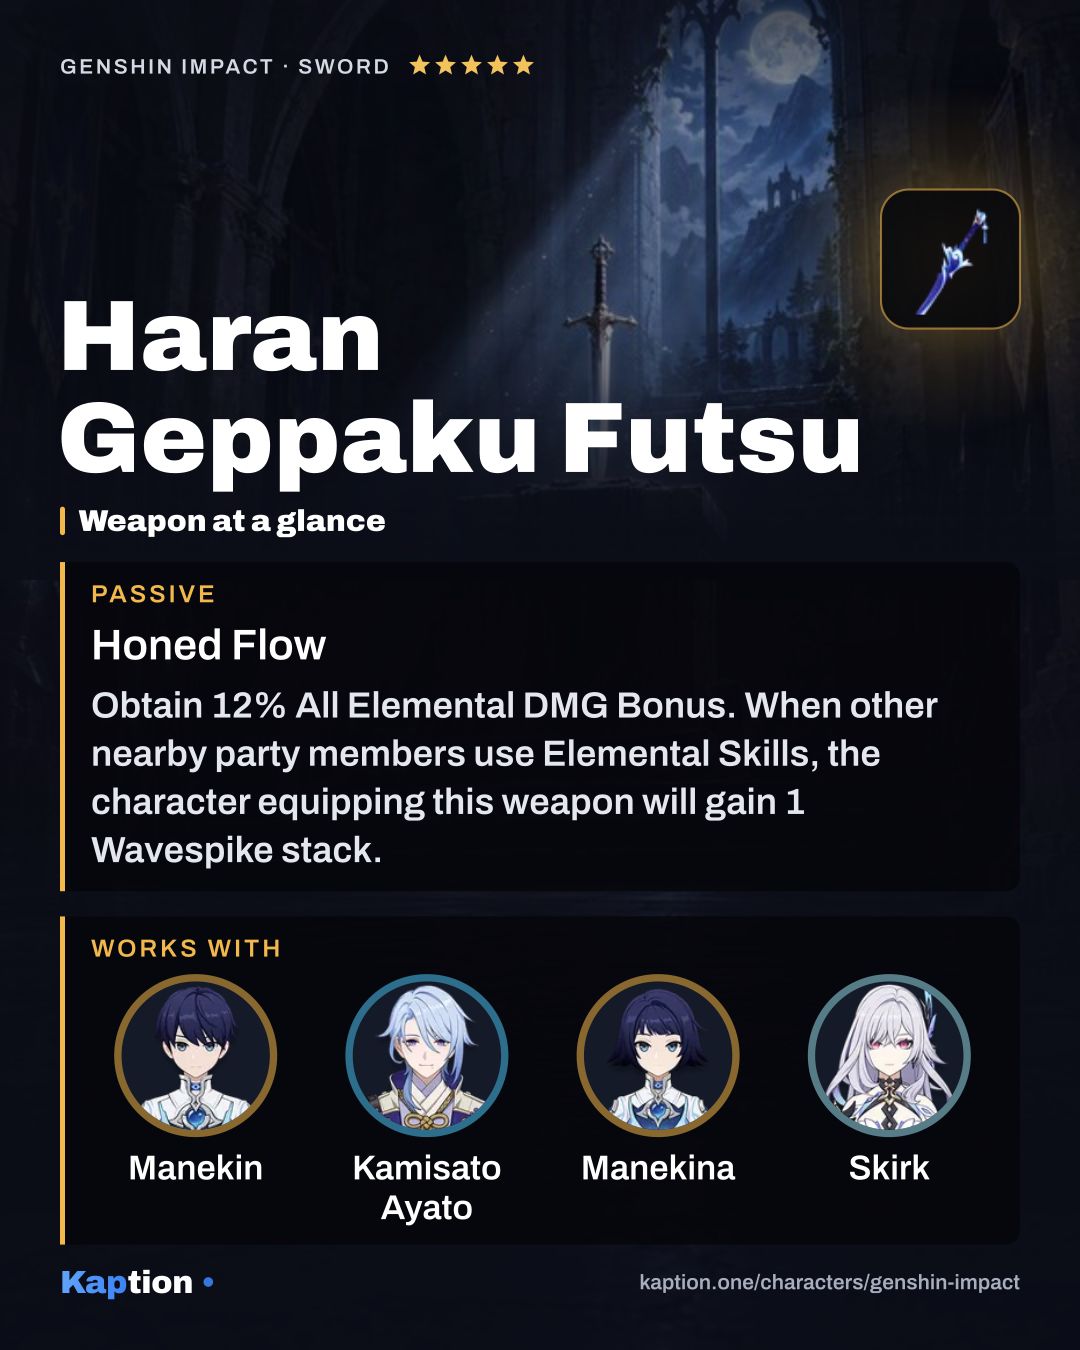
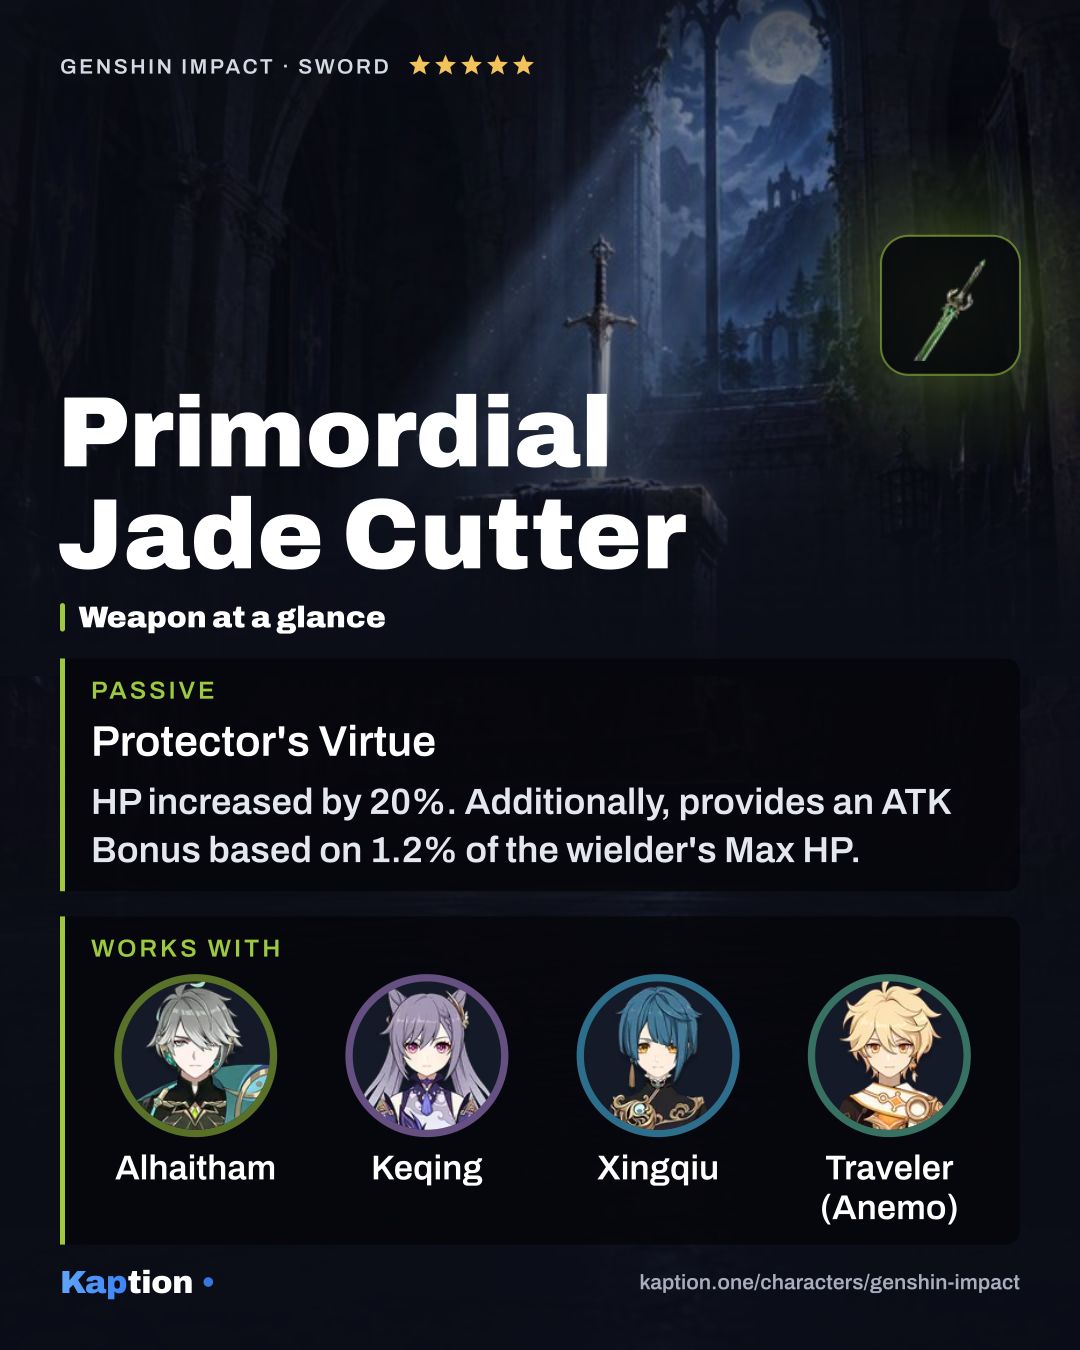
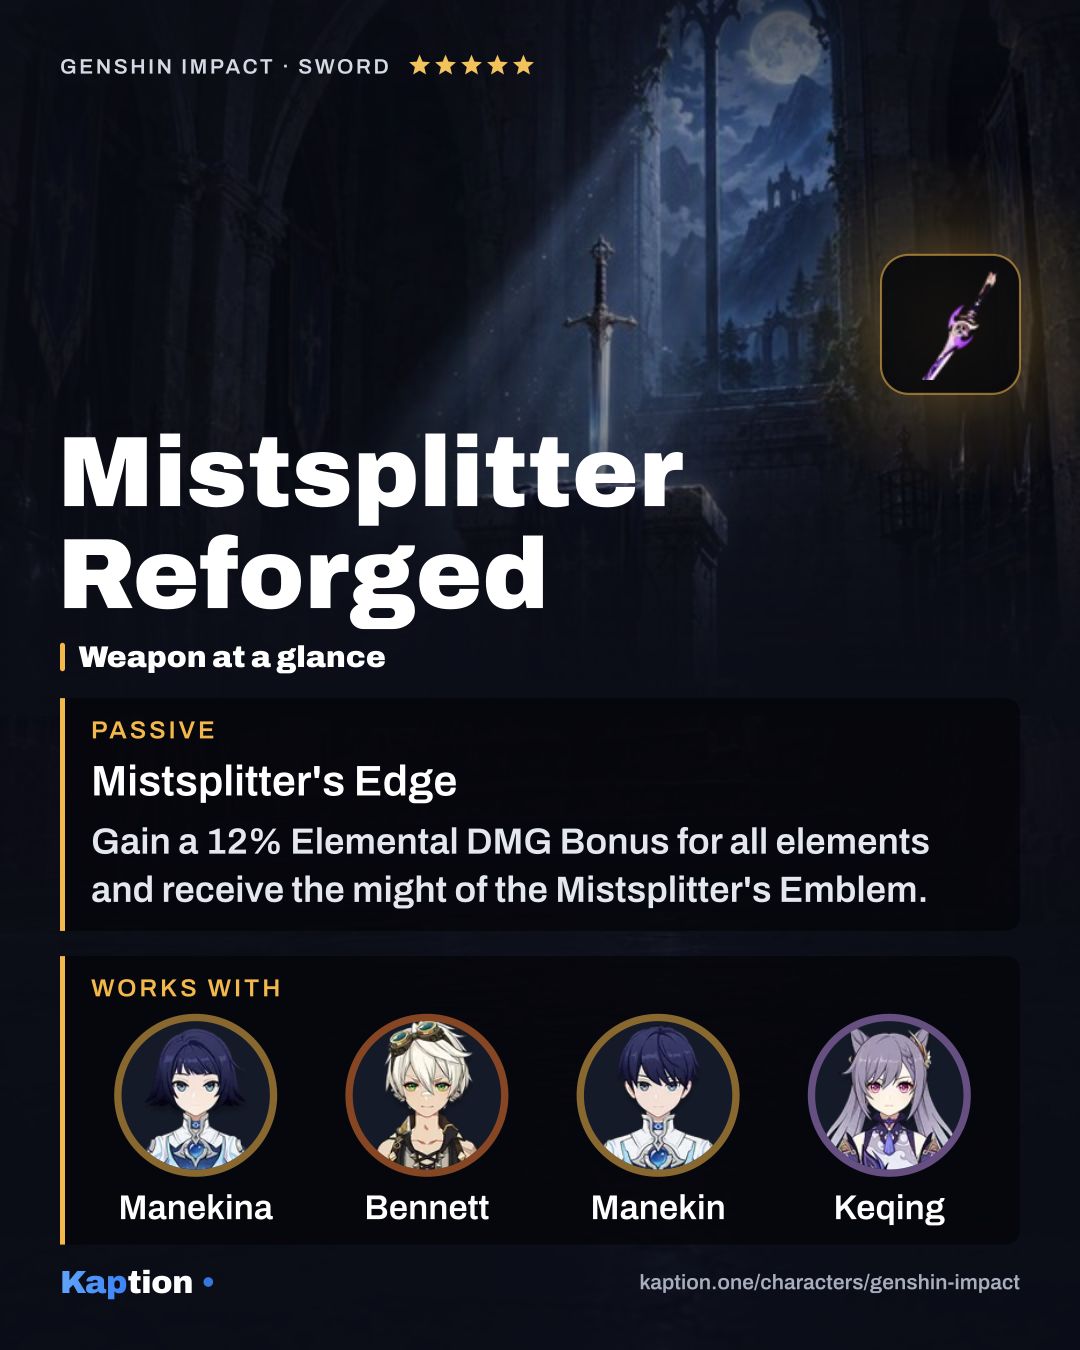
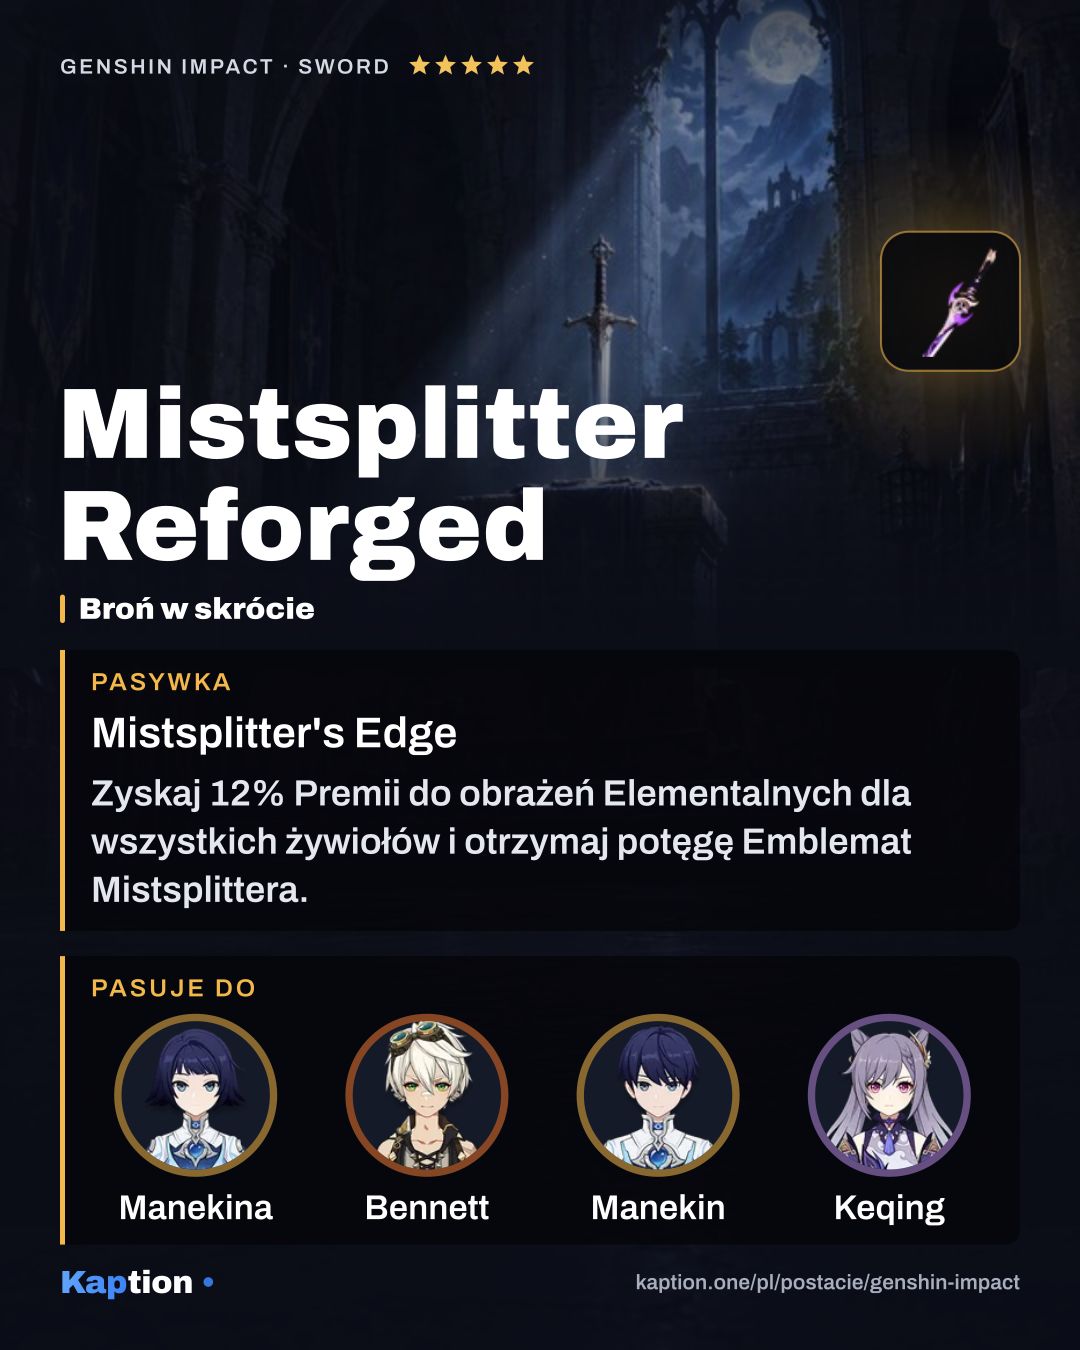
Haran Geppaku Futsu is the first weapon choice. It gives 12% All Elemental DMG Bonus and gains stacks when other nearby party members use their Skills. Ayato consumes those stacks with his Skill for up to 40% Normal Attack DMG for 8 seconds. Primordial Jade Cutter gives 20% HP and ATK based on Max HP. Mistsplitter Reforged gives Elemental DMG Bonus, with further bonuses from its stacks.
The Black Sword is a four-star option: it increases Normal and Charged Attack DMG by 20% and can heal on a CRIT Hit with those attacks. Its healing effect can occur once every 5 seconds.
Leveling priority
A suggested talent order is Kamisato Art: Kyouka, then Kamisato Art: Suiyuu, then Kamisato Art: Marobashi (NA). Start with the Skill for Ayato's Shunsuiken field time, then improve the Burst for its area damage and Normal Attack bonus. The regular attack talent comes last in this build.
To ascend Ayato fully, collect 420,000 Mora, 168 Sakura Bloom and 46 Dew of Repudiation. You also need 1 Varunada Lazurite Sliver, 9 Varunada Lazurite Fragment, 9 Varunada Lazurite Chunk and 6 Varunada Lazurite Gemstone, plus 18 Old Handguard, 30 Kageuchi Handguard and 36 Famed Handguard.
For all talents at maximum, the separate total is 4,957,500 Mora, 3 Crown of Insight, 9 Teachings of Elegance, 63 Guide to Elegance, 114 Philosophies of Elegance, 18 Old Handguard, 66 Kageuchi Handguard, 93 Famed Handguard and 18 Mudra of the Malefic General.
Constellations worth it
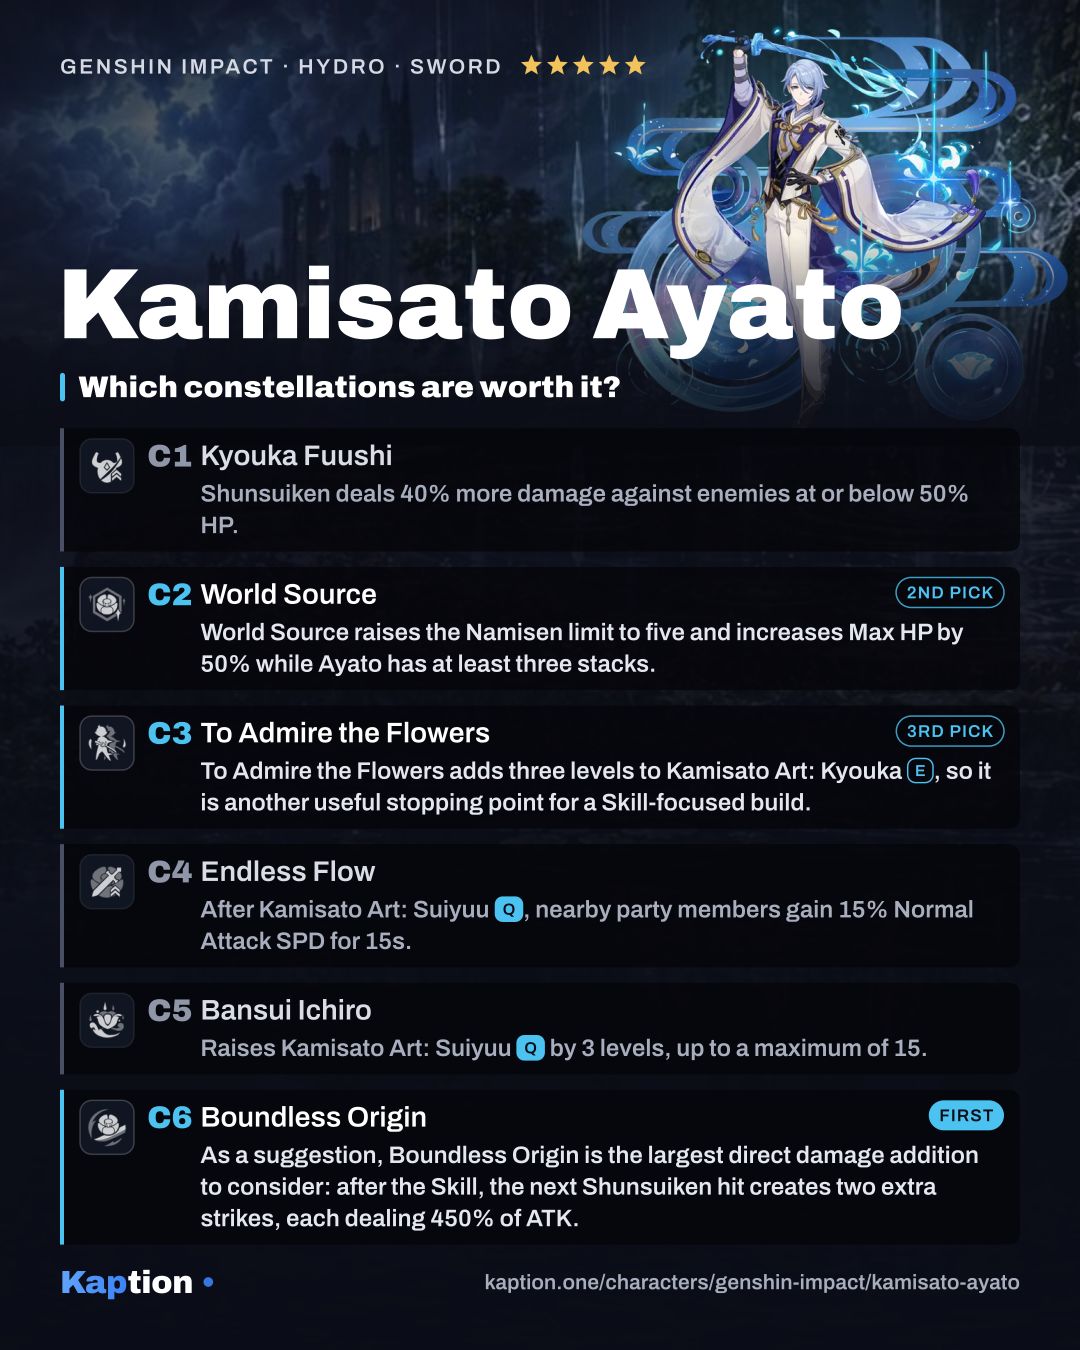
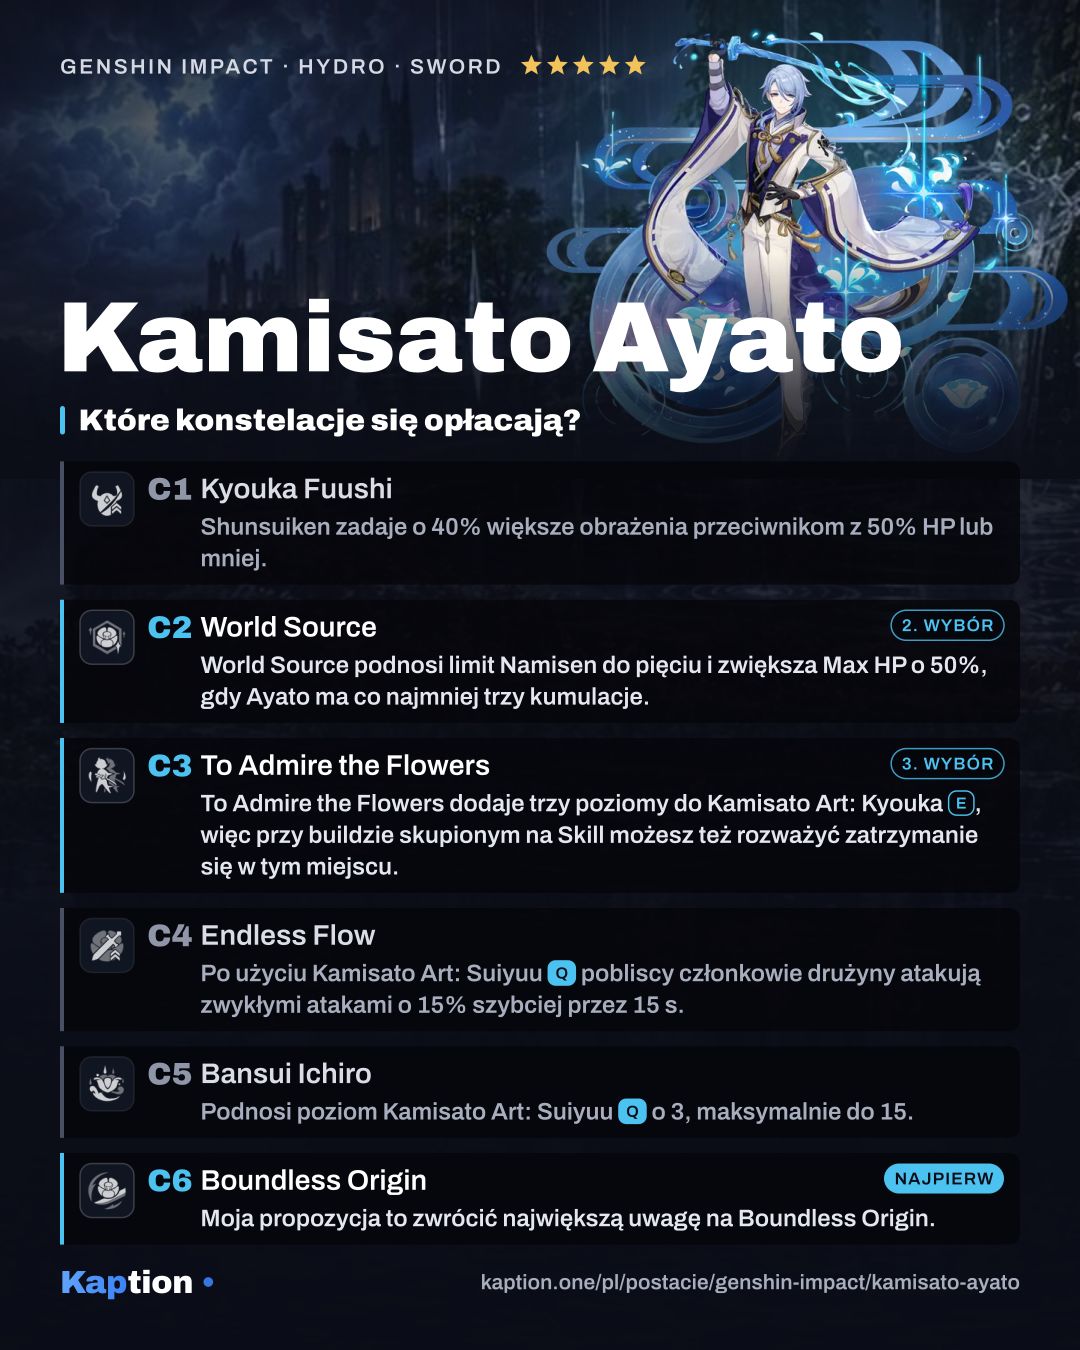
As a suggestion, Boundless Origin is the largest direct damage addition to consider: after the Skill, the next Shunsuiken hit creates two extra strikes, each dealing 450% of ATK. Those extra strikes do not benefit from Namisen.
World Source raises the Namisen limit to five and increases Max HP by 50% while Ayato has at least three stacks. To Admire the Flowers adds three levels to Kamisato Art: Kyouka, so it is another useful stopping point for a Skill-focused build.
Kyouka Fuushi increases Shunsuiken DMG by 40% against opponents at or below 50% HP. Endless Flow gives nearby party members 15% Normal Attack SPD for 15 seconds after Kamisato Art: Suiyuu, while Bansui Ichiro adds three Burst levels.
You can stay at C0 and skip the constellation line. If C2 or C3 is your target, C1 comes before them; later constellations cannot be reached without the earlier ones. Stopping at C2 or C3 instead of continuing to C6 is a reasonable choice.
Teams
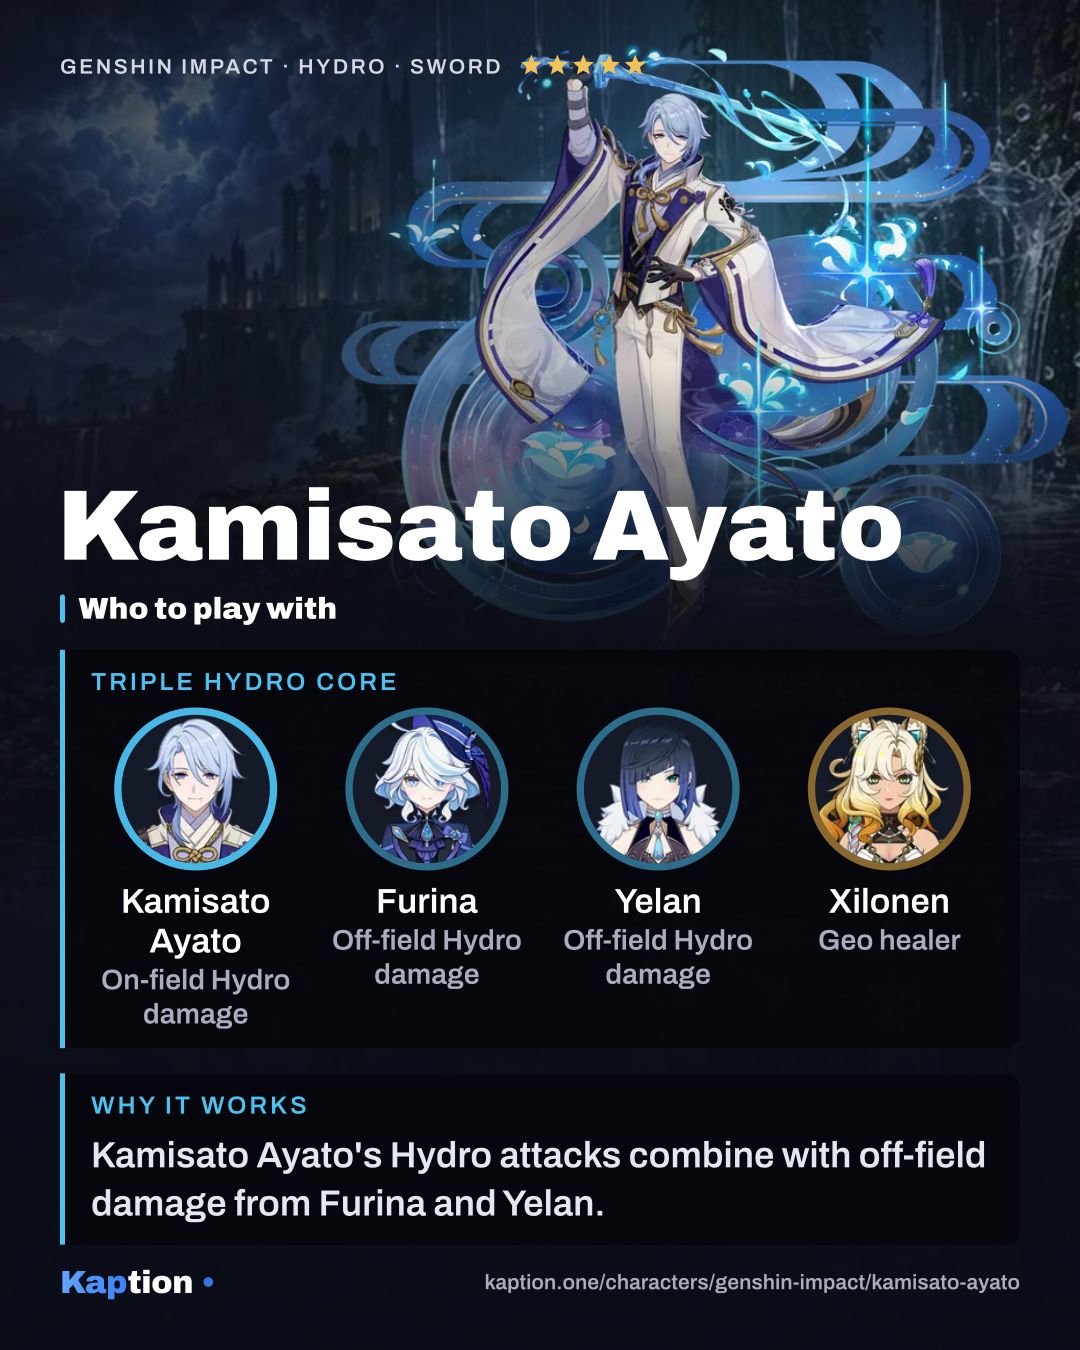
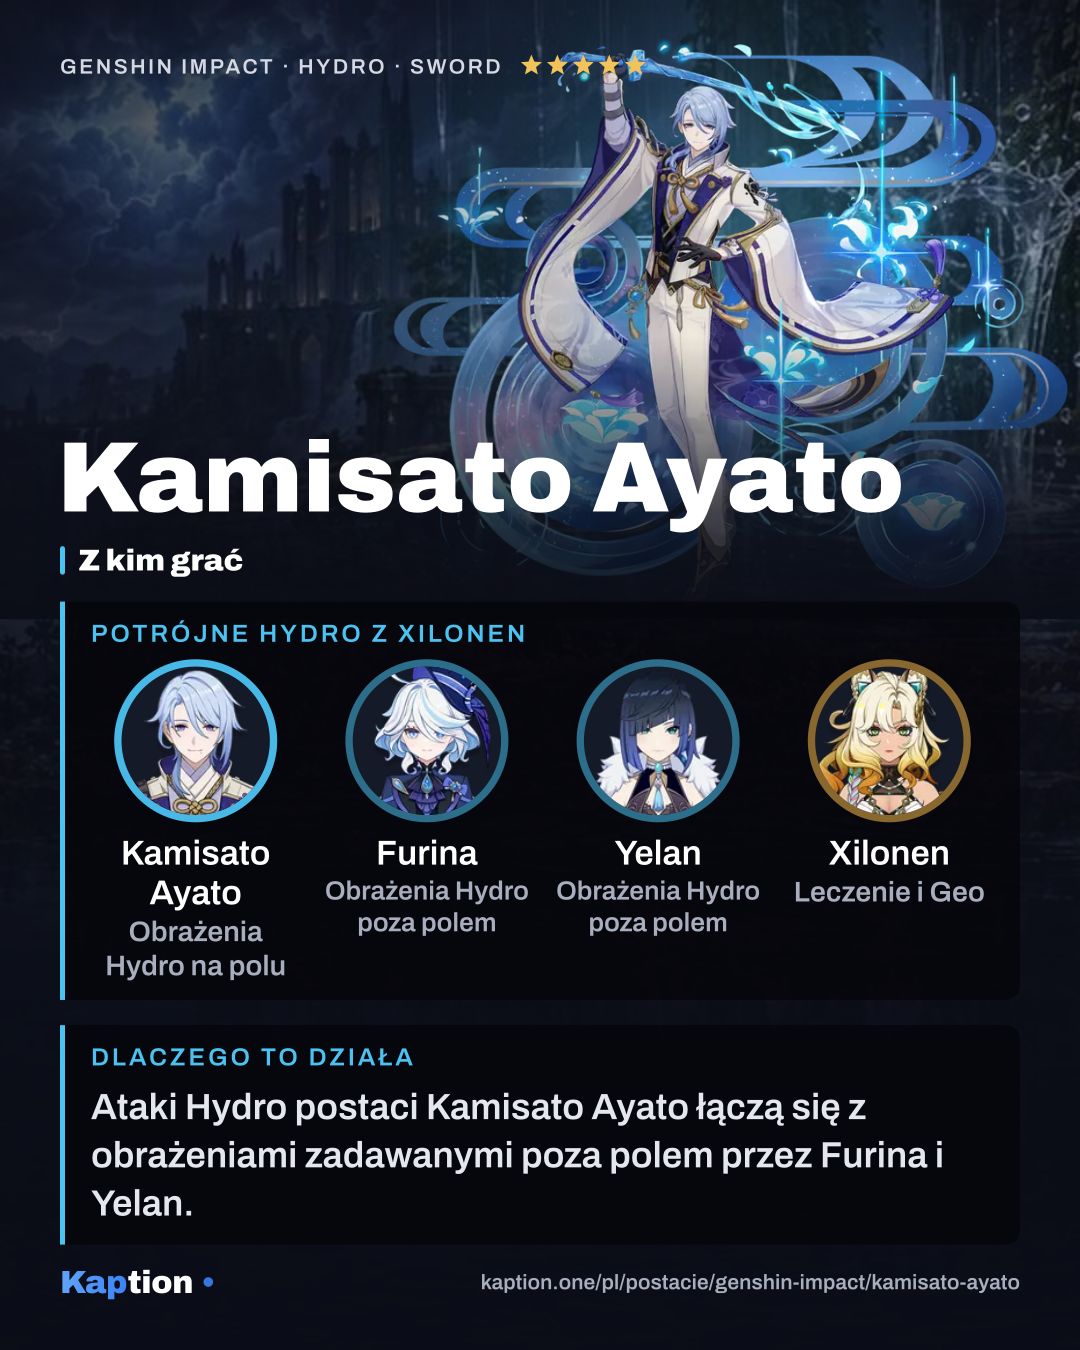
Ayato gives a team Hydro damage from his Skill and Burst. His Burst also gives Normal Attack DMG to characters inside its area, so another character who uses Normal Attacks can make use of it after Ayato leaves the field.
Common mistakes
Do not switch Ayato out in the middle of Takimeguri Kanka unless you need to. His Skill state and Namisen stacks disappear when he leaves. Recasting the Skill during the state replaces it rather than preserving the old one.
Do not try to use Charged or Plunging Attacks during the state. Use Normal Attacks for Shunsuiken and remember that the Skill's interruption resistance does not mean Ayato has a shield.
Do not build entirely around HP just because Namisen uses Max HP. The suggested build still puts ATK Percentage and CRIT stats ahead of HP Percentage. Keep Energy Recharge in mind if you want to use the Burst, even though the off-field passive helps restore some Energy.