










































Guide
How the kit works
Start a fight with Blade's Reach Spares None when possible. It inflicts Taunt on all enemies for 1 turn and reduces Mortenax Blade's damage taken by 90% for 2 turns.
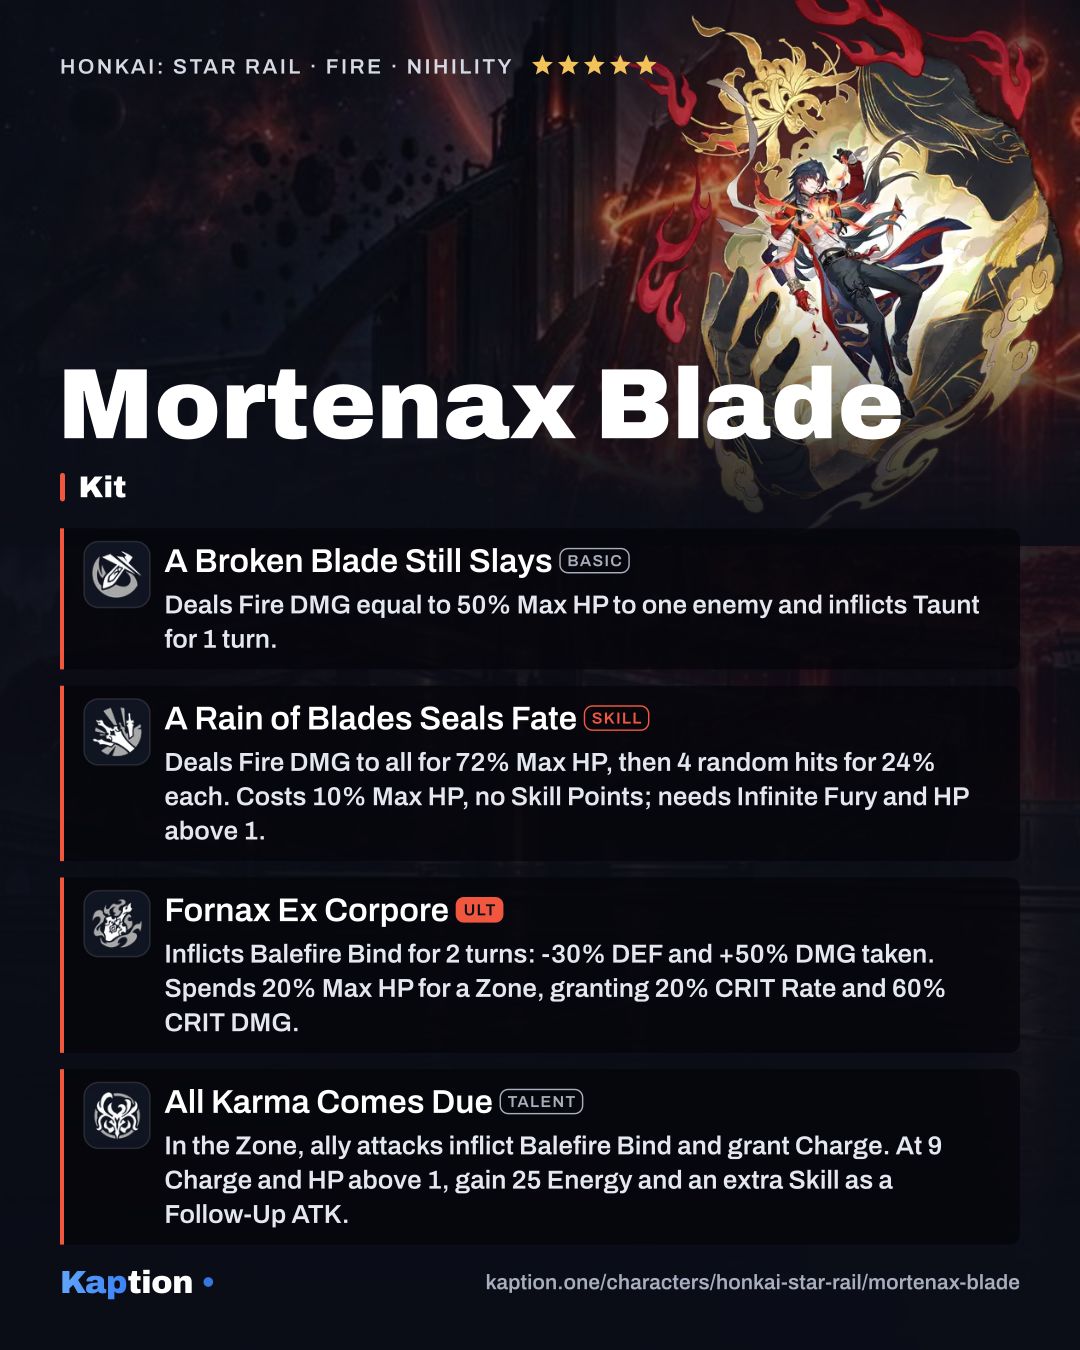
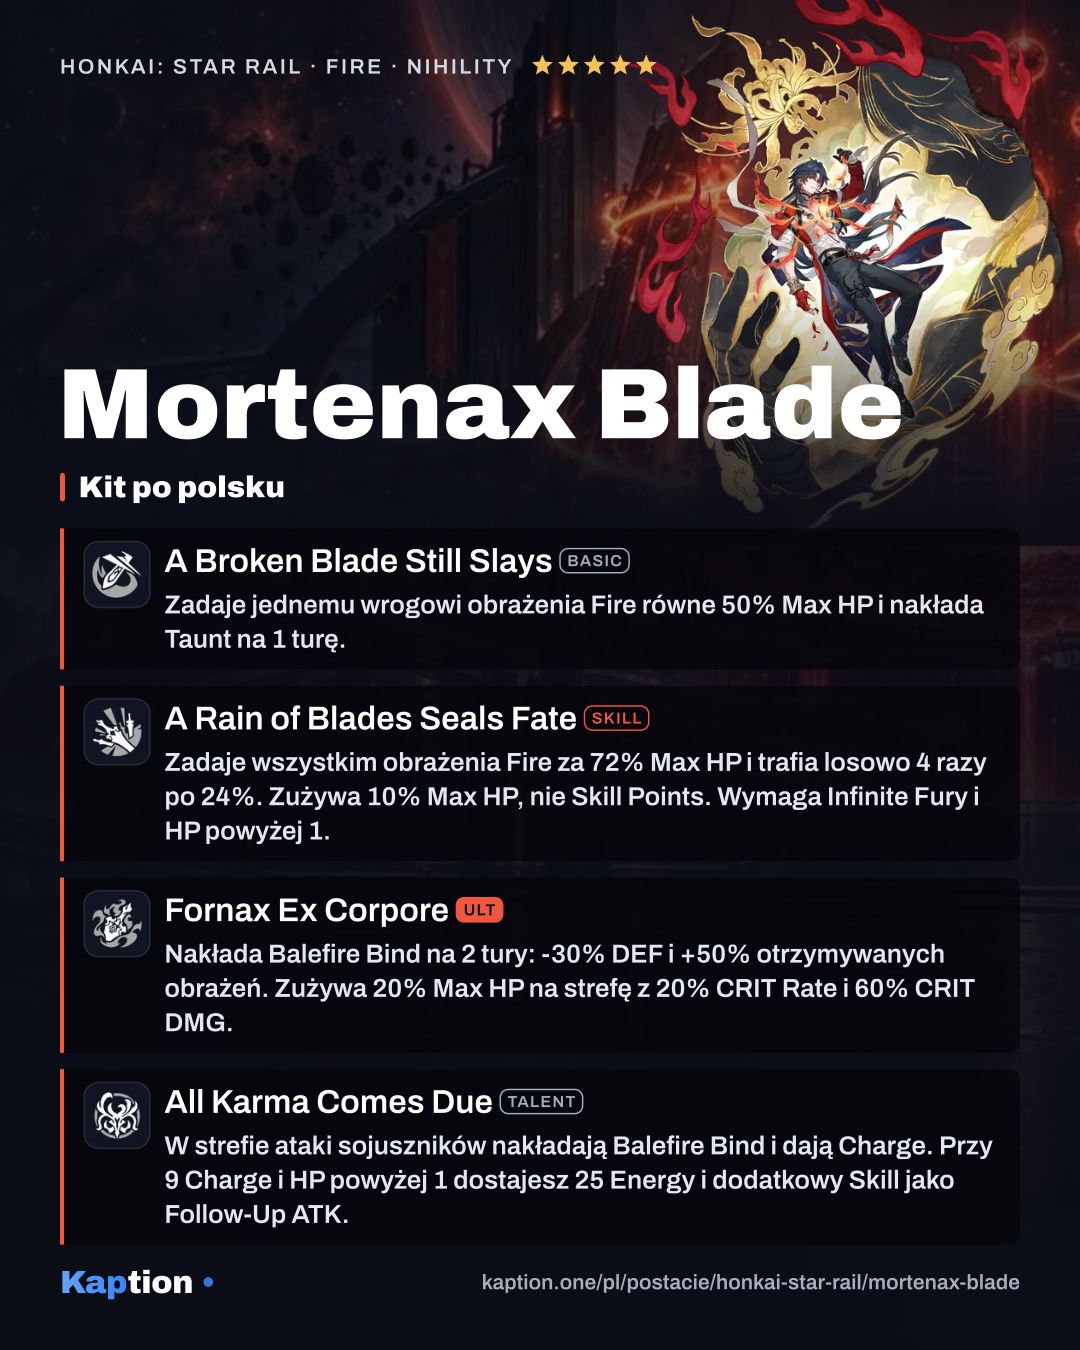
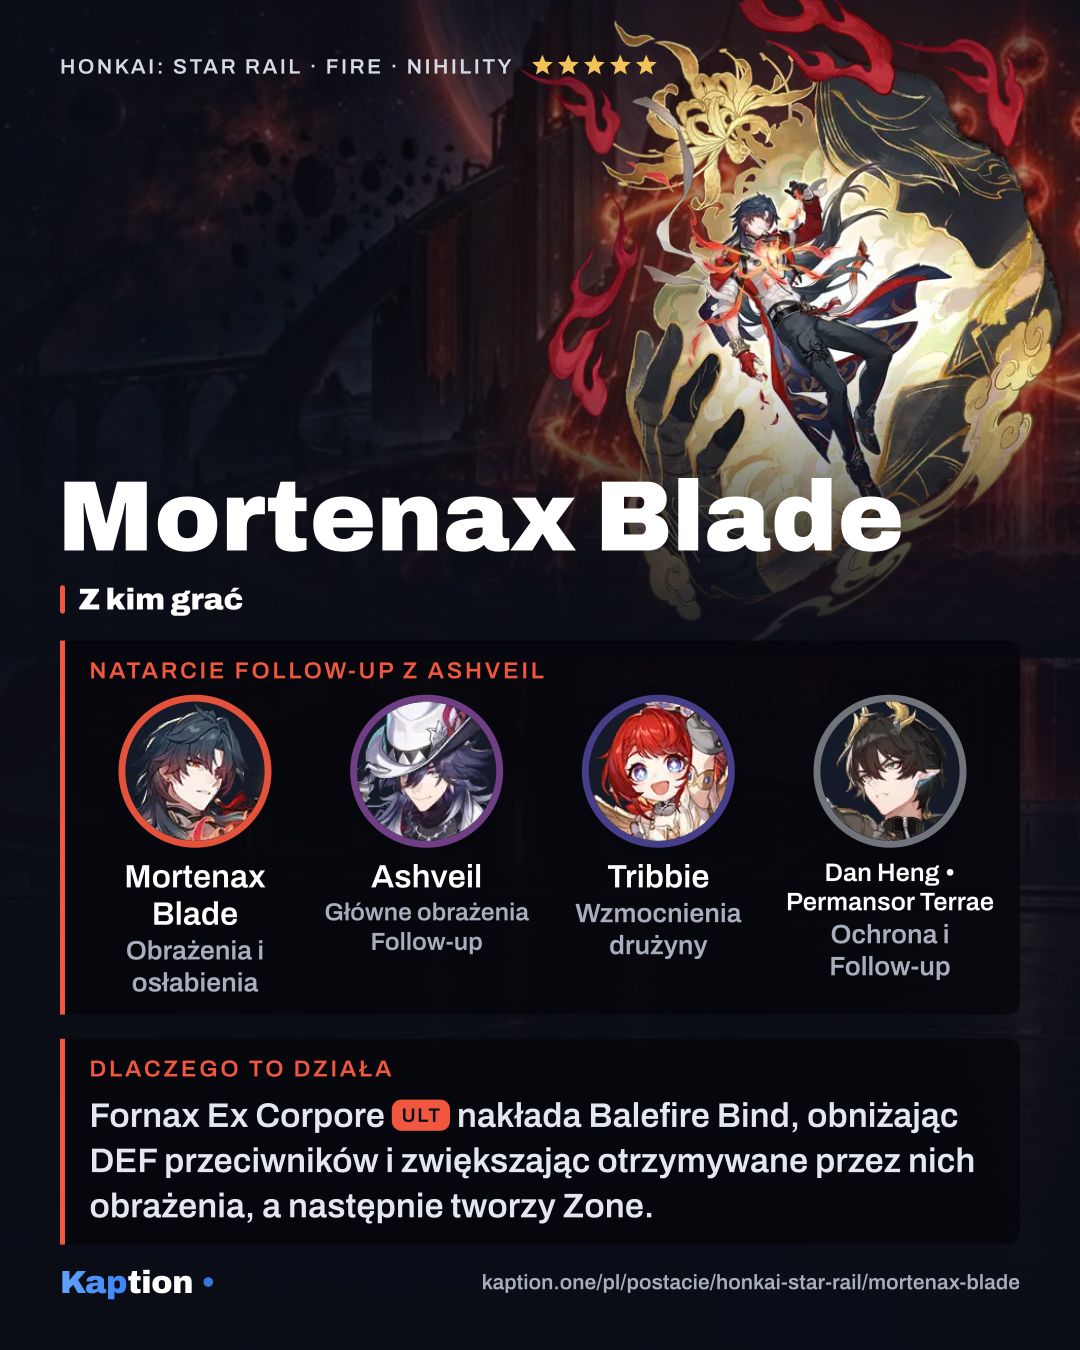
Use Fornax Ex Corpore to inflict Balefire Bind on all enemies. For 2 turns, it reduces their DEF by 30% and increases the damage they receive by 50%. The Ultimate consumes 20% of Max HP and creates a Zone, granting Infinite Fury. In that state, Mortenax Blade gains 20% CRIT Rate and 60% CRIT DMG, an enhanced Basic, access to his Skill and a new Ultimate. The Zone ends when its countdown, which has 70 SPD, takes its turn.
During the Zone, use A Rain of Blades Seals Fate. It costs 10% of Max HP, deals Fire DMG to all enemies and sends four extra instances of damage to random enemies. It costs no Skill Points, but cannot be used outside Infinite Fury or at 1 HP. Tenax Per Ignem deals Fire DMG equal to 350% of Max HP to all enemies.
All Karma Comes Due gives Mortenax Blade 1 Charge after each ally attack on an enemy during the Zone and applies Balefire Bind to the target. At 9 Charge, if he has more than 1 HP, he consumes the Charge, restores 25 Energy and uses an extra Skill counted as a Follow-Up ATK. Being attacked during the Zone also applies Balefire Bind to the attacker and grants him 1 Charge.
Use A Broken Blade Still Slays outside the Zone when you need an attack. In the Zone it becomes A Tempered Blade Severs Souls. Both inflict Taunt for 1 turn. If a killing blow lands during the Zone, Mortenax Blade stays up, the Zone ends and he restores 50% of Max HP.
Build and why
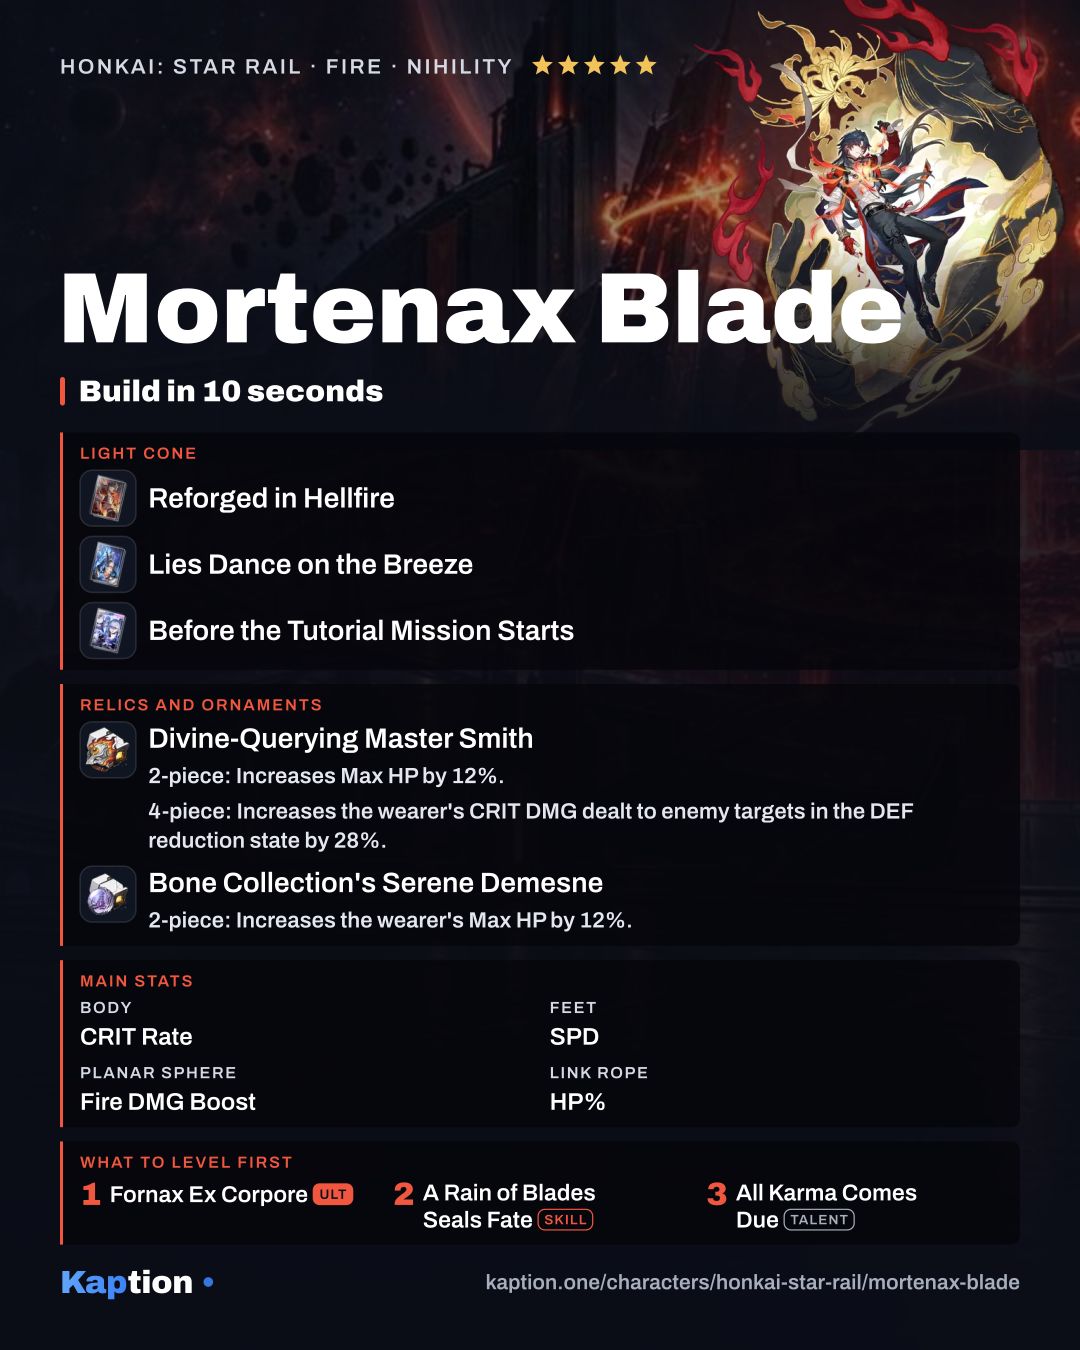
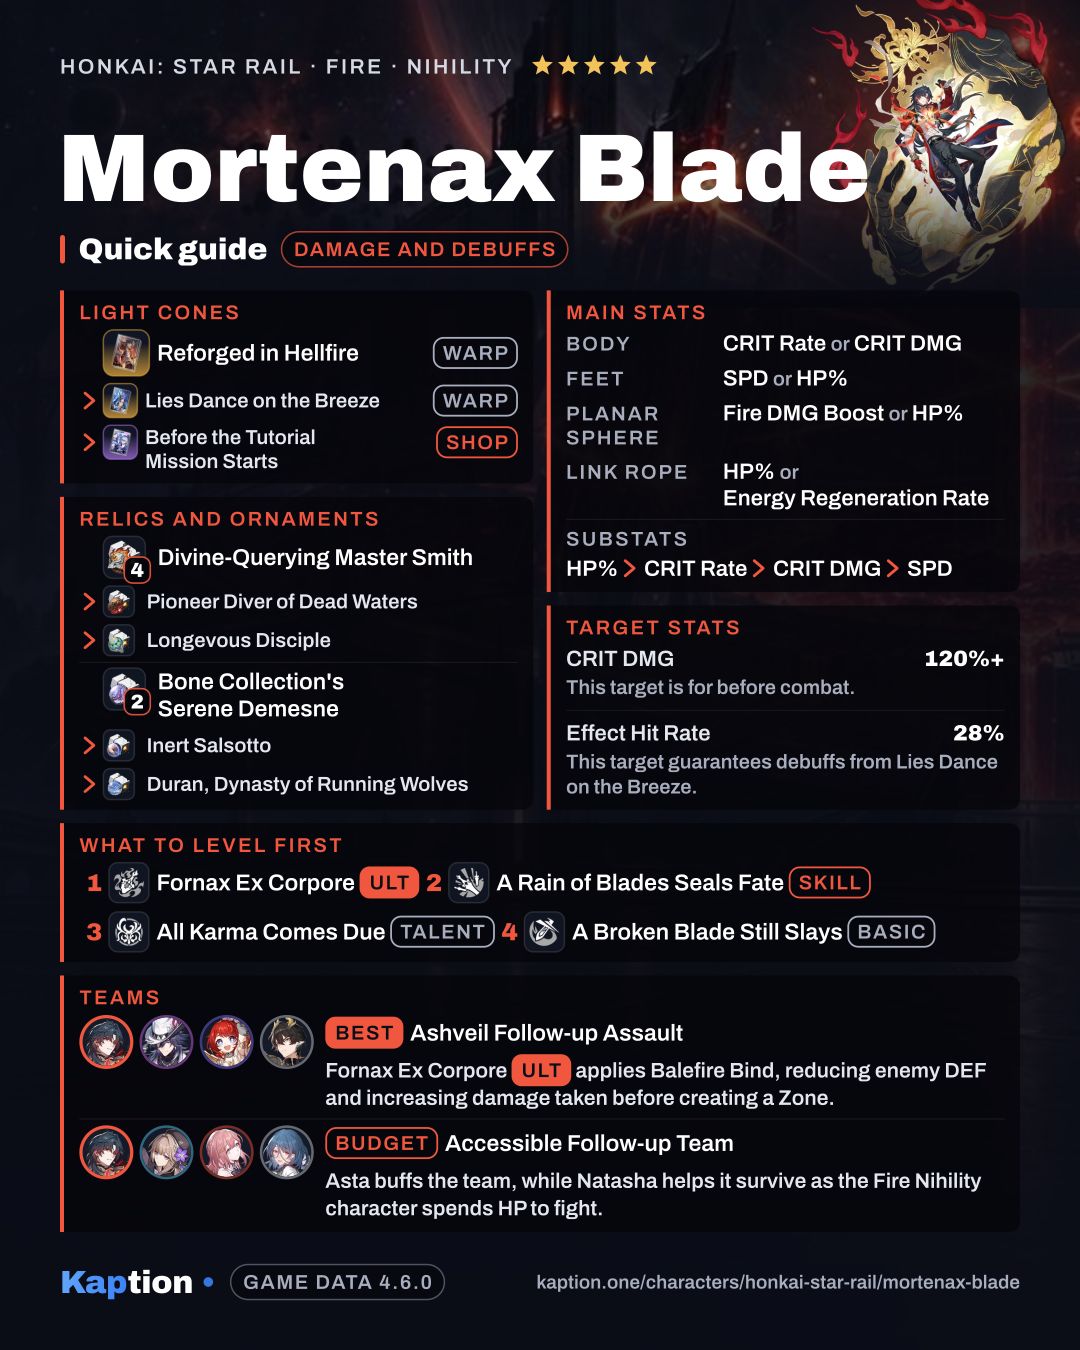
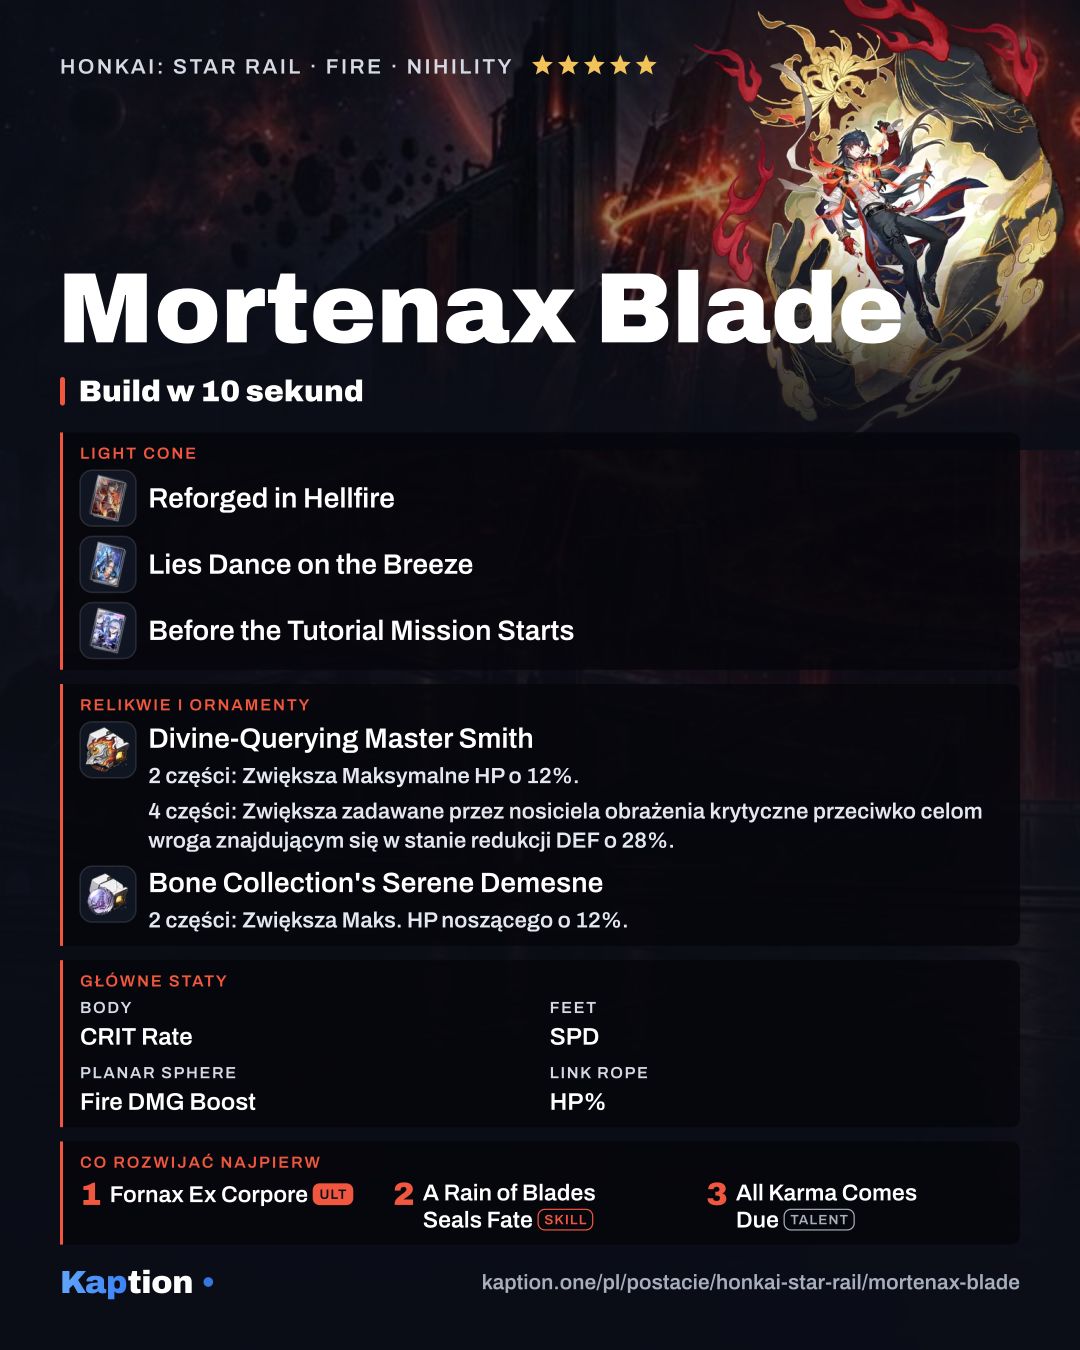
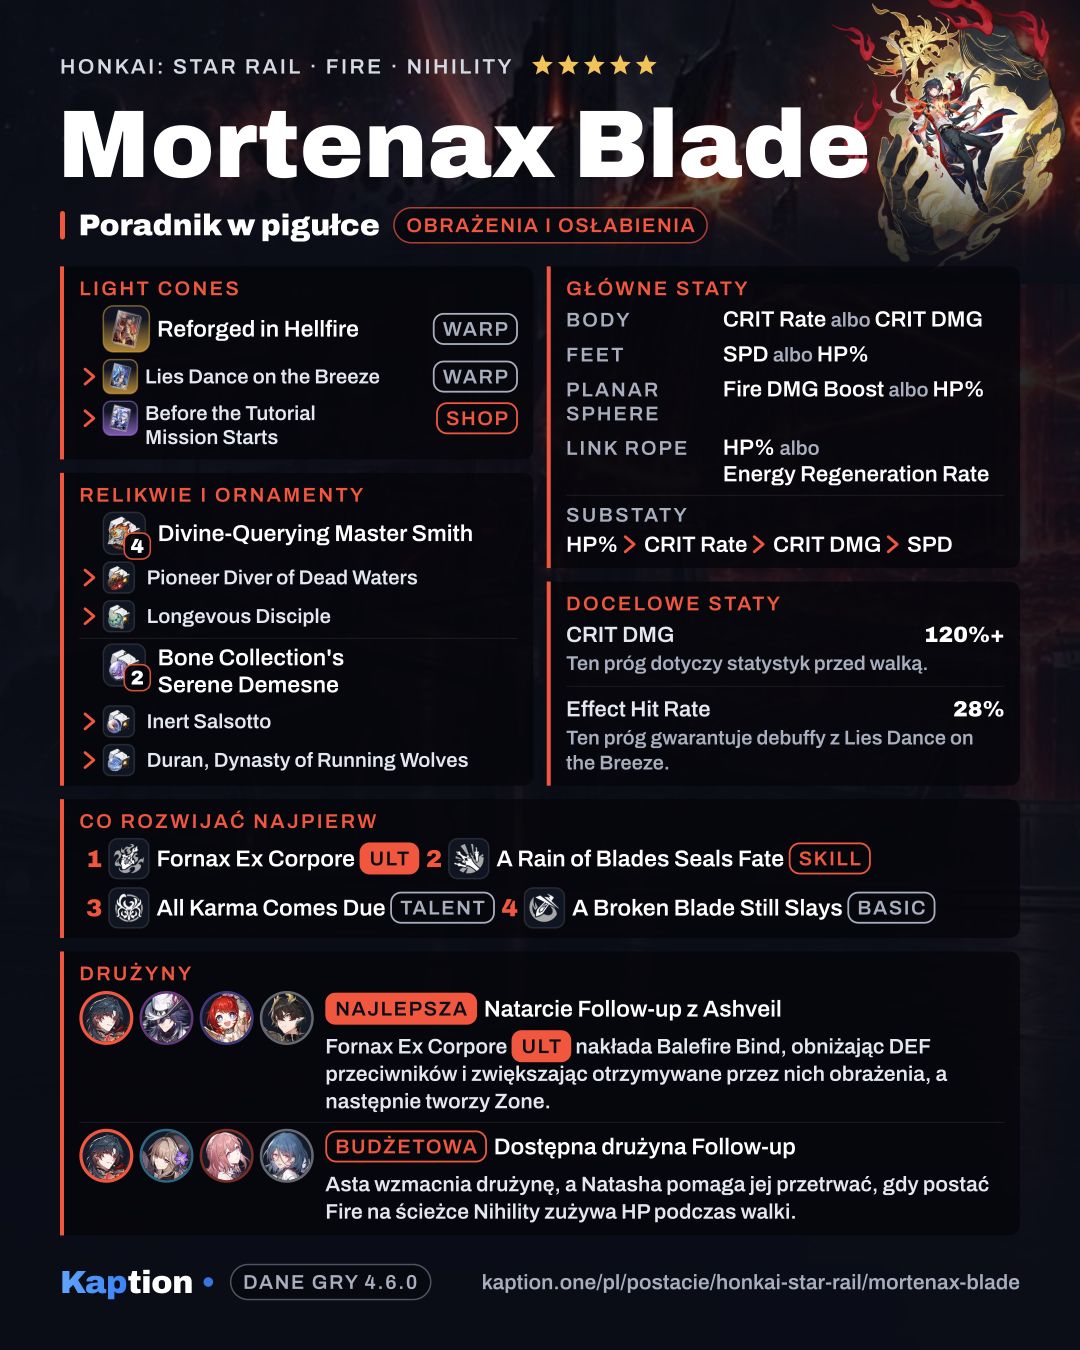
The leading relic choice is four pieces of Divine-Querying Master Smith. Its Max HP suits his damage scaling, and his DEF reduction lets him benefit from its CRIT DMG effect and grant allies Comburent. Eagle of Twilight Line is an alternative for its action advance after an Ultimate, though its two-piece Wind DMG bonus does not help his Fire attacks. Pioneer Diver of Dead Waters is another option for damage against debuffed enemies.
For the planar set, Sprightly Vonwacq offers Energy Regeneration Rate and advances his first action if he has at least 120 SPD. Bone Collection's Serene Demesne is a damage option: it gives Max HP and, at 5,000 Max HP, 28% CRIT DMG.
Choose CRIT Rate or CRIT DMG on the body, SPD or HP Percentage on the feet, Fire DMG Boost or HP Percentage on the sphere, and HP Percentage or Energy Regeneration Rate on the rope. For substats, the game recommends HP Percentage first, then CRIT Rate, CRIT DMG and SPD. Account for the 20% CRIT Rate he gains in the Zone when balancing his stats.
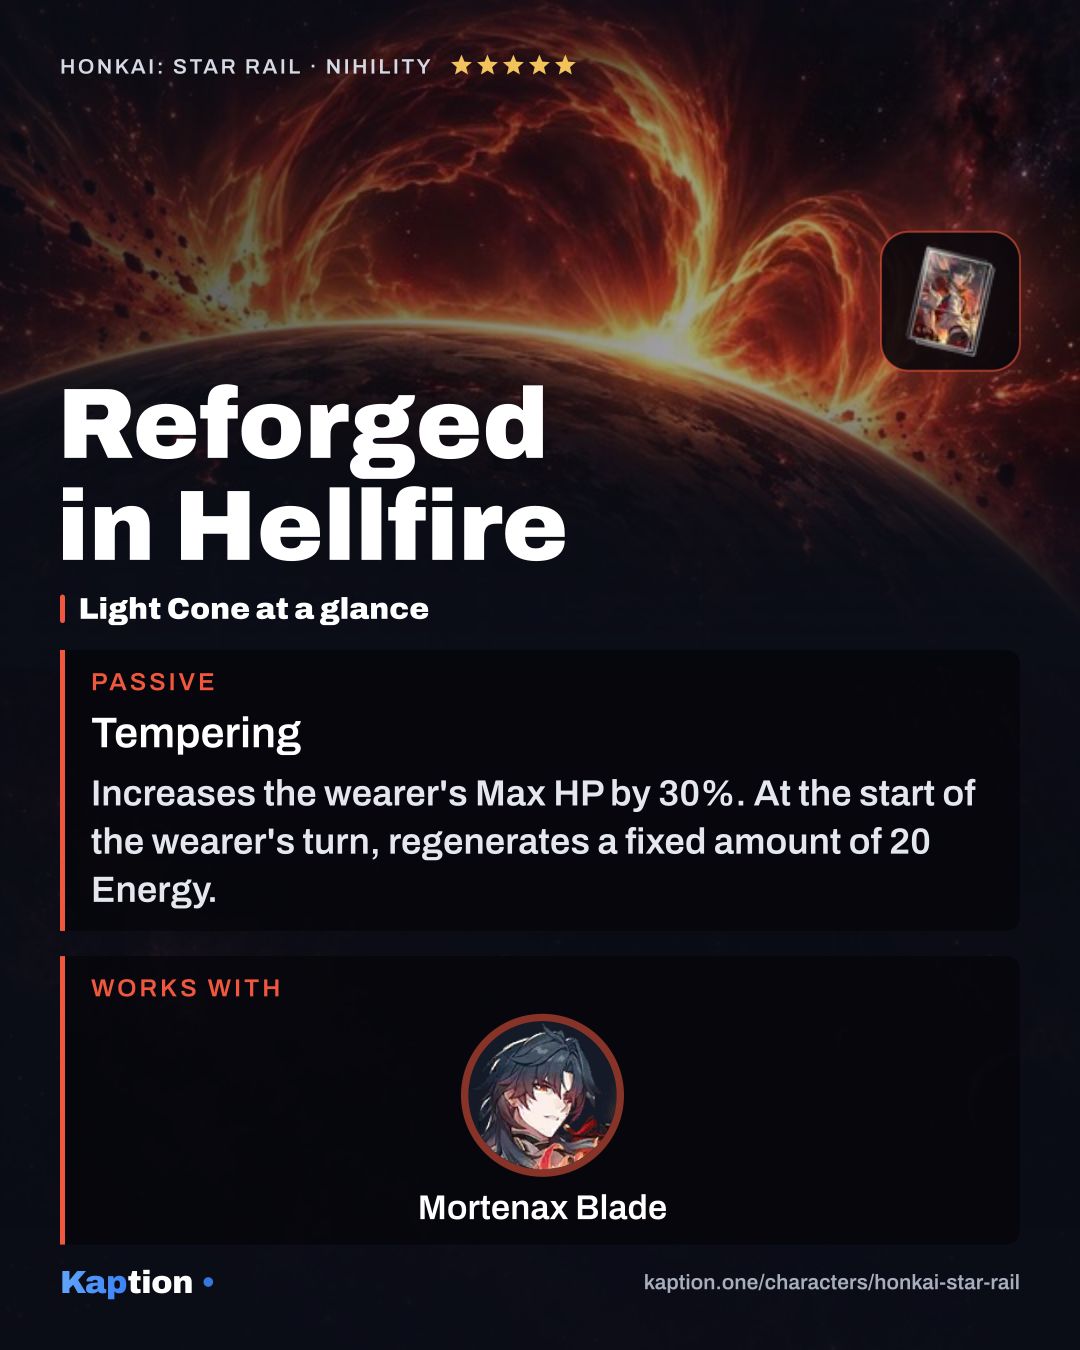
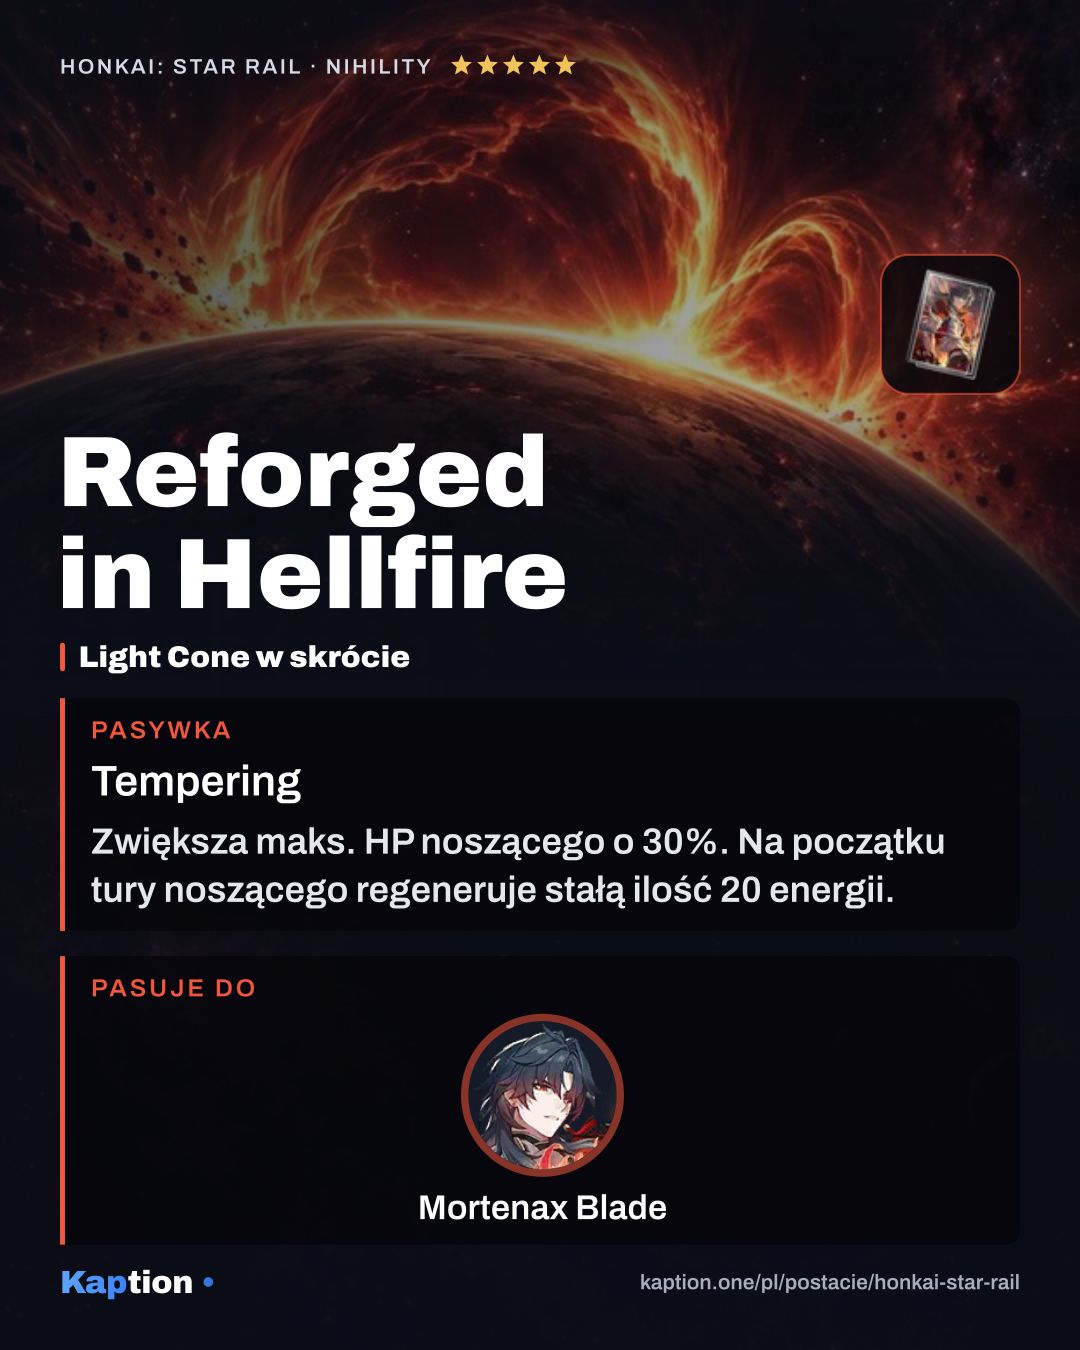
Reforged in Hellfire is the first Light Cone choice. It gives Max HP and Energy, and its Purgatory effect makes targets take more CRIT DMG. Lies Dance on the Breeze offers SPD and a chance to reduce enemy DEF after an attack. Before the Tutorial Mission Starts is a four-star option that restores Energy when he attacks enemies with reduced DEF.
Leveling priority
Follow the game's order: Fornax Ex Corpore, A Rain of Blades Seals Fate, All Karma Comes Due, then A Broken Blade Still Slays. The Ultimate sets up the Zone and enemy debuff; the Skill supplies his repeated damage. The Talent supports the extra Skill and Energy recovery, while the Basic comes last.
For maximum ascension, gather 308,000 Credit, 65 Radiant Prominence and 15 each of Whimsy Wax, Dreamweave Steel and Lucid Awl. For all skills, the listed total is 3,000,000 Credit, 8 Tracks of Destiny, 18 Tear of Phagousa, 69 Wine of Phagousa, 139 Heart of Phagousa, 12 Vanquished Flow's Reticence, 41 Whimsy Wax, 56 Dreamweave Steel and 58 Lucid Awl.
Eidolons worth it
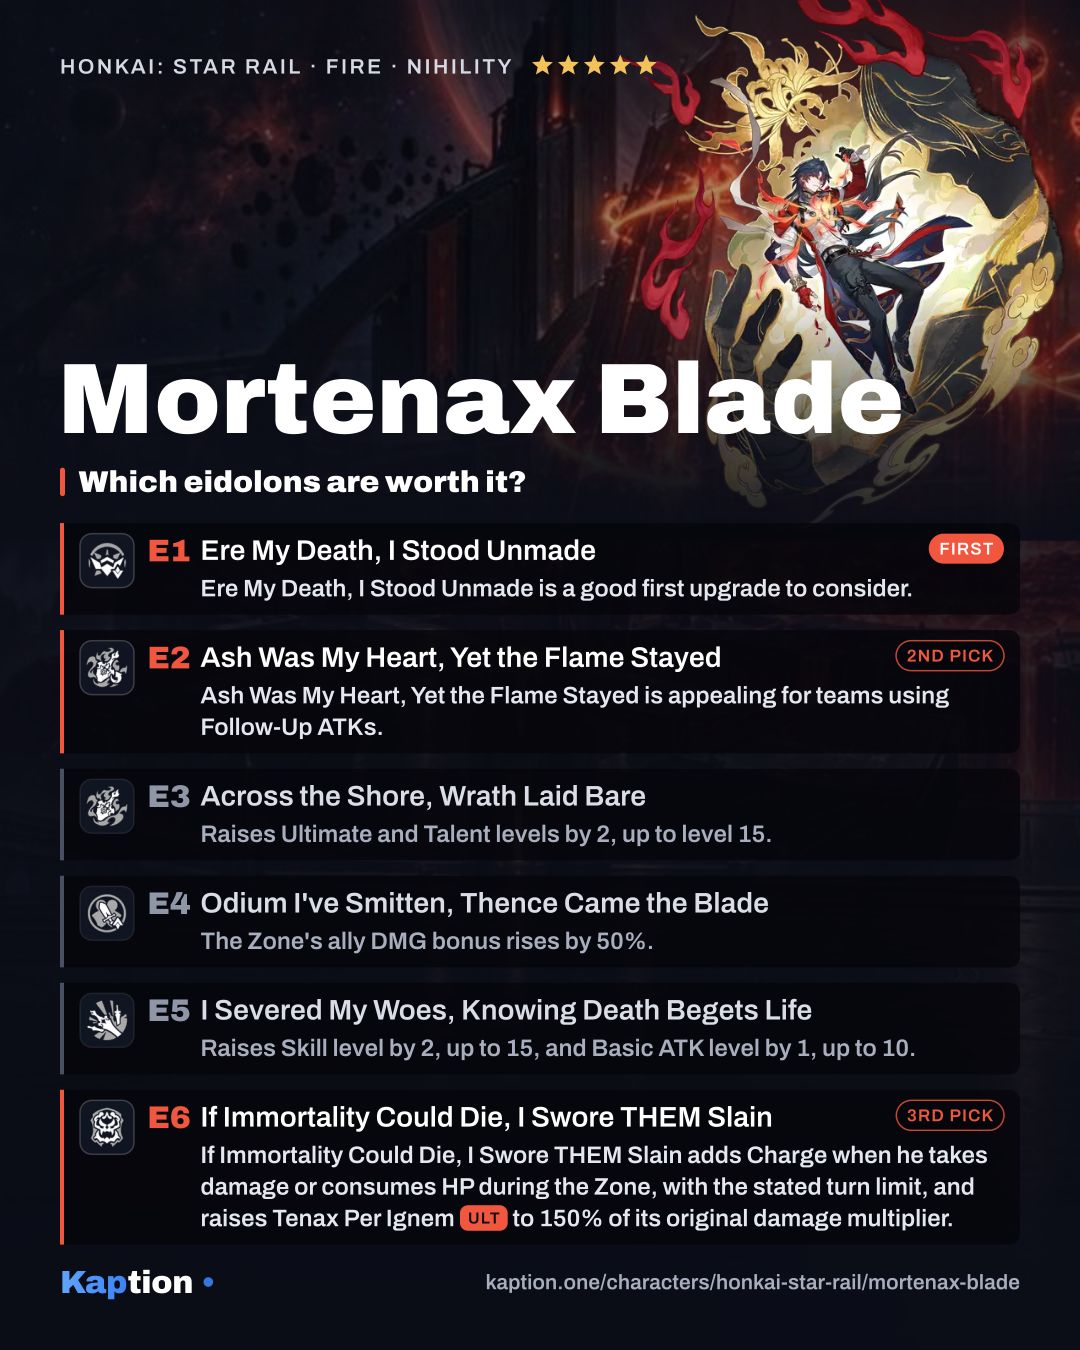
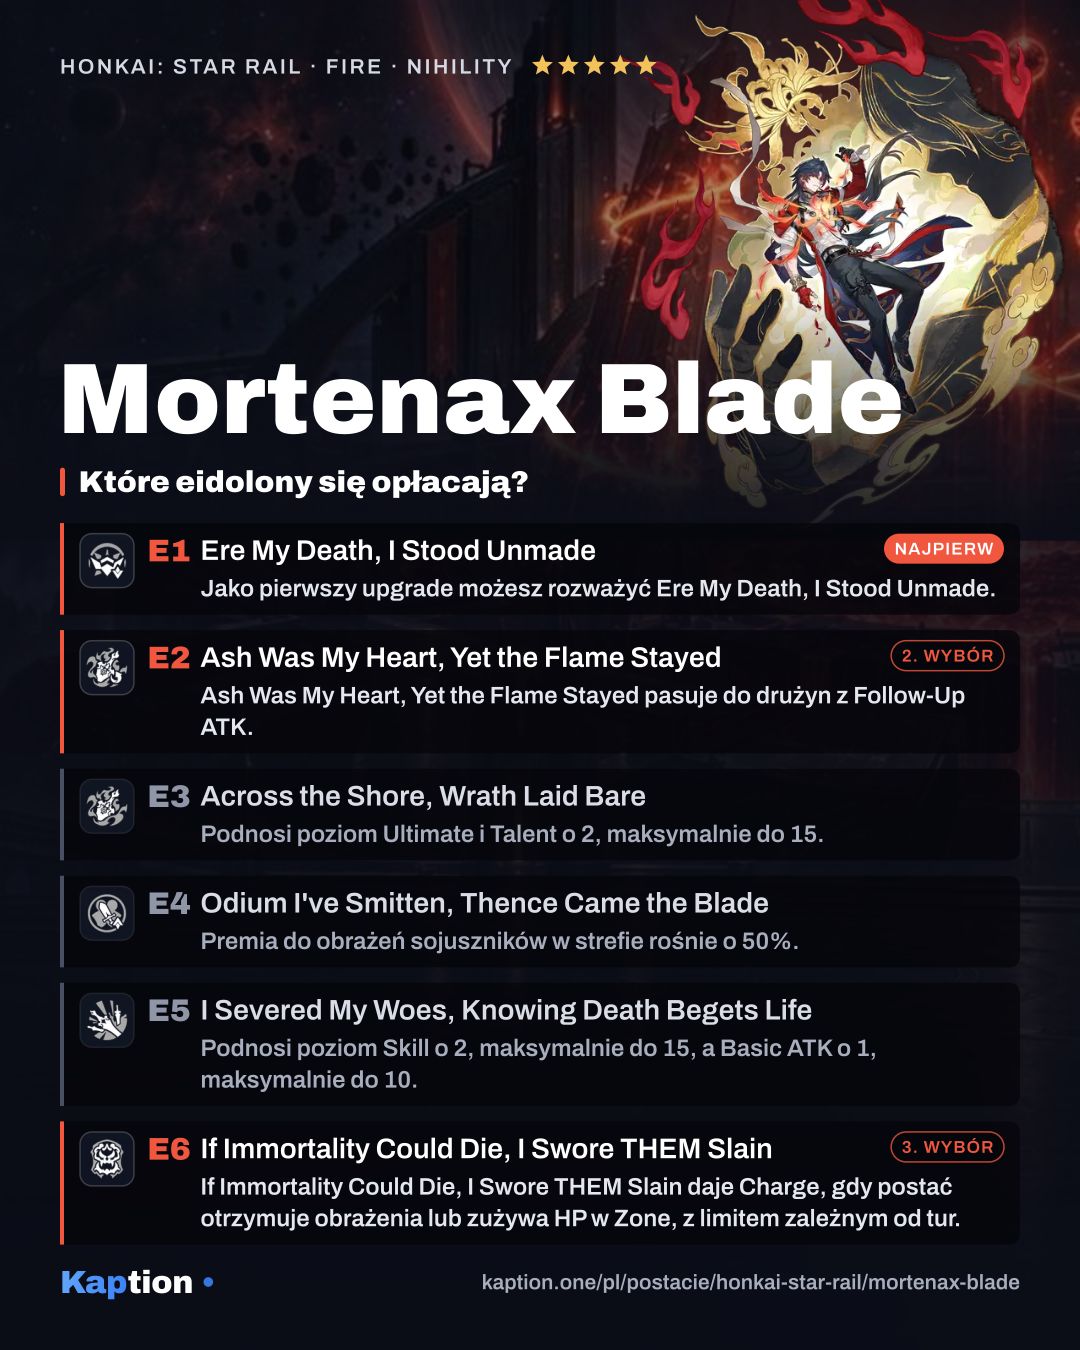
Ere My Death, I Stood Unmade is a good first upgrade to consider. During the Zone it reduces all enemies' All-Type RES by 20%, and the extra Skill from his Talent delays the Infinite Fury countdown by 15%.
Ash Was My Heart, Yet the Flame Stayed is appealing for teams using Follow-Up ATKs. It treats an ally's damaging Ultimate as a Follow-Up ATK, increases allies' Follow-Up ATK DMG by 75% and lowers the Charge limit to 7. If Immortality Could Die, I Swore THEM Slain adds Charge when he takes damage or consumes HP during the Zone, with the stated turn limit, and raises Tenax Per Ignem to 150% of its original damage multiplier.
E4 is worth considering for another 50% ally DMG from his passive. You can skip E3 and E5 if you are content with skill-level increases rather than new effects; neither is needed for his base rotation.
Teams
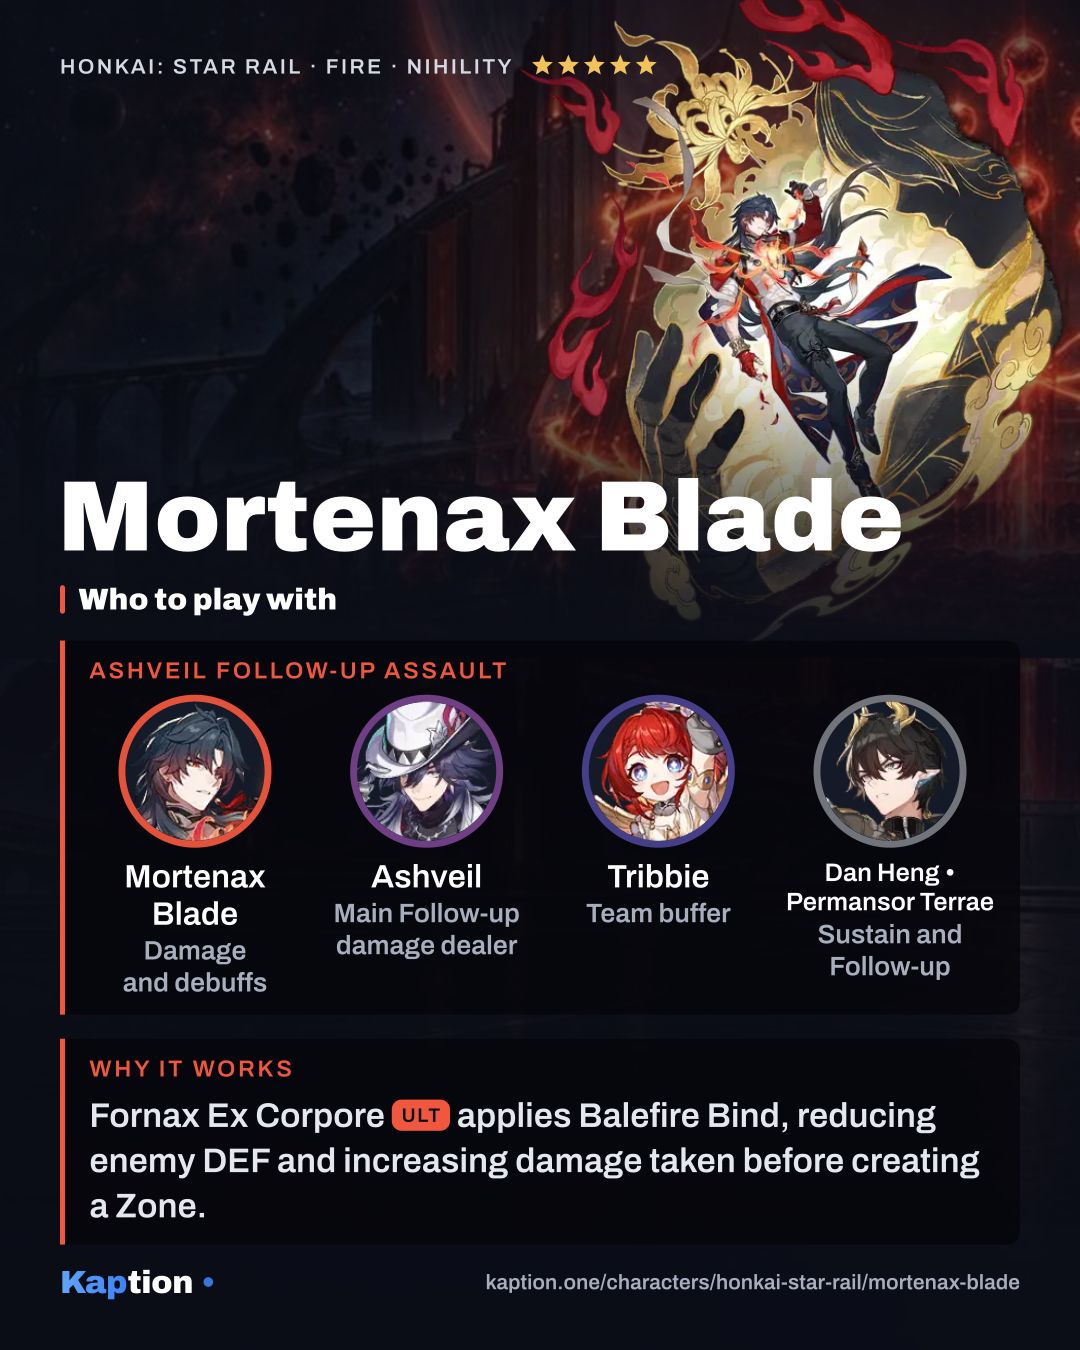
Frequent ally attacks help build Charge during the Zone, so Follow-Up teammates are a good fit. Ashveil is a suggested attacker; Dan Heng • Permansor Terrae offers Follow-Up and sustain, while Tribbie adds Follow-Up and support. Mortenax Blade gives them enemy DEF reduction and increased ally damage during the Zone.
Cipher is a Nihility teammate with Follow-Up and debuffer tags. Bringing another Nihility character changes Mortenax Blade's passive: allies gain 75% increased Ultimate DMG during the Zone. Without another Nihility character, Mortenax Blade instead gains 75% increased DMG himself. Acheron and Welt are other named Nihility options.
Leave room for sustain when the fight demands it. Hyacine is a suggested sustain teammate, while Dan Heng • Permansor Terrae is another option. Keeping Mortenax Blade above 1 HP lets him keep using his Skill.
Common mistakes
Do not expect to use the Skill before the Zone is active or while Mortenax Blade is at 1 HP. Watch the countdown too: once the Zone ends, the enhanced Basic and special Ultimate are no longer available.
Do not rely on the killing-blow protection as a substitute for sustain. It ends the Zone when triggered. Also avoid building only for CRIT: his attacks scale with Max HP, and his Zone already supplies CRIT Rate and CRIT DMG.
Finally, do not count every damage instance as a separate Talent trigger. The Talent grants Charge after an ally attack; the Skill's four random damage instances are described as part of that Skill.